Advertisement
Quick Links
Advertisement

Subscribe to Our Youtube Channel
Related Manuals for Xo WORKTOP

Summary of Contents for Xo WORKTOP
- Page 1 XO WORKTOP INSTRUCTIONS FOR USE INSTALLATION INSTRUCTIONS...
-
Page 2: Table Of Contents
XO WORKTOP – Instructions for use & Installation instructions Content Introduction ........................3 XO WORKTOP ........................3 Use ........................... 4 Cleaning and disinfection ..................... 4 Installation ......................... 5 Symbols..........................9... -
Page 3: Introduction
XO WORKTOP – Instructions for use & Installation instructions 1. INTRODUCTION Please read these instructions carefully before you start installing and using XO WORKTOP. See the presentation film: English Deutsch Français Visit xo-care.com and/or contact us at info@xo-care.com for more information. -
Page 4: Use
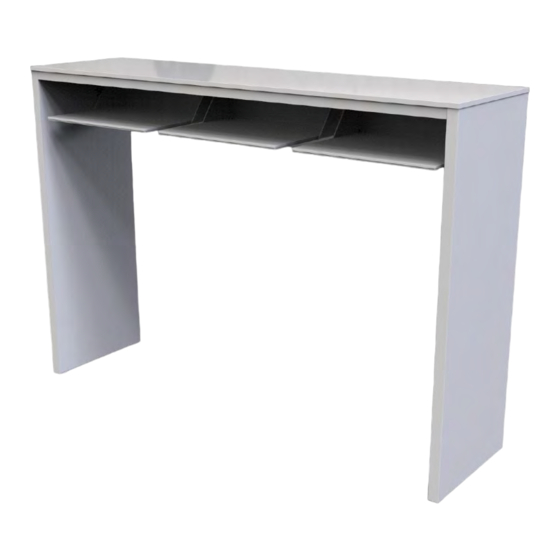
XO WORKTOP – Instructions for use & Installation instructions Figure 2 – XO WORKTOP – dimensions (mm) The three extendable delivery plates are used for delivery og instrument (trays) and material (tubs). 3. USE To see all surfaces of all teeth in healthy working postures it is important that the (right-handed) dentist can work in all positions between 9 and 12 o’clock. -
Page 5: Installation
Please see more details in safety data sheets at xo-care.com and in the instructions supplied with the disinfectant. 5. INSTALLATION 5.1. Dimensions of operatory and positioning of XO WORKTOP XO WORKTOP can be used in an operatory equal to or larger than the dimensions listed in Figure 5. - Page 6 XO WORKTOP – Instructions for use & Installation instructions Figure 5 – Plan of installation XO WORKTOP and XO unit (all measures in mm)
- Page 7 XO WORKTOP – Instructions for use & Installation instructions 5.2. Installation Unpack XO WORKTOP. XO WORKTOP has: 3 extendable delivery plates in Corian® • fitted in 3 drawers 1 tabletop in Corian® • 2 side panels • The parts are heavy!
- Page 8 XO WORKTOP – Instructions for use & Installation instructions D. Pull out the drawers to get access to the fixation points in the tabletop. Place the side panels. Fix each side panel with 4 screws using combination spanner No.10. Note the fasteners are already fitted in the...
-
Page 9: Symbols
XO WORKTOP – Instructions for use & Installation instructions G. Turn XO WORKTOP to normal position. Align the tabletop to the side panels and fix the screws (see section C above). All screws must be fastened! H. Use the 4 threaded furniture pads situated underneath the side panel to level XO WORKTOP. - Page 10 XO WORKTOP – Instructions for use & Installation instructions General caution...
- Page 11 XO WORKTOP – Instructions for use & Installation instructions...
- Page 12 XO WORKTOP REF FL-920 Document type Document ID YB-049 VER 1.2 2022-05-18 Subject to change XO CARE A/S Copenhagen Denmark Usserød Mølle Håndværkersvinget 6 DK 2970 Hørsholm +45 70 20 55 11 info@xo-care.com xo-care.com...
Need help?
Do you have a question about the WORKTOP and is the answer not in the manual?
Questions and answers