Advertisement
Quick Links
linkIT-Control4
Link your motors by integrating Gaposa radio motors into
Control4's industry-leading smart home control solutions.
LinkIT allows for group and individual motor control. Simply connect by
using our approved connection cable to your controller and install the
easy to use integration driver. Each LinkIT can support up to 24 chan-
nels depending on model number.
TECHNICAL CHARACTERISTICS
Individual or group control
16 or 24 individual channels
Tilting mode
Intermediate position
LED for feedback
Reset and programming buttons
Cables available for easy connection
Voltaje de entrada del Hub
Potencia de entrada del Hub
Frecuencia
Conexión
Red Wi-Fi
Alcance
Grado de protección
Temperatura de funcionamiento
5V
0.3 A Max.
868.30 MHz
Wi-Fi
2.4 GHz únicamente
30 mt / 98 feet
IP20
0°C a 60°C / 32°F a 140°F
en
Advertisement

Related Manuals for GAPOSA linkIT-Control4

Summary of Contents for GAPOSA linkIT-Control4
- Page 1 Link your motors by integrating Gaposa radio motors into Control4’s industry-leading smart home control solutions. LinkIT allows for group and individual motor control. Simply connect by using our approved connection cable to your controller and install the easy to use integration driver. Each LinkIT can support up to 24 chan- nels depending on model number.
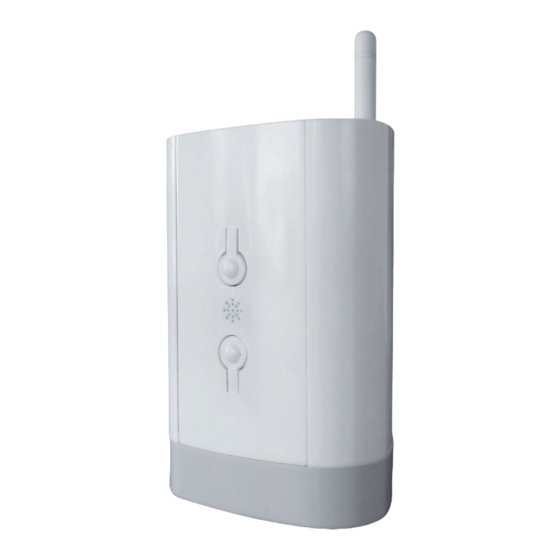
- Page 2 Hardware Comes with 2A, 5V micro-USB power supply and DB9 adapter cable. It is possible to install more than one LinkIT provided your Controller has the requisite number of RS232 ports or a Remote RS232 - TCP/IP Convertor is used. No daisy chain possible Antenna Device...
- Page 3 Driver functions This driver enables you to use the Gaposa LinkIT in a Control 4 installation. The driver consists of a main gateway driver which communicates with LinkIT by RS232. Slave drivers then provide control over 1 motor (blind) address.
- Page 4 GAPOSA-xxxx (ex: GAPOSA-c045) Plug the hub into an outlet within range of your Wi-Fi network and Gaposa powered shades. Enter password You will be taken to connect (Case to the network sign-in page, if not,...
- Page 5 Click Configure A list of visible WiFi new AP networks appears. Please select your home WiFi network. Enter your WiFi Exit out of the hub network password sign in page and and click Apply reconnect to your home WiFi if it doesn’t connect automatically.
- Page 6 Download the app Open the app and from the app store. create an account Search RollApp by clicking Add New Account The app will ask for location permis- sions. Please allow location use for sunset / sunrise control. Fill out the form Read the privacy with your desired policy and...
- Page 7 The app will find Once you have cre- your location and ated your account, auto fill your details. please sign in using Please confirm this the credentials you is all correct. just created. Scan the QR code The app is now or enter the serial setup and you can number.
- Page 8 CONFIGURING THE DRIVER For IP wireless connection Important - You must install the Gaposa Blind RS232 IP interface driver first before adding any shade drivers. Add Gaposa Shade IP interface driver as pictured below: Bind the Driver to the Linkit hub.
- Page 9 Bind the IP Driver to the IP controller as pictured: Add the shade driver to the room the blind is located in as pictured...
-
Page 10: Configuring The Driver
CONFIGURING THE DRIVER Important - You must install the Gaposa Blind RS232 interface driver first before adding any slave drivers. Add master driver Bind the Driver to the correct RS232 port on the controller Add the slave blind driver to the room the blind is located in... - Page 11 Configure the blind driver; see below for details: PAIRING MOTOR Before a screen can be controlled from LinkIt/Control 4, the screen must be synched into RollApp. 1. Create a room 2. Into the room create the device 3. From the handheld remote already paired with the screen, move the screen to the middle. Press and hold in the sync button on the back of the remote until the screen starts moving.
-
Page 12: Configuration Options
4. To delete follow the guide and instead use the Delete Motor option. To add to an existing motor, open the channel with the handset first. Gaposa srl - via Ete, 90 - 63900 Fermo - Italy T. +39.0734.220701 - F. +39.0734.226389 - info@gaposa.com...
Need help?
Do you have a question about the linkIT-Control4 and is the answer not in the manual?
Questions and answers