Table of Contents
Advertisement
Quick Links
Advertisement
Table of Contents

Subscribe to Our Youtube Channel
Related Manuals for Spectral Evolution PSR Series


Summary of Contents for Spectral Evolution PSR Series
- Page 1 PSR Series Spectroradiometer Operator’s Manual...
- Page 2 Updated address 9/24/12 1.06 PSR-1900 version 10/30/13 1.07 Added description of contact probes, chapter on 1/21/14 fan pack, appendices on probe maintenance. 1.08 Updated for PSR+3500 3/31/2015 2015 Spectral Evolution, Inc. 1 Canal St. Unit B-1 Lawrence, MA 01840 USA...
-
Page 3: Table Of Contents
Appendix F: Desktop Reflectance Probe............... 35 Operation........................35 Changing the Light Bulb .................... 35 Specifications ......................38 Information and Warnings..................39 Appendix G: Reference Plate ..................40 2015 Spectral Evolution, Inc. 1 Canal St. Unit B-1 Lawrence, MA 01840 USA... -
Page 4: Introduction
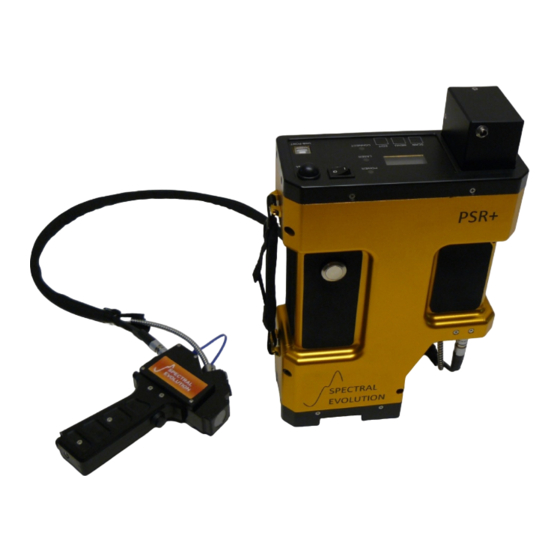
This manual contains data concerning Spectral Evolution’s PSR Series field- portable spectroradiometer systems (including PSR+3500, PSR-3000, PSR-2500, PSR- 1900). Each instrument in the PSR Series consists of a UV-VIS-NIR range spectrometer coupled with an optional calibrated lens foreoptic or fiber optic cable. The complete system collects and stores spectral data and produces output calibrated to units of spectral radiance (W/m2/nm/sr). -
Page 5: Hardware And Interface Description
All systems incorporate a 512-element silicon array covering the spectral range from 350–1000 nm. The PSR-1900 and PSR-2500 contain a single 256-element thermoelectrically-cooled InGaAs array that extends 2015 Spectral Evolution, Inc. 1 Canal St. Unit B-1 Lawrence, MA 01840 USA... - Page 6 When the battery is inserted in the recess in the front panel, power can be applied to the PSR Series instrument. When the battery voltage falls too low to power the instrument, it will turn off and go to 0 volts. Remove the battery from the instrument for recharging with the supplied charger.
- Page 7 (see figure below). Figure 2: Detail of Optical Input/Laser/Probe Connector For more details on using the reflectance probes, see the appropriate appendix sections. 2015 Spectral Evolution, Inc. 1 Canal St. Unit B-1 Lawrence, MA 01840 USA...
- Page 8 PSR Series Spectroradiometer Manual Revision: 1.08 3/31/2015 Figure 3: Hand-held Reflectance Probe Figure 4: Bench-top Reflectance Probe 2015 Spectral Evolution, Inc. 1 Canal St. Unit B-1 Lawrence, MA 01840 USA...
- Page 9 2.1.7 Laser Scan Switch The Laser Scan switch is located on the top cover of the PSR Series spectroradiometer. Depressing the switch actuates the sighting laser and can be optionally configured to initiate the start of the spectral scan.
-
Page 10: Interface Specification
3/31/2015 2.2 Interface Specification 2.2.1 Battery Pack Your PSR Series spectroradiometer is supplied with two Li-Ion battery packs that insert into the recess on the front panel. Important: See Section 6: Battery Charger for details on charging the external battery and safe operation. -
Page 11: Control Panel
PSR Series Spectroradiometer Manual Revision: 1.08 3/31/2015 3 Control Panel The control panel of each PSR Series spectroradiometer contains the controls and displays that are required for the stand-alone operation of the instrument. Figure 5: Control Panel Detail 3.1 Indicators The Control Panel has 3 LED status indicators. -
Page 12: Lcd Display
MEM# xxx - Displays the memory slot that will hold the next acquired scan. The allowable values are from 1 to 500. The memory slot cannot be adjusted by the keypad, with the exception of completely erasing all memory. 2015 Spectral Evolution, Inc. 1 Canal St. Unit B-1 Lawrence, MA 01840 USA... - Page 13 (2) Modify the parameter by depressing the EDIT button. The push button switches are programmed to scroll the menu of available options. (3) Depress the MENU button again to save the selected parameter setting. 2015 Spectral Evolution, Inc. 1 Canal St. Unit B-1 Lawrence, MA 01840 USA...
-
Page 14: Operational/Functional Description
4.1 Setup Battery Pack To use the PSR Series spectroradiometer install a fully charged battery pack by inserting it into the battery slot located on the instrument’s operating panel. When inserting the battery into the battery slot, the four copper tabs on the battery should be oriented towards the outboard side of the instrument. - Page 15 A field of view diagram is provided with each instrument and shows the relative position of the sighting laser spot and the active field of view for the instrument at the 2015 Spectral Evolution, Inc. 1 Canal St. Unit B-1 Lawrence, MA 01840 USA...
-
Page 16: Standalone Operation
• The instrument has been idle for an extended period, or has been turned off. • Lighting conditions have changed or are variable. When in doubt, take a reference measurement! 2015 Spectral Evolution, Inc. 1 Canal St. Unit B-1 Lawrence, MA 01840 USA... -
Page 17: Operation With A Host Pc
DARWin SP while connected to your spectroradiometer are: 1. Controlling the instrument remotely and collecting and displaying scan data in real time, with expanded control options, and 2015 Spectral Evolution, Inc. 1 Canal St. Unit B-1 Lawrence, MA 01840 USA... - Page 18 For detailed information on how to use DARWin SP with your PSR Series spectroradiometer, see the DARWin SP User Manual included with your instrument. 2015 Spectral Evolution, Inc. 1 Canal St. Unit B-1 Lawrence, MA 01840 USA...
-
Page 19: Changing Foreoptic Accessories
PSR Series Spectroradiometer Manual Revision: 1.08 3/31/2015 5 Changing Foreoptic Accessories Your PSR Series instrument comes with a standard lens foreoptic installed. If you have purchased additional foreoptic accessories such as fiber optic cable and 180° diffuser, this section describes their installation. Important: Removing the factory-installed lens exposes the optical slit (see Figure 9). - Page 20 Be careful not to touch the slit when moving the plug. To Center of Instrument Alignment Plug Laser Slit Figure 9: Detail of Fiber Alignment Plug Installation 2015 Spectral Evolution, Inc. 1 Canal St. Unit B-1 Lawrence, MA 01840 USA...
- Page 21 Important: Verify that the keyed end of the cable goes into the adapter to ensure proper alignment of the optical fibers and to avoid slit damage. 2015 Spectral Evolution, Inc. 1 Canal St. Unit B-1 Lawrence, MA 01840 USA...
- Page 22 At the opposite end of the fiber optic cable is a threaded SMA-type connector that simply screws into the Diffuser (Figure 12). Figure 12: Diffuser with Fiber Optic Cable 2015 Spectral Evolution, Inc. 1 Canal St. Unit B-1 Lawrence, MA 01840 USA...
-
Page 23: Battery Charger
Do not use any DC power supply or charger other than the dedicated battery charger supplied with your instrument; this may cause the battery pack to malfunction. 2015 Spectral Evolution, Inc. 1 Canal St. Unit B-1 Lawrence, MA 01840 USA... - Page 24 PSR Series Spectroradiometer Manual Revision: 1.08 3/31/2015 Also, always power the PSR Series instrument with its battery only. NEVER use the dedicated battery charger to provide power to the instrument. ® Windows is a registered trademark of Microsoft Corporation. 2015 Spectral Evolution, Inc. 1 Canal St. Unit B-1 Lawrence, MA 01840 USA...
-
Page 25: Appendix A: Laser Safety
LABELING: The following labels are required for the PSR Series instrument. Each label is described below. If the instrument does not have the appropriate labels, contact the manufacturer to ensure that your unit is in compliance. (1) Explanatory Label Location –... -
Page 26: Appendix B: Bluetooth Information
Revision: 1.08 3/31/2015 Appendix B: Bluetooth Information Bluetooth Versions Supported: V1.1 Bluetooth Class: Class I Bluetooth Connection Type: Virtual COM Port Bluetooth Connection Pin Key/Pairing Code: psr3500 2015 Spectral Evolution, Inc. 1 Canal St. Unit B-1 Lawrence, MA 01840 USA... -
Page 27: Appendix C: Psr+3500 Specifications
Onboard Storage 500 spectra Tripod Mount Two ¼-20 mounting holes Environmental Specifications Operation Temperature -10–40°C Humidity 15–90 % non-condensing Storage Temperature -20–70°C Humidity 15–90 % non-condensing 2015 Spectral Evolution, Inc. 1 Canal St. Unit B-1 Lawrence, MA 01840 USA... - Page 28 PSR Series Spectroradiometer Manual Revision: 1.08 3/31/2015 Appendix D: CE Compliance Declaration 2015 Spectral Evolution, Inc. 1 Canal St. Unit B-1 Lawrence, MA 01840 USA...
-
Page 29: Appendix E: Handheld Contact Probe
Pulling the collar, and only the collar, will disengage a latch in the connector and remove the connector from the probe in one motion. 2015 Spectral Evolution, Inc. 1 Canal St. Unit B-1 Lawrence, MA 01840 USA... - Page 30 To remove the fiber from the probe, depress the stainless steel tab on top of the probe by pressing gently on the center of the tab. The fiber should spring free of the probe body. Installation Removal 2015 Spectral Evolution, Inc. 1 Canal St. Unit B-1 Lawrence, MA 01840 USA...
- Page 31 HOT after prolonged operation. 2) Remove the lid of the probe by using a Phillips head screw driver to remove the 5 #2-56 screws as shown. 2015 Spectral Evolution, Inc. 1 Canal St. Unit B-1 Lawrence, MA 01840 USA...
- Page 32 If the pins are not aligned properly lightly bend them into the correct position. Correctly aligned pins will make installing the bulb much easier. 2015 Spectral Evolution, Inc. 1 Canal St. Unit B-1 Lawrence, MA 01840 USA...
- Page 33 7) Lightly press the bulb into the receptacle after the pins and sockets are aligned. There should be a slight click to indicate the bulb is properly seated in the receptacle. 2015 Spectral Evolution, Inc. 1 Canal St. Unit B-1 Lawrence, MA 01840 USA...
- Page 34 Do not place any combustible materials in the contact probe sampling area for a long period of time. 2015 Spectral Evolution, Inc. 1 Canal St. Unit B-1 Lawrence, MA 01840 USA...
-
Page 35: Appendix F: Desktop Reflectance Probe
5) After completing the needed scans, make sure to turn the probe off. Changing the Light Bulb 1) Ensure the desktop probe is off and has had time to cool to room temperature 2015 Spectral Evolution, Inc. 1 Canal St. Unit B-1 Lawrence, MA 01840 USA... - Page 36 4) Loosen, but do not remove the bulb clamping screws, after the light bulb is free to be removed from its clamp. Do this by pulling the bulb straight out of the clamp. 2015 Spectral Evolution, Inc. 1 Canal St. Unit B-1 Lawrence, MA 01840 USA...
- Page 37 The oils from your finger or dust from the gloves can stick to the reflector and can alter its output characteristics including life expectancy. 2015 Spectral Evolution, Inc. 1 Canal St. Unit B-1 Lawrence, MA 01840 USA...
-
Page 38: Specifications
10)Attach the probe cover by reinstalling the 4 #4-40 screws. Specifications Input: 5.5-9 V, 2A minimum Bulb: Halogen, 4.25 V, 1.06A, ~650 life hours, Color Temp 3,000°K 2015 Spectral Evolution, Inc. 1 Canal St. Unit B-1 Lawrence, MA 01840 USA... -
Page 39: Information And Warnings
Do not place any combustible materials in the contact probe sampling area for a long period of time. 2015 Spectral Evolution, Inc. 1 Canal St. Unit B-1 Lawrence, MA 01840 USA... -
Page 40: Appendix G: Reference Plate
When complete, dry the surface by blowing nitrogen or clean compressed air over the surface. 2015 Spectral Evolution, Inc. 1 Canal St. Unit B-1 Lawrence, MA 01840 USA...
Need help?
Do you have a question about the PSR Series and is the answer not in the manual?
Questions and answers