Table of Contents
Advertisement
Available languages
Available languages
Quick Links
FreeSpace
IZA 190-HZ / IZA 250-HZ
Integrated Zone Amplifiers
ZA 190-LZ / ZA 250-HZ
Zone Amplifiers
Installation and Operating Guide
Installations- og betjeningsvejledning
Installations- und Bedienungsanleitung
For use by professional installers only
Kun beregnet til at anvendes af professionelle installatører
Guía de instalación y funcionamiento
Nur zur Verwendung durch einen fachkundigen Monteur
Guide d'installation et d'utilisation
Solo apto para instaladores profesionales
Réservé à un technicien professionnel
Manuale di installazione e funzionamento
L'utilizzo è riservato agli installatori professionisti
Installatie- en bedieningshandleiding
Uitsluitend bestemd voor professionele installateurs
Bruksanvisning för installation och användning
Endast för professionella användare
Advertisement
Table of Contents

Subscribe to Our Youtube Channel
Related Manuals for Bose Professional FreeSpace IZA 190-HZ


Summary of Contents for Bose Professional FreeSpace IZA 190-HZ
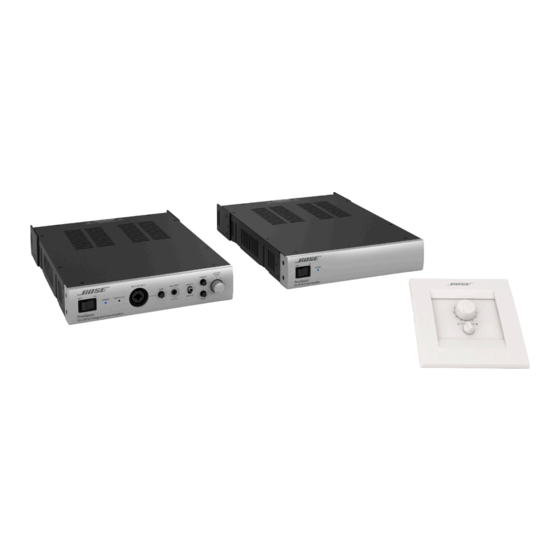
- Page 1 FreeSpace IZA 190-HZ / IZA 250-HZ Integrated Zone Amplifiers ZA 190-LZ / ZA 250-HZ Zone Amplifiers Installation and Operating Guide Installations- og betjeningsvejledning Installations- und Bedienungsanleitung For use by professional installers only Kun beregnet til at anvendes af professionelle installatører Guía de instalación y funcionamiento Nur zur Verwendung durch einen fachkundigen Monteur Guide d’installation et d’utilisation...
- Page 2 Contents BoseProfessional.com 2 Installation and Operation English...
-
Page 3: Table Of Contents
Contents BoseProfessional.com Safety Information ����������������������������������������������������������������������������������������������������������������������������������������������������������������� 4 Introduction ����������������������������������������������������������������������������������������������������������������������������������������������������������������������������������������������������������20 FreeSpace IZA 190-HZ/IZA 250-LZ integrated zone amplifier ����������������������������������������������������������������������������������������������������20 Contents �������������������������������������������������������������������������������������������������������������������������������������������������������������������������������������������������������20 Front-panel �������������������������������������������������������������������������������������������������������������������������������������������������������������������������������������������������20 Rear-panel ���������������������������������������������������������������������������������������������������������������������������������������������������������������������������������������������������� 21 Loudspeaker connections ��������������������������������������������������������������������������������������������������������������������������������������������������������������������� 21 Making loudspeaker connections (IZA 190-HZ)������������������������������������������������������������������������������������������������������������� 21 Making loudspeaker connections (IZA 250-LZ) ����������������������������������������������������������������������������������������������������������� 22 Input connections ������������������������������������������������������������������������������������������������������������������������������������������������������������������������������������... -
Page 4: Safety Information
Please read this document before attempting installation� Warning: All Bose Professional products must be used in accordance with local, state, federal and industry regulations� It is the installer’s responsibility to ensure installation of the amplifier is performed in accordance with all applicable codes, including local building codes and regulations�... - Page 5 Do not attempt to service this product yourself� Opening or removing covers may expose you to dangerous voltages or other hazards� Please call Bose Professional to be referred to an authorized service center near you�...
- Page 6 Dette produkt er kun beregnet til at anvendes af professionelle installatører! Dette dokument har til formål at give professionelle installatører grundlæggende installations- og sikkerhedsretningslinjer for Bose Professional FreeSpace-forstærkere i typiske systemer med fast installation� Læs venligst dette dokument, inden du forsøger at foretage en installation�...
- Page 7 – forsøg ikke at servicere dette produkt selv� Åbning eller fjernelse af dæksler kan udsætte dig for farlige spændinger eller andre risici� Kontakt Bose Professional for at få oplysninger om det nærmeste servicecenter�...
- Page 8 FreeSpace-Verstärker in typischen Festinstallationssystemen bieten� Bitte lesen Sie dieses Dokument vor der Installation durch� Warnung: Alle Bose Professional-Produkte müssen gemäß den örtlichen und staatlichen Vorschriften sowie gemäß allen Branchenbestimmungen verwendet werden� Der Monteur ist dafür verantwortlich, sicherzustellen, dass die Installation des Verstärkers gemäß allen geltenden Vorschriften durchgeführt wird, einschließlich örtlicher Bauvorschriften und Bestimmungen�...
- Page 9 Fällen keinesfalls, das Gerät selbst zu reparieren� Öffnen oder entfernen Sie unter keinen Umständen die Gehäuseabdeckungen, da Sie andernfalls mit gefährlichenelektrischen Spannungen in Berührung kommen oder anderen Gefahren ausgesetzt sein könnten� Wenden Sie sich telefonisch an Bose Professional, um die Anschrift eines autorisierten Kundendienstzentrums in Ihrer Nähe zu erfragen�...
- Page 10 Solo un instalador profesional deberá montar este producto� Este documento está pensado para ofrecer a los instaladores profesionales instrucciones básicas de instalación y seguridad relacionadas con los amplificadores Bose Professional FreeSpace en sistemas típicos de instalaciones fijas� Lea este documento antes de intentar la instalación�...
- Page 11 No intente reparar el producto usted mismo� La apertura o retirada de las tapas le expondrá a tensiones peligrosas o a otros peligros� Póngase en contacto con Bose Professional para conocer cuál es el centro de servicio técnico autorizado de su zona�...
- Page 12 L’installation de ce produit est réservée à un technicien professionnel ! Ce document à l’intention des installateurs professionnels contient les directives de pose et de sécurité relatives aux amplificateurs professionnels Bose Professional FreeSpace en installation fixe� Lisez attentivement ce document avant l’installation�...
- Page 13 à des tensions électriques ou autres dangers� Veuillez contacter Bose Professional pour connaître les coordonnées du centre de réparation agréé le plus proche� 15� Pour éviter tout risque d’incendie ou d’électrocution, ne surchargez pas les prises murales, les rallonges ou les prises multiples�...
- Page 14 Bose Professional FreeSpace negli impianti convenzionali a installazione fissa� Leggere attentamente il documento prima di procedere all’installazione� Avvertenza: Tutti i prodotti Bose Professional devono essere utilizzati in conformità con gli standard locali, statali, federali e di settore� È responsabilità dell’installatore assicurare che l’installazione dell’amplificatore venga eseguita in conformità...
- Page 15 è stato esposto a pioggia o umidità, non funziona correttamente o è caduto� Non tentare di ripararlo autonomamente� L’apertura o la rimozione di coperchi può comportare l’esposizione a tensioni pericolose o altri pericoli� Chiamare Bose Professional per ottenere il recapito del centro assistenza autorizzato di zona�...
- Page 16 Dit product is uitsluitend bestemd voor installatie door professionele installateurs! Dit document is bedoeld om basisrichtlijnen met betrekking tot de installatie en veiligheid te bieden voor professionele installateurs voor Bose Professional FreeSpace-versterkers in standaardsystemen voor vaste installatie� Lees dit document door voordat u begint met de installatie�...
- Page 17 Probeer dit product niet zelf te repareren� Door afdekkingen te openen of te verwijderen kunt u worden blootgesteld aan gevaarlijke spanningen of andere gevaren� Bel Bose Professional voor een erkend servicecentrum bij u in de buurt�...
- Page 18 Viktig säkerhetsanvisningar BoseProfessional�com Denna produkt ska endast installeras av välutbildade installatörer� Detta dokument är avsett för professionella installatörer som behöver enkla riktlinjer för installation och säkerhet för Bose Professional FreeSpace-förstärkare i vanliga fasta systeminstallationer� Läs igenom dokumentet innan du påbörjar installationen�...
- Page 19 öppnar eller tar bort några skydd riskerar du att utsättas för farlig elektrisk spänning eller andra faror� Ring till Bose Professional så hjälper vi dig att hitta ett auktoriserat servicecenter nära dig� 15� För att förhindra risken för brand eller elektriska stötar ska du undvika att överbelasta eluttag, förlängningssladdar och inbyggda tillbehörsuttag�...
-
Page 20: Introduction
(1) 2-pin Euroblock for MUTE connection (8) Spade lugs for OUTPUT connections (LZ only) (1) 3-pin Euroblock for OUTPUT connection (HZ only) Front-panel Note: Front-panel controls and indicators are identical on the FreeSpace IZA 190-HZ amplifier� FreeSpace IZA 250-LZ 20 Installation and Operation English... -
Page 21: Rear-Panel
Setup and Operation BoseProfessional.com Rear-panel FreeSpace IZA 190-HZ FS2C/ SE/P FS4CE/SE FRONT MIC FRNT MIC DUCK FreeSpace IZA 250-LZ FLAT FS2C/ SE/P FS4CE/SE Loudspeaker connections Use 22 AWG (0�3 mm ) to 14 AWG (2�0 mm ) size wire only�... -
Page 22: Making Loudspeaker Connections (Iza 250-Lz)
Setup and Operation BoseProfessional.com Making loudspeaker connections (IZA 250-LZ) Note: Loudspeaker connections are the same for the ZA 250-LZ amplifier� 1� Attach included crimp-on spade lug connectors to loudspeaker wiring� Blue spade lug connectors are compatible with 16-14 AWG wire� Red spade lug connectors are compatible with 22-16 AWG wire� Note: You may need to bend the spade lugs to fit�... -
Page 23: Input Connections
Setup and Operation BoseProfessional.com Input connections RCA input connections Insert the RCA plugs into the INPUT A or INPUT B connectors� Page input connections The PAGE INPUT is a mic/line input with a trigger contact closure� This input signal is routed to all outputs (including AUX OUT) when the trigger is detected�... -
Page 24: Mic/Line Input Connections (Front-Panel)
Setup and Operation BoseProfessional.com Mic/Line input connections (Front-panel) The MIC/LINE INPUT connector is designed for use with handheld dynamic microphones and XLR, TRS, or TS ¼" microphone cables� Line-level sources also can be used with this input� See the diagrams below for input wiring configurations�... -
Page 25: Remote Control Connections
The amplifier also can be controlled with a linear taper 10k ohm potentiometer (full CCW=0 ohm, full CW=10k ohm) and SPDT switch� Volume Control with A/B Select Note: The Bose Professional Volume Control User Interface (PC 041966), not shown here, is not fully functional with the IZA 190-HZ and IZA 250-LZ amplifiers� Mute with standard contact closure The amplifier is designed to mute all outputs (including AUX OUT) when a trigger is detected via the MUTE connector�... -
Page 26: Setup - Rear-Panel Controls
FreeSpace FS2C/SE/P and FS4CE/SE loudspeakers when used with additional zone amplifiers� Loudspeaker EQ preset switch Provides loudspeaker equalization presets designed to optimize the performance of Bose Professional FreeSpace FS2C/SE and FS4C/SE loudspeakers� A high-pass filter (HPF) setting is also available for use with any passive loudspeakers�... -
Page 27: Operation - Front-Panel Controls And Indicators
Allows you to choose between rear line inputs A and B from the front panel of the amplifier� Rear line inputs A and B can also be selected remotely with the use of optional Bose Professional Volume Control with A/B Select User Interface accessory�... -
Page 28: Freespace Za 190-Hz/250-Lz Zone Amplifier
Setup and Operation BoseProfessional.com FreeSpace ZA 190-HZ/250-LZ zone amplifier Contents Feet with pins (4) AC power cord 3-pin Euroblock (HZ only) RCA cable Spade lugs (8) (LZ only) (1) Power cord (1) RCA stereo cable (4) Feet with pins (8) Spade lugs (LZ only) (1) 3-pin Euroblock (HZ only) Front-panel controls and indicators Note: Front-panel controls and indicators are identical on the FreeSpace ZA 190-HZ amplifier�... -
Page 29: Expanding An Iza System With A Za Amplifier
BoseProfessional.com Expanding an IZA system with a ZA amplifier The Bose Professional FreeSpace ZA 190-HZ/250-LZ zone amplifier makes system expansion easy� When a system design requires more loudspeakers than the FreeSpace IZA 190-HZ/250-LZ integrated zone amplifier can support, the FreeSpace ZA 190-HZ/250-LZ zone amplifier is available to provide additional output channels�... -
Page 30: Installation And Placement
Installation BoseProfessional.com Installation and Placement Importance of proper ventilation For placement of the amplifier, keep the following in mind: • Make sure that air can circulate freely around the amplifier for adequate ventilation� There are vents on the top, bottom, and sides� •... -
Page 31: Mounting In Standard Rack With Rack Mount Kit Accessory
BoseProfessional.com Mounting in standard rack with Rack Mount Kit Accessory An accessory Rack Mount Kit is available from Bose Professional for installing one or two FreeSpace amplifiers in a standard 19" 1 RU electronics rack� The Rack Mount Kit includes:... -
Page 32: Mounting Two Amplifiers
Installation BoseProfessional.com 3� Mount amplifier in a rack with four (4) rack screws and washers (not included)� Mounting two amplifiers 1� Remove rear rack ears from both amplifiers where they will meet in the middle� Then place the amplifiers upside-down on a flat, level surface on a protective covering to avoid scratching the top of the chassis� 2�... -
Page 33: Using The Rear Rack Ears For Strain Relief
Installation BoseProfessional.com 3� Place the amplifiers side by side and attach the two (2) link brackets to the amplifier chassis with four (4) included screws each� CAUTION: Only use the mounting hardware recommended by the rack manufacturer� 4� Mount amplifier in rack with four (4) rack screws and washers (not included)� Using the rear rack ears for strain relief The slots on the rear rack ears can be used to provide strain relief with standard wire ties�... -
Page 34: Troubleshooting
Troubleshooting BoseProfessional.com Troubleshooting Problem Solution No power • Turn on power� Blue LED on front-panel will be visible when power is on� • Make sure the power cord is plugged in� • Try a different AC outlet that is working with another piece of equipment� Power is on, but no sound •... -
Page 35: Ac Current Draw And Thermal Dissipation Information
Specifications BoseProfessional.com AC Current Draw and Thermal Dissipation Information IZA 250-LZ, AC Current Draw and Thermal Dissipation Load Configuration 230VAC Thermal Dissipation, Max Total Audio 120VAC 60Hz� Test Signal & Power Level (Note: Both IZA channels 50Hz� Line Output, W Line Current, A Watts BTU/hr�... -
Page 36: Iza 250-Lz/190-Hz Specifications
Specifications BoseProfessional.com IZA 250-LZ/190-HZ Specifications Power Rating Model IZA 250-LZ Model IZA 190-HZ Amplifier Power 2 x 50 W @ 4 Ω; 2 x 25 W @ 8 Ω 1 x 90 W 70/100V Audio Performance Specifications Model IZA 250-LZ Model IZA 190-HZ Frequency Response 40 Hz - 20 kHz... - Page 37 Specifications BoseProfessional.com Controls and Indicators LED Status Indicators Power - blue; Input Clip - red (-3 dBFS) Controls, Front Panel Power On/Off, Input Select (A/B), Tone Controls (Treble/Bass), Mic/Line Gain, Master Level Amplifier Mode DIP Switch, Loudspeaker EQ Preset Selector, Controls, Rear Panel Input Gain (A/B/Page Mic), Output Trim Electrical Specifications...
-
Page 38: Za 250-Lz/190-Hz Specifications
Specifications BoseProfessional.com ZA 250-LZ/190-HZ Specifications Power Rating Model ZA 250-LZ Model ZA 190-HZ Amplifier Power 2 x 50 W @ 4 Ω; 2 x 25 W @ 8 Ω 1 x 90 W 70/100V Audio Performance Specifications Model ZA 250-LZ Model ZA 190-HZ Frequency Response 20 Hz - 20 kHz... - Page 39 Specifications BoseProfessional.com Physical Rack Space Units 1 RU high, half rack wide Dimensions 11�9" L x 8�4" W x 1�8" H (302 mm x 214 mm x 45 mm) Shipping Weight 250-LZ: 6�4 lb (2�9 kg), 190-HZ: 8�6 lb (3�9 kg) Product Weight 250-LZ: 4�4 lb (2�0 kg), 190-HZ: 6�7 lb (3�0 kg) Cooling System...
-
Page 40: Importer Information
Additional Resources BoseProfessional.com Importer Information China Importer: Bose Electronics (Shanghai) Company Limited, Level 6, Tower D, No� 2337 Gudai Rd� Minhang District, Shanghai 201100 UK Importer: Bose Limited Bose House, Quayside Chatham Maritime, Chatham, Kent, ME4 4QZ, United Kingdom EU Importer: Bose Products B�V�, Gorslaan 60, 1441 RG Purmerend, The Netherlands Mexico Importer: Bose de México, S�... - Page 44 ©2023 Transom Post OpCo LLC� All rights reserved� Framingham, MA 01701 USA BoseProfessional�com AM857567 Rev� 02 May 2023 857567-0030...
Need help?
Do you have a question about the FreeSpace IZA 190-HZ and is the answer not in the manual?
Questions and answers