Advertisement
Quick Links
- 1 Premessa - Instruction - Einführung - Introduction - Introducción
- 2 2 Thermostat Series - Ctop2Wf Wand-Oder Bordthermostat-Serie - Ctop2Wf Série de Thermostats4
- 3 Funzioni E Settaggi Speciali - Special Function and Settings - Sonderfunktion und Einstellungen - Fonction Spéciale et Paramètres - Funciones Especiales y Ajustes
- 4 Schemi Elettrici Funzionali - General Wiring Diagrams - Schémas Généraux de Câblage
- Download this manual
GUIDA PER IL CLIENTE FINALE
END USER GUIDE
ENDE BENUTZERHANDBUCH
UTILISATEUR FINAL
GUÍA DEL USUARIO FINAL
CTOP2WF
SERIES ZEFIRO CONTROL
ATTENZIONE: Leggere questo manuale accuratamente prima di usare l'apparecchio ed eseguire le
operazioni come indicato. Le istruzioni sono importanti per la sicurezza e per un corretto funzionamento;
accertarsi di osservarle.
WARNING: Please read this manual carefully before using the equipment; carry well out all the operations here
indicated. The section explains how to use the equipment safety and correctly. Observe the precautions given in
this manual and on plates and tables attached to the unit.
ACHTUNG: Bitte lesen Sie genau diese Anleitung vor Gebrauch des Geräts und die Verfahren auf korrekte
Weise durchführen. Die in diesem Abschnitt beschriebenen Anweisungen beziehen sich auf einen für die
Sicherheit korrekten Betrieb; diese Anweisungen unbedingt befolgen.
ATTENTION: Avant d'utiliser l'appareil, lire attentivement ce manuel et effectuer les opérations de la juste façon.
Les instructions décrites dans cette section assurent un fonctionnement correct; s'assurer de bien les respecter.
ATENCION: Es necesario leer cuidadosamente el presente manual antes de usar el equipo. La lectura de
la guia ayuda la ejecucion correcta de los procedimientos y garantizan un correcto funcionamiento de la
unidad.
Advertisement

Related Manuals for Thermics CTOP2WF Series

Summary of Contents for Thermics CTOP2WF Series
- Page 1 GUIDA PER IL CLIENTE FINALE END USER GUIDE ENDE BENUTZERHANDBUCH UTILISATEUR FINAL GUÍA DEL USUARIO FINAL CTOP2WF SERIES ZEFIRO CONTROL ATTENZIONE: Leggere questo manuale accuratamente prima di usare l’apparecchio ed eseguire le operazioni come indicato. Le istruzioni sono importanti per la sicurezza e per un corretto funzionamento; accertarsi di osservarle.
-
Page 2: Table Of Contents
INDICE INDICE - INDEX - INHALTSVERZEICHNIS - INDEX - INDICE PREMESSA - INSTRUCTION - EINFÜHRUNG – INTRODUCTION – INTRODUCCIÓN TERMOSTATI A PARETE O A BORDO MACCHINA SERIE CTOP2WF - CTOP2WF WALL OR ONBOARD MOUNTING THERMOSTAT SERIES - CTOP2WF WAND-ODER BORDTHERMOSTAT-SERIE - CTOP2WF SÉRIE DE THERMOSTATS MURAUX OU INTÉGRÉ... -
Page 3: Premessa - Instruction - Einführung - Introduction - Introducción
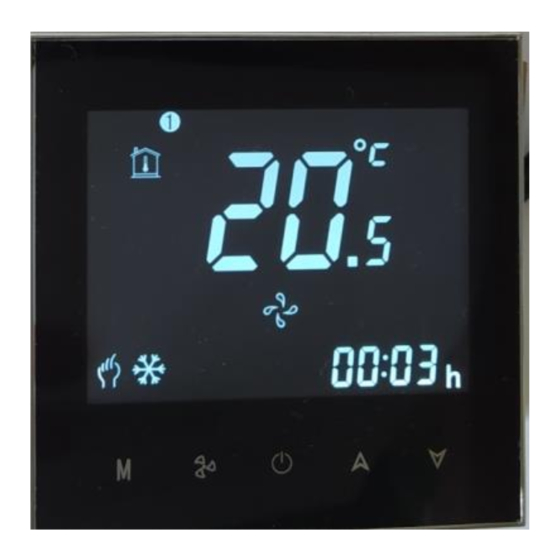
Manuale Uso Installazione PREMESSA - INSTRUCTION - EINFÜHRUNG – INTRODUCTION - INTRODUCCIÓN Le unità possono essere predisposte con 3 tipologie di controlli, che garantiscono sempre tutte le funzionalità in modo da garantire il massimo comfort ambientale: Termostato touch screen a parete Termostato touch screen a bordo unità... - Page 4 Manuale Uso Installazione TERMOSTATI A PARETE O A BORDO MACCHINA SERIE CTOP2WF - CTOP2WF WALL OR ONBOARD MOUNTING THERMOSTAT SERIES - CTOP2WF WAND-ODER BORDTHERMOSTAT- SERIE - CTOP2WF SÉRIE DE THERMOSTATS MURAUX OU INTÉGRÉ - CTOP2WF SERIE DE TERMOSTATO DE MONTAJE EN PARED O A BORDO Premere il tasto Accensione/Spegnimento del termostato.
-
Page 5: Funzioni E Settaggi Speciali - Special Function And Settings - Sonderfunktion Und Einstellungen - Fonction Spéciale Et Paramètres - Funciones Especiales Y Ajustes
Manuale Uso Installazione FUNZIONI E SETTAGGI SPECIALI - SPECIAL FUNCTION AND SETTINGS - SONDERFUNKTION UND EINSTELLUNGEN - FONCTION SPÉCIALE ET PARAMÈTRES - FUNCIONES ESPECIALES Y AJUSTES. Per cambiare l’ora indicata, tenere premuto il tasto M, lampeggerà. Premere nuovamente M per impostare minuti, ore e giorni usando le frecce. - Page 6 Manuale Uso Installazione Wochenprogramm: Der Thermostat bietet täglich sechs geplante Heiz- und Kühlperioden: drei Komfortperioden (1,3 und 5, wobei die Temperatur bei Raumbelegung erforderlich ist) und drei Economy-Perioden (2,4 und 6, wobei die Temperatur bei Raumbedarf erforderlich ist) Zimmer ist nicht belegt). Um das Wochenprogramm anzupassen, drücken Sie M.
- Page 7 Manuale Uso Installazione Predisposizione WiFi – WiFi predisposition - WiFi-Veranlagung - Prédisposition WiFi - Predisposición WiFi Andare su Play Store (sistemi Android) o su APP Store (sistemi IOS) e installare sullo smartphone l’APP TUYA SMART. Una volta installata, fare partire l’APP la cui icona è come sopra indicato. Connect to Play Store (Android system) or to APP Store (IOS system) and install TUYA APP SMART in your smartphone.
- Page 8 Manuale Uso Installazione In particular, it is necessary to register by giving your email. During the installation operations, the SmartPhone must be connected to the home WiFi and the BlueTooth must be activated. Remaining at a distance of no more than one meter from the thermostat, when it is powered and switched OFF, you must first connect the thermostat to the WiFi by holding down the "arrow down"...
-
Page 9: Installazione - Installation - Installation - Installation - Instalación
Manuale Uso Installazione INSTALLAZIONE - INSTALLATION - INSTALLATION - INSTALLATION – INSTALACIÓN Il termostato va posizionato al muro usando una scatola elettrica rotonda 65x38mm (non fornita dall’azienda). Possibili soluzioni sono: scatola tonda da incasso quali GW240209 della Gewiss, FAFG10235 della Sovaterm o similari Scatola quadrata: Bticino 502E Thermostat must be positioned on the wall using 65x38mm round box (not supplied by the factory) - Page 10 Manuale Uso Installazione Fissare il controllo alla piastra di montaggio. Join the screen to the mounting plate. Verbinden Sie den Bildschirm mit der Montageplatte. Joignez l'écran à la plaque de montage. Une la pantalla a la placa de montaje. Per le connessioni elettriche, usare cavi di 1mmq per i cavi di segnale e cavi di sezione 2mmq per l’alimentazione dell’unità...
-
Page 11: Telecomando A Infrarossi - Infrared Remote Handset Control - Infrarot-Fernbedienung - Télécommande Infrarouge
Manuale Uso Installazione TELECOMANDO A INFRAROSSI – INFRARED REMOTE HANDSET CONTROL - INFRAROT- FERNBEDIENUNG -TÉLÉCOMMANDE INFRAROUGE CELSIUS/ FAHRENHEIT AUTO CONDIZIONAMENTO COOLING REFROIDISSEMENT TIMER ON KÜHLUNG ENFRIAMIENTO DEUMIDIFICAZIONE TIMER OFF SÈCHE TROCKEN SECA VENTILAZIONE NUR LÜFTER SEUL VENTILATEUR SOLO FAN RISCALDAMENTO HEATING HEIZUNG CHAUFFAGE... - Page 12 Manuale Uso Installazione Funzione Celsius/Fahrenheit “℃/℉”: Premere il bottone “℃/℉” per passare da “Celsuis” a “Fahrenheit”. Timer ON/OFF: Dopo aver premuto i pulsanti "TIMER ON" o "TIMER OFF", viene visualizzato l'indicatore del timer e l'aria condizionata è in modalità timer. Blocco per I bambini: Lock: Premere i bottoni “...
- Page 13 Manuale Uso Installazione Celsius/Fahrenheit-Funktion „℃/℉“: Drücken Sie die Taste “℃/℉ “, um zwischen “Celsuis“ und “Fahrenheit“ umzuschalten. Timer EIN/AUS: Nach dem Drücken der Tasten “TIMER ON“ oder “TIMER OFF“ wird die Timer-Anzeige angezeigt und die Klimaanlage befindet sich nun im Timer-Zustand. Sperren: Drücken Sie gleichzeitig die Tasten “...
- Page 14 Manuale Uso Installazione Fonction Celsius/Fahrenheit “℃/℉ “: Appuyez sur le bouton "℃/℉" pour basculer entre "Celsuis" et "Fahrenheit". Minuterie MARCHE/ARRÊT: Après avoir appuyé sur les boutons "TIMER ON" ou "TIMER OFF", l'indicateur de minuterie s'affiche et le climatiseur est maintenant en mode minuterie. Verrouillage: Appuyez simultanément sur les boutons “...
-
Page 15: Información
Manuale Uso Installazione INDICAZIONI LED RICEVITORE – LED RECEIVER INDICATIONS - LED-EMPFÄNGERANZEIGEN - LED INDICATIONS DU RÉCEPTEUR - INDICACIONES DEL RECEPTOR LED. ALTRE INFORMAZIONI – OTHER INFO - ANDERE INFORMATION - LES AUTRES INFORMATIONS - OTRA INFORMACIÓN E’ possibile usare il contatto finestra previsto nella scheda elettronica per Contatto finestra per accendere/spegnere l’unità. - Page 16 Manuale Uso Installazione As accessory for the FS and SM series, it will be possible to use RPEHFS e RPEHSM the radiant panel. The panel will be always ON in case of radiant panel heating mode in case of remote or built-in thermostat Als Zubehör für die FS- und SM-Serie wird es möglich sein, die Strahlungsplatte zu RPEHFS e RPEHSM- verwenden.
- Page 17 Manuale Uso Installazione Es posible utilizar una sonda NTC como accesorio para colocarla en las aletas de aluminio de la bobina, cerca de la entrada de la misma bobina, para usarla como sensor mínimo o máximo. De esta manera, en modo calefacción, el ventilador se Sonda de agua H2OPR encenderá...
-
Page 18: Schemi Elettrici Funzionali - General Wiring Diagrams - Schémas Généraux De Câblage
Manuale Uso Installazione 5. SCHEMI ELETTRICI FUNZIONALI – GENERAL WIRING DIAGRAMS – SCHÉMAS GÉNÉRAUX DE CÂBLAGE - DIAGRAMAS DE CONEXIONES GENERALES CLOSE HEAT VALVE OPEN CLOSE COOL VALVE OPEN HIGH AC220V-N AC220V-L PUMP HEATER FILTER HEATING COOLING 230V-50 Hz STEP1 COM1 ROOM WATER... - Page 19 Manuale Uso Installazione HEATER FILTER PUMP HEATING COOLING STEP1 COM1 ROOM WATER 19/75...
- Page 20 Manuale Uso Installazione CLOSE HEAT VALVE OPEN CLOSE COOL VALVE OPEN HIGH AC220V-N AC220V-L HEATER FILTER PUMP HEATING COOLING 230V-50 Hz STEP1 COM1 ROOM WATER 20/75...
- Page 21 Manuale Uso Installazione 21/75...
- Page 22 Manuale Uso Installazione CLOSE HEAT VALVE OPEN CLOSE COOL VALVE OPEN HIGH AC220V-N AC220V-L HEATER FILTER PUMP HEATING COOLING 230V-50 Hz STEP1 COM1 ROOM WATER 22/75...
- Page 23 Manuale Uso Installazione HEATER FILTER PUMP HEATING COOLING STEP1 COM1 ROOM WATER 23/75...
- Page 24 Manuale Uso Installazione CLOSE HEAT VALVE OPEN CLOSE COOL VALVE OPEN HIGH AC220V-N AC220V-L HEATER FILTER PUMP HEATING COOLING 230V-50 Hz STEP1 COM1 ROOM WATER 24/75...
- Page 25 Manuale Uso Installazione 25/75...
- Page 26 Manuale Uso Installazione CLOSE HEAT VALVE OPEN CLOSE COOL VALVE OPEN HIGH AC220V-N AC220V-L HEATER FILTER PUMP HEATING COOLING 230V-50 Hz STEP1 COM1 ROOM WATER 26/75...
- Page 27 Manuale Uso Installazione CLOSE HEAT VALVE OPEN CLOSE COOL VALVE OPEN HIGH AC220V-N AC220V-L PUMP HEATER FILTER HEATING COOLING 230V-50 Hz STEP1 COM1 ROOM WATER 27/75...
- Page 28 NOTE 28/75...
- Page 29 Sede Operativa: Via C. Pascoletti 2 – 33040 Povoletto (UD) Tel. (+39) 0432 823600 – Fax. (+39) 0432 825847 www.thermics-energie.it | info@thermics-energie.it Tutti i diritti sono riservati. La Thermics Energie si riserva il diritto di modificare ed aggiornare il presente documento.
Need help?
Do you have a question about the CTOP2WF Series and is the answer not in the manual?
Questions and answers