Table of Contents
Advertisement
Quick Links
Advertisement
Table of Contents

Subscribe to Our Youtube Channel
Related Manuals for GENORAY iM3 PORT-X IV


Summary of Contents for GENORAY iM3 PORT-X IV
- Page 2 PORT-X IV for Veterinary User’s Manual 2020.04.17 Document Ver.1.0 Copyright 2020 by GENORAY Co., Ltd. All Rights Reserved...
-
Page 4: About The Manual
Please read this manual thoroughly to ensure safe and effective use of the instrument. GENORAY Co., Ltd. is continuously developing the equipment, so it’s manual and configuration may change without the user's prior consent. If you have any questions about the equipment or manual, please contact our service center. - Page 5 About the Manual Used Symbols Symbol Description Location AC (Current) Graft Boards ON/OFF switch ON/OFF switch X-ray generator, X-ray inspection Label Type-B Bayonet Catch Label Warning: dangerous voltage Generator WEEE Mark Label Laser Equipment Refer to the User’s Manual Label Name of Manufacturer and Address Label Manufactured Date...
-
Page 6: Table Of Contents
Table of Contents Table of Contents About the Manual ....................i Table of Contents ..................... iii 1. Equipment Introduction and Safety Information ........1 Equipment Introduction ......................1 Precautions before use ......................2 Suitability ..........................3 Precautions During Use ......................3 Precautions when using a wireless USB Dongle................. -
Page 7: Table Of Contents
Table of Contents 3. Directions ....................29 Preparation before use ......................29 Image Acquisition ......................... 30 3.2.1 Filming Method - Not Using the Sensor ................30 3.2.2 Filming Method - Using the Sensor ................... 32 Image Transfer ........................36 3.3.1 Automatic Transfer ......................36 3.3.2 Manual Transfer....................... - Page 8 Table of Contents Appendix4. Maintenance ................63 App.4.1 Cleaning ........................63 App.4.2 Dose Confirm ....................... 64 App.4.3 Check image ........................ 66 App.4.4 Battery ........................68 App.4.5 Service ........................68 App.4.6 Returns and repairs ...................... 68 App.4.7 Maintenance table ......................69...
- Page 9 Table of Contents...
-
Page 10: Equipment Introduction And Safety Information
Breakdown was caused by a natural disaster such as earthquake, fire, lightning, etc Breakdown due to improper movement of equipment or careless use after installation Breakdown was caused by repair or modification by someone other than Genoray Co., Ltd. or designated service personnel. -
Page 11: Precautions Before Use
1. Equipment Introduction and Safety Information Precautions before use The user is responsible for the operation and maintenance of the equipment. For your safety, please be familiar with the following precautions and perform regular inspections. There is always potential risk present with the use of medical devices that use X-rays and electricity. -
Page 12: Suitability
1. Equipment Introduction and Safety Information Suitability The user of this equipment is responsible for verifying the X-ray exposure, leakage dose, valid beam center and accuracy of kV and mAs. This equipmentmay be used only by legally qualified doctors and radiologists. ... -
Page 13: Precautions When Using A Wireless Usb Dongle
A wireless USB Dongle that uses a RTL8188EU Chipset can be used for PROT-X IV. We recommend that you only use products that have been provided by CE/FCC certified by Genoray Co. The router uses WPA-PSK or a higher form of security, preventing external devices from connecting. -
Page 14: Storage Precautions
1. Equipment Introduction and Safety Information Storage Precautions Please store it at a place away from water. Store in a place where adverse effects are not caused by atmospheric pressure, temperature, humidity, ventilation, consistency, dust, salt, ions, etc. ... -
Page 15: Electrical Safety And Fire
1. Equipment Introduction and Safety Information Electrical Safety and Fire Please check the following before using this equipment. This equipment is powered by a battery. While charging the battery, please check if the plug supplying power is appropriate. ... -
Page 16: Significant Zones Of Occupancy
1. Equipment Introduction and Safety Information Significant zones of occupancy Highest permissible Air Measured stray radiation kerma in one hour Height(cm) In one year, mGy 0.101 0.309 0.334 0.140 0.081 0.149 0.242 0.221 0.208 0.108 0.198 0.129... -
Page 17: Radiation Safety
1. Equipment Introduction and Safety Information Radiation Safety The user must obey the radiation safety and protection laws of their respective country. All users should wear radiation protection apparatuses using the equipment. In order to prevent unnecessary exposure, collimation should be done according to the patient's body type. -
Page 18: 1.10 Equipment Overheating
1. Equipment Introduction and Safety Information 1.10 Equipment Overheating The below warning is displayed when the high voltage generating device is overheated. Temperature Color X-Ray Exposure Status Room temperature 5℃ or below X-ray exposure impossible Grey X-ray exposure possible (recommended Room temperature 6℃... -
Page 19: 1.11 Usage Environment
1. Equipment Introduction and Safety Information 1.11 Usage Environment Allowable Environment Temperature: 6°C to 35°C (42.8°F to 95°F) Relative Humidity: 10% to 80% Atmospheric pressure: 500 to 1060hPa (50 to 106kPa) Optimal temperature and humidity ... -
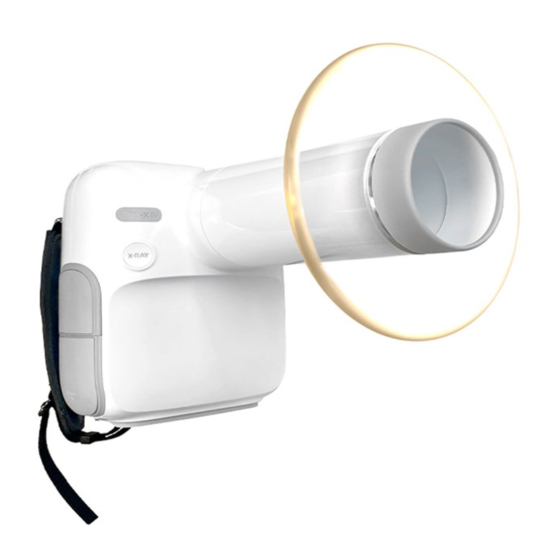
Page 20: Composition Of Port-X Iv
2. Composition of PORT-X IV Composition of PORT-X IV Structure and Naming Naming Naming Field size-restricted equipment Hand switch connector X-ray exposure button Oral sensor USB connector Power button/Status indicator Wireless USB dongle connector Charging connector Trackball Reset button Display Micro SD card connector Strap Handle... - Page 21 2. Composition of PORT-X IV Component Image Description Battery Charger FFC jig Wireless USB dongle (optional) IO sensor (optional) Hand switch (optional) Tripod (optional)
-
Page 22: Buttons For Equipment Operation
2. Composition of PORT-X IV Buttons for Equipment Operation Optimal images can be obtained by subdividing the patient's size and tooth position selection as well as equipment ON/OFF control. Button Description [Equipment ON] If you press the power button for at least 0.5 seconds, the status indicator button turns on blue with a start sound and the unit turns on. - Page 23 2. Composition of PORT-X IV Button Description [Tooth Selection] Press the tooth selection button to change the tooth position. Use the trackball to select the maxillary/mandibular and the tooth to be imaged. Depending on the tooth, the x-ray exposure time changes. ...
-
Page 24: Exposure Restriction Mechanism
2. Composition of PORT-X IV Exposure Restriction Mechanism Exposure Restriction Mechanism Image Description This is a device to prevent X-rays from being exposed. The inside is shielded with lead and equipped with an aluminum filter to minimize radiation exposure for patients and users. -
Page 25: Connector
2. Composition of PORT-X IV Connector Image Description [Micro SD Card connector] A connector that inserts the Micro SD Card. It is encouraged to have important clips be backed up elsewhere other than the Micro SD card, as our company does not have any responsibility for any form of loss or damage of recorded data on the Micro SD card. - Page 26 2. Composition of PORT-X IV Image Description [Holder string] In order to use the equipment securely, hold the equipment firmly with your hand. The string length can be adjusted for the user’s convenience. [Wireless USB dongle connector] A USB connector to insert a wireless USB Dongle. ...
-
Page 27: Display
2. Composition of PORT-X IV Display You can check the device status and filming condition on the display. ① ② ③ ④ ⑤ ⑥ ⑦ ⑧ ⑨ ⑭ ⑩ ⑪ ⑬ ⑫ Feature Feature X-ray tube temperature check Current time Firmware update notification Patient name Micro SD card insert check... -
Page 28: Menu
2. Composition of PORT-X IV 2.5.1 Menu 1. When the menu button ( ) is pressed, the following screen will be displayed. 2. If you want to return to the main screen from the menu screen, click the X-ray exposure button. - Page 29 2. Composition of PORT-X IV Menu Description [List] The patient list will pop up when you click on List button. If you click patient information using the trackball, an image thumbnail view will pop up. The “Send” feature requires wireless settings and a server PC to be set.
- Page 30 2. Composition of PORT-X IV Menu Description [Setting] The settings window will pop up when you click on Setting. The settings window is divided into “when using the oral sensor” and “when not using the oral sensor.” You can set the usage environment of PORT-X IV.
- Page 31 2. Composition of PORT-X IV Menu Description [Wireless] The wireless connection method is as follows. ② Check the wireless AP list and select the wireless AP to use. ① Settings -> Select Wireless When linking with PortView, connect to the same wireless AP with the server PC ③...
- Page 32 2. Composition of PORT-X IV Menu Description [Server] You can select Server PC to connect to a server PC. Basic ID: PORTXIV PW: 12345678 The IP address has to be the same as the server PC. If multiple devices are using a server PC at the same time and you are trying to select patients, you will not be able to select multiple patients.
- Page 33 2. Composition of PORT-X IV Menu Description [Auto FFC] If the message that there is no FFC file is displayed when reconnecting, click the Create FFC button again to create it. Please note that x-rays are automatically generated when creating a FFC.
- Page 34 2. Composition of PORT-X IV Menu Description [Language] You can set the language of the equipment. Setable languages: Korean, English, Japanese [System] Automatic transfer When you check automatic transfer, the data is transferred automatically and sent to the server. Format SD card ...
- Page 35 2. Composition of PORT-X IV Menu Description [Time] You can set the time. Manual setting Select Settings, and control the time using the trackball. Automatic setting If you select a country when connected to the Internet, the time is automatically set to the time of the selected country.
- Page 36 2. Composition of PORT-X IV Menu Description [Update] You can check current version of the firmware and also update it to the latest version. Check firmware version You can check the version of the firmware by clicking on the teeth select button.
- Page 37 2. Composition of PORT-X IV...
-
Page 38: Directions
3. Directions Directions Preparation before use Get well-acquainted with the user manual. Check the voltage specified by the manufacturer. Check the charging level before use. X-ray exposure is not possible while the device is charging. Before imaging, you must ask the patient to remove other jewelry and metallic items worn by them. -
Page 39: Image Acquisition
3. Directions Image Acquisition 3.2.1 Filming Method - Not Using the Sensor Sequence Description Notes ① Click the patient size button to set the size of the patient. Patient size button ( ② After clicking the tooth selection button, set the location for imaging using the trackball Tooth selection button ( ③... - Page 40 3. Directions Sequence Description Notes ① Press the X-ray exposure button. ② A “Ready” message appears in the LCD window for about 2 seconds. ③ When the exposure begins, an “X-ray exposure” notification window is displayed on the LCD, and a beep sound occurs.
-
Page 41: Filming Method - Using The Sensor
3. Directions 3.2.2 Filming Method - Using the Sensor PORT-X IV Filming Technique Sequence Description Notes 1. Register ① Register or select the patient getting imaged. Refer to “2.5.1” patients Menu → “Quick”, “Regist”, “List” ① Set the size of the patient by clicking on the patient size button Patient size button ( ②... - Page 42 ① Check the image once imaging is completed. The captured image is automatically saved to the Micro SD card. When automatic transmission is selected, the image is automatically sent to the server. GENORAY 5. Check the image...
- Page 43 3. Directions Server Linked Imaging Method Sequence Description Notes ① Select the standby patient that has been registered on 1. Select the server. Standby Refer to 2.5.1 Menu → “Standby” Patients Click the power button on the main screen. ...
- Page 44 ① Check the image once imaging is completed. The captured image is automatically saved to the Micro SD card. ② Send the file to the server. Click on the Select Teeth button ( ) to begin transfer. GENORAY 5. Check the image and send...
-
Page 45: Image Transfer
Menu→System. (Refer to 2.5.1) 3.3.1 Automatic Transfer Logistics Description Notes GENORAY 1. Complete ① Once imaging is completed, the image and imaging the progress bar will appear. ① Once the transfer is completed, move on to the next image. -
Page 46: Manual Transfer
3. Directions 3.3.2 Manual Transfer Logistics Description Notes GENORAY ① Once imaging is completed, the captured 1. Complete image will be printed. imaging For re-imaging, press X-ray exposure button to conduct re-imaging. ① Click on Select Teeth button to transfer the image. -
Page 47: Image Transfer
[Transfer] Click on Select Imaging Location button ( ) to transfer the images to the server PC. GENORAY Transfer image [Zoom-in] Click the power button ( ) to magnify the image in a total of 3 steps (1x, 1.3x, 1.7x). - Page 48 ① Click the menu button ( ) to bring up the image management tab. ② Click the list button to go to the thumbnail screen. GENORAY Image list [Moving] ① Click the menu button ( ) to bring up the image management tab.
- Page 49 ① Click the menu button ( ) to bring up the image management tab. ② After clicking the brightness control button, you can adjust the brightness using the trackball. GENORAY Brightness adjustment The modified screen brightness is automatically saved. [Color Inversion] ①...
- Page 50 [Filter] ① Click the menu button ( ) to bring up the image management tab. ② By pressing the filter button, you can select the filter level from Level 0~3. GENORAY Filter [Length Measurement] ① Click the menu button ( ) to bring up the image management tab.
- Page 51 ① Click the menu button ( ) to bring up the image management tab. ② You can reset the modified image to the original image by clicking the reset button. GENORAY Reset Zoom, movement, and brightness will be all reset to the original image.
-
Page 52: Precautions After Use
4. Precautions after Use Precautions after Use Regular Inspection It is recommended that this equipment be inspected by the service center once a year for the reliability and reproducibility of the equipment. This equipment is subject to equipment inspection and defense inspections once every three years by the inspection agency of the Ministry of Food and Drug Safety in accordance with the regulations on radiation safety control. - Page 53 4. Precautions after Use...
-
Page 54: Equipment Specifications
5. Equipment Specifications Equipment Specifications Main Component Specifications X-ray generator Item Specification Tube voltage 70 kV Tube current 2 mA X-ray control device Item Specification Epicycle 22 VDC Exposure time 0.05 ~ 1.6 sec Exposure control equipment Item Specification Type Round type Exposed area 1.5 mm... - Page 55 5. Equipment Specifications Dimensions and weight Item Specification Size 140(W) X 173(H) X 254(D) Weight 1.5 kg X-ray tube Item Specification Manufacturer Canon Model D-045S TYPE Fixed anode X-ray tube Focus 0.4 mm Target angle 12.5° Material Tungsten Cooling method Oil cooling Maximum allowable tube voltage 70kV...
- Page 56 5. Equipment Specifications Maximum Rating Charts (Absolute Maximum Rating Charts) Emission Characteristics...
- Page 57 5. Equipment Specifications Anode Thermal Characteristics D-045S Dimensions (Unit: mm)
- Page 58 5. Equipment Specifications Wireless USB Dongle Specification (Optional) Item Specification Chipset Realtek 8188 EUS IEEE 802.11g, IEEE 802.11b, CSMA/CA with ACK used with IEEE 802.11n (draft 2.0) Standard wireless technology Interface USB 2.0 Frequency 2.4~2.4835GHz 11n: the highest data rate can reach 150 Mbps Wireless Speed 11g: 6/9/12/18/24/36/48/54 Mbps (Dynamic)
- Page 59 5. Equipment Specifications Dimensions and weight Equipment weight: 1.5 kg ± 5% Equipment dimensions: 140 x 173 x 254 (Unit: mm)
-
Page 60: Equipment Labeling
5. Equipment Specifications Equipment Labeling Be sure to check the label and manual before turning on the power. X-ray Tube Assembly Label Tube 라벨 Battery Label 배터리 라벨 제조사 표시 사항 Manufacturer Label... - Page 61 5. Equipment Specifications Manufacturer display items PORT-X IV ZEN-PX4 Tube label...
- Page 62 5. Equipment Specifications Battery...
- Page 63 5. Equipment Specifications...
-
Page 64: Appendix1. Error Messages And Interim Measures
Appendix1. Error Messages and Interim Measures Appendix1. Error Messages and Interim Measures If a problem occurs while using the equipment and normal functionality is not working, an error message is displayed on the X-ray control unit. After checking the message, take appropriate action. If the same symptom is repeated even after taking the temporary measures, contact the service center. - Page 65 Appendix1. Error Messages and Interim Measures Code number Error 7 Error message The tank temperature is high. Please use the device after keeping the power OFF for 30 minutes or more. Measures If the same symptoms occurs again, apply for service. Code number Error 8 Error message...
-
Page 66: App.1.2 Warning Message
Appendix1. Error Messages and Interim Measures App.1.2 Warning Message Code number Warning 00 Error message X-ray exposure is limited while the battery is charging. Use after charging is completed. Measures If the same symptoms occurs again, apply for service. ... - Page 67 Appendix1. Error Messages and Interim Measures Code number Warning 08 Error message Micro SD card connection failure. Check the micro SD card connection. Measures If the same symptoms occurs again, apply for service. Code number Warning 09 Error message Oral sensor connection failure.
-
Page 68: Appendix2. X-Ray Exposure Condition Table
Appendix2. X-ray exposure condition table Appendix2. X-ray exposure condition table The DAP table below records the average values of the measurements. X-ray output error or measurement error may occur depending on the equipment, therefore the tolerance in the table below is 20%. In addition, the data was measured with the image performance option set to Normal Mode. -
Page 69: App.2.2 Air-Kerma Information
Appendix2. X-ray exposure condition table App.2.2 Air-kerma information Step Air-Kerma Step Air-Kerma 0.05 0.14 0.41 0.32 0.85 2.37 0.06 0.17 0.48 0.36 0.95 2.68 0.07 0.19 0.55 0.40 1.05 2.98 0.08 0.22 0.62 0.45 1.18 3.34 0.09 0.24 0.69 0.50 1.32 3.72 0.10... -
Page 70: Appendix3. Resetting The Filezilla Shared Folder
Appendix3. Resetting the FileZilla Shared Folder Appendix3. Resetting the FileZilla Shared Folder Logistics Contents After running the FileZilla program, select Menu → Edit → Users. Select Shared folders tab. Click [Remove] button to remove an existing shared folder. - Page 71 Appendix3. Resetting the FileZilla Shared Folder Logistics Contents Click [Add] button to add a shared folder. Shared folder should be located in the PortView setting location. After adding a shared folder, be sure to click the [Set as home dir] ...
-
Page 72: Appendix4. Maintenance
Appendix4. Maintenance Appendix4. Maintenance Experienced users are responsible for the proper operation and maintenance of the system. Check regularly for the safety of the patient and the operator as per the following information. App.4.1 Cleaning Use a disinfectant (less than 17% alcohol) and a cloth to clean the PORT-X IV. In particular, always keep the tip of the cone clean, which is in frequent contact with the patient. -
Page 73: App.4.2 Dose Confirm
Appendix4. Maintenance App.4.2 Dose Confirm The PORT-X IV's X-ray generating device is factory calibrated and tested. The following checks are to be performed by a qualified technician. The test items measure the X-ray tube voltage/current, radiation time and dose, and can diagnose the condition of the equipment with the measured results. - Page 74 Appendix4. Maintenance If it is out of the above error range, re-exposure the X-rays. If it is continuously out of the error range, contact the manufacturer. Details regarding the measuring equipment used are as follows. We recommend using the following equipment or equivalent certified products. Model Manufacturer Photo...
-
Page 75: App.4.3 Check Image
Appendix4. Maintenance App.4.3 Check image Please refer to “Dose Confirm” item to check whether the X-ray is output normally. Make Flat Field Correction In order to obtain a low-noise image, execute the FFC (flat filed correction) function by using the FFC JIG provided for the first connection with the PORT-X IV and Intra Oral sensor Select Setting-AutoFFC to execute the FFC function automatically. - Page 76 Appendix4. Maintenance Resolution Check the image quality by measuring the clarity of the image via resolution. The method is explained below. Logistics Photo ① Attach the I/O Sensor to the phantom. ② Exposure X-ray for 0.2 seconds. ③ The lines of the resolution chart should appear as shown in the image.
-
Page 77: App.4.4 Battery
The charging time and usage time may differ depending on the usage environment. Battery maintenance may vary depending on the device. App.4.5 Service Only technicians certified by Genoray Co. can perform inspection and service of equipment. For technical support, please contact our service center. App.4.6 Returns and repairs ... -
Page 78: App.4.7 Maintenance Table
Appendix4. Maintenance App.4.7 Maintenance table Result Inspection Inspection items Inspector period Remarks Power plug connection status Grounding connection status Power off after using the equipment Cleanliness of the equipment Disinfecting sections that come Everyday into contact with patient User On/off switch Up/down, right/left buttons Exposure Switch Patient registration... - Page 79 Appendix4. Maintenance...
- Page 81 Obeliss.a.
Need help?
Do you have a question about the iM3 PORT-X IV and is the answer not in the manual?
Questions and answers