Advertisement
Quick Links
Advertisement

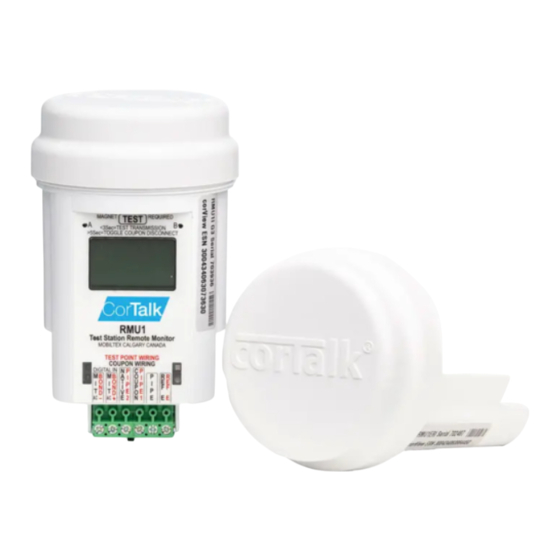
Summary of Contents for MOBILTEX RMU1
- Page 1 RMU1 TRAINING...
- Page 2 Preparing To Visit a Site...
-
Page 3: Tools For Installation
- Drill bits - Lockout/Tag out - Wire cutters - Wire strippers - Crimping plyers - Screw drivers - Wiring kit - RMU1 programmer (RMU1PGM or RMU1/2/3) - Laptop or mobile device with configuration app installed - Portable reference cell... - Page 4 RMU1 Configuration Install RMU1 Config App on your laptop.* www.mobiltex.com/software/ *Must have Admin rights to install drivers.
- Page 5 RMU1 Configuration Install RMU1 Config App On Your IOS Device.
- Page 6 RMU1 Configuration Install RMU1 Config App On Your Android Device.
-
Page 7: Installing The Hardware
Installing The Hardware... - Page 8 Installing The Hardware Determine what it is you want to measure. RMU1 Bond RMU1 Single Coupon w/AC Mitigation RMU1 Test Point RMU1 Dual Coupon RMU1 Separate DC and AC Coupons RMU1 Single Coupon w/DC Bond...
- Page 9 Installing The Hardware The RMU1 is held on the test post with a single Philips screw. One or two spacers need to be installed so the test post lid will fit over the RMU1.
- Page 10 The green connector can be removed to make it easier to attach the wires. The flex circuit replaces the wires and connects the Screwing down the lid will RMU1 to the bolts on the turn on the RMU1. back of the test station.
- Page 11 Configuring the RMU1 With a Laptop...
- Page 12 RMU1 Configuration RMU1 Basic Configuration Overview 1. Read from RMU1. 2. Make configuration changes. 3. Write to RMU1.
-
Page 13: Update Firmware
RMU1 Configuration Update Firmware If you get a warning about updating the firmware, close the app and open the firmware updater. Click on the Program Firmware button to update the firmware. - Page 14 RMU1 Configuration For this example, we are going to program the RMU for separate AC and DC coupons.
- Page 15 RMU1 Configuration Configure An RMU1 Using The PC App Press the Read Config From RMU1 button to connect to the RMU1 and download the current settings in the RMU1 into the app.
- Page 16 RMU1 Configuration Select The Measurement Type...
- Page 17 RMU1 Configuration Click To Disable Any Unused Measurements...
- Page 18 RMU1 Configuration Set Up Alarm Limits...
- Page 19 RMU1 Configuration Ignore During Interruption Can Usually Be Left On...
- Page 20 RMU1 Configuration Offset adds to the reading. You can use the coupon Scaling is a multiplier. It is This can be used to make calculator to calculate the typically set to 1 for voltage different reference cells look scaling value for you.
- Page 21 RMU1 Configuration You can set the range for the current density readings. AC Low 4.25mVac AC Med 42.5mVac AC High 140mVac DC Low 6mA DC DC Med 60mA DC DC High 200mA DC...
- Page 22 RMU1 Configuration The Digital In checkbox changes the slot from an analog measurement to a on/off check. This should be left unchecked at most sites.
- Page 23 Initial Delay is the time until the first depolarization after the RMU1 powers up. Interval is how often you want it to depolarize. Duration is how long you want to have the coupon disconnected for.
- Page 24 RMU1 Configuration After You finish making changes you then need to write to the RMU to save the changes.
- Page 25 RMU1 Configuration You can then test the RMU by clicking the [Update] button and verifying the readings.
- Page 26 5 minutes before a a jumper between the Pipe pin RMU1 battery life. It is just for too much. clear message is transmitted to and the running the 4-20mA loop.
- Page 27 RMU1 Advanced Options The Set RMU1 Clock button will The Read Faults button will The Detailed Status button will The Cap Detect Calibration The Extract Datalogger Mem The Clear Datalogger Mem The Cellular Parameters button The Test Transmission will The Reboot RMU1 button can...
- Page 28 RMU1 Configuration You can use the Write Config To File button to save a copy of the configuration to use at other similar sites. You can use the Read Config From File button to open a saved copy of the configuration.
- Page 29 RMU1 Configuration AC Mitigation Transformers When installing an AC mitigation transformer, type the scaling value printed on the transformer into the slot scaling box.
- Page 30 10 into the Shunt full scale amps into the scaling box for both the AC box (0.01V/0.001Ω) and DC current. The RMU1 measures this voltage drop to determine the current. This will give you a scaling of 833.33...
- Page 31 Configuring the RMU1 With a Mobile Device...
- Page 32 RMU1 Configuration Mobile Apps Android...
- Page 33 Start by clicking on Connect to RMU1. It will then search for your programmer. Once it has read out the RMU1, you will see Go to Measurements. Select the measurement type you would like Select each measurement to configure it.
-
Page 34: Service And Support
RMU1 Troubleshooting Call For Support Service & Support 3640 26 St N.E. Calgary AB Canada T1Y 4T7 O: (403) 291 2770 Toll-Free: 1 844 689 3282 Skype: mobiltex.data http://www.Mobiltex.com/service...


Need help?
Do you have a question about the RMU1 and is the answer not in the manual?
Questions and answers