Advertisement
Quick Links
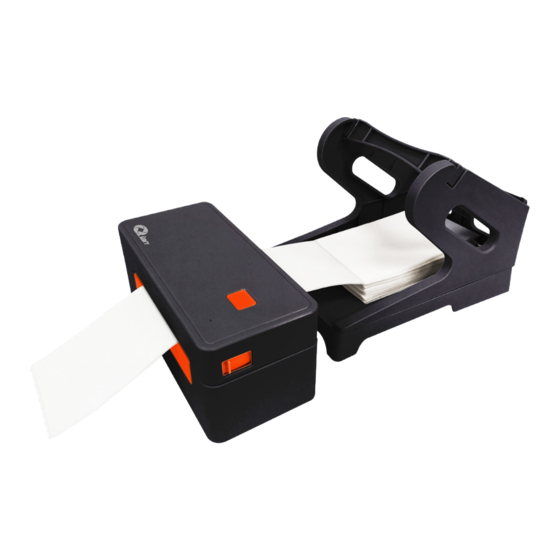
THERMAL LABEL PRINTER 108MM USB+BT
IMPRESORA TÉRMICA DE ETIQUETAS 108MM USB+BT
MODEL QOP-T18UB-LE
Please read carefully before using your equipment
and save it for future reference.
Por favor lea cuidadosamente antes de usar su equipo
y guárdelo para uso de futuras consultas.
USER MANUAL / MANUAL DE USUARIO
Advertisement

Related Manuals for Qian QOP-T18UB-LE


Summary of Contents for Qian QOP-T18UB-LE
- Page 1 THERMAL LABEL PRINTER 108MM USB+BT IMPRESORA TÉRMICA DE ETIQUETAS 108MM USB+BT MODEL QOP-T18UB-LE Please read carefully before using your equipment and save it for future reference. Por favor lea cuidadosamente antes de usar su equipo y guárdelo para uso de futuras consultas.
- Page 3 (in so far as it is invalid or unenforceable) shall be given no effect and deemed to be excluded without invalidating any of the remaining terms. Qian reserves the right to amend any term at any time without notice.
- Page 4 WARNING In case of fire or lightning, please don’t put product in damp and raining place, operate or maintain according to the user manual. Be careful when you see an attachment with a Dangerous Voltage which might cause serious electric accident. Notice: 1.
- Page 5 PRODUCTION VIEW VISTA DE PRODUCCIÓN Status light / Luz de estado Paper feed key / Tecla de alimentación de papel Open button / Botón abrir Side view / Vista lateral Adjustable slot / Ranura ajustable Power switch / USB port / Interruptor de alimentación Puerto USB Power socket /...
-
Page 6: Installation Instalación
INSTALLATION INSTALACIÓN (1) Place the printer on a steady surface and ensure that the power is turned off. (2) Connect one end of the USB data cable to the printer and the other end to the host computer. (3) Insert the power cord into both the printer and the power outlet. (1) Coloque la impresora sobre una superficie firme y asegúrese de que la energía está... - Page 7 LOADING MEDIA CARGANDO MEDIOS (1) Push the open button to open the cover. (2) Put in the folding paper. (3) Pull out the paper roll, guide and fasten the paper with the paper guide. (4) Close the cover carefully. (1) Pulse el botón de apertura para abrir la tapa. (2) Coloque el papel plegable.
- Page 8 FEED KEY & AUTO PAPER DETECTION TECLA DE ALIMENTACIÓN Y DETECCIÓN AUTOMÁTICA DE PAPEL 1. The functions of the feed key 1. Las funciones de la tecla de avance (1) Feed paper When the printer is ready, press the feed key, will feed the paper to the next label.
- Page 9 DRIVER INSTALLATION INSTALACIÓN DEL CONTROLADOR Open the location then double-click the driver icon, and accept the license agreement. Abra la ubicación y luego haga doble clic en el icono del controlador, y acepte el contrato de licencia. Select the installation path and click Next. Seleccione la ruta de instalación y haga clic en Siguiente.
- Page 10 Please ensure that the printer is turned on and connect it to the computer using the provided USB cable. Click Finish to enter the interface for installing drivers. Asegúrese de que la impresora esté encendida y conéctela a la computadora con el cable USB proporcionado. Haga clic en Finalizar para ingresar a la interfaz para instalar controladores.
- Page 11 Plug and Play Printer Detection, New Plug and Play printers are automatically detected for installation. Detección de impresoras Plug and Play, nuevo Plug and Play las impresoras se detectan automáticamente para su instalación. After confirming the model is 4B-2054N, click on the next page. Después de confirmar que el modelo es 4B-2054N, haga clic en el siguiente página.
- Page 12 Finally, click Finish to start the installation of the driver. Finalmente, haga clic en Finalizar para iniciar la instalación del controlador. This step is the driver installation progress. Click Finish after the installation is completed. Este paso es el progreso de la instalación del controlador. Haga clic en Finalizar una vez completada la instalación.
- Page 13 Click Close after installation. Haga clic en Cerrar después de la instalación. View the installed driver, click on the computer to start opening the settings, and then click on the device. The words Bluetooth, printers, and mouse are displayed as below. Vea el controlador instalado, haga clic en la computadora para comience a abrir la configuración y luego haga clic en el dispositivo.
- Page 14 After entering from the device, click on the printer and scanner to see the downloaded driver. Después de ingresar desde el dispositivo, haga clic en la impresora y el escáner para ver el controlador descargado. COMPUTER BLUETOOTH CONNECTION CONEXIÓN BLUETOOTH DE LA COMPUTADORA Click on the computer to enter the setup interface.
- Page 15 Enter the PIN password “0000” for the corresponding model. Ingrese la contraseña PIN “0000” para el modelo correspondiente. Tap the keyboard window key+R to open the run window, and enter “devmgmt.msc” to enter the device manager. Toque la tecla de la ventana del teclado + R para abrir la ventana de ejecución, e ingrese “devmgmt.msc”...
- Page 16 After opening the device manager, click on the port, select the corresponding Bluetooth standard serial interface, and select COM3. Después de abrir el administrador de dispositivos, haga clic en el puerto, seleccione la interfaz serial estándar de Bluetooth correspondiente y seleccione COM3. Return to the printer configuration interface, and check the port number of the Bluetooth device you just queried in the port list box (if there are two or more, you can try them separately).
- Page 17 Finally, unplug the printer USB connection cable and print the test page through Bluetooth connection on the driver. If the test page is printed, the connection is successful. Finalmente, desconecte el cable de conexión USB de la impresora e imprima la página de prueba a través de la conexión Bluetooth en el controlador.
- Page 18 BLUETOOTH CONNECTIVITY CONECTIVIDAD BLUETOOTH (1) Scan QR code to download printing and editing software. (1) Escanee el código QR para descargar el software de impresión y edición. Click disconnect. (2) Haga clic en desconectar. (3) Select Bluetooth connection (3) Seleccione la conexión Bluetooth.
- Page 19 (5) The upper right corner of the APP main page displays “connect” means a successful connection. (5) La esquina superior derecha de la página principal de la aplicación muestra “conectar” significa una conexión exitosa. LED STATUS ESTADO DE LED LED status Explanation Estado de LED Explicación...
- Page 20 SPECIFICATION ESPECIFICACIÓN Parameters Values Parámetros Valores Printing Speed 152 mm/s Velocidad de impresión Resolution 203 DPI Resolución Density Densidad Paper width Max 108mm (4.09”) (Default 4inch) Ancho del papel Paper length Max 1778mm (70”) (Default 6inch) Longitud del papel Paper thickness 0.06 ~ 0.20 mm Grosor del papel Power adapter...
- Page 21 General Cleaning - Keep the outside of your printer clean by wiping it periodically with a soft cloth dampened with water. Do not use abrasive cleaners as they may damage the surfaces. Limpieza general: mantenga limpia la parte exterior de la impresora limpiándola periódicamente con un paño suave humedecido con agua.
Need help?
Do you have a question about the QOP-T18UB-LE and is the answer not in the manual?
Questions and answers