Table of Contents
Advertisement
Available languages
Available languages
Quick Links
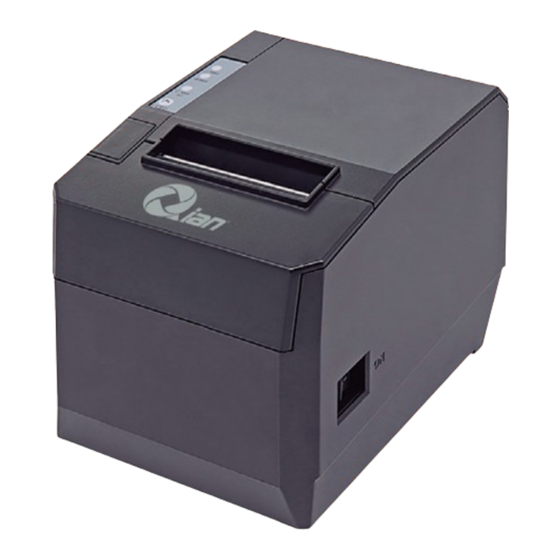
THERMAL PRINTER DAYIN80
IMPRESORA TÉRMICA DAYIN 80
MOD. QTM-58306
1
BLUETOOTH
250mm/s
USB
AUTOMATIC CUT
80mm
®
CORTE AUTOMATICO
Please read carefully before using your equipment
and save it for future reference. (Page 2)
Por favor lea cuidadosamente antes de usar su equipo
y guárdelo para uso de futuras consultas. (Página 48)
USER MANUAL / MANUAL DE USUARIO
Advertisement
Table of Contents

Related Manuals for Qian DAYIN80


Summary of Contents for Qian DAYIN80
- Page 1 THERMAL PRINTER DAYIN80 IMPRESORA TÉRMICA DAYIN 80 MOD. QTM-58306 BLUETOOTH 250mm/s AUTOMATIC CUT 80mm ® CORTE AUTOMATICO Please read carefully before using your equipment and save it for future reference. (Page 2) Por favor lea cuidadosamente antes de usar su equipo y guárdelo para uso de futuras consultas.
-
Page 2: About This Manual
About This Manual Thank you for purchasing the Qian DAYIN 80 thermal and receipt printer. This manual can help you learn how to use the product efficiently. Please read it before using the product and keep it for future reference. -
Page 3: Safety Precautions
Safety Precautions This section presents important information intended to ensure safe and effective use of this printer. WARMING: • Scratch Warning: Never try to touch the auto cutter or jagged teeth. • Scald Warning:To avoid been burned, please do not touch the printer head. -
Page 4: Product Information
6) The printer should only be disassembled or repaired by a technician. 7) Please strictly follow the recommended use tips of this manual. 1.Product Information Main features of the DAYIN 80 thermal printer • High-quality printing,High-speed and strong stability; • Interface ( Serial RS232 / RJ45 Ethernet / USB / Blue- tooth/ WiFi ) •... - Page 5 1.1 Technical Parameters and Features Printer Method Line Thermal 300mm/sec (80-III type) ;250mm/sec (80-II type) Print Speed Simpli ed Chinese 24x24 point. support GB18030 font Fonts library,support Taiwan and HK traditional(complex font), Korean and Japanese 576dot/line or 512dot/line ANK Character Font A:12*24dot,1.5(W)*3.0(H)mm Character Size Font B:9*17dot,1.1(W)*2.1(H)mm...
-
Page 6: Communication Ports
2.Communication Ports 2.1 Universal Serial Bus (USB Port) Connect the printer with the standard usb cable(usb device types are automatically) , once printer is connected with the PC, install the driver , then choose the corresponding port accordingly. 2.2 RJ45 Ethernet Port (10M/100M) (suitable for 80-III type) With this port, we can use the network cable and connect the computer directly, communication and the port number is 9100;... -
Page 7: Basic Function Operation
3.Basic Function Operation 3.1 Indicator Light & Printer Status The printer has 3 Led Indicators( Power / Error and Paper Out ),Power indicator will lights o n once power is plug- ged in. And Error Led will lights on when any error arose ( Paper Out / Temperature is too high / mal-position of the carriage unit on the print head );... - Page 8 4.Cleaning Of the Printer We need to clean the print head if problems as below. Printing is not clear, but thermal paper is ok. Some columns on the printed pages are not clear. Alimentación de papel ruidosa. Cleaning steps 1. Turn off the power,open the printer cover and take off the paper roll.
-
Page 9: Installation Wizard
5.Installation Wizard 5.1 Hardware Connection Ensure all the cables connected correctly( e.g. Adapter / Interface Cables / RJ-11 cable ) . Open the cover and load the paper rolls and cartridge ( Paper Loading Direction as below ). 5.2 Driver Installation 1,Enter the DC driver,click the related files(printer driver software of 58mm/80mm series)and install.the installation language will be shown as below. - Page 10 2 - Select the language you need and click the button ”Confirm”,and show the imgae as below,then click the bu- tton”next step. 3 - Please read the related terms carefully,and install it as agreement as below...
- Page 11 4 - Click”next step” ans show as below(customer is available for modifying channel of driver installation or default one). 5 - Click the button”next step”again and show as below and install it:...
- Page 12 6 - After installation,the related interface will be shown as below,select operation system of your computer and prin- ter model,click”USB port for testing”, if you communication with USB port, USB port of computer will be identified auto- matically .Click he button”next step”and install continuous- ly as below :...
- Page 13 7 - Click the button”Start Installation” and shown as below. And select installation: 8 - Finish the driver installation as below.
- Page 14 5.2.1 USB Port Connection ( If your desired port is USB ). 1: Open “ Properties “ then choose “ Ports ” We can see many usb ports if there is other usb printer used in this PC. Select the unoccupied usb port and click “Apply”. Remarks: Ensure the printer is power on &...
- Page 15 If the print test page works well, that mean all setting is ok. Remarks: If “ Printer Error “ , we should back to “ Ports” and try the USB ports one by one until it is ok. 5.2.2 Ethernet Connection (If your desired port is Ethernet) 1: Get the IP address from a Self Printing Test Paper Switch off the printer then press “FEED”...
- Page 16 2: Select “ Add Port”we can see below image. 3: Click “ Next ”, and enter into the printer IP address :...
- Page 17 4: Next and choose “ Generic Network Card “ then click Next: 5: Then you can check the image as below:...
- Page 18 6: Click Finished and we can check the added ports as below image.
- Page 19 7: Let’s back to “General”and click “Print Test Page ”. If the print test page works well, that mean all setting is ok. We can also change the setting by “ Device Settings ” ( print method setting ,cash drawer setting, paper cutter setting etc ) - As below image shown ;...
- Page 20 5.2.3 Serial Port Connecting ( If your desired port is Serial ) 1: Following “ Printer - Properties - Ports ” as below.
- Page 21 2: Select “COM1” - “Configure Port ” - default setting as below image. We should refer to the default baud rate from the self test page and input the same baud rate above or there will be error in the printing. Once setting parameters confirm, click “...
- Page 22 3: Back to “ General”and try “ Print Test Page” .
- Page 23 If the print test page works well, that mean all setting is ok. Try below setting if we the printing speed is too slow: - “ Device Settings “ ---- “Print Mode” ---- select “ Print as soft font “. 5.2.4 Bluetooth port to be used (if you choose models support Bluetooth printing).
- Page 24 4:if you can see screen as below,then the device is sear- ching the bluetooth printer,please wait.
- Page 25 5:Once the Bluetooth printer is found. You can see it lis- ted on the screen, Here, for example,Bluetooth. Printer is successfully found. Please click “-Bluetooth printer”, click “Next” 6:Choose “Let me choose my own passkey”, then enter “1234”(this is factory default passkey, if you want to change it, you have to inform us to set the new passkey for you in...
- Page 26 our factory before shipping),then click “Next”. 7:if you can see the screen as below, that means the Blue- tooth printer is already connected. Please notice the assig- ned COM ports ,then Click”Finish”. (Note: The Bluetooth device will automatically assign a COM port.)
- Page 27 8: Now if you want to test if the printer is OK to print, you could use a com tool , and send printed data to Outgoing COM port( just as above image shown: COM5). (Com tool setting is 9600,N,8,1.). 6.
- Page 28 1.3, Modify the IP address of the computer, make sure that the printer is in the same network segment, and the subnet mask and gateway should be the same as printer. As shown in “image 6.2”, and then press the “OK”.
- Page 29 1.4, Open the PC browser, enter the IP address into the PC browser, (default IP address of printer is 192.168.1.100), as below image shown: Then you can check the “Ethernet Webset System” as below : 1.5, Click “Configuration” , then you can set the Ethernet rela- ted information settings, as shown in “Image 6.5”, modify each one if you need and click “Save”...
- Page 30 address into PC browser what you modify , to check the new setting of printer. If all is ok, that means the IP setting is successful. 1.7, You can make a print testing by “ Print Test” as below : 2.
- Page 31 Step 1: Select the port “ Ethernet” , and get the printer IP from Self- test page.(the default IP address is 192.168.1.100). Step 2: Click the “Connection”, if success, it will be shown “ Discon- nection”. Step 3: Can be modified the relevant parameter of printers ( IP, Sub- net mask, Gateway, MAC), After all the setting are done, please power off and restart the printer.
- Page 32 7. WIFI IP Address Setting. The setting parameters of 80 WIFI thermal printer can be done by the browser configured, the steps as below: 1. Connect the printer with PC and switch on the printer. 2. Find the wireless network and link it. Then find the file na- med“...
- Page 33 Select “AP+STA mode” , and save. Note: When the module is selected to STA mode (NIC), then re-start the module, you can not reuse the wireless configura- tion, SSID number can not be found. 4. Select “ STA Setting ” as below; 5.
- Page 34 Above are all your current wireless network, select one of your wireless device available to be used, then click “ OK ”. 6. Input the correct configuration within the dialog, as below:. STA setting is complete, click “save”. 7. Select “Other Setting”, setting as below:...
- Page 35 After finish the setting, click “ Save”. 8. Restart the module, as below: Module configuration is complete. 9. Click computer “Start” “ Run”, Input word “CMD”, as below:...
- Page 36 Input “ping 192.168.1.105 -t” as below. If details shows as below , means connection is Ok. Return to the driver -” properties “ - “ port “-” add port “, consistent with the add ports:...
- Page 37 8.Operating Manual for Android OS This manual applies to all of our android OS compatible printers ( both 58mm & 80mm width printer) Currently, the common communication ports we used for android OS are ( USB, Ethernet, Bluetooth and WiFi ). If you want to use Android Device connected with our prin- ter, first of all make sure that printers can be supported Android Operate System, proceed as follows ( Bluetooth...
- Page 38 pairing password for Bluetooth connection is “ 1234” ) . After the connection successfully, click on the “Print Test Page”, the printer will work. If you use the “Ethernet interface”, “USB”, “WIFI” commu- nication, replace “BLUETOOTHDEMO” from “Step 2” into the corresponding “NETDEMO”, “USBDEMO”...
- Page 39 2. Turn on the Bluetooth setting of IOS device , then click “POS-Printer. 3. Into the App of “POS-Printer”, select the paper width as below:...
- Page 40 4. Select the way of communication of printers, “Bluetooth” or “WIFI”:...
- Page 41 5, If connect with Bluetooth, then you can click “ Select Printer” first, you will search the “Bluetooth Printer” (the default name of printer is Bluetooth Printer), click it to be connected. 6, If connect with WIFI, please make sure that your device WIFI is connected with printer (both of them in the same Network segment).
- Page 42 7, If above steps are successful, then you can print text to have a test:...
- Page 43 8, Other features of this APP: 1) Send HEX: In the text box, enter the hexadecimal data, click “Send HEX”, then cansend text box hexadecimal data to the printer. 2) Print Image mode: input data in the text box, click “Print Image mode”, you will be able to convert the contents of the text box into a image printed.
-
Page 44: General Troubleshooting
9. The applicable version: can be compatible with IOS6.0 or above versions. 10.General Troubleshooting. 1: Why serial port printer printing messy code? A: Ensure the baud rate setting in the PC is same as the printer baud rate. ( we can see printer baud rate from self test page). - Page 45 for repair. 7: Ethernet printer does not printer after linked with a router. A: Make sure the network cable and router port works well, does the printer IP and router IP are on the same network segment? Is the printer IP occupied by other device ? We can modify the ip with the printer tools at- tached in the cd disc.
- Page 46 12: Printing speed is very slow for serial printer A: follow this path and change the set accordingly : Dri- ver -- Properties -- Device Settings -- Print Mode -- Print as soft font. 13: Water or other liquid spills into the printer A: Cut off the power,we can dry the main board or prin- ter head with a hair dryer, careful of the temperature ( average 50 degree is ok ).
-
Page 48: Acerca Del Manual
Acerca del Manual Gracias por la compra de la impresora térmica y de recibos DAYIN 80 de Qian. Este manual puede ayudarlo a aprender a usar eficiente- mente el producto. Léalo por favor antes de usar el produc- to y guárdelo para futuras consultas. -
Page 49: Consejos De Seguridad
Consejos de Seguridad Información importante destinada a garantizar el uso efectivo de esta impresora. Advertencia • Nunca intente tocar el cortador automático o la sierra de corte. • Para evitar quemaduras, no toque el cabezal de la im- presora. • Por favor interrumpa la corriente de electricidad antes de conectar o desconectar el cable de alimentación de la impresa. -
Page 50: Información Del Producto
6) La impresora solo debe ser desmontada o reparada por un técnico. 7) Siga estrictamente los consejos de uso recomendados de este manual. Información del producto Características principales de la impresora térmica DAYIN 80 • Impresión de alta calidad, alta velocidad y gran estabi- lidad;... -
Page 52: Puertos De Comunicación
2. Puertos de comunicación 2.1 Puerto USB (Universal serial bus) Conecte la impresora con el cable USB estándar (los disposi- tivos de tipo USB son automáticos), una vez que la impresora está conectado a la PC, instale el driver, luego elija el puerto correspondiente en consecuencia. -
Page 53: Funciones Básicas
El método de cableado de la impresora de interfaz en serie sigue las reglas estándar de la interfaz en serie EIA están- dar. El consumidor puede obtener la velocidad de transmi- sión predeterminada actual de “Imprimir página de prueba” y también puede ajustar velocidad de transmisión a través del interruptor DIP (el interruptor DIP está... -
Page 54: Limpieza De La Impresora
• Prueba de auto impresión: apague la impresora, luego presione el botón “ALIMENTACIÓN” y no la suelte. presio- ne el botón “POWER” al mismo tiempo hasta que se en- cienda el indicador “PAPER OUT”, suelte el botón y podrá ver la configuración actual de la página de prueba. •... -
Page 55: Asistente De Instalación
Pasos para limpiar el cabezal 1. Apague la alimentación, abra la cubierta de la impresora y retire el rollo de papel. 2. Espere un momento si acaba de terminar una impresión. 3. Utilice un cepillo suave o algodón sumergido en etanol para limpiar el cabezal de impresión. - Page 56 RJ-11). Abra la cubierta y cargue los rollos de papel y el cartucho (Posición de carga de papel como se muestra a continuación). 5.2 Instalación del controlador 1 - Ingrese al DC driver, haga clic en los archivos rela- cionados (driver software de la impresora serie 58mm / 80mm) e instálelo.
- Page 57 2 - Seleccione el idioma que necesita y haga clic en el bo- tón “Confirmar”, y como se muestra a continuación, luego haga clic en el botón “siguiente”. 3 - Por favor lea los términos cuidadosamente y seleccio- ne “siguiente”.
- Page 58 4 – Haga clic en “siguiente” como se muestra a continuación (Se puede seleccionar la carpeta del driver o dejar la prede- terminada). 5 – Haga clic en “siguiente” otra vez como se muestra a con- tinuación y seleccione “instalar”.
- Page 59 6 – Después de la instalación, la interfaz relacionada se mos- trará a continuación, seleccione el sistema operativo de su computadora y modelo de impresora, haga clic en “Puerto USB para prueba”, si se comunica con el puerto USB, el puerto USB de la computadora será...
- Page 60 7 - Haga clic en “comenzar instalación” como se muestra a continuación y seleccione “instalar”. 8 – Para terminar la instalación del driver haga clic en “OK” se la siguiente manera.
- Page 61 5.2.1 Conexión del puerto USB (si su puerto deseado es USB). 1: Abra “Propiedades” y luego seleccione “Puertos”. Se muestran varios puertos USB, si hay otra impresora co- nectada por USB seleccione el puerto USB desocupado y haga clic en “Aplicar”. Observaciones: asegúrese de que la impresora esté...
- Page 62 2: Haga clic en “General” y luego seleccione “Imprimir página de prueba”. Si la impresión de prueba es correcta, significa que los ajus- tes fueron aplicados. Observaciones: si aparece “Error de impresora”, debe volver a “Puertos” y probar los puertos USB uno por uno hasta que esté...
- Page 63 madamente 1 segundo después de que se apaguen los indica- dores “ERROR”. Luego puede ver la configuración actual desde la página de auto impresión. (La dirección IP predeterminada es: 192.168.1.100). Abra “Propiedades” y luego haga clic en “Puer- tos”, como se muestra a continuación en las imágenes: 2: Seleccione “agregar puerto”...
- Page 64 3: Haga clic en “siguiente” e ingrese la dirección IP de la im- presora: 4: Haga clic en “siguiente” y seleccione “Generic Network Card” y luego haga clic en “siguiente”. 5: Seleccione finalizar como se muestra a continuación.
- Page 65 6: Haga clic en finalizar y puede comprobar que se ha agrega- do el puerto correspondiente como se muestra a continuación.
- Page 66 7: Regrese a “General” y haga clic en “Imprimir página de prueba”. Si la impresión de prueba es correcta, significa que los ajus- tes fueron aplicados. También puede cambiar la configuración mediante “Configu- ración del dispositivo” (configuración del método de impre- sión, configuración del cajón de efectivo, cortador de papel, configuración, etc.): como se muestra a continuación.
- Page 67 5.2.3 Conexión del puerto serial (si su puerto deseado es serial) 1: Siga los pasos que se muestras a continuación “Impresora – Propiedades – Puertos”.
- Page 68 2: Seleccione “COM1” – “configuración de puerto”. Debe referirse a la velocidad de transmisión predeterminada de la página de autoevaluación e ingresar la misma veloci- dad de transmisión arriba o habrá un error en la impresión. Una vez que confirme los parámetros de configuración, haga clic en “Aplicar”...
- Page 69 3: Regrese a “General” y haga clic en “Imprimir página de prueba”.
- Page 70 Si la impresión de prueba es correcta, significa que los ajus- tes fueron aplicados. Pruebe la siguiente configuración si la velocidad de impre- sión es demasiado lenta: - “Configuración del dispositivo” -”Modo de impresión” - se- leccione “Imprimir como fuente suave” 5.2.4 Conexión por Bluethooth (si su dispositivo per- mite impresión por Bluetooth) 1: Asegúrese de que está...
- Page 71 go seleccione “Mi dispositivo está configurado de acuerdo y listo para ser encontrado”, haga clic en “Siguiente” como se muestra a continuación. 4: Si puede ver el siguiente mensaje, significa que se está buscando el dispositivo Bluetooth, por favor espere.
- Page 72 5: Una vez que se haya encontrado la impresora mediante Bluetooth, la podrá ver enlistada. Haga Clic en “Impresora Bluetooth” y luego “siguiente”. 6: Seleccione “Permítame elegir mi propia clave de ac- ceso”, luego ingrese “1234” (esta es la clave de acceso predeterminada de fábrica, si desea cambiarlo, debe in-...
- Page 73 formarnos para configurar la nueva clave de acceso para usted en nuestra fábrica antes del envío), luego haga clic en “Siguiente”. 7: Si puede ver la pantalla a continuación, significa que la impresora Bluetooth ya está conectada.Tenga en cuenta los puertos COM asignados, luego haga clic en “Finalizar”.
- Page 74 (Nota: el dispositivo Bluetooth asignará automáticamente un puerto COM). 8: Ahora, si desea probar si la impresora está bien para imprimir, puede usar una herramienta de comunicación y enviar datos impresos a Puerto COM saliente (tal como se muestra en la imagen de arriba: COM5). (La configuración de la herramienta Com es 9600, N, 8,1.) 6.
- Page 75 1.3 Modifique la dirección IP de la computadora, asegúrese de que la impresora esté en el mismo segmento de red y la máscara de subred y la puerta de enlace deben ser las mismas que las de la im- presora. Como se muestra a continuación y luego haga clic en “OK”.
- Page 76 1.4 Abra el navegador de la PC, ingrese la dirección IP en el navegador de la PC (la dirección IP predeterminada de la im- presora es 192.168.1.100), como se muestra a continuación: Luego puede verificar el “Sistema de Webset Ethernet” como se muestra a continuación: 1.5 Haga clic en “Configuración”, luego puede establecer la configuración de información relacionada con Ethernet, como...
- Page 77 1.6 Reinicie la impresora, luego puede ingresar la nueva dirección IP en el navegador de la PC que modifique, para verificar la nueva configuración de la impresora. Si todo está bien, eso significa que la configuración de IP es exitosa. 1.7 Puede hacer una prueba de impresión mediante “Prueba de impresión”...
- Page 78 Paso 1: Seleccione el puerto “Ethernet” y obtenga la IP de la impresora desde la página de autocomprobación. (la dirección IP predeterminada es 192.168.1.100) Paso 2: Haga clic en “Conexión”, si tiene éxito, se mostrará “Desconexión”. Paso 3: Se puede modificar el parámetro relevante de impre- soras (IP, máscara de subred, puerta de enlace, MAC), des- pués de todo el ajuste hecho, apague y reinicie la impresora.
- Page 79 (ACTIVAR / DESACTIVAR), Densidad de impresión (Nivel 1 a Nivel 4), Velocidad de transmisión en serie (9600, 19200, 38400, 57600, 115200), Delantero set (Front_1, Front_2 y Front_3,). Después de completar todos los ajustes, apague y reinicie la impresora. Paso 5: También puede hacer el “Restablecimiento de fá- brica”...
- Page 80 la PC, haga clic en “Enter”, se muestra lo siguiente: Ingrese “admin” para el nombre de usuario y la contraseña predeterminada también es “admin”. Haga clic en “ok” y lue- go “Siguiente”. Seleccione “Modo AP + STA” y guárdelo. Nota: Cuando el módulo se selecciona en modo STA (NIC), reinicie el módulo, no puede reutilizar la configuración inalám-...
- Page 81 brica o no se puede encontrar el número SSID. 4: Seleccione “Configuración de STA” como se muestra a continuación: 5: Haga clic en “Scan” aparecerá la selección de la siguiente manera: Arriba está toda su red inalámbrica actual, seleccione uno de sus dispositivos inalámbricos disponibles para usar, luego haga clic en “Aceptar”.
- Page 82 6: Ingrese la configuración correcta dentro del diálogo, como se muestra a continuación: La configuración de STA está completa, haga clic en “guar- dar”. 7: Seleccione “Otra configuración”, como se muestra a con- tinuación: Después de finalizar la configuración, haga clic en “Guardar”.
- Page 83 8: Reinicie el módulo, como se muestra a continuación: La configuración del módulo está completa 9: Haga clic en la computadora “Inicio”, “Ejecutar”, ingrese la palabra “CMD”, como se muestra a continuación: Ingrese “ping 192.168.1.105 -t” como se muestra a continuación...
- Page 84 Si los detalles se muestran de la siguiente manera, significa que la conexión está bien. Regrese al driver - “propiedades” - “puerto” - “agregar puerto”, de acuerdo con los puertos de agregar. 8. Manual de funcionamiento para el sistema operativo Android Este manual se aplica a todas nuestras impresoras com- patibles con Android OS (impresoras de 58 mm y 80 mm de ancho).
- Page 85 Paso 1: - Inserte el disco del driver en el CD-ROM, conecte su dis- positivo Android a su computadora; Paso 2: - Busque el archivo denominado “SDK” en el controlador del CD, luego siga la ruta: “Android SDK - BLUETOOTH- DEMO - bin - BT-POSPrinter.APK “...
- Page 86 9. Manual de funcionamiento para el sistema operativo IOS 1. Descargue la aplicación “POS-PrinterV1.0” de App Sto- re, como se muestra a continuación:...
- Page 87 2. Active la configuración de Bluetooth del dispositivo IOS, luego haga clic en “Impresora POS”. 3. En la aplicación de “Impresora POS”, seleccione el an- cho del papel de la siguiente manera:...
- Page 88 4. Seleccione la forma de comunicación, “Bluetooth” o “WIFI”:...
- Page 89 5. Si se conecta con Bluetooth, puede hacer clic en “Selec- cionar impresora” primero, es necesario buscar la “Impre- sora Bluetooth” (el nombre predeterminado de la impre- sora es Impresora Bluetooth), haga clic para conectarse. 6. Si se conecta con WIFI, asegúrese de que su disposi- tivo WIFI esté...
- Page 90 7. Si los pasos anteriores son exitosos, puede imprimir tex- to para realizar una prueba.
- Page 91 8. Otras características de esta aplicación: 1) Enviar HEX: en el cuadro de texto, ingrese los datos hexadecimales, haga clic en “Enviar HEX”, luego envíe el cuadro de texto y datos hexadecimales a la impresora. 2) Modo de impresión de imagen: ingrese los datos en el cuadro de texto, haga clic en “Modo de imagen de impre- sión”, podrá...
-
Page 92: Solución De Problemas Generales
página de prueba”, el texto imprimirá una sección de la prueba para confirmar que la impresora está conectada y la impresión normal se realiza correctamente. 9. Compatibilidad de la App: puede ser compatible con IOS6.0 o versiones superiores. 10. Solución de problemas generales 1: ¿Por qué... - Page 93 R: Use un cepillo suave para limpiar el sensor de papel e intente nuevamente o envíelo al centro de servicio para reparar. 5: Impresión de código desordenado después de un pe- ríodo de tiempo R: La placa de interfaz está dañada, reemplácela o repá- rela.
- Page 94 9: Mal funcionamiento del corte automático de papel R: Si la cortadora no funciona, verifique las herramientas de la impresora -Funciones - Set de cortadora, y asegúre- se de que la opción esté activada. O comuníquese con el centro de servicio para obtener ayuda. 10: El indicador rojo sigue parpadeando durante la impre- sión.
- Page 95 14: Papel de impresión sin contenido (en blanco) R: 1. Si la impresión normal está bien, pero la página de autocomprobación está en blanco (sin contenido), eso sig- nifica que la fuente está dañada, necesita reemplazar los chips de fuente. 2.
Need help?
Do you have a question about the DAYIN80 and is the answer not in the manual?
Questions and answers