Table of Contents
Advertisement
Advertisement
Table of Contents

Subscribe to Our Youtube Channel
Related Manuals for Sheeran Looper +

Summary of Contents for Sheeran Looper +
- Page 1 User Guide English Manual Version 1.0.0...
-
Page 2: Table Of Contents
Table of Contents (4.5) Other Functions ......18 (1.0) Introduction ....... 3 (4.5.1) Energy Save Mode ......18 (1.1) Box Contents ........3 (4.5.2) Low Battery Warning ......18 (4.5.3) Memory Full Warning ....... 18 (1.2) Support ..........3 (4.5.4) MIDI Control ......... 19 (4.5.5) Factory Reset ........ -
Page 3: (1.0) Introduction
For a walkthrough of basic looping techniques, proceed to the following (4.2) Basic Looping chapter. When you are finished using Sheeran Looper + and ready to shut it down, power off your output device first, and then power off Sheeran Looper +. -
Page 4: (2.1) Connection Diagram
(2.1) Connection Diagram Items not listed under (1.1) Introduction > Box Contents are sold separately. See the following (3.2) Rear Panel section for more information on each connection. Guitar amplifier Guitar Microphone External Footswitch Power adapter (optional) PA Speaker Computer (optional) -
Page 5: (3.0) Features
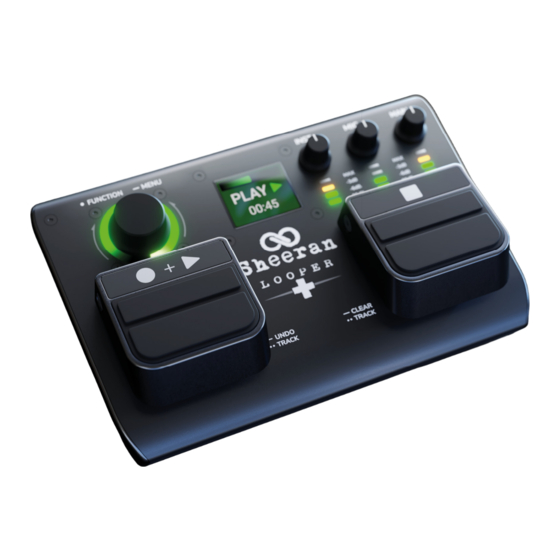
(3.0) Features (3.1) Top Panel Display This multicolor LCD display shows information relevant to Sheeran Looper +’s current operation, including record/overdub/playback status and menu functions. See the following (4.0) Operation chapter to learn more about how it works. 2. Encoder (Navigation Wheel) Press and hold this knob to access the (4.4) Menu... - Page 6 4. STOP Pedal Press this pedal to stop recording a loop, overdubbing a loop, or playing back a recorded loop. When in Single Mode, press and hold this pedal to clear all recorded layers of the current loop recording. When in Multi, Song, or Sync Modes, press and hold this pedal to clear all recorded layers of the current loop on the currently selected track.
-
Page 7: (3.2) Rear Panel
(Mono) L. 4. EXT FS (1/4” [6.35 mm], TRS) Connect an optional secondary footswitch control to this input. Sheeran Looper + supports dual- function footswitches using a TRS connection. See (4.4.9) Operation > Menu Screen > Assign learn more about assigning footswitch functions. - Page 8 Connect a power adapter (9 V, 0.5 A, center-positive. Not included) to this jack, and then into an electrical outlet to power Sheeran Looper +. 9. Power Switch Press this button to turn the Sheeran Looper + on or off.
-
Page 9: (4.0) Operation
(4.0) Operation This chapter describes how to use Sheeran Looper +. (4.1) Performance Screen Overview Progress Bar Loop Status MIDI Battery Reverse Speed Looper Mode Progress Bar: Displays the length of the loop as you are recording, overdubbing, or playing back. This bar will also show when a Fade In or Fade Out is in progress. -
Page 10: (4.2) Basic Looping
) pedal again as desired. The LED ring will change between orange and green accordingly. Note: You can configure whether Sheeran Looper + enters overdub (R>D>P, default) or playback (R>P>D) after recording the initial layer in the Logic menu. See (4.4.7) Operation >... - Page 11 To stop the loop, press the Stop ( ) pedal. The encoder LED will pulse green. Note: Audio currently being recorded or overdubbed will be committed to the loop when stopped. To undo (temporarily remove) audio recorded since the last overdubbing began, press and hold the Record + Play ( ) pedal.
-
Page 12: (4.3) Looper Modes
(4.3) Looper Modes Sheeran Looper + includes four total looper modes that allow you to experiment with looping in a variety of ways. The looper mode icon is shown at the bottom of the performance screen. To change looper modes, use the (4.4.8) Operation >... - Page 13 Sync: In this mode, you can record and play back two looper tracks with compatible lengths. Record a loop on the first track using the same basic method described above. 2. Double-press the Record + Play ( ) pedal to switch to the second track.
-
Page 14: (4.4) Menu Screen
To exit the menu, scroll the encoder to the left until it reaches the back arrow in the top-left corner of the screen, then push the encoder. Alternatively, wait about 4 seconds, and Sheeran Looper + will automatically return to the main screen. -
Page 15: (4.4.4) Save
When you first open the Save menu, the save slot will be highlighted. Turn the encoder to select an EMPTY save slot. There are 128 available slots in Sheeran Looper +’s internal storage. If you navigated away from the save slot and need to reselect it, turn the encoder until it is highlighted, and then push to select it. -
Page 16: (4.4.7) Logic
(4.4.9) Assign Use this menu to set the behavior of the encoder push function and external footswitches. Sheeran Looper + supports dual function footswitches using a TRS cable to access both FS1 and FS2 options. -
Page 17: (4.4.10) Midi
(4.4.10) MIDI This menu determines the MIDI functionality of Sheeran Looper +. Turn the encoder to select the following menus, and then push it to view the available options: • Source: Determines the MIDI input source. Select Off to disable MIDI input, 1/8” to use the MIDI In jack on the rear panel, or USB to use the USB port on the rear panel. -
Page 18: (4.5) Other Functions
(4.5.2) Low Battery Warning If you are operating Sheeran Looper + on battery power, two warnings will appear as your batteries drain to let you know it is time to recharge or connect to power. -
Page 19: (4.5.4) Midi Control
MIDI settings. MIDI Clock Receive Sheeran Looper + can be synced to the tempo of an external MIDI device (such as a drum machine) while recording and playing your loops. To use MIDI Clock Receive: First, make sure you have set the proper MIDI input Source and Channel in the Menu Screen > MIDI page, and that the Clock setting has been set to On. - Page 20 When external MIDI control is enabled, you can use a MIDI device to remotely control the basic functions of Sheeran Looper +. The chart below lists the parameters that can be controlled by sending the listed incoming MIDI messages from your external MIDI hardware:...
-
Page 21: (4.5.5) Factory Reset
A second screen will appear for confirmation. Turn the encoder to select YES, then push it to continue. If you wish to cancel, turn the encoder to select NO and Sheeran Looper + will restart and power on in normal operation. -
Page 22: (5.0) Appendix
(5.0) Appendix (5.1) Technical Specifications Hardware Display 1.8” color TFT LCD Pedals (2) aluminum die-cast pedals Knobs (1) 360° navigation/data encoder with push-to-enter and RGB LED indicator (2) Input gain knobs (1) Main Output volume knob Connectors (1) Combo XLR / 1/4" (6.35 mm) balanced input (mono) (2) 1/4”... - Page 23 Looping Specifications Modes Single, Multi, Song, Sync Functions Record, Overdub, Play, Stop, Undo/Redo, Clear Track, Clear All, Reverse, 1/2 Speed, Fade In/Out, Solo, Mute Tracks Max Loop Length 1.5 hours Max Layers per Loop Unlimited Max Overdub Time per Loop 30 minutes Loop File Type .WAV (32-bit PCM, 44.1 kHz)
-
Page 24: (5.2) Trademarks & Licenses
(5.2) Trademarks & Licenses Sheeran Looper products are produced by inMusic Brands, Inc. HeadRush is a trademark of inMusic Brands, Inc., registered in the U.S. and other countries. macOS is a trademark of Apple Inc., registered in the U.S. and other countries. - Page 25 Manual Version 1.0.0...
Need help?
Do you have a question about the Looper + and is the answer not in the manual?
Questions and answers