Table of Contents
Advertisement
Advertisement
Table of Contents

Related Manuals for RockJam RJ493


Summary of Contents for RockJam RJ493
- Page 1 RJ493 / RJ493RC 49 Key MIDI Keyboard User Guide...
-
Page 2: Important Information
Important Information Be sure to obey the following information so as not to harm yourself or others or damage this instrument or other external equipment. Power Chord: • Do not place the USB power cable near to any source of heat such as radiators or other heaters. -
Page 3: Table Of Contents
Contents Important Information ............................2 Controls, Indicators and External Connections ....................5 Front Panel ..............................5 External Connections ..........................5 LED Display..............................5 Preparation Before First Use ..........................6 Power ................................6 Use of USB Type C Cable: ........................6 Battery Operation: .......................... - Page 4 Rhythm Start / Stop: ..........................13 Rhythm Volume Adjustment: ........................ 13 Sync:..............................14 Intro / End: ............................14 Tempo Adjustment: ..........................14 Enhanced Features ........................... 15 Touch Sensitive Keys: .......................... 15 Demo Songs: ............................15 Chord Mode: ............................15 Metronome: ............................16 Metronome Volume Adjustment: ......................
-
Page 5: Controls, Indicators And External Connections
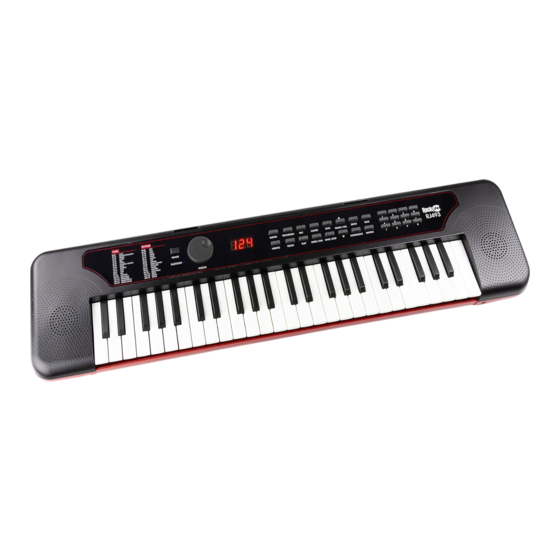
Controls, Indicators and External Connections Front Panel 1. Speaker 10. Tempo / Vol + 18. Start / Stop 2. Power switch / Charge Indicator 11. Demo 19. Tempo / Vol - 3. Bluetooth indicator 12. Tone 20. Metronome 4. Volume wheel 13. -
Page 6: Preparation Before First Use
Preparation Before First Use Power Use of USB Type C Cable: Please use the USB type C cable that is supplied with the electronic keyboard and a 5V USB - 2A adapter (not included). Connect the cable into the socket on the rear of the keyboard and then connect the other end into the adapter or power supply and switch on. -
Page 7: Connecting An Amplifier Or Hi-Fi Equipment
Connecting an Amplifier or Hi-Fi Equipment: This electronic keyboard has a built in speaker system but it can be connected to an external amplifier or other hi-fi equipment. First turn off the power to the keyboard and any external equipment you are looking to connect. -
Page 8: Connecting A Microphone
Connecting a Microphone: Connect the 3.5mm microphone plug into the [MIC] jack on the rear of the keyboard. The microphone should be an electret or condensor type. Microphone not included. Connecting to a Tablet, Laptop or PC: You can connect the keyboard to a tablet, laptop or PC to work with various third party MIDI softwares for recording and playing back songs. -
Page 9: Keyboard Operation
Bluetooth mobile device and scan for available devices. Select ‘’RJ493 AUDIO’’ for Bluetooth audio. The Bluetooth indicator on the keyboard will light and a sound prompt will be heard to indicate the device has been connected successfully. -
Page 10: Power And Volume
Power and Volume Power Control: Press the [POWER] button to turn the power on and again to turn the power off. The LED screen will light up to indicate power on. Auto Power Off: The keyboard has an ‘Auto Power Off’ function and will switch off to save power after no key is pressed for approximately 5 minutes. -
Page 11: Tone
Tone Tone Selection: When the keyboard is switched on the default Tone is ‘000’ Grand Piano. To change the Tone, press the [TONE] button first, the display will briefly show ‘ton’ followed by the currently selected tone number. Then select the required tone by pressing the corresponding digits 0-9. Tones can also be changed by using the [+ / -] buttons on the key pad. -
Page 12: Vibrato
Vibrato: The Vibrato function adds a wavering quality to the note being played. Press the [VIBRATO] button to enter Vibrato mode. The LED display will briefly show ‘On’ to show that Vibrato is on. Pressing the [VIBRATO] button again will turn the Vibrato feature off and exit this mode. The display will briefly show ‘Off’. Panel Percussion Instruments: When the [PERCUSSION] button is pressed, all the keyboard’s keys can be used to play percussion sounds. -
Page 13: Rhythm
Rhythm Selecting the Rhythm: You can choose from any of the 128 built in rhythms. Please refer to Appendix II. for the detailed rhythm table. Press the [RHYTHM] button to enter the rhythm selection function, the display will briefly show ‘Rhy’ followed by the current rhythm number. -
Page 14: Sync
Sync: Press the [SYNC] button to select the synchronised accompaniment function, the display will show ‘Syn’. The rhythm will start playing as soon as any of the first 19 keys on the left side of the keyboard are pressed. Press the [START /STOP] button to stop the rhythm and exit the sync function. Intro / End: To schedule an introductory rhythm section press the [INTRO/END] button, the display will briefly show ‘Pre’. -
Page 15: Enhanced Features
Enhanced Features Touch Sensitive Keys: The Touch sensitivity mode is switched on by default. Press the [TOUCH] button to switch off the touch response, the display will briefly show ‘Off’. Press the [TOUCH] button again to turn the touch response on. The display will briefly show ‘On’... -
Page 16: Metronome
Metronome: Press the [METRONOME] button to start the tick-tock beat. There are four beats to choose from (b01 to b04). Depending on the performance, you can press the [TEMPO] buttons to speed up or slow down the beat. Press the [METRONOME] button repeatedly to cycle through the available beat patterns. -
Page 17: Appendix I. Percussion Instruments
Appendix I. Percussion Instruments No. Percussion Instrument Percussion Instrument Percussion Instrument Bass Drum 1 Ride Bell Maracas Side Stick Tambourine Short Whistle Acoustic Snare Splash Cymbal Long Whistle Hand Clap Cowbell Short Guiro Electric Snare Crash Cymbal 2 Long Guiro Low Floor Tom Vibraslap Claves... -
Page 18: Appendix Ii. Rhythm Table
Appendix II. Rhythm Table Rhythm Name Rhythm Name Rhythm Name 16 beat 1 Kinetic 1 Love ballad 4 16 beat 2 Kinetic 2 Love ballad 5 16 beat 3 African Mambo 1 16 Beat Tune Bluegrass Mambo 2 16 Reggae Blues 1 Tango 1 8 Beat modern... -
Page 19: Appendix Iii. Tone Table
Appendix III. Tone Table Tone Name Tone Name Tone Name Acoustic Grand Piano Timpani Pad 7 (halo) Bright Acoustic Piano String Ensemble 1 Pad 8 (sweep) Electric Grand Piano String Ensemble 2 FX 1 (rain) Honky-tonk Piano Synth Strings 1 FX 2 (soundtrack) Rhodes Piano Synth Strings 2... -
Page 20: Appendix Iv. Demo Song Table
Contrabass Pad 3 (polysynth) Laser Gun Tremolo Strings Pad 4 (choir) Cheer Pizzicato Strings Pad 5 (bowed) Laughter Orchestral Harp Pad 6 (metallic) Appendix IV. Demo Song Table No. Name of Song No. Name of Song No. Name of Song Turkish March Santa Claus is Coming Minuet in G... -
Page 21: Appendix V. Chord Table
Appendix V. Chord Table... -
Page 22: Appendix Vi. Troubleshooting
Appendix VI. Troubleshooting Problem Possible Reason / Solution A faint noise is heard when turning the power on This is normal and nothing to worry about. or off. After turning the power on to the keyboard there Check the master volume is not set to minimum. was no sound when the keys were pressed. -
Page 23: Appendix Vii. Technical Specification
Appendix VII. Technical Specification • Display 3 Digit LED Display • Tone 140 tones • Rhythm 128 stereo rhythms • Demo 50 different demo songs • Effect and Control Touch Sensitive Keys, Sustain, Vibrato • MIDI Wired and Wireless MIDI •... -
Page 24: Appendix Viii. Midi Apps
Appendix VIII. MIDI APPs Apple Bluetooth Android Bluetooth MIDI MIDI Support Support AudioKit Synth One Synthesizer FM Synthesizer [SynprezFM II] KORG Gadget 2 le Cubasis LE 3 Trial Garageband KORG Module Caustic 3 NOTE: The above APPs are not endorsed or supported by the keyboard manufacturer in any way and should be used at the user’s own risk. -
Page 25: Product Disposal Instructions (Eu And Uk)
Product Disposal Instructions (EU and UK) The symbol shown here and, on the product, means that the product is classed as Electrical or Electronic Equipment and should not be disposed with other household or commercial waste at the end of its working life. The Waste Electrical and Electronic Equipment (WEEE) Directive (2012/19/EU) has been put in place to encourage the recycling of products using best available recovery and recycling techniques to minimise the impact on the environment, treat any hazardous substances and avoid the increase of landfill.
Need help?
Do you have a question about the RJ493 and is the answer not in the manual?
Questions and answers