
Subscribe to Our Youtube Channel
Related Manuals for BioLife IntelliRate i67C


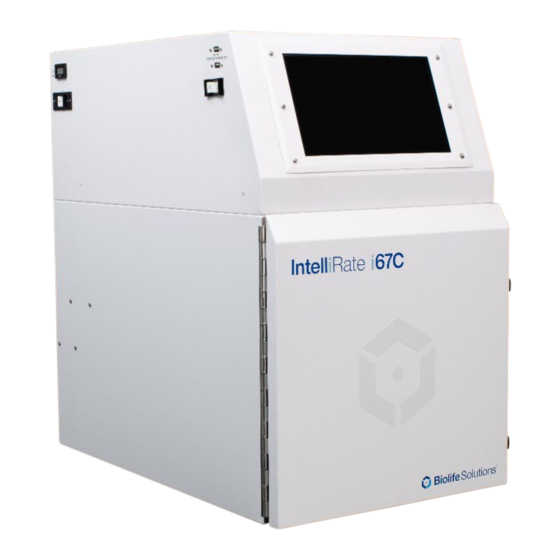
Summary of Contents for BioLife IntelliRate i67C
- Page 1 Custom BioGenic Systems IntelliRate i67C Set-Up and Technical Manual Designed and manufactured by: Custom BioGenic Systems, a BioLife Solutions Company www.custombiogenics.com...
- Page 2 www.custombiogenics.com...
-
Page 3: Important Information
IMPORTANT INFORMATION Read and understand this manual completely before proceeding to set-up. Save these instructions for future use. • Ensure all parts are accounted for and that no damage has occurred during shipping. • The safety of any system incorporating this equipment is the responsibility of the assembler of the system. -
Page 4: Warranty Information
WARRANTY INFORMATION Custom BioGenic Systems warrants all manufactured cryogenic equipment to be free from defects in workmanship or materials for a period of one-year warranty. Custom BioGenic Systems’ liabilities under the warranty shall be limited to correcting or replacing defective workmanship or materials. A claimant under the warranty must notify Custom BioGenic Systems within ten (10) days after the discovery of the defect. -
Page 5: Table Of Contents
TABLE OF CONTENTS IMPORTANT INFORMATION ..................3 WARRANTY INFORMATION ..................4 SYMBOLS ........................7 Properties of Liquid Nitrogen (LN2) ................. 8 Handling Liquid Nitrogen ................... 9 PRODUCT SAFETY ...................... 10 INITIAL INSTALLATION ....................11 Introduction ......................11 Transport, Handling, and Storage ................12 Unpacking ......................... - Page 6 Printing the Audit Trail ..................26 Create a Program ..................... 26 Save a Program ......................27 Edit a Program ......................28 Preview a Profile ...................... 30 Run a Program ......................32 Run Screen ......................34 Logout of the System ....................37 Exiting the System ....................
-
Page 7: Symbols
SYMBOLS Safety Symbols CAUTION The safety statement that follows this safety alert symbol indicates a hazardous situation which, if not avoided, has the potential to cause damage to property or equipment. WARNING The safety statement that follows this safety alert symbol indicates a hazardous situation which, if not avoided, has the potential to cause bodily harm or death. -
Page 8: Properties Of Liquid Nitrogen (Ln2)
LIQUID NITROGEN SAFETY IMPORTANT: The following section on LIQUID NITROGEN SAFETY should be read carefully and be followed completely but is by no means a complete volume on the safe use of cryogenic liquids. All personnel should have a complete knowledge of the correct procedures, as well as the hazards of working with liquid nitrogen. -
Page 9: Handling Liquid Nitrogen
Handling Liquid Nitrogen • All personnel should have a complete knowledge of the correct procedures, as well as the hazards of working with liquid nitrogen. Have available the Safety Data Sheet (SDS) provided by the liquid nitrogen supplier for appropriate first aid measures. -
Page 10: Product Safety
PRODUCT SAFETY WARNING ELECTRICAL SHOCK HAZARD. To avoid risk of electrical shock, this equipment must be connected to a properly grounded power source outlet. If the power supply outlet is not grounded, it will be necessary to install a ground by qualified engineers. DO NOT remove enclosure. •... -
Page 11: Initial Installation
INITIAL INSTALLATION Introduction Welcome to the IntelliRate i67C controlled rate freezer. This system consists of a freezing chamber, computer, controlled rate freezing software, a sample rack, a sample probe, and a liquid nitrogen transfer hose. The software that is provided and comes pre-loaded on your controlled rate freezer computer operates using the same navigation and conventions as windows based operating systems (menus, basic commands, etc.). -
Page 12: Transport, Handling, And Storage
Transport, Handling, and Storage CAUTION • Vehicles used to transport the device should be properly designed and equipped to ensure protection from the different environmental and weather conditions in which it operates. The use of vehicles with defects that could affect the quality of the device should be avoided. -
Page 13: Unpacking
Always inspect the bill of lading for accuracy and external crate/packaging for damage before accepting the shipment. Each IntelliRate i67C controlled rate freezer will arrive on a pallet in a box that is 37” x 30” x 40” (L x W x H). -
Page 14: Installation Specifications
Installation Specifications The rate freezer is intended to operate in the following environment: Intended Use: The unit is a general-purpose controlled rate freezing system consisting of a freezing chamber, computer, built in controlling software, and LN2 transfer hose. The unit allows users to program and manipulate freezing rates using LN2, heater, and fans. -
Page 15: Bench Top Installation
Bench Top Installation The rate freezer should be set on a bench top in a vertical position to ensure proper operation. Ensure that there are the proper clearances for the liquid nitrogen connection. Connections Make all the following connections BEFORE turning on the freezer. Power Connections The rate freezer is designed to operate on either 120VAC or 240VAC (must be specified when unit is ordered), depending on the user’s needs. -
Page 16: Liquid Nitrogen Supply Connection
Liquid Nitrogen Supply Connection The liquid nitrogen supply connection is located on the right rear corner. This connector accepts a standard LN2 transfer hose. Liquid Nitrogen Supply Tanks must be operated in accordance with the manufacturer / supplier instructions. Safety instructions will also be posted on the side of each tank. -
Page 17: Operating Instructions
OPERATING INSTRUCTIONS Power On 1. Power on the main unit by pressing on the POWER switch. The switch is in the rear upper corner on the left side of the freezer. NOTE: If you are asked to log into the computer, the initial username is RateFreezer custombio and the password is... - Page 18 PROGRAM - This menu button allows the user to program, edit, and save freezing profiles. VIEW OLD DATA - This menu button allows users to view and print previously saved freeze runs. The default print out consists of information header and the graph.
-
Page 19: Cfr Part 11
START FREEZE RUN This menu button brings up the profile and freeze name selection screen. AUDIT FUNCTIONS This menu button brings up the audit trail details after enabling User Accounts / Security USER ACCOUNTS This menu button allows the user to configure multiple users and passwords, and to enable or disable security. -
Page 20: Enabling Security / 21 Cfr Part 11
Enabling Security / 21 CFR Part 11 The Security / 21 CFR Part 11 module is disabled by default. To enable the process, perform the following steps: 1. From the main menu select User Accounts: 2. Un-check the box “Disable Security”: 3. -
Page 21: Creating A New Account
Creating a New Account To create a new User: 1. Ensure that you are logged in as the Administrator 2. From the Main menu select User Accounts 3. Click New User 4. Enter the Username and Full Name 5. Enter a Password, then Retype the password 6. -
Page 22: Edit A User
Edit a User To Edit a User: 1. Ensure that you are logged in as the Administrator 2. From the Main menu select User Accounts 3. Click Edit User 4. Change the information as necessary Deleting a User To Delete a User: 1. -
Page 23: Setting The Inactivity Timer
Setting the Inactivity Timer According to the 21 CFR Part 11 ruling the system must allow you to set an inactivity timer. Once this time limit is reached the user is logged out and must log in again. To set the Inactivity Timer do the following: 1. -
Page 24: Setting The Password Expiration
Setting the Password Expiration According to the 21 CFR Part 11 ruling, Passwords must expire (and therefore be changed) a minimum of every 90 Days. To set the expiration period do the following: 1. Ensure that you are logged in as the Administrator. 2. -
Page 25: Viewing The Audit Trail
Viewing the Audit Trail According to the 21 CFR Part 11 ruling the system must keep a complete history of all security related interactions with the system. The Audit Trail provides a record of all changes made to the Controlled Rate Freezer by users. To View the Audit Trail: 1. -
Page 26: Printing The Audit Trail
Printing the Audit Trail The Audit Trail can be printed from the same screen by clicking the Print Button. The system will print the records that are currently displayed in the grid. NOTE: If a printer is connected to the freezer, the Audit Trail will physically print. If no printer is connected, the user will be prompted to select a location to save the file. -
Page 27: Save A Program
NOTE: The recommended method for starting a freezing cycle is to program a “wait” function. Enter a 0 (zero) as the cooling rate by clicking the cooling rate area [B] (see program profile p.29). Enter a target temperature in area [D] (see program profile p.29). This function will pre-cool the chamber and hold the chamber temperature at the programmed target temp [D] (see program profile above). -
Page 28: Edit A Program
Edit a Program 28 | OPERATING INSTRUCTIONS... - Page 29 Custom BioGenic Systems has provided you with six preset programs that you can use as templates for many common freezing processes. (Both user-created and preset programs can be edited.) 1. At the main menu screen press the PROGRAM button [A]. 2.
-
Page 30: Preview A Profile
Preview a Profile 30 | OPERATING INSTRUCTIONS... - Page 31 NOTE: Custom BioGenic Systems recommends that you preview a program before running it. By doing this you can often identify incorrect information by previewing the program as a graph. 1. At the main screen press the PREVIEW button [A]. 2. At the preview profile screen select a profile to load and click OK [B]. 3.
-
Page 32: Run A Program
Run a Program 32 | OPERATING INSTRUCTIONS... - Page 33 Every time you run a program you create a unique set of data. In many cases you will wish to save this data using a unique file name; if you don’t your old program data will be overwritten by the latest data. 1.
-
Page 34: Run Screen
Run Screen Run Controls – Start the freeze run Run Warm – Warms the chamber up to 25°C for shut down. Typically used at the end of a freeze run. Exit – Ends the freeze run and returns to main menu. - Page 35 Freezer Status Running – Light is on when the freeze run is in progress. Stopped – Light is on when the freeze run is not running. Alarm – Light is on when there is an active alarm. Mute Alarm – Checking this box will mute any active alarm.
- Page 36 System Unlocked/Locked Header Information – When pressed, prevents user interaction with the screen. To unlock, press again. Step # - Displays the current step of the freezing profile. Cooling Rate – Displays the current cooling rate from the freezing profile. Demand Temp –...
-
Page 37: Logout Of The System
Logout of the System 1. At the main menu screen click the LOGOUT button [A]. NOTE: Logging out of the system brings up the Log On screen so another user can enter their login and password if desired. Exiting the System 1. -
Page 38: Power Off The Freezer
Power Off the Freezer 1. Navigate to the START menu in the lower left corner of the screen. 2. Click POWER. 3. Click SHUT DOWN. NOTE: It is recommended to keep the main power switch on, and the main power cord plugged in during regular use. -
Page 39: Basic Operation
BASIC OPERATION Theory Of Operation This Cryogenic Rate Freezer freezes at pre-defined, user programmable rates. This means that the user has total freedom when it comes to programming their freezing profiles. A few good practices when programming and running profiles is: 1) The chamber temperature should be used for controlling the freezing of the sample. -
Page 40: The Hold Function
Rationale: 1. The Controlled Rate Freezer has passed verification and validation tests that will be invalidated if 3rd Party Software is installed on the device. 2. The Controller has been validated and verified with a specific version of windows and specific drivers. Updating the windows version or drivers will invalidate the verification and validation tests as there is no guarantee that future updates or driver changes will not change the function of the controller. -
Page 41: Alarm Deviation
Alarm Deviation The alarm deviation consists of two things. 1) The temperature difference between the CHAMBER and TARGET values that must exist for a TRACKING ALARM to occur, and 2) The amount of time that these two values are not equal before a TRACKING ALARM occurs. -
Page 42: Reviewing Data
Reviewing Data Data can be viewed as it is being acquired, and after the freeze run has completed. When viewing data during a freeze run, there are two tabs at the top of the graph labeled RECENT DATA and ALL DATA. The RECENT DATA view is selected by default and shows only the most recent portion of the freeze run. -
Page 43: Example Data View Screens
Example Data View Screens BASIC OPERATION | 43... -
Page 44: Advanced Setup
Advanced Setup The following options require the modification of an INI file located in the hard drive of the notebook PC: C:\Program Files\Cryogenic Rate Freezer\release custom biogenic systems\data\crfs DO NOT ATTEMPT TO MODIFY THIS FILE UNTIL THIS ENTIRE MANUAL IS READ AND UNDERSTOOD. -
Page 45: Sample Probe Placement | 45
SAMPLE PROBE PLACEMENT Sample probe placement is very important. The position of this probe determines the accuracy and repeatability of the sample trace line on the viewer screen. Vial Probe Placement Bag Press Probe Placement SAMPLE PROBE PLACEMENT | 45... - Page 46 Canister Probe Placement 46 | SAMPLE PROBE PLACEMENT...
-
Page 47: Cleaning And Decontamination
CLEANING AND DECONTAMINATION NOTE: It is the responsibility of the organization to determine cleaning method and schedule that is appropriate for the intended use. The units are NOT provided sterile. A solution that does not react with stainless steel can be used in the cleaning process of the interior of the unit. -
Page 48: Disposal
DISPOSAL The WEEE (Waste Electrical and Electronic Equipment) symbol indicates compliance with the European Union Directive. The directive sets requirements for the labeling and disposal of certain products in affected countries. When disposing of this product in countries affected by this directive: •... -
Page 49: Troubleshooting
TROUBLESHOOTING Issue Solution No Power to Freezer Confirm the main power cord is plugged • into a power source and into the freezer. Confirm the main power switch is set to Display Black / Does not Turn See “No Power to Freezer” •... - Page 50 Chamber Probe Alarm One (or both) of the thermocouple’s • conductors are broken or disconnected. This can occur anywhere between the tip of the probe and the NIDAQ modules. This alarm is NOT self-correcting, and only • goes away once the cause has been fixed and the software re-started.
- Page 51 www.custombiogenics.com...
- Page 52 www.custombiogenics.com...
- Page 53 NOTE: Custom BioGenic Systems Rate Freezers are Class A devices pursuant to FCC Part 15 Subpart B / ICES-003 IEC 61326-1:2012 / EN 61326-1:2013. A ‘Class A’ device may be marketed for use in a commercial, industrial, or business environment. CAUTION: This is a Class A product.
- Page 54 www.custombiogenics.com...
- Page 55 Revision: ORG IntelliRate i67C Instructions for Use - English Cryogenic Freezer Platform CHANGE HISTORY Revision Reason/Description of Change Effective Date Original Formal release of IFU – English version 10AUG2023 This information is BioLife Solutions CONFIDENTIAL. Reproduction without authorization is prohibited.
Need help?
Do you have a question about the IntelliRate i67C and is the answer not in the manual?
Questions and answers