
Related Manuals for Van Raam Easy Go

Summary of Contents for Van Raam Easy Go
- Page 1 User manual Easy Go Van Raam Guldenweg 23 7051 HT Varsseveld, The Netherlands +31 (0)315 – 25 73 70 Version 24.01 info@vanraam.com www.vanraam.com...
-
Page 2: Table Of Contents
Adjustments of the bike ..........................9 Before first use ............................. 12 Operation ................................ 16 Silent electrical system ..........................17 Van Raam e-bike app ..........................29 Accessories..............................30 Technical specifications ..........................32 Standardisation and CE-marking ......................33 Maintenance and adjustments by owner ..................... 34 Repairs and maintenance to be done by dealer ................. -
Page 3: Manufacturer Contact Details
Conformity Conformity Europe (CE) Van Raam Reha Bikes B.V., as manufacturer, declares that the Easy Go, as described in this user manual, is manufactured in accordance with Regulation (EU) 2017/745, risk class 1. The Easy Go supplied with the Silent electrical system also complies with Directive 2006/42/EC including the applicable parts of EMC Directive 2014/30/EU and the NEN-EN 15194:2017 Bicycles - Electric supporting bicycles - EPAC Bicycles - part 4.2 Electrical... -
Page 4: Introduction
Introduction This user manual provides important and necessary information about the use of your scooter bike. We ask you to read this manual thoroughly before using the scooter bike. Always follow the instructions as provided in this user manual and keep the manual carefully. The most current version of the READ CAREFULLY user manual can be found on the product page of the bicycle on the website www.vanraam.com. -
Page 5: Indication
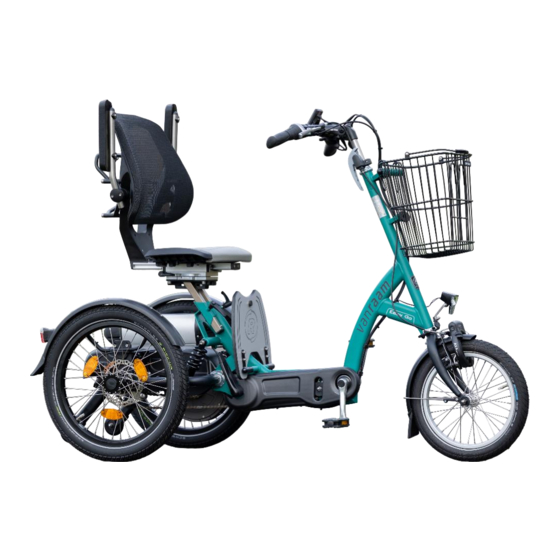
Easy Go! Intended usage The Easy Go scooter bike is designed for normal use on a flat, solid surface. The Easy Go may be used at ambient temperatures ranging from -25 degree Celsius to +50 degree Celsius. In general, scooter bikes caution should always be observed when using the scooter bike. -
Page 6: Safety Measures
/ or theft. This scooter bike is suitable for transporting a single person. • Only use original Van Raam parts and accessories. • Ride carefully on roads that are slippery due to rain, ice or snow. - Page 7 Avoid slopes steeper than 6º. • Riding this scooter bike (forward or in reverse) on steep slopes can be dangerous. Please note that the stopping distance could be greater on a • slope as compared to a horizontal surface. Make sure that you do not reach a dangerous speed when •...
- Page 8 Road safety If you are under the influence of medicines that may affect your ability to drive, • you are not allowed to drive a scooter bike. Your vision must be adequate to drive the scooter bike safely in any situation •...
-
Page 9: Adjustments Of The Bike
Adjustments of the bike Before using the scooter bike, adjust it to the measurements of the driver. This is of great importance, especially the seat and the handlebars. If an optimal adjustment of the scooter bike, as defined in the instructions, is not possible, you can contact your dealer for a fitting solution. - Page 10 Ensure that the clamping levers are always firmly tightened, even with the seat in the lowermost position! Seat depth The seating area of the seat can be adjusted to tailor the seat to the user's comfort. In order to adjust the seat, follow these steps: Remove the seat cushion [A] from the seat frame.
- Page 11 Handlebars height The height of the handlebars affects the comfort of the ride. It determines the pressure on the hands and the position of the back. You decide the most comfortable position yourself with some practice. To adjust the handlebars: Slightly loosen the screw by using an Allen key.
-
Page 12: Before First Use
Before first use Parking brake Always use the parking brake if you park the tricycle and leave it behind. Block the tricycle with the hydro brake when passengers are getting on and off. To operate the parking brake, squeeze the left brake [A] and secure the brake with the lever [B]. - Page 13 Centrally Operated Lighting The bike has been equipped with centrally operated lighting, with the lighting being connected to the electric system. The lighting will turn on automatically when the electric system is activated. Adjust the angle of the headlight, so that the centre of the light beam is aimed about ten metres in front of the bike.
- Page 14 Contact your dealer and stop using your scooter bike as soon as you observe irregularities during the check! As with all mechanical parts, the scooter bike is subject to wear and tear and high loading. If a component fails, it can lead to very dangerous situations. This can lead to damage or injuries to the user of the scooter bike.
- Page 15 Extra attention is needed when a child or an adult with limited powers of perception uses the scooter bike! (The minimum age for riding the Scooter bike in traffic is 16 years.) Before a child or an adult with limited powers of perception rides the scooter bike independently for the first time, they should practice first under your supervision (or under the supervision of others).
-
Page 16: Operation
Operation The scooter bike can be used in two different ways, as a cycle and as a scooter. These two modes can be interchanged simply by folding the footplate (with the hand or foot). When you have folded down the footplate, the bike works as a scooter and when you fold it up, you can pedal along. -
Page 17: Silent Electrical System
Silent electrical system The Silent electrical system comprises 5 components: display, button unit, battery, motor and bottom bracket. How the first 3 parts are used is explained in this user manual. Operation of the display The display provides you with cycling information, which will be explained in more detail later. - Page 18 Information screen After the electrical system is powered up, the information screen is displayed. This screen displays real-time cycling information. The information screen will only work if you have switched on the electrical system. (a) Bluetooth connection (b) Reverse function of (thumb) throttle activated (c) Notification field (d) Bicycle lights (e) Speed indicator...
- Page 19 Screen modes The screen mode (i) can be set by using the mode button (3) You can switch between the following 3 screen modes while cycling. Radius of action [RANGE] (default display) This is the number of kilometres that can still be cycled with the remaining battery capacity in the active assistance mode.
- Page 20 Notifications Several symbols can be displayed in the information screen. The symbols are explained below. More information on the notifications can be found in the chapter “Possible Faults”. The bicycle lights are activated A Bluetooth connection is active No communications with the battery Reverse function of (thumb) throttle is activated The temperature of the controller is too high Voltage is too high...
- Page 21 Van Raam app. Van Raam E-Bike app With the app, you can track various information and configure the assistance modes. (More information on this can be found in the chapter on the Van Raam E-Bike app) Version 24.01 21/47...
- Page 22 Charging the battery To charge the battery: 1. Unlock the battery by turning the key a quarter turn. 2. Press the lock in and simultaneously pull the battery pack out of the holder with your other hand. 3. Take the battery with you inside. First plug the charger into the power outlet.
- Page 23 Charger indicator light The status of the charger is indicated by the colored indicator light. If the indicator light is green, the charger is in standby mode or the battery is full. If the indicator light is red then the charger is charging the battery.
- Page 24 The housing of the battery and the charger must not be opened. In case of any • problems, please consult your dealer. A Van Raam battery is not allowed nor is it possible to recondition the battery due to • safety reasons and incorrect functioning of the electrical system.
- Page 25 Every battery drains over time. This process is called "self-discharge". A battery that is empty and not charged can undergo a deep discharge caused by self-discharge and become faulty as a result. The warranty is voided in the case of a deep discharge. Keep in mind that every battery wears out over time.
- Page 26 Charging and maintenance of the battery pack Important safety warning: Charger safety precautions Only charge Van Raam Li-Ion batteries with the supplied charger. Only connect the • charger to a suitable wall socket (220-240 Volt AC 50-60 Hz). When the charger is not in use, disconnect it from the power outlet and the power plug from the battery.
- Page 27 Always keep an eye on the charger and battery while charging. When the battery is full, • disconnect the power plug from power outlet and remove the power plug from the battery. Silent Electrical System options There are different options for the electrical system for each bicycle model. External charging point In order to make battery charging more accessible, the bicycle can be equipped with an...
- Page 28 Switchable battery pack If you have two batteries, the bicycle can be equipped with the switchable battery pack option. Once the connected battery pack is empty, you can switch the system to the second battery pack by using the switch. This is located between the seats. Direction indicator The scooter bike can be equipped with a turn signal set.
-
Page 29: Van Raam E-Bike App
Van Raam e-bike app The Van Raam bicycle app is a free smartphone app that you can use while cycling on your electric Van Raam bicycle. What can you do with the Van Raam e-bike app? App can be used as a luxury bicycle computer •... -
Page 30: Accessories
Accessories Depending on your order, you can use the accessories as described below. Armrests (optional) Item number: -0060/-7056 The armrests give the user extra comfort and safety. To make it easier to get on the bicycle, you can fold up the armrests separately from each other. While cycling, you can rest your arms on the armrests. - Page 31 Crank shortener The crank shortener is fitted to the crank, as illustrated. The pedal can then be fitted into the crank shortener at two positions. With the Allen screw [A] the crank shortener should be aligned with the crank. Walking-stick holder The walking-stick holder is attached to the seat.
-
Page 32: Technical Specifications
Technical specifications Length (cm) Width (cm) Frame height (cm) Boarding height (cm) Front wheel 16” Back wheel 20” Type of tyres Pneumatic tyres Weight (kg) approx. 64 Brakes, front Hand brake Brakes, back Hand brake Battery Li-ion 36V Max. static stability downhill 10 ̊... -
Page 33: Standardisation And Ce-Marking
Max. speed with fully electric system (km/h) Turning radius (cm) Action radius* (km) The Easy Go is normally delivered with three levels for the speed; 5 km/h, 10 km/h and 15 km/h Gas operation using thumb throttle, or electric assistance while pedaling. -
Page 34: Maintenance And Adjustments By Owner
Maintenance and adjustments by owner Below you can find the instructions for maintenance and adjustments that you can do yourself on a regular basis, which will keep your scooter bike in top condition. Cleaning The frame of the scooter bike can be cleaned with a damp cloth. For areas that are dirtier you can use a mild detergent. -
Page 35: Repairs And Maintenance To Be Done By Dealer
If you still decide you want to replace components yourself, you are responsible for damage or harm due to incorrectly fitted components. Only use original Van Raam spare parts, which you can buy at you dealer. If requested the dealer will make the necessary information on repair and maintenance available. -
Page 36: Adjustments To Be Done By Dealer
Adjustments to be done by dealer The correct tension of the chain Several chains are present on the scooter bike. The chains should not be too tight. Without efforts you should be able to move the chain up and down, about half a centimetre. Adjusting the chain tension of the foremost chain To keep the foremost chain of the scooter bike tight,... - Page 37 3. Tighten the nuts of the hub slightly. 4. Check if the chain tension is correct. 5. Tighten the nuts firmly. Adjusting the chain tension of engine chain In order to maintain the correct chain tension of the engine, the engine is adjusted. To do this, follow the instructions given below: 1.
-
Page 38: Disposal
This is also the case if unauthorized maintenance is carried out or if technical changes or additions are made with non-original Van Raam parts without permission of Van Raam. The original CE certification will become nul-and-void if Version 24.01... -
Page 39: Frame Number
modifications are done by third parties. The absence of the certification can lead to problems in insuring your bike, and for any loss or incurred. Frame number The frame number is printed on the sticker. This sticker is located on the frame, see illustration. -
Page 40: Maintenance Recommendation
A Van Raam bike often is subject to extensive use and must perform in all weather conditions. By correctly maintaining the bike, the lifecycle can be extended greatly. This maintenance can be done by a Van Raam dealer. In most cases, you can do the monthly and annual inspection yourself. - Page 41 Service moment 15-30 minutes Among them: Check tyres and inflate • Check the spoke tension • Check the chain tension and grease • Tighten any bolts and nuts if needed • Check all brake cables and brake calipers • Check the gears •...
- Page 42 Service plan Service moment Yes/No Date: Dealer: Mechanic: Remarks: ………………………………………………………………………………………………………………………………………… …………..…………………………………………………………………………………………………………………………… ………………………..……………………………………………………………………………………………………………… ……………………………………..………………………………………………………………………………………………… Service moment Yes/No Date: Dealer: Mechanic: Remarks: ………………………………………………………………………………………………………………………………………… …………..…………………………………………………………………………………………………………………………… ………………………..……………………………………………………………………………………………………………… ……………………………………..………………………………………………………………………………………………… Service moment Yes/No Date: Dealer: Mechanic: Remarks: ………………………………………………………………………………………………………………………………………… …………..…………………………………………………………………………………………………………………………… ………………………..……………………………………………………………………………………………………………… ……………………………………..………………………………………………………………………………………………… Version 24.01 42/47...
- Page 43 Annual inspection Date Dealer Mechanic Remarks Version 24.01 43/47...
- Page 44 Notes: Version 24.01 44/47...
- Page 45 Notes: Version 24.01 45/47...
- Page 46 Notes: Version 24.01 46/47...
-
Page 47: Delivery And Service Form
Congratulations on your purchase of your Van Raam scooter bike. This bike is produced with utmost care. To guarantee the quality as much as possible Van Raam produces the cycles according to the ISO 9001:2015 quality standards. Van Raam has been certified by DNV GL Business Assurance BV.
Need help?
Do you have a question about the Easy Go and is the answer not in the manual?
Questions and answers