Advertisement
Quick Links
FZSH-V1
Notice:
1. Follow the installation instructions. Please confirm all accessories are present before installation.
2. Do not fully tighten the screws during initial assembly. Fully tighten screws only once all pieces
which are correctly assembled.
3. If you encounter any problems during installation, please contact our customer service.
ASSEMBLY INSTRUCTIONS
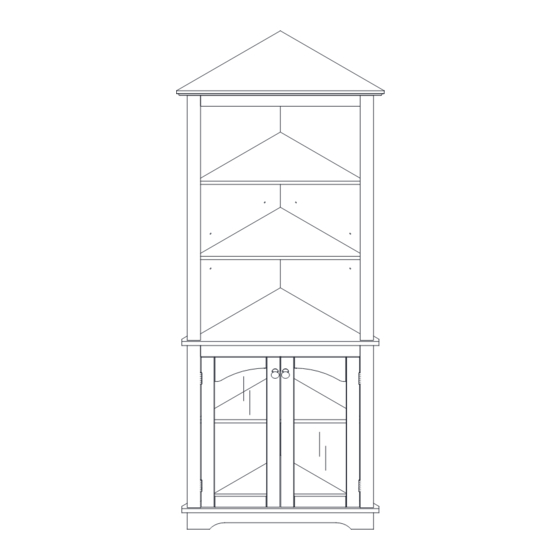
Storage Cabinet
FTHKCT-0012
FTHKCT-0013
Advertisement

Subscribe to Our Youtube Channel
Related Manuals for YitaHome FTHKCT-0012


Summary of Contents for YitaHome FTHKCT-0012
- Page 1 ASSEMBLY INSTRUCTIONS FZSH-V1 FTHKCT-0012 FTHKCT-0013 Storage Cabinet Notice: 1. Follow the installation instructions. Please confirm all accessories are present before installation. 2. Do not fully tighten the screws during initial assembly. Fully tighten screws only once all pieces which are correctly assembled.
- Page 2 Hardware: [The number after "+" indicates the quantities of spare screws] Piece Piece Letter Letter Number Number 47+2pcs 4pcs 6x30mm 42x15mm 14+1pcs 8pcs Ø5mm 6x35mm 14+1pcs 2pcs 15x12mm 1set 2sets 3x14mm 4x16mm 2sets 18+2pcs 3x12mm 8pcs 2sets 4x14mm 4x35mm 22+1pcs 2pcs 4x25mm 4x25mm...
- Page 3 (B)x14pcs Seperate the light strips into two parts by pressing the buckle. Tear off the self sealing tape, and stick the light strips per the direction of arrows. (Q)x1set 4 x 25 mm 4 x 30 mm (G)x12pcs...
- Page 4 4 x 25 mm 4 x 30 mm (H)x2pcs 4 x 25 mm 4 x 30 mm (A)x7pcs (H)x4pcs 4 x 25 mm 4 x 30 mm (H)x2pcs...
- Page 5 (A)x6pcs (F)x4pcs 90° Front (D)x1set (O)x2pcs 4 x 25 mm 4 x 30 mm (G)x8pcs...
- Page 6 (A)x6pcs 4 x 25 mm 4 x 30 mm (H)x3pcs (A)x6pcs (F)x4pcs (G)x2pcs 4x25mm (H)x1pc 4x30mm...
- Page 7 >90° (A)x6pcs (C)x6pcs (A)x8pcs (C)x4pcs...
- Page 8 (A)x8pcs (C)x4pcs...
- Page 9 (E)x18pcs (I)x4pcs (K)x2pcs (L)x2sets...
- Page 10 (J)x8pcs...
- Page 11 Connect the two light strips together. (N)x2sets...
-
Page 12: Installation Completed
Please use a leveler to locate the screw holes. OPTION #1 DRYWALL WALL ANCHOR WITH SCREW OPTION #2 DRYWALL WOOD STUD SCREW ONLY DANGER – To prevent furniture from toppling attach, mount, bolt or otherwise secure to walls and floors. Do not put heavy items on top shelves. - Page 13 Pure & Easy CONTACT US: If you have any questions about the installation of YITAHOME® products, just contact us at +1(888)-717-8084 from Mon-Fri 8:00 AM-16:30 PM PST / Saturday 8:00 AM-12:00 PMPST or E-mail us at: after-sale.cs@hotmail.com Alternative method to contact us (amazon.com orders only) 1.
Need help?
Do you have a question about the FTHKCT-0012 and is the answer not in the manual?
Questions and answers