Advertisement
Quick Links
Model Number: ____________________
Número del modelo
Numéro de modèle
Date of Purchase: ____________________
Fecha de compra
Date d'achat
Register Online
Regístrese en línea
S'enregistrer en ligne
www.deltafaucet.com/registerme
To reference replacement parts and access additional
technical documents and product info,
visit www.deltafaucet.com
Para referencia sobre las piezas de repuesto y acceder
a documentos técnicos adicionales e información del
producto, visite www.deltafaucet.com
Pour obtenir la référence des pièces de rechange ainsi
que pour avoir accès à d'autres documents techniques et
renseignements sur le produit, allez à www.deltafaucet.com
?
1-800-355-2721
www.deltafaucet.com/service-parts
KNOWLEDGE BASE:
Framing
Plumbing
• Confirm that your model will fit in intended location and plumbing fixtures are located where
required before beginning installation.
• Walls and sub-floor must be solid, plumb, and square.
• Do not install in areas where temperature may drop below 32ºF (0ºC).
• Allow product to reach room temperature for 30 minutes before installation.
These instructions include suggestions for rough construction and plumbing installation.
Local building codes vary and could supersede those suggestions. If you are not confident
in your ability to perform these tasks, contract out those tasks you need help with or use a
professional installer.
BASE DE CONOCIMIENTOS:
Encuadrado
Plomería
• Verifique que su modelo quepa en la ubicación deseada y que los accesorios de fontanería se
encuentren donde sea necesario antes de iniciar la instalación.
• Las paredes y el contrapiso deben estar firmes, nivelados y en escuadra.
• No realice la instalación en áreas donde la temperatura pueda ser inferior a 32°F (0 °C).
• Deje que el producto alcance la temperatura ambiente durante 30 minutos antes de la instalación.
Estas instrucciones incluyen sugerencias para construcciones sin acabar e instalación de
cañerías. Los códigos locales de construcción varían según el lugar y tienen prioridad sobre
estas sugerencias. Si no se siente capaz de realizar estas tareas, tercerícelas o contrate un
instalador profesional.
BASE DE CONNAISSANCES:
Encadrement
Plomberie
• Avant de débuter l'installation, assurez-vous qu'il y a suffisamment d'espace pour le modèle que
vous voulez installer et que la plomberie est située au bon endroit.
• Les murs et le faux-plancher doivent être solides, de niveau et d'équerre.
• N'installez pas le produit à un endroit où la température peut descendre sous 32 ºF (0 ºC).
• Attendez 30 minutes avant d'installer le produit pour que celui-ci soit à la température ambiante.
Estas instrucciones incluyen sugerencias en la construcción preliminar y la instalación de la
plomería. Los códigos locales varían de un lugar a otro y pueden tomar prioridad a estas
sugerencias. Si usted no está seguro de su habilidad para realizar estas tareas, subcontrate
en las que necesita ayuda o use un instalador profesional.
NOTICE
AVISO
AVIS
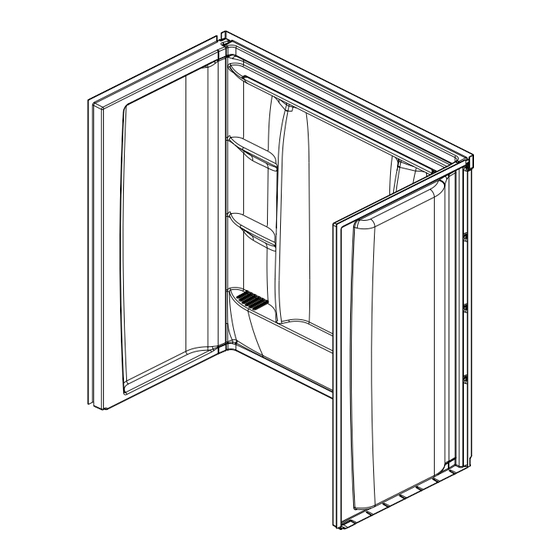
DIRECT-TO-STUD BATHTUB WALL SET
113863
CONJUNTO DE PARED DE TINA
DIRECTA AL MONTANTE
ENSEMBLE MURAL POUR BAIGNOIRE
FIXÉE AUX MONTANTS
B23205-6030-WH
B23205-6032-WH
B23207-6030-WH
B23207-6032-WH
1
B23208-6030-WH
B23208-6032-WH
RP103265
Foam Strip
Tira de espuma
Bande de mousse
08/02/2022 Rev. A
Advertisement

Subscribe to Our Youtube Channel
Related Manuals for Delta B23205-6030-WH


Summary of Contents for Delta B23205-6030-WH
- Page 1 Pour obtenir la référence des pièces de rechange ainsi que pour avoir accès à d’autres documents techniques et renseignements sur le produit, allez à www.deltafaucet.com B23205-6030-WH B23205-6032-WH 1-800-355-2721 www.deltafaucet.com/service-parts KNOWLEDGE BASE:...
-
Page 2: Tools And Materials Required
TOOLS AND MATERIALS REQUIRED • Nominal 2 x 6 and 1 x 4 or 2 x 4 lumber for additional wall studs NOTE: It is recommended to install insulation. HERRAMIENTAS Y MATERIALES NECESARIOS • Madera nominal de 2 x 6 y 1 x 4 o 2 x 4 para pernos de pared adicionales NOTA: Se recomienda instalar el aislamiento. - Page 3 Studs must be plumb and square. Los montantes deben estar nivelados y en escuadra. Les montants doivent être parfaitement à la verticale et d’équerre. B23205-6030-WH B23205-6032-WH B23207-6032-WH B23207-6030-WH 13 1/4” 16" 16" 13 1/4" 13 1/4” 16" 16" 13 1/4"...
- Page 4 Tub Door Installation Only 2 3/16” (5.6 cm) 57" (144.8 cm) 1" (2.5 cm) NOTE: Install Tub Door Nailers It is recommended to install insulation on exterior walls. • Install additional studs (2) on each side. It is recommended that two people install this product. •...
- Page 5 Dry Fit Panels Prepare Panels • Check panels for gaps and alignment. • Drill 3/16” holes at all stud locations on top flanges (1). • Check that vertical side panel flanges (1) are straight • Drill 3/16” holes along side flanges (2) at five locations equal and square to base.
- Page 6 Back side of panel. Parte posterior del panel Face arrière du panneau. Prepare for Plumbing Fixtures Apply Fire Retardant Pad • Measure and mark location for plumbing fixtures on the front • Remove backing from self-adhesive pad (1). of the side panel. Drill pilot holes. •...
- Page 7 4” (10.2 cm) 2” (5.1 cm) 2” Apply Foam Strip Preparing for Back Panel Apply adhesive to studs as shown. Ensure that beads • Apply the adhesive-backed foam strip on the bottom of are twice as thick as sill seal so that an adequate bond is the nailing flange as shown.
- Page 8 4” (10.2 cm) Tub Door Installation Only 3” 3 po 2” 2 po Place Back Panel Preparing for Side Panels • Position back panel in place. Confirm that the panel is sitting Staple sill plate gasket to studs as shown. down on the tub.
- Page 9 Secure Panels Apply Sealant • Slide the side panel into the snap channel in the back panel, pressing • Apply sealant or painter’s caulk where the wall surround meets firmly until the wall snaps into position. Repeat for other side panel. drywall.
- Page 10 CARE AND CLEANING We recommend that you clean your acrylic bathing product with mild detergents. Use a terry cloth towel, soft cloth, or sponge. Avoid using abrasive scrubbing pads, steel wool, or sponges. After cleaning, rinse thoroughly with water. NOTICE When using drain cleaner or clog remover, rinse thoroughly with water.
- Page 11 113863 Rev. A...
- Page 12 • Nafta • Acetato de amilo Cabinas y puertas de regaderas Delta® de vidrio y sin marco. Cinco (5) años a partir de la fecha de compra • Solución de peróxido de hidrógeno (peróxido común de uso doméstico) por el comprador consumidor original o, para usuarios comerciales, un (1) año a partir de la fecha de compra.
- Page 13 DIRECT-TO-STUD BATHTUB 113866 BAÑERA DIRECTA A TUBO BAIGNOIRE FIXÉE AUX MONTANTS Model Number: ____________________ Número del modelo B23605-6030L-WH Numéro de modèle B23605-6030R-WH Date of Purchase: ____________________ Fecha de compra B23605-6032L-WH Date d’achat B23605-6032R-WH Register Online Regístrese en línea S’enregistrer en ligne www.deltafaucet.com/registerme To reference replacement parts and access additional technical documents and product info,...
- Page 14 REQUIREMENTS FOR SUCCESSFUL INSTALLATION REQUISITOS PARA UNA INSTALACIÓN EXITOSA EXIGENCES À RESPECTER POUR RÉUSSIR L’INSTALLATION KNOWLEDGE BASE: Framing Plumbing • Confirm that your model will fit in intended location and plumbing fixtures are located where required before beginning installation. • Walls and sub-floor must be solid, plumb, and square. •...
- Page 15 TOOLS AND MATERIALS CHECKLIST LISTA DE VERIFICACIÓN DE HERRAMIENTAS Y MATERIALES LISTE DE VÉRIFICATION DES OUTILS ET DU MATÉRIAL REQUIS Tape Measure Extension Bit Caulk Gun Pencil Utility knife Safety Glasses Level Holder Cinta métrica Pistola para sellar Lápiz Cuchillo de uso Antiparras de Nivel seguridad...
- Page 16 IMPORTANT: IF INSTALLING MATCHING WALL SET, refer to Wall Additional studs will be required and need to be installed at this point. Set Installation Manual for specific lumber sizes and placement. IMPORTANTE: SI INSTALA EL JUEGO DE PARED, consulte las tamaños específicos y la ubicación de las maderas.
- Page 17 Required For Proper Installation Entire bottom support must be in contact with a flat level surface as shown below. IF INSTALLATION SURFACE IS NOT LEVEL, use leveling compound or mortar bed for proper installation. Requerida Para Una Instalación Correcta Todo el soporte inferior debe estar en contacto con una superficie plana y nivelada. SI LA SUPERFICIE DE LA INSTALACIÓN NO ESTÁ...
- Page 18 Protect bathtub finish by overturning it onto a clean, soft Verify Bathtub Fit surface such as a drop cloth. • Position bathtub as shown above. Use level (1) and square (2) • Apply double sided foam tape to the apron support face to verify that it is positioned straight and square.
- Page 19 NOTA: El drenaje y el desbordamiento requerirán al menos verticales frontales. 13 3/4" de ajuste vertical. Las piezas RP293 y RP393 han sido diseñadas para adaptarse a las bañeras Delta. No perfore agujeros directamente en los montantes. El portabrocas puede dañar el producto. Utilice una AVISO extensión de portabrocas para reducir el riesgo de que el...
- Page 20 Less than 1/8” gap. Menos de 1/8” de brecha Écart inférieur à 1/8 po IF THE SUBFLOOR IS NOT FLAT IF THE SUBFLOOR IS FLAT AND AND LEVEL, a mortar bed must LEVEL: be applied where the base will be •...
- Page 21 CARE AND CLEANING If not installing matching wall set. We recommend that you clean your acrylic bathing product with mild detergents. Use Si no instala el juego de pared correspondiente. a terry cloth towel, soft cloth, or sponge. Avoid using abrasive scrubbing pads, steel Si vous n’installez pas l’ensemble mural correspondant.
- Page 22 113866 Rev. C...
- Page 23 113866 Rev. C...
- Page 24 (1) año a partir de la fecha de compra. • Acetato de amilo Cabinas y puertas de regaderas Delta® de vidrio y sin marco. Cinco (5) años a partir de la fecha de compra • Solución de peróxido de hidrógeno (peróxido común de uso doméstico) por el comprador consumidor original o, para usuarios comerciales, un (1) año a partir de la fecha de compra.
Need help?
Do you have a question about the B23205-6030-WH and is the answer not in the manual?
Questions and answers