
Related Manuals for Waterford FITMASTER

Summary of Contents for Waterford FITMASTER
-
Page 1: Owner's Manual
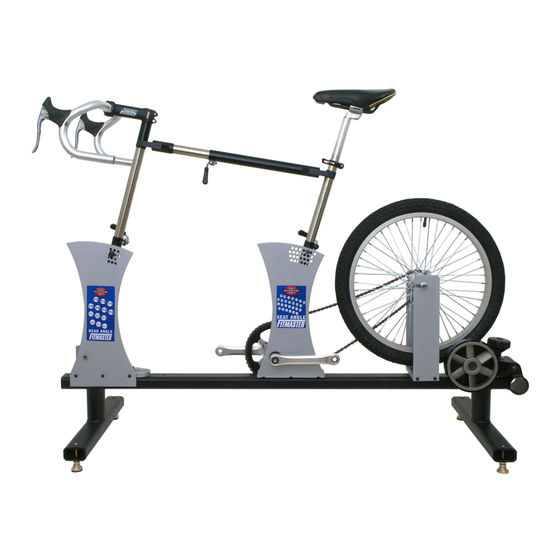
Professional Bicyclist Sizing Instrument Owner’s Manual Copyright 2006 Waterford Precision Cycles, Inc. - All Rights Reserved. Page - 1... -
Page 2: Table Of Contents
Care and Maintenance ........14 Warranty ............... 14 Dear Fitmaster Customer: Thank you for choosing Fitmaster to help you offer the ultimate in rider service. The Fitmaster is designed to provide precise measurements and years of daily use. This manual is designed to make it easy to assemble and use this instrument. -
Page 3: Parts List
Crank Arms and bolts. Chainring Chainring bolt kit K/L. Wheel and Tire Tube Rim strip Chain Front angle plate assembly Seatmast slider Head tube slider Seat clamp Seatpost Copyright 2006 Waterford Precision Cycles, Inc. - All Rights Reserved. Page - 3... -
Page 4: Assembly Instructions
Remove the levelers from their packaging. Screw in the height adjust- ment nut to the maximum depth (but do not tighten). Then screw the levelers into the holes in each of the four feet. Page - 4 Copyright 2006 Waterford Precision Cycles, Inc. - All Rights Reserved. - Page 5 Step 7. Install the crank. A. Install chainring to drive side crank using chainring bolts. B. Install the crank on the BB spindle according the the manufacturer’s specification. Copyright 2006 Waterford Precision Cycles, Inc. - All Rights Reserved. Page - 5...
- Page 6 Step 11. Install the seat clamp and seatpost. A. Slide the seatpost clamp over the top of the seat tube. B. Assemble the saddle seatpost, insert into the seat tube an secure the clamp. Page - 6 Copyright 2006 Waterford Precision Cycles, Inc. - All Rights Reserved.
- Page 7 Non-Supplied Parts List You must supply general parts to be able to use the Fitmaster. These parts are readily available in every bike shop. Item Qty Description Seat Pedals Handlebars Stem Brake Levers Handlebar Tape While Waterford supplies an initial crank and seatpost, you may want to equip yourself with extras to increase your level of service: •...
-
Page 8: The Fitting Process
This facilitates accurate measurements - especially those that require a level. • Platform: Many shops find it easier to adjust the machine and observe the rider when the Fitmaster is mounted on a plat- form, typically not higher than 18 inches from the surrounding floor (45cm). - Page 9 Top Tube C to C Max Avg Standover Top Tube Slope Recommendations: New Frame/Bike Specs Brand/Model Size Eyelets Rear Rack Mounts Pump Peg Chain Hanger Frt. Derailleur Clamp Styling Copyright 2006 Waterford Precision Cycles, Inc. - All Rights Reserved. Page - 9...
-
Page 10: Fitting For A Custom Frame
D. Install either the rider’s pedals or pedals compatible with the rider’s cycling shoes. E. Loosen the front angle plate bolts on the Fitmaster. This allows the front plate to float on the base as you make the other adjustments. - Page 11 TTS2. The difference is the amount TTS2. TTS1. of the top tube slope. Other information to collect is listed in the rider form on page 9. Copyright 2006 Waterford Precision Cycles, Inc. - All Rights Reserved. Page - 11...
-
Page 12: Fitting To A Stock Design
Fitting to a Stock Design Preparation is the key to using the Fitmaster to fit riders to a stock bike. In order to efficiently set up a Fitmaster for a stock bike, (as well as to use the Fit Kit fitting software), you must gather sufficient information from the manufacturer in order to complete the setup. - Page 13 2. Stem model, length and angle. 3. Seatpost and position within rails. 4. Saddle brand and model. This information lets you replicate the fit some- time in the future. Copyright 2006 Waterford Precision Cycles, Inc. - All Rights Reserved. Page - 13...
-
Page 14: Care And Maintenance
Care and Maintenance The Fitmaster is designed to give years of commercial use with a minimum of care. Below are measures that insure the proper functioning of your Fitmaster: 1. Lubricate all threads during assembly and re-assembly. 2. Keep all machanical parts - chain, hubs, bottom bracket properly adjusted and lubricated.
Need help?
Do you have a question about the FITMASTER and is the answer not in the manual?
Questions and answers