Table of Contents
Advertisement
Quick Links
Advertisement
Table of Contents

Related Manuals for South INNO 8


Summary of Contents for South INNO 8
- Page 1 INNO 8 USER MANUAL Version 1.0 SOUTH SURVEYING & MAPPING TECHNOLOGY CO., LTD...
-
Page 2: Table Of Contents
Content Chapter 1 Preface ........................- 1 - §1.1 Introduction .......................- 1 - §1.2 Applications ......................- 1 - §1.3 Main Features ......................- 1 - Chapter 2 INNO8 receiver introduction ................... - 5 - §2.1 Receiver components ....................- 5 - §2.2 Receiver touch screen menu .................. - Page 3 §4.2 Photogrammetry ......................- 57 - Chapter 5 Accessories ......................- 63 - §5.1 Instrument Case ...................... - 63 - §5.2 Charger &Adapter ....................- 64 - §5.3 Differential Antennas ....................- 64 - §5.4 Cables ........................- 64 - Appendix A INNO8 technical specifications ................- 66 -...
-
Page 4: Chapter 1 Preface
INNO8 Chapter 1 Preface Read this chapter, you will have a brief knowledge of SOUTH Company and INNO8 measurement system. §1.1 Introduction Welcome to SOUTH Surveying Instruments Co., Ltd, which is China’s leading manufacturer of surveying equipment including GNSS receivers and Total Stations. To know more about SOUTH, please visit our official website https://www.southinstrument.com//... - Page 5 INNO8 various sensory modalities, including visual and auditory. This approach eliminates the proficiency gap between experienced surveyors and novices by providing real-time visual guidance within authentic environments. Additionally, voice prompts are employed when nearing designated targets. This streamlined process allows surveyors to stake out targets without the need for leveling the pole, relying on visual and auditory guidance for precise stakeout each time.
- Page 6 INNO8 Intelligent Platform New generation of embedded Linux operating system platform improves RTK performance and work efficiency. Its operating efficiency is higher; a unique core processing mechanism which can respond to more than one command at one time; it starts faster and more responsive in real time.
- Page 7 INNO8 Support to access the internal web UI manage page of receiver with WiFi and USB connection, monitor host state real-time, configure receiver freely. Electronic Bubble & Tilt Compensation Integrated with a new generation IMU module which makes tilt measurement more stable, accurate and fast that without strict leveling the receiver to measure the point at will.
-
Page 8: Chapter 2 Inno8 Receiver Introduction
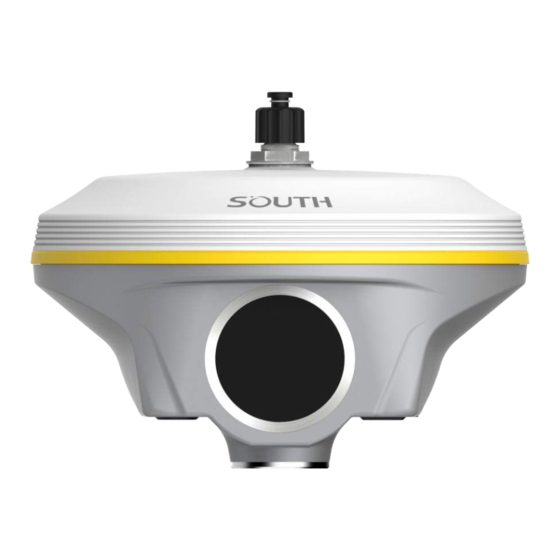
INNO8 Chapter 2 INNO8 receiver introduction §2.1 Receiver components Receiver front view UHF antenna port LCD touch screen Receiver back view UHF antenna port HD camera - 5 -... - Page 9 INNO8 Receiver bottom view power button Speaker SIM card slot power indicator light port type-c LEMO port 5 PIN bottom camera type-c port: for static data downloading, OTG (for external storage) and charging. 5-Pin port: 1) For external power supply 2) For export data, debug and configure receiver power indicator light :...
-
Page 10: Receiver Touch Screen Menu
INNO8 §2.2 Receiver touch screen menu §2.2.1 Main display interface The receiver can be operated from touch screen. By swiping the screen, receiver can be configured. After the device is powered on, the current working status is displayed. The status interface consists of ICONS and text Current charge Static collection state... -
Page 11: Work Mode
INNO8 [Receiver information] [Work mode], [Set Datalink], [System Setup], The shutdown and restart menu is displayed in the drop-down list §2.2.3 Work mode To switch work mode between Rover mode, Base mode and Static mode. §2.2.4 Set Datalink To configure datalink and there are 7 datalink modes as below: - 8 -... - Page 12 INNO8 UHF(inbuilt radio) as datalink Cellular network (via SIM card) as datalink External radio as datalink Dual transmit (inbuilt radio and cellular network) Bluetooth datalink (also called controller network as datalink) - 9 -...
-
Page 13: System Setup
INNO8 WIFI datalink Intelligent datalink No datalink §2.2.5 System Setup Radio Config GSM/GPRS Config - 10 -... - Page 14 INNO8 WIFI Config Self-check Factory Default Clean EPH Reset OEM - 11 -...
- Page 15 INNO8 Language Radio Config Data and Air baud rate: Normally, it is recommended to take default air baud rate. If need to change it, please make the same change for both base and rover receiver. More air baud rate, more data can be transmitted per second. Radio Channel and protocol: Normally, it is recommended to take default protocol (Farlink).
-
Page 16: Hardware Operation
INNO8 connected to it and visit receiver’s WEB UI. Client mode: with the receiver’s inbuilt network module, it can connect other WIFI hotspot to access to internet so that the WIFI datalink can be used. Note: suggest to close WIFI client mode if there is no need to use WIFI datalink. By default, it is set as AP mode. -
Page 17: Chapter 3 Web Ui Management
Chapter 3 Web UI Management §3.1 Overview Because of using the smart embedded Linux operating system and SOUTH intelligent cloud technology, the web UI allows users to configure and monitor the status of INNO8 in real-time. The accessing way is not only by WiFi connection, but also can be USB mode. -
Page 18: Access By Usb
INNO8 Run IE broswer on computer and input the default IP (10.1.1.1) into address bar, after a while, the system login interface is refreshed, then apply “admin” for username and password to login. IP Address: 10.1.1.1 Username: admin Password: admin §3.3 Access by USB On this mode, the Type-C USB port of INNO8 must work as an Ethernet port, then internal web UI shall be accessed via USB cable connection with computer. - Page 19 INNO8 suitable one. The file bugvista64.inf is applied to 64bit operating system, and linux.inf is for 32bit operating system. Choose the folder which contains the drivers - 16 -...
- Page 20 INNO8 NOTE: The driver can be downloaded from official website automatically or please contact with us for more supports. If the driver has been successfully installed, the USB port of INNO8 will be recognized as Linux USB Ethernet/RNDIS Gadget, and a local area connection will generate in Network Connections on the computer.
- Page 21 INNO8 Then double click on Internet Protocol Version 4 (TCP/IPv4) option or click on properties button to call out Internet Protocol Version 4 (TCP/IPv4) properties window, set the fixed LAN IP address as shown in following, then click OK button and confirm the settings, return to the IE browser and use the IP address 192.168.155.155 to access the internal web UI.
-
Page 22: Web Ui Main Interface
INNO8 IP Address: 192.168.155.155 Username: admin Password: admin §3.4 Web UI main interface After login the Web UI management of INNO8 by WIFI or USB connection, the main interface appears with displaying configuration items and positioning. As shown at following figures. In the Web UI home page, the configuration items are listed at left side. -
Page 23: Status
INNO8 information including coordinates information and satellites are displayed at right side Component Description Positioning information, satellite tracking and the others will Status be displayed in this page It contains registration for receiver, base configuration, Configuration antenna configuration, satellite configuration, receiver configuration and system configuration. - Page 24 INNO8 Work Status The physical state of INNO8 such as working mode, datalink, host temperature, remaining power and the free memory is obtained from this page Position Information In this page, users can be clear at a glance on current position information and satellite information - 21 -...
-
Page 25: Configuration
INNO8 §3.4.2 Configuration General Config, Base Setup, Antenna Setup, Satellite Tracking, Receiver Operate and Default Language are contained under Configuration menu. Users are able to configure all kinds of parameters for INNO8 under Configuration menu, and all the settings are immediate effect after saving. - Page 26 INNO8 If the code of INNO8 has expired or is going to be run out, please provide the serial number of your INNO8 for us to apply for another available code, then input the code into the blank or register the receiver online. INNO8 allows users to setup the working mode and datalink from this Web UI that only need the mobile phone or tablet PC is able to connect the wifi hotspot of INNO8.
- Page 27 INNO8 Work Mode: There are Rover, Base and Static contained in this dropdown list Datalink: Pull down the list, there will be all kinds of options for datalink, such as radio, Network, External, Bluetooth, WIFI. Radio Route: This feature is used to transfer the correction which from the reference station to the other rover by radio, the rovers will have the same reference coordindates.
- Page 28 INNO8 RadioTransfer: This is the function that INNO8 is able to transfer the correction from Base station to the other rovers with the internal UHF, definitely,INNO8 can work as a radio transfer (radio repeater). Operation: 1, check the box of “RadioTransfer” on “General Config” dialog for Base station. 2, open the same function for Rover in critical status (when the Rover is close to working distance of Base internal UHF).
- Page 29 INNO8 3, configure the datalink of the other rovers into internal UHF mode, then make sure the channel, protocol and frequency point are same as “Repeater” rover. Note: please take in mind that the “Repeater” rover should keep away from Base station to avoid signal interference.
- Page 30 INNO8 CMR ID/RTCM2.X ID/RTCM3.X ID: Users can specify the ID for transmitting correction. Position: Click this button to capture the coordinates for current position Spare: This is used to the repeat station Base Start Mode: Here contains 3 methods to start the Base, manually start base, automatically start base by fixed point, automatically start base by current point.
- Page 31 INNO8 Antenna Height: This is the value for height of antenna while surveying. Measuring Method: Here provides several methods for measuring the antenna height such as carrier phase center, slant height, antenna edge, height plate and to the bottom. Satellite Tracking In this page, users can define the mask angle for satellite tracking, and check on the box of corresponding band from the constellation that to use this band or not - 28 -...
- Page 32 INNO8 Receiver Operate The page provides all kinds of operations to control the receiver such as self-check operation, clean epochs, factory reset, reboot and power off. Self-check: Users can also do the self-check from this configuration page, click on the Check all button to check all the modems or click on the check button corresponding to the modem to check one by one.
- Page 33 INNO8 Reboot: Click this button to restart the receiver. Power Off: Click this button to power off the receiver. Reset OEM(cold): to reset OEM, and receiver will restart. Reset OEM(hot): to reset OEM, receiver will not need to restart. System Setup This page is used to control Voice prompt, volume of voice, power saving, USB mode and the default language for receiver.
-
Page 34: Satellite Information
INNO8 Authority zone: Default means the default area. Global-20991215 means it can work in all around the world. Satellites View Mode: There are two methods, Solving Satellite and Common Visible Satellite. Satellites System: You can choose the different satellite systems in here. Ionosphere Suppression: It has a big influence for RTK when the ionosphere is active, so you can try turn on this feature. - Page 35 INNO8 Skyplot In this page, all the tracking satellires are shown on the skypolt, this let users intuitively view and know where the current position of satellite is. GPS on/off For all the running GNSS constellations or the augmentation system,INNO8 allows to configure to use which satellite or not.
-
Page 36: Data Record
INNO8 GLONASS on/off: to check and uncheck the satellites for tracking BDS on/off: to check and uncheck the satellites for tracking GALILEO on/off: to check and uncheck the satellites for tracking SBAS on/off: to check and uncheck the satellites for tracking QZSS on/off: to check and uncheck the satellites for tracking IRNSS on/off: to check and uncheck the satellites for tracking §3.4.4 Data Record... - Page 37 INNO8 Storage Option: Here are the options to be selected for where the raw data will be stored, internal memory or external memory. Interval: This is the sampling interval for data storage, 50Hz (0.02s) sampling interval now is available for INNO8. File Interval: This is used to defined the data storage time for the static file.
- Page 38 INNO8 This page provides the data files to download. Choose the storage where the static data recorded, and file type, then click on the blank of “Select Date” to choose what date the data was recorded and click “Get Data” button, all the files recorded in the date you choose will show in the table, tap download button to download the data files.
-
Page 39: Data Transfer
This page is allowed to configure the baud rate, odd-even check and the data flow for serial port (5-pin port) and Bluetooth. CAUTION: do not change the default value in this page for each item, if you want to change the settings, please contact with SOUTH technician for further support. - 36 -... - Page 40 Navigation Data: This is the navigation data output from receiver such as NMEA-0183, GSV, AVR, RMC and so on. It is configured in Data Flow Config page. SIC Observation Data: This is the user-defined format observation data from SOUTH. OpenSIC Observation Data: This is the open version of SOUTH user-defined format observation data for secondary development.
- Page 41 INNO8 NTRIP Config This is used to configure the NTRIP performance while receiver is going to connect to internet. INNO8 supports complete NTRIP performance including NTRIP Client, NTRIP Server and NTRIP Caster. Multiple Ntrip To transmit corrections to different server at the same time through Ntrip protocol - 38 -...
- Page 42 INNO8 Data Flow Config In this page, users can optionally to configure the content and the update rate of data flow that to output or not to output what kind of data format. Click on the dropdown list for each data format to define the update rate RTCM Config In this page, users can set different differential signal formats.
-
Page 43: Network Config
INNO8 §3.4.6 Network Config The “Network Config” is able to configure the ways and the contents for internet access of New INNO8 plus. GSM/GPRS Config, CSD Config, WIFI Config, Bluetooth Config, Port Forwarding, Router and Network Testing are under the list of Network Config GSM/GPRS Config In this page, all the information of receiver under GPRS mode will be displayed including the hardware information and dialing status. - Page 44 INNO8 SMS Config On this configuration dialog, input a phone number into the blank, New INNO8 plus will send text message onto the phone which number is written. - 41 -...
- Page 45 INNO8 WIFI Config This is mainly used on the WIFI configuration for INNO8, there are AP mode and Client mode for optional. AP: This is used to enable the WIFI hotspot for INNO8 to broadcast for mobile terminals such as smartphone or tablet to connect and access the Web UI. Check the box of AP in Work Mode to enable the WIFI hotspot forINNO8, and define the SSID, password, encryption method and broadcasting channel for WIFI connection.
- Page 46 INNO8 Bluetooth Config In this page, users can view the information and connection status of Bluetooth, such the MAC of Bluetooth, discoverable or not, the PIN code, and the connection devices in following table. The advanced Settings module enables Bluetooth search. Port Forwarding This page is mainly used to view and configure the internet transmission port for INNO8, customize and debug receiver.
- Page 47 INNO8 NOTE: Usually we will keep the default setting in this page, if you would like to modify it, please contact with SOUTH technician for more supports. Route This is mainly used to view and configure the parameters for router, only under the condition of customize and debug receiver.
-
Page 48: Radio Config
INNO8 §3.4.7 Radio Config As the name implies, the parameters of radio can be done in “Radio Config”, it is divided into Radio Parameter and Radio Frequency. Radio Parameter This page is mainly used to configure the parameters for internal radio module of INNO8. High performance mode: To increase the radio performance in the forest and harsh environment, both Base and Rover should be enable this function at the same time, and the protocol should be farlink. - Page 49 Data Baud Rate: This represents the rate of data transmission port of internal radio. The rate should be the same in both Base and Rover. In general, the data baud rate of SOUTH radio module has been unified to be 19200, keep it as default.
-
Page 50: Firmware Update
This page displays all the information of the firmware which current installed on INNO8, and allows to update the latest version firmware for receiver. To get latest version firmware please contact with SOUTH technician. Online Update:INNO8 supports to update the firmware online anytime if there is something... - Page 51 INNO8 update or optimized. Local Update: Update the latest firmware by using a firmware file. How to upgrade the firmware with Local Update Click on “Browse” button to load firmware file (Please take in mind that the firmware is ended with .img as the extension name). And then click “Installation”...
-
Page 52: Track Manage
INNO8 SPECIAL REMIND:INNO8 doesn’t support to update the firmware with the help of INstar program any more, in the future, update the firmware for INNO8 shall be done through the Web UI. Module Update This page is used to update the firmware for corresponding modem such as OEM board, radio module and sensor. - Page 53 INNO8 Parameter Setting Record Setting Check on the box of “Record Enable” to activate track recording function, and choose a proper recording interval in dropdown list of “Record Interval”. EchoEnable Setting This configuration dialog is used to upload the recording data to a server in real-time. - 50 -...
-
Page 54: Coordinate System(Reserve)
INNO8 Data Download On this page, users can download the track data file from receiver. Choose the recording date and click “Get Data” to load all the data files recorded at that day, then choose the files and click download button. §3.4.10 Coordinate System(reserve) INNO8 allows users to setup the local coordinate system on internal web UI management. -
Page 55: Online Service(Reserve)
INNO8 §3.4.11 Online Service(reserve) This function is to upload the data onto a server real-time, including Navigation data, raw observation data, correction data, SIC observation data and open SIC observation data. §3.4.12 User Management This page is used to manage the authority of login Web UI for users, including the username, password and add users. -
Page 56: System Log
INNO8 §3.4.13 System log System log In this page, users can download the system log book of receiver (the log book can help to backtrack the working status of receiver). NOTE: Only the administrator can modify any parameters for receiver and manage users, and the ordinary users only have the right to view the relative parameters. -
Page 57: Chapter 4 New Functions
INNO8 In this page, users can record data and choose duration. Chapter 4 New functions §4.1 AR Stakeout Augmented Reality (AR) stakeout revolutionizes conventional surveying methods by integrating various sensory modalities, including visual and auditory. This approach eliminates the proficiency gap between experienced surveyors and novices by providing real-time visual guidance within authentic environments. - Page 58 INNO8 2) Click the "Point stakeout" function, select a point and turn on the tilt survey function. Shake the device as prompted to initialize the tilt survey. (Note that the pole height is consistent with the actual pole height) 3) After the initialization page is displayed, perform initialization as prompted. After the - 55 -...
- Page 59 INNO8 initialization succeeds, the tilt measurement icon is displayed as follow. 4) Click the AR icon to realize the real scene lofting. 5) Follow the arrow guide to find the target point easily. - 56 -...
-
Page 60: Photogrammetry
INNO8 §4.2 Photogrammetry INNO8 visual positioning broadens the scope of RTK applications through the synergistic integration of photogrammetry and RTK positioning technologies. With an 8-megapixel camera, “Fast” IMU and the latest positioning algorithm, INNO8 is adept at capturing and processing images or videos to derive precise coordinates. - Page 61 5 seconds, and walk more than 2 meters. Click to end the shoot. SOUTH's 3D modeling technology are fully utilized and transformed in INNO8. The results of image measurements by INNO8, can be seamlessly integrated with data outcomes from UAV.
- Page 62 INNO8 UAV Survey for SOUTH building, Lion statue detail lost INNO8 scan the Lion statue - 59 -...
- Page 63 INNO8 INNO8 scan the Car Detailed steps: 1) Use wifi connection to connect to the device. The device is connected to CORS to achieve a fixed solution. 2) To enter photogrammetry, this function needs to be combined with the tilt survey function. If the tilt survey function is available, shake the device as prompted to initialize the tilt survey.
- Page 64 INNO8 3) There are three modes for you to choose from : ‘Takin Photos Mode’ 、 ‘Taking Videos Mode’and ‘Modeling for Post-processing’. Use ‘Taking Videos Mode’, click to start shooting, keep the target to be measured in sight, walk horizontally or in a circular motion to shoot video for at least 5 seconds, and walk more than 2 meters.
- Page 65 INNO8 progress: The picture taken by the device is being transferred to the controller) 4) Click OK to perform the upload server calculation. (The calculation time is related to the number of uploaded pictures, the more pictures, the longer it takes) - 62 -...
-
Page 66: Chapter 5 Accessories
INNO8 5) After the solution is completed, click OK, select three pictures, select the same target point, you can calculate the coordinates Chapter 5 Accessories §5.1 Instrument Case The instrument case for INNO8 contains two layers of packing: the inner layer is filled with anti-collision foam, the host and other accessories can be dispersed and embedded;... -
Page 67: Charger &Adapter
INNO8 §5.2 Charger &Adapter INNO8 is equipped with a rechargeable internal battery, it uses a type-c cable and a PD adapter for the charging. §5.3 Differential Antennas UHF Antenna The differential antennas are as shown above; The UHF differential antenna is required to install to the interface at the bottom of receiver if INNO8 is set up into internal UHF mode. - Page 68 INNO8 Type-C interface, connect to receiver USB, connect to computer - 65 -...
-
Page 69: Appendix A Inno8 Technical Specifications
INNO8 Appendix A INNO8 technical specifications - 66 -...
Need help?
Do you have a question about the INNO 8 and is the answer not in the manual?
Questions and answers