Advertisement
Quick Links
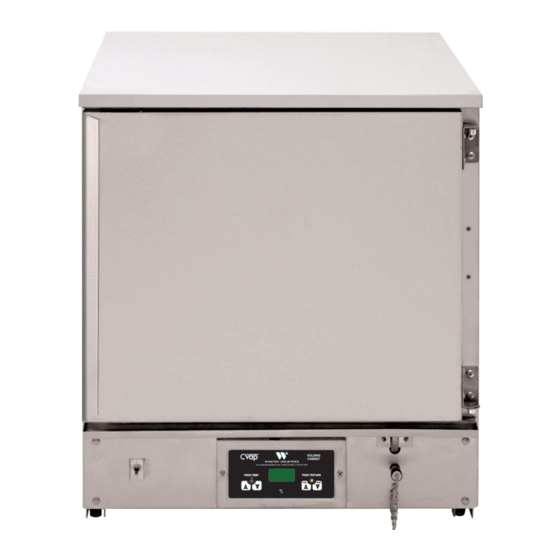
HC4009 Retro Control Board
WINSTON FOODSERVICE
2345 Carton Drive | Louisville, KY 40299 USA
winstonfoodservice.com | 800.234.5286 | +1.502.495.5400
Installation
Follow QR Code for Manual
Download, Videos, and More.
instructions-hc4009-retro-control-installation-doc20231220wlp1-rev01
Advertisement

Subscribe to Our Youtube Channel
Related Manuals for Winston foodservice HC4009

Summary of Contents for Winston foodservice HC4009
- Page 1 HC4009 Retro Control Board Installation Follow QR Code for Manual Download, Videos, and More. WINSTON FOODSERVICE 2345 Carton Drive | Louisville, KY 40299 USA winstonfoodservice.com | 800.234.5286 | +1.502.495.5400 instructions-hc4009-retro-control-installation-doc20231220wlp1-rev01...
-
Page 2: Tools Required
3/8” Wrench SV1211Kit This instruction guide covers the retro control board installation for HC4009 series CVaps. Refer to the serial tag for model information. Do not plug the new control board into the unit until the new relay panel is installed. - Page 3 HC4009 Retro Control Board Installation 1. Power the unit off and disconnect from power source. (Fig.1-2) Fig.1 Fig.2 Air Probe Replacement 2. Locate the air probe access panel on the right side of the cabinet. Using a Phillips screwdriver, remove the panel.
- Page 4 HC4009 Retro Control Board Installation 4. Pull back the insulation and locate the air probe. Using a 3/8” nut-driver, remove the two retaining nuts. (Fig.7-8) Fig.7 Fig.8 5. Pull retaining bracket up and off of the mounting studs. Next remove the air probe, back retainer, and orange washer.
- Page 5 HC4009 Retro Control Board Installation 7. Insert air probe into opening and rotate until probe tip inside the unit is pointing down. (Fig.13-14) Fig.13 Fig.14 8. Start the two retaining nuts and tighten them using a 3/8” nut driver or socket. (Fig.15-16) Fig.15...
- Page 6 HC4009 Retro Control Board Installation Water Probe Replacement 10. Drain the water from the unit. Using a Phillips screwdriver or screw gun, remove the lower access panel on the right side.(Fig.19-20) Fig.19 Fig.20 11. Locate the water probe connection. And disconnect the probe wire.(Fig.21-22) Fig.21...
- Page 7 HC4009 Retro Control Board Installation 13. Gently tap the water probe with a hammer, then ,using pliers pull the water probe out of the water pan. (Fig.25-26) Fig.25 Fig.26 14. Locate the new water probe in the kit and thread on the compression nut and ferrule. The ferrule needs to be 2-1/4”...
- Page 8 HC4009 Retro Control Board Installation Relay Panel Installation 16. Remove the unit shelves and the evaporator cover if present.(Fig.31-32) Fig.31 Fig.32 17. Remove the cabinet door and lay the unit on it’s back. (Fig.33-34) Fig.33 Fig.34 18. Remove the left side lower access panel and then remove the left cabinet side. (Fig.35-36) Fig.35...
- Page 9 HC4009 Retro Control Board Installation 19. Using a Phillips screwdriver, remove the cabinet bottom. (Fig.37-38) Fig.37 Fig.38 20. Using a Phillips screwdriver or screw gun, remove the control board retaining screws. Pull the control board away from the opening.(Fig.39-40) Fig.39 Fig.40...
- Page 10 HC4009 Retro Control Board Installation 22. Using a flat tip screwdriver, depress the tabs on the control housing female nine pin Molex connection. Push the connection back into the cabinet side. (Fig.42-43) Fig.42 Fig.43 23. Locate the relay board in the kit and untie the relay wires. Locate the signal wire 9 pin Molex connection( thinner wires).
- Page 11 HC4009 Retro Control Board Installation 25. Insert the signal wire 9 pin Molex connection into the slot where the previous 9 pin Molex connection was. Ensure the connection is firmly seated.(Fig.48-49) Fig.48 Fig.49 26. Locate the power wire 9 pin Molex connection coming from the relay board (thicker wires).
- Page 12 HC4009 Retro Control Board Installation 28. Secure the excess wire in the relay panel wire straps. Remove the bottom middle screw grommet from the cabinet bottom rail.(Fig.54-55) Fig.54 Fig.55 29. Set the relay panel into the bottom rail. Ensure all existing wires are tucked above the panel leading edge.
- Page 13 HC4009 Retro Control Board Installation 31. Locate the two bottom grommets on the cabinet left side and remove. (Fig. 60-61) Fig.60 Fig.61 32. Locate unit bottom and replace. Locate the two 10-32 x .50 machine screws in the kit and insert into the bottom and the holes where the grommets were removed. (Fig.62-63) Fig.62...
- Page 14 HC4009 Retro Control Board Installation 34. Using a Phillips screwdriver, replace the unit side. (Fig.66-67) Fig.66 Fig.67 35. Locate the new control board in the kit and connect the 6 pin Molex connection and then the 9 pin connection.(Fig.68-69) Fig.68 Fig.69...
- Page 15 HC4009 Retro Control Board Installation 37. Set the unit upright and fill the evaporator with water. Verify the unit is not leaking around the new water probe area. (Fig.72-73) Fig.72 Fig.73 38.If no leak is detected, replace both of the lower access panels. Plug the unit in.(Fig.74-75) Fig.74...
- Page 16 HC4009 Retro Control Board Installation 40. Replace the unit evaporator cover, if present. Replace the unit shelves.(Fig.78-79) Fig.78 Fig.79 41. Replace the unit door. (Fig.80-81) Fig.80 Fig.81 WINSTON FOODSERVICE 2345 Carton Drive | Louisville, KY 40299 USA winstonfoodservice.com | 800.234.5286 | +1.502.495.5400...
- Page 17 Wiring Diagrams WINSTON FOODSERVICE 2345 Carton Drive | Louisville, KY 40299 USA winstonfoodservice.com | 800.234.5286 | +1.502.495.5400 instructions-ha-retro-control-installation-doc20211012wlp1-rev00...
- Page 18 Wiring Diagrams WINSTON FOODSERVICE 2345 Carton Drive | Louisville, KY 40299 USA winstonfoodservice.com | 800.234.5286 | +1.502.495.5400 instructions-ha-retro-control-installation-doc20211012wlp1-rev00...
Need help?
Do you have a question about the HC4009 and is the answer not in the manual?
Questions and answers