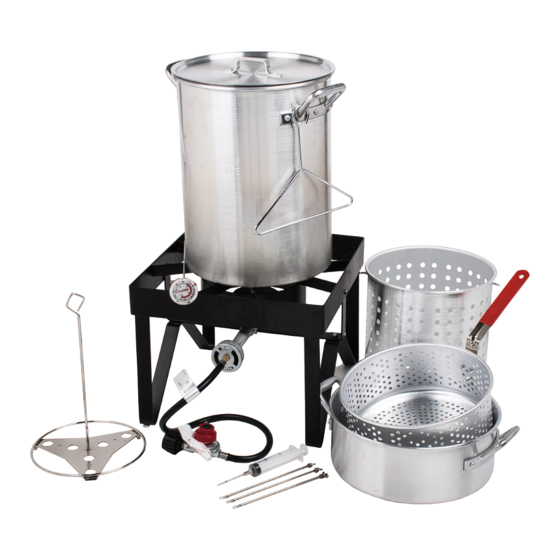
Summary of Contents for Backyard Pro Weekend Series
- Page 1 OUTDOOR RANGE OPERATION INSTRUCTIONS 554BP12KIT, 554BP30AL, 554BP30ALKIT, 554BP30SS, 554BP30SSKIT, 554BPHP17, 554BPRD13, 554BPRD21, 554BPSQ16, 554BPSS16, 554BPSQ212 KEEP THIS MANUAL FOR FUTURE REFERENCE. 06/2016...
-
Page 2: If You Smell Gas
READ AND UNDERSTAND BEFORE USING THIS PRODUCT Throughout this manual the words appliance, cooker, fryer/boiler, burner and stove will be used interchangeable to refer to the Backyard Pro Outdoor Ranges and Cookers. IF YOU SMELL GAS: 1. Shut off gas to the appliance. - Page 3 21. Use Backyard Pro appliances only in accordance with state and local ordinances, or in the absence of local codes, with the National Fuel Gas Code, ANSIZ223.1/NFPA 54, Storage and Handling of Liquified Petroleum Gases, ANSI/NFPA 58 or CSA B149.1, Natural Gas and...
-
Page 4: Cleaning The Appliance
Visit WebstaurantStore.com for information regarding a replacement hose assembly. Only the LP Hose/Regulator assembly specified by Backyard Pro should be used with the appliance. -
Page 5: Information Regarding Cooking Oil
Maintenance & Care TIPS FOR CARING FOR ALUMINUM FRY PANS AND BOILING POT It is not necessary to season aluminum pots before cooking with them. Wash with a liquid dish washing detergent and towel dry. After cooking, wash aluminum pots and fry pans in hot, sudsy detergent. If grease or black soot has cooked to the outside of the pot while cooking with your outdoor cooker, scrub the outside of the pot with a steel wool scouring pad. - Page 6 Lighting & Operating Instructions WARNING NEVER PUT HANDS OR FACE DIRECTLY OVER BURNER WHILE LIGHTING OR WHILE THE APPLIANCE IS LIT FOR MODELS WITH ADJUSTABLE REGULATORS (ILLUSTRATIONS PAGE 7) 1. Check the casting to make sure it is set up as per the illustration (Figure 1). 2.
-
Page 7: Turning Off And Storing The Cooker After Use
Lighting & Operating Instructions WARNING NEVER MOVE THE COOKER OR POT WHILE IN USE OR STILL HOT [ABOVE 100°F (38°C)] TURNING OFF AND STORING THE COOKER AFTER USE 1. After each use, turn OFF the cooker at the regulator/manual valve first, then at the gas cylinder valve. - Page 8 FOR ITEMS 554BPHP17 554BPRD13 554BPRD21 554BPSQF2B...
- Page 9 Assembly Instructions FOR ITEM 554BPSQ212 HARDWARE FOR ASSEMBLY TOOLS NEEDED FOR ASSEMBLY (8) Bolts (1) Adjustable Wrench (8) Nuts (1) Disposable Wrench (Included) (16) Washers INSTRUCTIONS 1. Assemble bolts, washers and nuts as per diagram. 2. Wrench tighten. Make sure all bolt sets are used and unit stands sturdily.
- Page 10 Assembly Instructions FOR ITEMS 554BPSS16 554BPSQ16 HARDWARE FOR ASSEMBLY TOOLS NEEDED FOR ASSEMBLY (12) Bolts (1) Adjustable Wrench (12) Nuts (1) Disposable Wrench (Included) (24) Washers INSTRUCTIONS 1. Assemble bolts, washers and nuts as per diagram. 2. Wrench tighten. Make sure all bolt sets are used and unit stands sturdily.
- Page 11 Assembly Instructions FOR ITEMS 554BP30ALKIT 554BP30SSKIT HARDWARE FOR ASSEMBLY TOOLS NEEDED FOR ASSEMBLY (4) Bolts (1) Adjustable Wrench (4) Nuts (1) Disposable Wrench (Included) (8) Washers INSTRUCTIONS 1. Assemble bolts, washers and nuts as per diagram. 2. Wrench tighten. Make sure all bolt sets are used and unit stands sturdily.
- Page 12 Assembly Instructions FOR ITEMS 554BP12KIT HARDWARE FOR ASSEMBLY TOOLS NEEDED FOR ASSEMBLY (9) Bolts (1) Adjustable Wrench (9) Nuts (1) Disposable Wrench (Included) (18) Washers INSTRUCTIONS 1. Assemble bolts, washers and nuts as per diagram. 2. Wrench tighten. Make sure all bolt sets are used and unit stands sturdily.
- Page 13 FOR ITEMS 554BPFF19 HARDWARE FOR ASSEMBLY TOOLS NEEDED FOR ASSEMBLY (13) Bolts (1) Adjustable Wrench (13) Nuts (1) Disposable Wrench (Included) INSTRUCTIONS 1. Assemble bolts, washers and nuts as per diagram.
- Page 14 INSTRUCTIONS FOR ITEMS 554BPSQ2150 with wind shield INSTRUCTIONS 1. Assemble bolts, washers and nuts as per diagram.


Need help?
Do you have a question about the Weekend Series and is the answer not in the manual?
Questions and answers