Table of Contents
Advertisement
Available languages
Available languages
Quick Links
Advertisement
Table of Contents

Related Manuals for Create Microwave Retro

Summary of Contents for Create Microwave Retro
- Page 1 Microwave Retro User manual | Manual de instrucciones...
-
Page 4: Table Of Contents
I N D E X ENGLISH ESPAÑOL Security instructions Instrucciones de seguridad List of parts Lista de partes Installation guide Guía de instalación Grounding instructions Instrucciones de toma a tierra Radio interference Interferencias de radio Before calling for service Antes de llamar al servicio técnico Cooking techniques Técnicas de cocinado Cookware Guide... - Page 5 INDE X ITALIANO DEUTSCH Istruzioni di sicurezza Sicherheitshinweise Elenco delle parti Teileliste Guida d'installazione Installationsanleitung Istruzioni di messa a terra Erdungsanweisungen Interferenze radio Funkstörungen Prima di chiamare l'assistenza Bevor Sie den Service rufen Tecniche di cottura Kochtechniken Guida alle pentole Kochgeschirr-Ratgeber Pannello di controllo Schalttafel...
-
Page 6: English
E N G LISH Thank you for choosing our microwave. Before using this appliance and to ensure its best use, please read the instructions carefully. The safety precautions listed here reduce the risk of fire, electric shock, and injury when followed correctly. - Page 7 • The microwave is only used independently, it is not suitable for built-in use. • The microwave must not be placed in a cupboard. • The door or the outer surface may become hot when the appliance is in operation. •...
- Page 8 • The microwave oven is designed to heat food and drinks. Drying clo- thing and heating heating pads, slippers, sponges, damp cloths, and the like may create a risk of injury, ignition, or fire. • This product is a Group 2 Class B ISM equipment. The definition of...
-
Page 9: List Of Parts
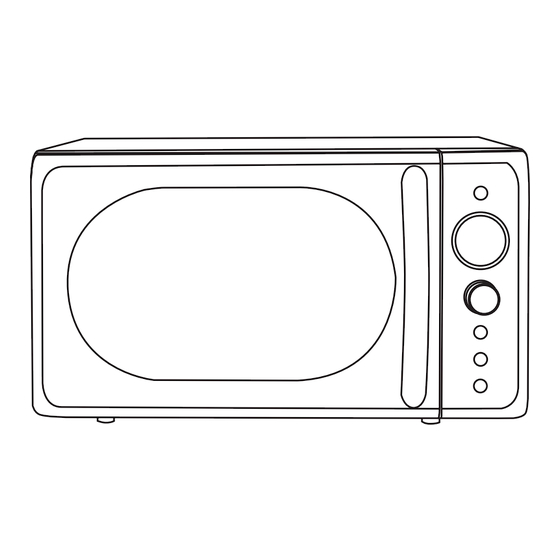
LIST OF PARTS 7. Metal grid for cooking 1. Waveguide 3. Grill with grill (Do not remove the 4. Door mica plate covering the 8. Rotating ring 5. Door security lock system waveguide) 9. Axis 6. Control Panel 2. Glass tray INSTALLATION GUIDE •... -
Page 10: Grounding Instructions
GROUNDING INSTRUCTIONS • This appliance must be grounded. The microwave is equipped with a power cord that has a grounding wire and plug. It must be plugged into a wall outlet that is properly installed and grounded. In the event of an electrical short circuit, grounding reduces the risk of electric shock by providing an escape wire for electric current. -
Page 11: Cooking Techniques
COOKING TECHNIQUES • Load food carefully. Place the thickest parts facing the edges of the dish. • Be careful with the cooking time. Cook your food in the shortest time indicated and add more if you need it. Overcooked food may smoke or catch fire. •... -
Page 12: Control Panel
CONTROL PANEL SCREEN • Cooking time, power indicators and time are displayed. DEFROST/CLOCK • Press once to set the fast defrost program. • Press twice to set defrost program by weight. Both the defrost time and power are set automatically once the food category and weight are chosen. - Page 13 C LOCK SE T TI N G You can choose to display the 12 or 24 hour clock by pressing the DEFROST/CLOCK button. 1. In standby mode, press and hold DEFROST/CLOCK button for 3 seconds to choose 12-hour clock. (If you want the 24-hour clock, press again.) 2.
- Page 14 AU TOMATI C D E FROST You can defrost meat, fish and shellfish. The defrost time and power level are automatically adjusted once the weight has been programmed. The weight range of the frozen food varies between 100 and 800 g. 1.
- Page 15 C OOK E D W IT H GRI LL Grilling is particularly useful for thin steaks, chops, kebabs, sausages and chicken pieces. The maximum time is 60 minutes. 1. Press the GRILL/COMBI button once. 2. Turn the MENU/WEIGHT/TIME dial to set the time. 3.
-
Page 16: Cleaning And Care
CLEANING AND CARE • Turn the oven off and unplug it from the electrical outlet before cleaning. • Keep the inside of the oven clean. When splashes or spilled liquids have stained interior walls, wipe with a damp cloth. Mild soaps can be used if the oven gets very dirty. Avoid using spray or other harsh cleaners. -
Page 17: Instrucciones De Seguridad
E SPAÑOL Gracias por elegir nuestro microondas. Antes de utilizar este electrodoméstico y para asegurar su mejor uso, por favor, lea detenidamente las instrucciones. Las medidas de seguridad aquí indicadas reducen el riesgo de incendio, descarga eléctrica y lesiones cuando se siguen correctamente. Guarde el manual en un lugar seguro para futuras referencias, así... - Page 18 • La limpieza y el mantenimiento por parte del usuario no deben ser realizados por niños a menos que sean mayores de 8 años y estén supervisados. • Los niños pequeños deben mantenerse alejados del microondas. • El microondas solo se utiliza de forma independiente, no es apto para utilizarse empotrado.
- Page 19 • Es muy importante que la puerta del horno se cierre correctamente y que no haya daños en la puerta (incluidas abolladuras), las bisagras y pestillos (rotos o sueltos), los sellos de la puerta y las superficies de sellado. Reducir el riesgo de fuego dentro del horno: •...
-
Page 20: Lista De Partes
LISTA DE PARTES 1. Guía de ondas 4. Puerta 7. Rejilla de metal para cocinar con grill (no retire la placa de mica 5. Sistema de bloqueo de que cubre la guía de ondas) 8. Aro giratorio seguridad de la puerta 2. -
Page 21: Instrucciones De Toma A Tierra
INSTRUCCIONES DE TOMA A TIERRA • Este aparato debe estar conectado a tierra. El microondas está equipado con un cable de alimentación que tiene un cable y un enchufe de conexión a tierra. Debe enchufarse a una toma de pared que esté correctamente instalada y conectada a tierra. En caso de un corto- circuito eléctrico, la conexión a tierra reduce el riesgo de descarga eléctrica al proporcio- nar un cable de escape para la corriente eléctrica. -
Page 22: Técnicas De Cocinado
TÉCNICAS DE COCINADO • Coloque la comida con cuidado. Coloque las partes más gruesas orientadas hacia los bor- des del plato. • Tenga cuidado con el tiempo de cocinado. Cocine su comida en el menor tiempo indicado y añada más si lo necesita. La comida sobrecocinada puede desprender humo o prenderse fuego. -
Page 23: Panel De Control
PANEL DE CONTROL PANTALLA • Se muestra el tiempo de cocinado, los indicadores de potencia y el tiempo. DEFROST/CLOCK • Pulse una vez para establecer el programa de descongelado rápido. • Pulse dos veces para establecer el programa de descongelado por peso. - Page 24 A J USTE D E L R E LOJ Puede elegir mostrar el reloj de 12 o 24 horas pulsando el botón DEFROST/CLOCK. 1. En modo de espera, mantenga pulsado el botón DEFROST/CLOCK durante 3 segundos para elegir el reloj de 12 horas. (Si quiere el reloj de 24 horas, pulse de nuevo.) 2.
- Page 25 DE SCON G E L ACI ÓN AUTO MÁT I CA Puede descongelar carne, pescado y marisco. El tiempo de descongelación y el nivel de po- tencia se ajustan automáticamente una vez se ha programado el peso. El rango de peso de la comida congelada varía entre 100 y 800 g.
- Page 26 C OCINADO CON GRI L L El cocinado con grill es particularmente útil para los filetes finos de carne, chuletas, broche- tas, salchichas y trozos de pollo. El tiempo máximo es de 60 minutos. 1. Pulse el botón GRILL/COMBI una vez. 2.
-
Page 27: Limpieza Y Cuidado
LIMPIEZA Y CUIDADO • Apague el horno y desenchúfelo de la toma de corriente antes de limpiarlo. • Mantenga limpio el interior del horno. Cuando haya salpicaduras o se hayan derramado líquidos y hayan manchado las paredes interiores, pase un paño mojado. Se pueden uti- lizar jabones suaves si el horno se ensucia mucho. -
Page 28: Português
P ORT U GU ÊS Obrigado por escolher nosso micro-ondas. Antes de utilizar este aparelho e para garantir o seu melhor uso, leia atentamente as instruções. As precauções de segurança listadas aqui reduzem o risco de incêndio, choque elétrico e ferimentos quando seguidas corretamente. - Page 29 • A limpeza e manutenção do usuário não devem ser realizadas por crianças, a menos que tenham mais de 8 anos de idade e sejam su- pervisionadas. • Crianças pequenas devem ser mantidas longe do micro-ondas. • O micro-ondas é usado apenas de forma independente, não é adequa- do para uso embutido.
- Page 30 • É muito importante que a porta do forno feche corretamente e que não haja danos à porta (incluindo amassados), dobradiças e trincos (quebrados ou soltos), vedações da porta e superfícies de vedação. Reduza o risco de incêndio no interior do forno: •...
-
Page 31: Lista De Peças
LISTA DE PEÇAS 7. Grade de metal para 1. Guia de onda 4. Porta cozinhar com grelha (não remova a placa de mica 5. Sistema de trava de que cobre a guia de onda) segurança da porta 8. Anel rotativo 2. -
Page 32: Instruções De Aterramento
INSTRUÇÕES DE ATERRAMENTO • Este aparelho deve ser aterrado. O micro-ondas está equipado com um cabo de alimen- tação com fio e plugue de aterramento. Ele deve ser conectado a uma tomada de parede devidamente instalada e aterrada. No caso de um curto-circuito elétrico, o aterramento reduz o risco de choque elétrico ao fornecer um fio de escape para a corrente elétrica. -
Page 33: Técnicas De Culinária
TÉCNICAS DE CULINÁRIA • Carregue os alimentos com cuidado. Coloque as partes mais grossas voltadas para as bor- das do prato. • Cuidado com o tempo de cozimento. Cozinhe os alimentos no menor tempo indicado e acrescente mais se precisar. Alimentos cozidos demais podem soltar fumaça ou pegar fogo. -
Page 34: Painel De Controle
PAINEL DE CONTROLE TELA • O tempo de cozimento, os indicadores de potência e o tempo são exibidos. DEFROST/CLOCK • Pressione uma vez para definir o programa de degelo rápido. • Pressione duas vezes para definir o programa de descongela- mento por peso. - Page 35 C O NFIG U R AÇÃO D O RE LÓGI O Você pode optar por exibir o relógio de 12 ou 24 horas pressionando o botão DEFROST/CLOCK. 1. No modo de espera, pressione e segure o botão DEFROST/CLOCK por 3 segundos para es- colher o relógio de 12 horas.
- Page 36 DE SCON G E L AME NTO AUTO MÁT ICO Pode descongelar carne, peixe e marisco. O tempo de descongelamento e o nível de potência são ajustados automaticamente após a programação do peso. A faixa de peso dos alimentos congelados varia entre 100 e 800 g. 1.
- Page 37 C OZIDO COM GRE LHA Grelhar é particularmente útil para bifes finos, costeletas, kebabs, salsichas e pedaços de frango. O tempo máximo é de 60 minutos. 1. Pressione o botão GRILL/COMBI uma vez. 2. Gire o botão MENU/WEIGHT/TIME para definir a hora. 3.
-
Page 38: Limpeza E Cuidados
LIMPEZA E CUIDADOS • Desligue o forno e desconecte-o da tomada elétrica antes de limpá-lo. • Mantenha o interior do forno limpo. Quando salpicos ou líquidos derramados mancharem as paredes interiores, limpe com um pano húmido. Sabonetes suaves podem ser usados se o forno ficar muito sujo. -
Page 39: Français
F R A NÇ AIS Merci d'avoir choisi notre micro-onde. Avant d'utiliser cet appareil et pour garantir son utili- sation optimale, veuillez lire attentivement les instructions. Les consignes de sécurité répertoriées ici réduisent les risques d'incendie, d'électrocution et de blessures lorsqu'elles sont suivies correctement. Veuillez conserver le manuel dans un endroit sûr pour référence future, ainsi que la garantie, le reçu de vente et la boîte. - Page 40 • Les enfants doivent être surveillés pour s'assurer qu'ils ne jouent pas avec l'appareil. • Le nettoyage et l'entretien par l'utilisateur ne doivent pas être effec- tués par des enfants sauf s'ils sont âgés de plus de 8 ans et surveillés. •...
- Page 41 • Ne placez aucun objet entre la face avant du four et la porte et ne laissez pas de saleté ou de résidus de nettoyant s'accumuler sur les surfaces d'étanchéité. • Le four ne doit être réglé ou réparé que par du personnel qualifié. N'utilisez pas le four s'il est endommagé.
-
Page 42: Liste Des Pièces
LISTE DES PIÈCES 7. Grille métallique pour 1. Guide d'ondes 4. Porte cuisiner avec grill (Ne retirez pas la plaque de 5. Système de verrouillage de mica recouvrant le guide 8. Bague tournante sécurité de porte d'ondes) 9. Axe 6. Panneau de commande 2. -
Page 43: Instructions De Mise À La Terre
INSTRUCTIONS DE MISE À LA TERRE • Cet appareil doit être mis à la terre. Le micro-ondes est équipé d'un cordon d'alimentation doté d'un fil et d'une fiche de mise à la terre. Il doit être branché dans une prise murale correctement installée et mise à... -
Page 44: Techniques De Cuisson
TECHNIQUES DE CUISSON • Chargez les aliments avec soin. Placer les parties les plus épaisses face aux bords du plat. • Attention au temps de cuisson. Faites cuire vos aliments dans le temps le plus court indiqué et ajoutez-en plus si vous en avez besoin. Les aliments trop cuits peuvent fumer ou prendre feu. -
Page 45: Panneau De Commande
PANNEAU DE COMMANDE FILTRER • Le temps de cuisson, les indicateurs de puissance et le temps sont affichés. DEFROST/CLOCK • Appuyez une fois pour régler le programme de décongélation rapide. • Appuyez deux fois pour régler le programme de décongélation en fonction du poids. - Page 46 RÉG L AGE D E L'HORLOGE Vous pouvez choisir d'afficher l'horloge au format 12 ou 24 heures en appuyant sur le bouton DEFROST/CLOCK. 1. En mode veille, appuyez et maintenez enfoncé le bouton DEFROST/CLOCK pendant 3 sec- ondes pour choisir l'horloge de 12 heures. (Si vous voulez l'horloge de 24 heures, appuyez à...
- Page 47 DÉG IVR AG E AUTOMAT IQUE Vous pouvez décongeler viandes, poissons et crustacés. Le temps de décongélation et le niveau de puissance sont automatiquement ajustés une fois le poids programmé. La four- chette de poids des aliments surgelés varie entre 100 et 800 g. 1.
- Page 48 C UIT AU GR I L Le gril est particulièrement utile pour les steaks fins, les côtelettes, les brochettes, les sau- cisses et les morceaux de poulet. La durée maximale est de 60 minutes. 1. Appuyez une fois sur le bouton GRILL/COMBI. 2.
-
Page 49: Nettoyage Et Entretien
NETTOYAGE ET ENTRETIEN • Éteignez le four et débranchez-le de la prise électrique avant de le nettoyer. • Gardez l'intérieur du four propre. Lorsque des éclaboussures ou des liquides renversés ont taché les parois intérieures, essuyez avec un chiffon humide. Des savons doux peuvent être utilisés si le four devient très sale. -
Page 50: Italiano
I TA LIANO Grazie per aver scelto il nostro forno a microonde. Prima di utilizzare questo apparecchio e per garantirne il miglior utilizzo, leggere attentamente le istruzioni. Le precauzioni di sicurezza qui elencate riducono il rischio di incendio, scosse elettriche e lesioni se seguite correttamente. - Page 51 • La pulizia e la manutenzione da parte dell'utente non devono essere effettuate da bambini a meno che non abbiano più di 8 anni e siano sorvegliati. • I bambini piccoli devono essere tenuti lontani dal microonde. • Il microonde viene utilizzato solo in modo indipendente, non è adatto per l'uso integrato.
- Page 52 • Il forno non deve essere regolato o riparato da nessuno se non da personale qualificato. Non utilizzare il forno se è danneggiato. • È molto importante che la porta del forno si chiuda correttamente e che non vi siano danni alla porta (incluse ammaccature), cernie- re e chiavistelli (rotti o allentati), guarnizioni della porta e super- fici di tenuta.
-
Page 53: Elenco Delle Parti
ELENCO DELLE PARTI 7. Griglia metallica per 1. Guida d'onda 4. Porta (non rimuovere la piastra cottura con grill 5. Sistema di chiusura di di mica che copre la guida sicurezza della porta 8. Anello rotante d'onda) 9. Asse 6. Pannello di controllo 2. -
Page 54: Istruzioni Di Messa A Terra
ISTRUZIONI DI MESSA A TERRA • Questo apparecchio deve essere collegato a terra. Il forno a microonde è dotato di un cavo di alimentazione con messa a terra e spina. Deve essere collegato a una presa a muro cor- rettamente installata e dotata di messa a terra. In caso di cortocircuito elettrico, la messa a terra riduce il rischio di scosse elettriche fornendo un filo di fuga per la corrente elettrica. -
Page 55: Tecniche Di Cottura
TECNICHE DI COTTURA • Caricare il cibo con cura. Posizionare le parti più spesse rivolte verso i bordi del piatto. • Attenzione ai tempi di cottura. Cucina il tuo cibo nel tempo più breve indicato e aggiungine altro se ne hai bisogno. Il cibo troppo cotto può fumare o prendere fuoco. •... -
Page 56: Pannello Di Controllo
PANNELLO DI CONTROLLO SCHERMO • Vengono visualizzati il tempo di cottura, gli indicatori di poten- za e il tempo. DEFROST/CLOCK • Premere una volta per impostare il programma di scongela- mento rapido. • Premere due volte per impostare il programma di scongela- mento in base al peso. - Page 57 REG OL A Z I ON E D E LL'O RO LOGI O È possibile scegliere di visualizzare l'orologio a 12 o 24 ore premendo il pulsante DEFROST/CLOCK. 1. In modalità standby, tenere premuto il pulsante DEFROST/CLOCK. per 3 secondi per sceg- liere l'orologio a 12 ore.
- Page 58 SB RIN AME NTO AU TO MAT I CO Puoi scongelare carne, pesce e crostacei. Il tempo di scongelamento e il livello di potenza vengono regolati automaticamente una volta programmato il peso. Il range di peso del cibo surgelato varia tra 100 e 800 g. 1.
- Page 59 C O T TO ALL A G RI GLI A La cottura alla griglia è particolarmente utile per bistecche sottili, braciole, spiedini, salsicce e pezzi di pollo. Il tempo massimo è di 60 minuti. 1. Premere una volta il pulsante GRILL/COMBI. 2.
-
Page 60: Pulizia E Cura
PULIZIA E CURA • Spegnere il forno e scollegarlo dalla presa elettrica prima di pulirlo. • Mantenere pulito l'interno del forno. Quando schizzi o liquidi versati hanno macchiato le pareti interne, pulire con un panno umido. È possibile utilizzare saponi delicati se il forno si sporca molto. -
Page 61: Sicherheitshinweise
D EU TSC H Vielen Dank, dass Sie sich für unsere Mikrowelle entschieden haben. Bevor Sie dieses Gerät verwenden und um eine optimale Nutzung zu gewährleisten, lesen Sie bitte die Anweisun- gen sorgfältig durch. Die hier aufgeführten Sicherheitsvorkehrungen verringern bei korrekter Befolgung das Risi- ko von Bränden, Stromschlägen und Verletzungen. - Page 62 • Kinder müssen beaufsichtigt werden, um sicherzustellen, dass sie ni- cht mit dem Gerät spielen. • Reinigung und Benutzerwartung dürfen nicht von Kindern durchge- führt werden, es sei denn, sie sind älter als 8 Jahre und werden beau- fsichtigt. • Kleine Kinder sollten von der Mikrowelle ferngehalten werden. •...
- Page 63 • Der Ofen darf nur von qualifiziertem Personal eingestellt oder repariert werden. Benutzen Sie den Backofen nicht, wenn er beschädigt ist. • Es ist sehr wichtig, dass die Backofentür richtig schließt und dass keine Schäden an der Tür (einschließlich Beulen), Scharnieren und Riegeln (gebrochen oder lose), Türdichtungen und Dichtflä- chen vorliegen.
-
Page 64: Teileliste
TEILELISTE 7. Metallgitter zum 1. Wellenleiter 3. Grill Kochen mit Grill (Entfernen Sie nicht die 4. Tür Glimmerplatte, die den 8. Rotierender Ring 5. Türsicherheitsschlosssystem Wellenleiter bedeckt) 9. Achse 6. Schalttafel 2. Glastablett INSTALLATIONSANLEITUNG • Entfernen Sie unbedingt sämtliches Verpackungsmaterial von der Innenseite der Tür. Warnung: Überprüfen Sie den Ofen auf Schäden wie eine falsch ausgerichtete oder verbogene Tür, beschädigte Türdichtungen und Dichtflächen, gebrochene oder lockere Türscharniere und Riegel sowie Dellen im Hohlraum oder an der Tür. -
Page 65: Erdungsanweisungen
ERDUNGSANWEISUNGEN • Dieses Gerät muss geerdet sein. Die Mikrowelle ist mit einem Netzkabel mit Erdungska- bel und Stecker ausgestattet. Es muss an eine ordnungsgemäß installierte und geerdete Wandsteckdose angeschlossen werden. Im Falle eines elektrischen Kurzschlusses verrin- gert die Erdung das Risiko eines Stromschlags, indem sie einen Ableitungsdraht für den elektrischen Strom bereitstellt. -
Page 66: Kochtechniken
KOCHTECHNIKEN • Laden Sie Lebensmittel vorsichtig ein. Platzieren Sie die dicksten Stellen zum Rand der Form hin. • Seien Sie vorsichtig mit der Garzeit. Kochen Sie Ihr Essen in der angegebenen kürzesten Zeit und fügen Sie bei Bedarf mehr hinzu. Zu lange gekochte Speisen können rauchen oder Feuer fangen. -
Page 67: Schalttafel
SCHALTTAFEL BILDSCHIRM • Garzeit, Leistungsanzeigen und Uhrzeit werden angezeigt. DEFROST/CLOCK • Einmal drücken, um das Schnellauftauprogramm einzustellen. • Drücken Sie zweimal, um das Auftauprogramm nach Gewicht einzustellen. Sowohl die Auftauzeit als auch die Leistung werden automatisch eingestellt, sobald die Lebensmittelkate- gorie und das Gewicht ausgewählt sind. - Page 68 U H RE IN STE LLU NG Durch Drücken der DEFROST/CLOCK-Taste können Sie wählen, ob das 12- oder 24-Stunden-Format angezeigt werden soll. 1. Halten Sie im Standby-Modus die DEFROST/CLOCK-Taste 3 Sekunden lang gedrückt, um die 12-Stunden-Uhr auszuwählen. (Wenn Sie das 24-Stunden-Format wünschen, drücken Sie erneut.) 2.
- Page 69 AUTOMATISCHE S ABTAUE N Sie können Fleisch, Fisch und Schalentiere auftauen. Die Auftauzeit und die Leistungsstufe werden automatisch angepasst, sobald das Gewicht programmiert wurde. Der Gewichts- bereich der Tiefkühlkost variiert zwischen 100 und 800 g. 1. Drücken Sie im Standby-Modus zweimal die DEFROST/CLOCK-Taste. 2.
- Page 70 M IT G R ILL ZUB E RE I TE T Grillen eignet sich besonders für dünne Steaks, Koteletts, Spieße, Würstchen und Häh- nchenteile. Die maximale Zeit beträgt 60 Minuten. 1. Drücken Sie einmal die GRILL/COMBI-Taste. 2. Drehen Sie das MENU/WEIGHT/TIME Rad, um die Zeit einzustellen. 3.
-
Page 71: Reinigung Und Pflege
REINIGUNG UND PFLEGE • Schalten Sie den Ofen aus und ziehen Sie den Stecker aus der Steckdose, bevor Sie ihn reinigen. • Halten Sie das Innere des Ofens sauber. Wenn Spritzer oder verschüttete Flüssigkeiten Flecken auf den Innenwänden hinterlassen, wischen Sie diese mit einem feuchten Tuch ab. Bei starker Verschmutzung des Ofens können milde Seifen verwendet werden. -
Page 72: Nederlands
N EDE R L AN DS Bedankt dat je voor onze magnetron hebt gekozen. Lees de instructies aandachtig door voor- dat u dit apparaat gebruikt en voor een optimaal gebruik. De hier vermelde veiligheidsmaatregelen verminderen het risico op brand, elektrische schokken en letsel als ze correct worden opgevolgd. - Page 73 • Kinderen moeten onder toezicht staan om ervoor te zorgen dat ze niet met het apparaat spelen. • Reiniging en gebruikersonderhoud mogen niet worden uitgevoerd door kinderen, tenzij ze ouder zijn dan 8 jaar en onder toezicht staan. • Houd kleine kinderen uit de buurt van de magnetron. •...
- Page 74 • Plaats geen voorwerpen tussen de voorkant van de oven en de deur en zorg ervoor dat vuil of reinigingsmiddelresten zich ophopen op de afdichtingsvlakken. • De oven mag door niemand anders dan gekwalificeerd personeel worden afgesteld of gerepareerd. Gebruik de oven niet als deze bes- chadigd is.
-
Page 75: Lijst Met Onderdelen
LIJST MET ONDERDELEN 7. Metalen rooster voor 1. Golfgeleider 4. Deur koken met grill (Verwijder de micaplaat die 5. Deur veiligheidsslot de golfgeleider bedekt niet) 8. Roterende ring systeem 2. Glazen dienblad 9. As 6. Controlepaneel 3. Grillen INSTALLATIE GIDS •... -
Page 76: Aarding Instructies
AARDING INSTRUCTIES • Dit apparaat moet geaard zijn. De magnetron is voorzien van een netsnoer met aardings- draad en stekker. Het moet worden aangesloten op een stopcontact dat correct is geïn- stalleerd en geaard. In het geval van elektrische kortsluiting vermindert aarding het risico op elektrische schokken door een ontsnappingsdraad te bieden voor elektrische stroom. -
Page 77: Kook Technieken
KOOK TECHNIEKEN • Laad voedsel voorzichtig. Leg de dikste delen naar de randen van de schaal. • Wees voorzichtig met de kooktijd. Kook je eten in de kortst aangegeven tijd en voeg meer toe als je het nodig hebt. Te gaar voedsel kan gaan roken of vlam vatten. •... -
Page 78: Controlepaneel
CONTROLEPANEEL SCHERM • Kooktijd, vermogensindicatoren en tijd worden weergegeven. DEFROST/CLOCK • Druk eenmaal om het snelle ontdooiprogramma in te stellen. • Druk twee keer om het ontdooiprogramma op gewicht in te stellen. Zowel de ontdooitijd als het vermogen worden autom- atisch ingesteld zodra de voedselcategorie en het gewicht zijn gekozen. - Page 79 K LOK IN ST E LL ING U kunt ervoor kiezen om de 12- of 24-uursklok weer te geven door op de DEFROST/CLOCK- knop te drukken. 1. Houd in de stand-bymodus de knop DEFROST/CLOCK 3 seconden ingedrukt om de 12-uursklok te kiezen. (Als u de 24-uurs klok wilt, drukt u nogmaals op.) 2.
- Page 80 AU TOMATI SCH ONT DOO I E N U kunt vlees, vis en schaal- en schelpdieren ontdooien. De ontdooitijd en het vermogen worden automatisch aangepast zodra het gewicht is geprogrammeerd. Het gewichtsbereik van de diepvriesproducten varieert tussen 100 en 800 g. 1.
- Page 81 GE KOOK T ME T GRI L Grillen is vooral handig voor dunne steaks, karbonades, kebabs, worstjes en stukjes kip. De maximale tijd is 60 minuten. 1. Druk eenmaal op de GRILL/COMBI-knop. 2. Draai aan de MENU/WEIGHT/TIME-knop om de tijd in te stellen. 3.
-
Page 82: Reiniging En Verzorging
REINIGING EN VERZORGING • Schakel de oven uit en haal de stekker uit het stopcontact voordat u deze schoonmaakt. • Houd de binnenkant van de oven schoon. Wanneer spatten of gemorste vloeistoffen vl- ekken op de binnenmuren hebben, veegt u deze af met een vochtige doek. Milde zeep kan worden gebruikt als de oven erg vuil wordt. -
Page 83: Polski
POLSKI Dziękujemy za wybranie naszej kuchenki mikrofalowej. Przed rozpoczęciem korzystania z tego urządzenia oraz w celu zapewnienia jego optymalnego wykorzystania prosimy o uważ- ne przeczytanie instrukcji. Wymienione tutaj środki ostrożności zmniejszają ryzyko pożaru, porażenia prądem elektrycz- nym i obrażeń, jeśli są przestrzegane prawidłowo. Proszę zachować instrukcję w bezpiecz- nym miejscu do wykorzystania w przyszłości, a także gwarancję, dowód zakupu i pudełko. - Page 84 • Dzieci muszą być nadzorowane, aby upewnić się, że nie bawią się ur- ządzeniem. • Czyszczenie i konserwacja użytkownika nie mogą być wykonywane przez dzieci, chyba że mają więcej niż 8 lat i są nadzorowane. • Małe dzieci należy trzymać z dala od kuchenki mikrofalowej. •...
- Page 85 • Nie umieszczać żadnych przedmiotów między przednią powierzch- nią piekarnika a drzwiczkami ani nie dopuszczać do gromadzenia się brudu lub pozostałości środka czyszczącego na powierzchniach uszczelniających. • Piekarnik nie powinien być regulowany ani naprawiany przez niko- go poza wykwalifikowanym personelem. Nie używaj piekarnika, jeśli jest uszkodzony.
-
Page 86: Lista Części
LISTA CZĘŚCI 7. Metalowa kratka do 1. Falowód 4. Drzwi gotowania z grillem (nie usuwaj płytki mikowej 5. System blokady zakrywającej falowód) 8. Obrotowy pierścień bezpieczeństwa drzwi 2. Szklana taca 9. Oś 6. Panel sterowania 3. Grill INSTRUKCJA INSTALACJI • Pamiętaj, aby usunąć wszystkie materiały opakowaniowe z wnętrza drzwi. Ostrzeżenie: Sprawdź... -
Page 87: Instrukcje Uziemienia
INSTRUKCJE UZIEMIENIA • To urządzenie musi być uziemione. Kuchenka mikrofalowa jest wyposażona w przewód zasi- lający z przewodem uziemiającym i wtyczką. Musi być podłączony do gniazdka ściennego, które jest prawidłowo zainstalowane i uziemione. W przypadku zwarcia elektrycznego uz- iemienie zmniejsza ryzyko porażenia prądem elektrycznym, zapewniając przewód odprow- adzający prąd elektryczny. -
Page 88: Techniki Gotowania
TECHNIKI GOTOWANIA • Załaduj żywność ostrożnie. Najgrubsze części układać przodem do krawędzi naczynia. • Uważaj na czas gotowania. Gotuj jedzenie w najkrótszym wskazanym czasie i dodaj więcej, jeśli tego potrzebujesz. Rozgotowane jedzenie może dymić lub zapalić się. • Przykrywaj jedzenie podczas gotowania. Przykrycie zapobiega rozpryskiwaniu i pomaga w równomiernym gotowaniu potraw. -
Page 89: Panel Sterowania
PANEL STEROWANIA EKRAN • Wyświetlany jest czas gotowania, wskaźniki mocy i czas. DEFROST/CLOCK • Naciśnij raz, aby ustawić program szybkiego rozmrażania. • Naciśnij dwukrotnie, aby ustawić program rozmrażania według wagi. Zarówno czas, jak i moc rozmrażania są ustawiane au- tomatycznie po wybraniu kategorii żywności i wagi. •... - Page 90 U STAW IE N I E Z EG AR A Możesz wybrać wyświetlanie zegara 12- lub 24-godzinnego, naciskając przycisk DEFROST/ CLOCK. 1. W trybie czuwania naciśnij i przytrzymaj przycisk DEFROST/CLOCK przez 3 sekundy, aby wybrać format 12-godzinny. (Jeśli chcesz ustawić zegar 24-godzinny, naciśnij ponownie.) 2.
- Page 91 AUTOMAT YCZ N E ROZMR A Ż ANI E Można rozmrażać mięso, ryby i skorupiaki. Czas rozmrażania i poziom mocy są automatycznie dostosowywane po zaprogramowaniu wagi. Zakres wagowy mrożonek waha się od 100 do 800 g. 1. W trybie czuwania naciśnij dwukrotnie przycisk DEFROST/CLOCK. 2.
- Page 92 GO TOWAN E Z GRILLE M Grillowanie jest szczególnie przydatne w przypadku cienkich steków, kotletów, kebabów, kiełbasek i kawałków kurczaka. Maksymalny czas to 60 minut. 1. Naciśnij jeden raz przycisk GRILL/COMBI. 2. Obróć pokrętło MENU/WEIGHT/TIME , aby ustawić czas. 3. Naciśnij przycisk MENU/WEIGHT/TIME, aby potwierdzić. A K T Y WUJ B LOK AD Ę...
-
Page 93: Czyszczenie I Pielęgnacja
CZYSZCZENIE I PIELĘGNACJA • Przed czyszczeniem wyłącz piekarnik i odłącz go od gniazdka elektrycznego. • Utrzymuj wnętrze piekarnika w czystości. Jeśli rozpryski lub rozlane płyny zabrudzą ścia- ny wewnętrzne, wytrzyj je wilgotną ściereczką. W przypadku silnego zabrudzenia pieka- rnika można użyć łagodnych mydeł. Unikaj używania sprayu lub innych ostrych środków czyszczących. - Page 96 Made in P.R.C.
Need help?
Do you have a question about the Microwave Retro and is the answer not in the manual?
Questions and answers