Table of Contents
Advertisement
Quick Links
Advertisement
Table of Contents

Related Manuals for Samsung NE63 895 S Series


Summary of Contents for Samsung NE63 895 S Series
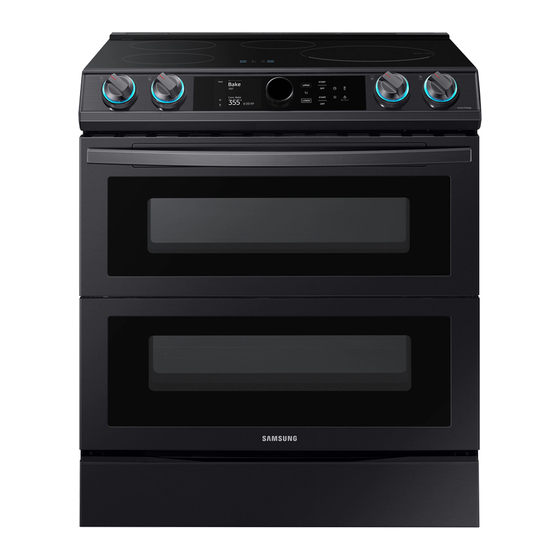
- Page 1 Electric Range User manual NE63*895*S*...
- Page 2 Anti-tip device WARNING WARNING To reduce the risk of tipping the range, the range must be secured by a properly installed Anti-Tip device. AFTER THE RANGE HAS Do not step, lean, or sit on the doors of the range. You can cause the BEEN INSTALLED, CONFIRM THAT THE ANTI-TIP DEVICE HAS BEEN range to tip, resulting in burns or serious injuries.
- Page 3 Regulatory Notice 1. FCC NOTICE • Connect the equipment into an outlet on a circuit different from that to which the receiver This equipment has been tested and found to is connected. comply with the limits for a Class B digital device, •...
- Page 4 Regulatory Notice 2. IC Notice IC RADIATION EXPOSURE STATEMENT: This equipment complies with IC RSS-102 radiation The term “IC” before the radio certification number exposure limits set forth for an uncontrolled only signifies that Industry Canada technical environment. This equipment should be installed specifications were met.
-
Page 5: Table Of Contents
Contents Important safety instructions Lock Display mode What you need to know about safety instructions Turning the oven light on and off California Proposition 65 Warning Clock For your safety Dual Door™ Induction cooktop elements Single mode Electrical safety Twin mode Child safety Cooking mode Oven... -
Page 6: Important Safety Instructions
Make sure the machine is grounded to prevent electric shock. installing, maintaining, and operating your oven. Call a Samsung service center for help. Important safety symbols and precautions Note What the icons and signs in this user manual mean: These warning signs are here to prevent injury to you and others. -
Page 7: For Your Safety
FOR YOUR SAFETY • Do not enter the oven. • Do not store items of interest to children in cabinets above When using electrical appliances, you should follow basic safety the range or on the back guard of the range. Children precautions, including the following: climbing on the range to reach items could be seriously CAUTION... - Page 8 Important safety instructions Important safety instructions • If there is a fire in the oven during self-cleaning, turn the • Use only dry potholders. Placing moist or damp potholders oven off and wait for the fire to go out. Do not force the on hot surfaces may result in burns from steam.
-
Page 9: Induction Cooktop Elements
INDUCTION COOKTOP ELEMENTS • Never leave surface elements unattended at high heat settings - Boilovers cause smoking and greasy spillovers • Be sure you know which touch control operates each that may ignite. A pan that has boiled dry may melt. surface heating unit. -
Page 10: Electrical Safety
If your appliance • Ensure that the appliance is switched off before replacing the is in need of repair, contact a Samsung authorized service lamp to avoid the possibility of electric shock. center. Failure to follow these instructions may result in •... -
Page 11: Child Safety
CHILD SAFETY OVEN • DO NOT TOUCH THE HEATING ELEMENTS OR INTERIOR WARNING SURFACES OF THE OVEN. Heating elements may be hot even • This appliance is not intended for use by young children or infirm though they are dark in color. Interior surfaces of an oven persons without the adequate supervision of a responsible adult. -
Page 12: Remote Operation
Important safety instructions Important safety instructions CAUTION • Use care when opening the door. Let hot air or steam escape before you remove food from or put food into the oven. Do not attempt to operate the oven during a power failure. If the •... -
Page 13: Self-Cleaning Ovens
SELF-CLEANING OVENS • Before operating the self-clean cycle, wipe grease and food soils from the oven. Excessive amounts of grease may Do not clean the door gasket. The door gasket is essential for ignite, leading to smoke damage to your home. a good seal. -
Page 14: Glass/Ceramic Cooking Surfaces
Important safety instructions Important safety instructions GLASS/CERAMIC COOKING SURFACES CRITICAL INSTALLATION WARNINGS • DO NOT TOUCH SURFACE UNITS OR AREAS NEAR UNITS. WARNING Surface units may be hot even though they are dark in color. • This appliance must be installed by a qualified technician or Areas near surface units may become hot enough to cause service company. -
Page 15: Critical Usage Warning
• If the appliance is flooded by any liquid, please contact your problems with the product. nearest Samsung service center. Failing to do so may result • Do not cut or remove the ground prong from the power in electric shock or fire. - Page 16 • If materials inside the oven should ignite, keep the oven When a repair is needed, contact your nearest Samsung door closed, turn the oven off and disconnect the power service center.
- Page 17 Do not open the door when the food in the oven is burning. foreign substances are inserted into any of these holes, If you open the door, it causes an inflow of oxygen and contact your product provider or nearest Samsung service may cause the food to ignite. center.
-
Page 18: Usage Cautions
Failing to do so may result in electric shock. If the door is damaged, do not use the appliance. Contact • Dishes and containers can become hot. Handle with care. a Samsung service center. Hot foods and steam can cause burns. Carefully remove • •... - Page 19 • Take care when heating liquids, such as water or other • Do not put your face or body close to the appliance while beverages. cooking or when opening the door just after cooking. Make sure to stir during or after cooking. Take care that children do not come too close to the Avoid using a slippery container with a narrow neck.
-
Page 20: Critical Cleaning Warnings
Important safety instructions Important safety instructions CRITICAL CLEANING WARNINGS • Do not use sealed containers. Remove seals and lids before cooking. Sealed containers can explode due to the build up CAUTION of pressure even after the oven has been turned off. Take care that food you are cooking in the oven does not •... -
Page 21: Introducing Your New Range
Divider (1) * Temperature probe (1) * Cleaner & cleaning pad (1) NOTE If you need an accessory marked with a *, you can buy it from the Samsung Contact Center (1-800-726-7864). 01 Control panel 02 Surface control 03 Dial knob (See... -
Page 22: Before You Begin
Before you begin Before you begin Surface cooking Clean the oven thoroughly before using it for the first time. Then, remove the About induction cooktop cooking accessories, set the oven to bake, and then run the oven at 400 °F for 1 hour. There will be a distinctive odor. - Page 23 • Do not use the induction range to dry clothes. Location of the induction cooktop elements and controls • Never store flammable materials such as aerosols and detergents in the The induction control knobs operate the induction surface elements on the cooktop drawer or cupboards under the induction cooktop.
-
Page 24: How To Set The Appliance For Cooktop Cooking
Surface cooking Digital display How to set the appliance for cooktop cooking • Power Boost : Use this setting to heat up the contents of a pot or pan faster CAUTION than the maximum power level " " (Hi). • Displayed if an element knob was set to an On position after the Sabbath •... - Page 25 Induction power boost control Induction simmer control To use the Power boost setting, turn the To use the Simmer setting, turn the control knob directly to the "9/Boost" control knob to 1. setting. The digital display will show " ". •...
-
Page 26: Before Using The Cooktop
Surface cooking Before using the cooktop CORRECT INCORRECT Use quality cookware in good condition The cookware used with the cooktop surface should have flat bottoms that make Curved or warped pan bottoms or Flat pan bottom & straight sides. good contact with the entire surface of the sides. -
Page 27: Cookware For Induction Cooking Zones
Cookware for induction cooking zones NOTE If a pan made of the correct material is centered properly on any of the active • The Induction element can only be turned on when cookware with a magnetic Cooking Zones but is too small, the affected Cooking Zone display will flash base is placed on one of the cooking zones. -
Page 28: Induction Cookware Test
Surface cooking Induction cookware test Operating noises You can test whether cookware is most efficient for induction cooktop. You may hear the following operational noises: • Cracking noises : You may hear a cracking noise when you are using cookware Press and hold(3secs) the Upper OFF made of two or more materials. -
Page 29: Temperature Detection
Better pans produce better results Temperature detection • You can recognize good pots and pans by their bases. The base should be as If for any reason the temperatures on any of the cooking zones exceeds the safety thick and flat as possible. level, then the cooking zone will automatically reduce the heat to a lower power •... -
Page 30: Suggested Settings For Cooking Specific Foods
Surface cooking Suggested settings for cooking specific foods Protecting the cooktop The figures in the table below are guidelines. The power settings required for Cleaning various cooking methods depend on a number of variables, including the quality of the cookware being used, the type, and amount of food being cooked. •... -
Page 31: Operating The Oven
Operating the oven The oven control panel How to use dial knob The dial knob can be used in the following ways: Turning Turning 1. Turning Pushing Pushing • Turning the dial knob clockwise or counterclockwise will show next or previous mode when selecting the cooking mode. -
Page 32: Lock
Operating the oven Lock Display mode This feature lets you lock Oven controls, Cooktop, and Oven door so they cannot be Sleep mode activated accidentally. The control panel enters Sleep mode if the oven is not used for a while. How to activate the Lock feature In Sleep mode, the control panel is inactive, displaying only the time, until it is reactivated by the user. -
Page 33: Clock
Clock Dual Door™ You must set the clock correctly to ensure the automatic features work properly. This oven has a unique Dual Door™ that is hinged in the middle. If you have This product supports two time formats: 12-hour (default) and 24-hour. inserted the divider and divided the oven in two (so it is in Twin Mode), you only need to open the top half to access the upper oven. -
Page 34: Single Mode
Operating the oven How to use the full door Single mode Hold the lever-less area of the handle, STEP 1 and then pull. Put all ingredients in a heat-safe container. STEP 2 This will open the whole door as shown. Select a cooking mode, and then start preheating. -
Page 35: Twin Mode
Twin mode STEP 4 Place a wire rack into the oven, arrange STEP 1 food containers on the racks. Put all ingredients in a heat-safe container. STEP 2 Insert the divider into the 4th rack position and push in until the range beeps. STEP 5 Close the door and start cooking. -
Page 36: Cooking Mode
Operating the oven Cooking mode NOTE To use Twin mode operation, insert the divider. • • Make sure to close the door before you • The cooling fan automatically runs for a certain amount of time after cooking start cooking. is complete. - Page 37 Twin mode Default Temperature Temp. Set Cook Mode temperature Delay Start range (°F) Probe Time (°F) Bake 175-550 Broil Hi-Lo Convection 175-550 Bake Convection 175-550 Insert the divider into the cavity. Roast Tap Upper or Lower to select the cooking zone. Air Fry 350-500 Select a mode using the dial knob.
-
Page 38: Twin Mode Temperature Setting Ranges
Operating the oven Twin Mode Temperature setting ranges Default Temperature Temp. Set Cook Mode temperature Delay Start Your oven has different temperature setting ranges when you use the upper and range (°F) Probe Time (°F) lower oven simultaneously. The range for each oven changes, depending on the function and temperature setting of the other oven. -
Page 39: Using The Oven Racks
Using the oven racks (O - Available, X - Not available) Upper Oven Lower Oven Single Mode - Full Oven Available Setting Function and Temp. Your oven range comes with 2 racks and 7 rack positions. The rack positions are Broil Bake and Roast... - Page 40 Operating the oven Twin Mode - Two Ovens Inserting and removing an oven rack In Twin mode, the divider separates the oven into an upper and lower oven. To insert an oven rack The upper and lower oven each have 3 rack positions. Place the rear end of the rack on a rack guide.
-
Page 41: Using The Gliding Rack
Before using the racks Using the gliding rack The rack has stops that need to be placed correctly on the supports. These stops The fully extendable Gliding rack makes food preparation easier, especially when will keep the rack from coming completely out. you are preparing heavier dishes. -
Page 42: Using The Divider
Operating the oven Removing the Gliding rack Using the divider • With the Gliding rack in the "Closed" • To use twin mode operation, insert the divider. position and the oven off and cool, • You cannot use the Self-Clean or Steam-Clean functions when the divider is grasp the rack and frame and pull both installed in the oven cavity. -
Page 43: Recipe Guide
Recipe guide Convection cooking The convection fan at the back of the oven circulates hot air evenly throughout the CAUTION oven cavities so that food is evenly cooked and browned in less time than with Always use this cooking mode with the regular heat. - Page 44 Operating the oven Broiling guide Convection baking • Cookies bake best when cooked on flat cookie sheets. • When convection baking using a single rack, place the NOTE rack in rack position 3 or 4. (In Twin mode, position A •...
- Page 45 Air fry Air fry cooking guide This feature uses hot air for crispier and healthier frozen or fresh foods without, or Item Amount Temperature Time less oil, than normal convection modes. For best results, use this mode on a single Potatoes oven rack and place the Air fry tray on the position 3.
- Page 46 Operating the oven Dehydrate Item Amount Temperature Time Dehydrate dries food or removes moisture from food via heat circulation. After Poultry drying the food, keep it in a cool and dry place. For fruit, adding lemon (or Fresh Drumsticks 40-45 oz 425 °F-450 °F 30-35 min pineapple) juice or sprinkling sugar on the fruit helps the fruit retain sweetness.
-
Page 47: Temperature Probe (Single Mode Only)
Temperature probe (Single Mode Only) Insert the temperature probe plug into the socket on the top side wall of the The temperature probe lets you cook roasts and poultry to the exact internal oven. temperature you want, taking the guess work out of determining whether a piece Select the cooking operation of meat is done or not. -
Page 48: Cooking Options
Operating the oven Temperature table Cooking options Type of Food Internal temperature (°F) CAUTION Rare 140-150 Food that can easily spoil, such as milk, eggs, fish, poultry, and meat, should be chilled in a refrigerator before they are placed in the oven. Even when chilled, Beef / Lamb Medium 160-170... -
Page 49: Special Features
Delay Start Special features The Delay Start function lets you use the kitchen timer to automatically start and stop another cooking program. You can set Delay Start so that it delays the The Sabbath feature (Single mode only) automatic start of a cooking operation you select by up to 12 hours. (For use on the Jewish Sabbath and Holidays) Mode: Bake / Convection Bake / Convection Roast / Air Fry / Dehydrate / Self-clean Use this option only for baking on the Jewish Sabbath and Holidays. -
Page 50: More Functions
Operating the oven Start a Bake Mode. (Single mode only.) More functions , and select the Sabbath feature. Tap the button on the control panel, and then turn the dial knob to change Turn the dial knob to select On/Off. various settings for your oven. - Page 51 Timer Setting Description The timer gives you an extra timer you can use to time cooking tasks, such as Set the clock to display the current date. Set Date boiling eggs. It does not, however, start or stop any cooking operation. You can set NOTE the timer from 1 minute to 9 hours and 59 minutes.
- Page 52 Operating the oven Deleting the favorite cook settings 12hr energy saving , and select Favorites using the dial knob. This will automatically turn off the oven 12 hours after baking starts or 3 hours Select Delete. after broiling starts. Select the favorite cook setting you want to delete. , and select 12hr energy saving using the dial knob.
-
Page 53: System Settings
System Settings Temp. Unit (°F / °C) Change the temperature format of the oven to Fahrenheit or Celsius. Tap and hold for 3 sec, on the control panel, and then Turn the dial knob to The default is Fahrenheit. change various settings for your oven. Tap and hold for 3 sec. -
Page 54: Smart Control
Operating the oven Operating the oven Default Cavity Smart control One cavity will be selected as a default in twin mode when oven turns on. Tap and hold for 3 sec. How to connect the oven Select Default Cavity using the dial knob. Download and open the SmartThings app on your smart device. - Page 55 To control the oven remotely WI-FI On/Off Press Smart Control appears in the display. The oven can now be controlled If you set the WI-FI mode to Off, mobile devices cannot connect to the range. Tap and hold for 3 sec. remotely with a connected remote device.
-
Page 56: Voice Control
Bixby Here’s how to link SmartThings account into Amazon Alexa or Google Assistant. Start conversation with Bixby on SAMSUNG mobile by saying “Hi Bixby” or by SmartThings App and Alexa App(or Google Assistant App) Should be installed on pressing the side key. -
Page 57: Maintaining Your Appliance
Maintaining your appliance Self-cleaning Function “Alexa” “Ok Google” This self-cleaning oven uses high temperatures (well above cooking temperatures) Check Temp • What is the temperature of • What is the temperature of to burn off leftover grease and residue completely or reduce them to a finely the oven[Device name]? the oven[Device name]? powdered ash that you can wipe away with a damp cloth. - Page 58 Maintaining your appliance Before a self-cleaning cycle How to run a self-cleaning cycle Make sure the oven door is closed completely and unlocked. Turn off all oven We recommend venting your kitchen • and cooktop functions. with an open window or using a , and select Cleaning >...
-
Page 59: Steam-Cleaning
After a self-cleaning cycle NOTE • You may notice some white ash in the oven. Wipe it up with a damp cloth When steam-cleaning, use exactly 10 oz. of water since this produces the best after the oven cools. (If white spots remain, remove them with a soap-filled results. -
Page 60: Care And Cleaning Of The Oven
For more difficult residue and built-up grease, apply a liquid detergent directly • To order graphite lubricant., call Samsung customer care at 1-800-SAMSUNG onto the area and leave for 30 to 60 minutes. Wipe with a damp cloth and dry. - Page 61 Air fry tray Shake the graphite lubricant before opening it. Starting with the left (front To keep the Air fry tray clean, remove them from the cavity, and soak them in and back) slide mechanism of the rack, Lukewarm soapy water. Then, scour soil off of the Air fry tray using a plastic place four (4) small drops of lubricant scouring pad.
-
Page 62: Care And Cleaning Of The Glass Cooktop
Maintaining your appliance Oven door Care and cleaning of the glass cooktop Use soap and water to thoroughly • Don’t hand Don’t hand clean the top, sides, and front of the Normal daily use cleaning clean the clean the oven door. Rinse well. You may use a Use only a ceramic cooktop cleaner. - Page 63 Removing burned-on residue Removing heavy, burned-on residue Allow the cooktop to cool. Allow the cooktop to cool. Spread a few drops of ceramic cooktop Use a single-edge razor-blade scraper cleaner on the entire burned residue at approximately a 45° angle against area.
-
Page 64: Removing And Reinstalling The Oven Door
Maintaining your appliance Cleaning the cooktop seal Removing and reinstalling the oven door To clean the seal around the edges of the glass, lay a wet cloth on it for a few How to remove the door minutes, then wipe clean with a nonabrasive You can remove the upper door the same way you remove the full door. -
Page 65: Removing And Reinstalling The Storage Drawer
How to reinstall the door Removing and reinstalling the storage drawer You can replace the upper door the same way you replace the full door. Slide open the drawer until it stops. Firmly grasp both sides of the door at the top. Locate the roller guide clips on either With the door at the same angle as the removal position, slide the indentation side. -
Page 66: Changing The Oven Light
The oven light is a standard 40-watt appliance bulb. It will come on when the oven Samsung works hard to ensure that you don’t have problems with your new door is open. When the oven door is closed, press the pad to turn it on or off. - Page 67 CONTROL DISPLAY Problem Possible cause Solution The surface unit The element will cycle on This is normal operation, Problem Possible cause Solution frequently cycles and off to maintain the and not a system failure. The display goes A fuse in your home may Replace the fuse or reset on and off.
- Page 68 Troubleshooting OVEN Problem Possible cause Solution Brown streaks or Boilovers have been cooked Wait until the surface • Problem Possible cause Solution specks. onto the surface. cools down. Then, The oven will The range is not completely Make sure the electrical use a single-edge not turn on.
- Page 69 Problem Possible cause Solution Problem Possible cause Solution The oven The oven controls have not Refer to the section on using Food does not The serving size may not be Refer to the cooking guide for smokes been set properly. the broiler starting on page broil properly.
- Page 70 Troubleshooting Problem Possible cause Solution Problem Possible cause Solution Excessive There is excessive soiling in Press OFF. Open the windows Strong odor. An odor coming from the Operate the oven empty on smoking during the oven. to rid the room of smoke. insulation around the inside the bake setting at 400 °F for a self-cleaning...
-
Page 71: Information Codes
Information codes Displayed Possible cause Solution code OVEN The sub PCB sensor is open when the oven is operating. Displayed C-22 Possible cause Solution Press OFF, and then restart There is a short in the sub PCB code the oven. If the problem sensor. - Page 72 Troubleshooting COOKTOP Displayed Possible cause Solution code Displayed code Possible cause Solution If the power connection is Turn the knob to Off, plugged in improperly, that and then turn it to the This error message appears code appears on the display. setting you want again.
-
Page 73: Warranty (U.s.a)
If the product is located in an area where service by a SAMSUNG authorized servicer is not available, you may be responsible for a trip charge or required to bring the product to a SAMSUNG authorized service center for service. - Page 74 During the applicable warranty period, a product will be repaired, replaced, or EXCLUSION OF IMPLIED WARRANTIES the purchase price refunded, at the sole option of SAMSUNG. SAMSUNG may use IMPLIED WARRANTIES, INCLUDING THE IMPLIED WARRANTIES OF new or reconditioned parts in repairing a product, or replace the product with MERCHANTABILITY OR FITNESS FOR A PARTICULAR PURPOSE, ARE LIMITED TO a new or reconditioned product.
-
Page 75: Warranty (Canada)
Warranty (CANADA) PLEASE DO NOT DISCARD. THIS PAGE REPLACES THE WARRANTY PAGE IN THE SAMSUNG will repair or replace this product, at our option and at no charge USE & CARE GUIDE as stipulated herein, with new or reconditioned parts or products if found to be defective during the limited warranty period specified above. -
Page 76: Appendix
DAMAGES CAUSED BY THE USE, MISUSE OR INABILITY TO USE THIS PRODUCT, REGARDLESS OF THE LEGAL THEORY ON WHICH THE CLAIM IS BASED, AND EVEN IF SAMSUNG HAS BEEN ADVISED OF THE POSSIBILITY OF SUCH DAMAGES. NOR SHALL RECOVERY OF ANY KIND AGAINST SAMSUNG BE GREATER IN AMOUNT THAN THE PURCHASE PRICE OF THE PRODUCT SOLD BY SAMSUNG AND CAUSING THE ALLEGED DAMAGE. - Page 77 Memo...
- Page 78 How-to Videos and Live Shows * Requires reader to be installed on your smartphone Please be advised that the Samsung warranty does NOT cover service calls to explain product operation, correct improper installation, or perform normal cleaning or maintenance. QUESTIONS OR COMMENTS?
Need help?
Do you have a question about the NE63 895 S Series and is the answer not in the manual?
Questions and answers