Advertisement
Quick Links
Instructions For Following Product(s)
• All JD Waterfall Tables (07WTM)
Products Required But Ordered Separately
• None
Related Instructions
• 00D00010 - Tabletop AC+USB 60W Charge
• 00D00011 - Undermount USB 36W Charge
Tools Required
Pencil, Pen or Marker *
Open End Wrench
7/16"
Rubber Mallet *
* May Be Needed
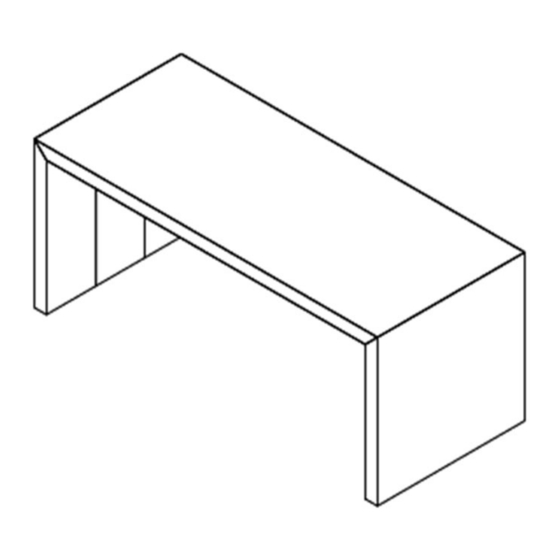
In The Box (Supplied By DatesWeiser): One-Piece Table
Instructions For Table JD Waterfall
Instruction Number: 07D00009-R01
Tape Measure *
Open End Wrench
External Hex Driver
1/2"
Wood Block *
Level
Driver\Drill Gun
Internal Hex Driver
7/16"
3/16"
Driver Bit
Phillips #2
Allen Key
4mm
Page 1 of 11
Advertisement

Related Manuals for DATESWEISER JD Waterfall

Summary of Contents for DATESWEISER JD Waterfall
- Page 1 Open End Wrench Open End Wrench External Hex Driver Internal Hex Driver Allen Key 7/16" 1/2" 7/16" 3/16" Rubber Mallet * Wood Block * * May Be Needed In The Box (Supplied By DatesWeiser): One-Piece Table Page 1 of 11...
- Page 2 Instructions For Table JD Waterfall In The Box (Supplied By DatesWeiser): Two-Piece Table In The Box (Supplied By DatesWeiser): Power And Connectivity – Cable Tray In The Box (Supplied By DatesWeiser): Power And Connectivity – Options Page 2 of 11...
- Page 3 Instructions For Table JD Waterfall One-Piece Table Note: No Assembly required as 1-Piece Table comes fully assembled. 1.1 Table Leveling 1.1.1 Once properly positioned, use a level to measure and adjust the levelers to level the table. [Fig. 01] 1.1.2 For installation of standard Power and Connectivity options, see Section 3.
- Page 4 Instructions For Table JD Waterfall Two-Piece Table 2.1 Table Assembly 2.1.1 Align table halves (BA) to each other. With the 4mm Allen Key provided, use Zip-Bolt (BF) 4 places to begin the connection process using the factory machined pockets. One on each inside edge and two on the top underside. [Fig. 02]...
- Page 5 Instructions For Table JD Waterfall Two-Piece Table [Continued] 2.1.2 Using a 3/16" Internal Hex Socket and 1/2" Wrench, secure Flat Stiffener Rail (BD) and Angled Stiffener Rail (BE) to the Centre Ribs using Button Head Cap Screw (BG) and Hex Nut (BJ) with Flat Stiffener and Button Head Cap Screws on the outside surface.
- Page 6 Instructions For Table JD Waterfall Two-Piece Table [Continued] 2.1.4 Use a level to measure and adjust levelers on Ends and Shipping Frames to level the table while continually verifying that the edges and top remained aligned. If necessary, make further adjustments to the Zip-Bolts and\or Stiffeners during the leveling process.
- Page 7 Instructions For Table JD Waterfall Two-Piece Table [Continued] 2.1.5 Using a #2 Phillips Driver, unscrew and discard all shipping frames. [Fig. 05] 2.1.6 With Shipping Frames now removed, use a 7/16" Wrench and External Hex Driver to install Threaded Rod (BC) and Hex Nut (BK) thru holes on X-Braces.
- Page 8 Instructions For Table JD Waterfall Two-Piece Table [Continued] 2.2 Final Table Leveling 2.2.1 Once properly positioned, verify all top and edge seams are still aligned and flush. Loosen, adjust and re-tighten Zip-Bolts and\or Stiffeners as required if adjustments are needed. A Rubber Mallet with a block of wood to protect the table from damage can be used if it helps.
- Page 9 Instructions For Table JD Waterfall End Access Panel - Adjustment, Install And Removal Note: The End Access Panel (BB) can be mounted flush or raised 1/2" to allow for cables to pass through from the floor. 3.1 To Flush End Access Panel 3.1.1 Using a #2 Phillips Driver, loosen the screws securing the Support Bracket on each side and lower it until the slots top out on the...
- Page 10 Instructions For Table JD Waterfall Power And Connectivity - Cable Tray (If Equipped) Note: When Power And Connectivity is specified, one or more Cable Trays to be fitted between the Centre Ribs will be provided to help manage cables under the top.
- Page 11 Instructions For Table JD Waterfall Power And Connectivity – Options (If Equipped) 5.1 Tabletop AC And USB-A\C 60W Charging 5.1.1 For general installation of Tabletop AC and USB-A\C 60W Charging, see instruction 00D00010. 5.1.2 Cable management of Tabletop AC And USB-A\C 60W Charging, see Figure 13.
Need help?
Do you have a question about the JD Waterfall and is the answer not in the manual?
Questions and answers