Advertisement
Quick Links
DIFFUSER INSTALLATION GUIDE
RONDO-100/ RONDO-125 / RONDO-160
Diffuser preparation
.........................................................
Installation Method No. 1
(connected via a flexible corrugated pipe)
Installation Method No. 2
(connection via a standard plenum box when the
ceiling panels have not yet been attached)
Installation Method No. 3
(connection via a standard plenum box when the
ceiling panels have already been attached)
Integrated diffuser finishing
Diffuser maintenance
...................................................
DIFFUSER PREPARATION
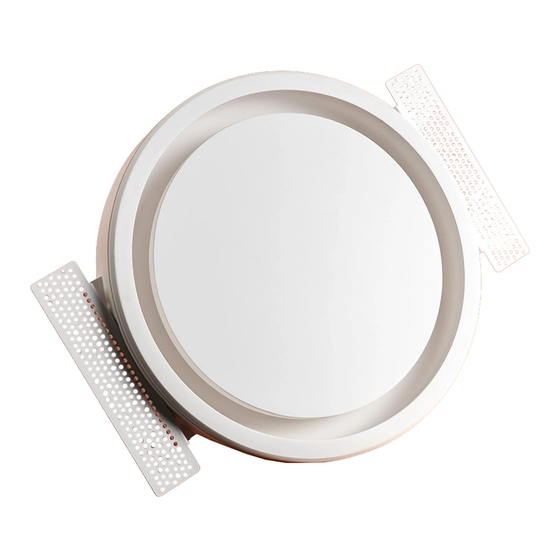
Remove the diffusers and side brackets from the boxes. Inspect
each diffuser for any cracks in the housing. Leave the covers
securely in the boxes (Image 1), as they will only be needed when
starting the painting.
1
Use screws to attach the side fasteners. They can be applied to 1
or 2 layers of plasterboard.
1 layer: the element is placed against the edge (Image 2);
2 layers: the fastening is aligned with the protruding brim in the
housing (Image 3).
2
3
page 9
page 10
...........................................
page 11
..........................................
page 13
...........................................
page 15
......................................
page 16
SELECTION OF THE INSTALLATION METHOD
•
Three installation methods are possible. You
will recognise which method is suitable for you
by looking at the images depicting different
situations. Choose the installation method
that best suits your situation and follow the
appropriate instructions.
INSTALLATION METHOD No. 1 (page 10)
METAL DUCT SYSTEM
Connection: via a flexible corrugated pipe.
INSTALLATION METHOD No. 2 (page 11)
75 mm PLASTIC DUCT SYSTEM
Connection: via a plenum box (metal/plastic).
Ceiling plasterboards are not yet attached.
INSTALLATION METHOD No. 3 (page 13)
75 mm PLASTIC DUCT SYSTEM
Connection: via a plenum box (metal/plastic).
Ceiling plasterboards are attached.
www.ergovent.com
EN
9
Advertisement

Related Manuals for ergovent RONDO-125


Summary of Contents for ergovent RONDO-125
- Page 1 DIFFUSER INSTALLATION GUIDE RONDO-100/ RONDO-125 / RONDO-160 Diffuser preparation page 9 ............Installation Method No. 1 page 10 ........... (connected via a flexible corrugated pipe) Installation Method No. 2 page 11 .......... (connection via a standard plenum box when the ceiling panels have not yet been attached) Installation Method No.
- Page 2 Attach the flexible corrugated pipe to the diffuser connector. A screws directly through the plasterboard into the side fasteners clamp or plastic strap will suffice (Image 1.3). (Image 1.6). The diffuser is ready for finishing. Go to the finishing instructions (page 15). www.ergovent.com...
- Page 3 The connecting pipes must be shortened by measuring Distance A from the level of the lower profile surface (Images 2.7 and 2.8). min 7cm For 1 layer of plasterboard, A = 4,5 cm For 2 layers of plasterboard, A = 3,5 cm min 6cm www.ergovent.com...
- Page 4 Cut out a hole in the required place and attach the board using screws (Image 2.12). 2.15 2.12 (RONDO 100/125) A=242 mm The diffuser is ready for finishing. (RONDO 160) A=300 mm Go to the finishing instructions (page 15). www.ergovent.com...
- Page 5 Rotate the diffuser 90 degrees so that the fasteners rest on the fasteners must be cut out only in the lower plasterboard (Image plasterboard (Image 3.11 and 3.13). If two layers of plasterboard 3.5). are being used, the fasteners must end up between the two boards (Image 3.12). www.ergovent.com...
- Page 6 3.14 3.18 Gypsum ceiling diffuser 0-1mm DIFFUSER ATTACHMENT The diffuser is fastened with self-tapping screws (Image 3.15). Insert the screws directly through the plasterboard into the side The diffuser is now ready for finishing (Image 3.19). fasteners. 3.15 3.19 www.ergovent.com...
-
Page 7: Finishing Instructions
Use a sharp knife to cut it flush with the inner as priming it will suffice. Paint only the visible surfaces of the edge of the diffuser, while making sure not to damage the gypsum centre cover (Image 4.6). housing (Image 4.3). www.ergovent.com... - Page 8 Accumulated dust can also be removed with a vacuum cleaner. Avoid damaging the painted surface. The diffuser installation is now complete (Image 4.9). 4.11 www.ergovent.com...
Need help?
Do you have a question about the RONDO-125 and is the answer not in the manual?
Questions and answers