Table of Contents
Advertisement
Quick Links
Advertisement
Table of Contents

Related Manuals for Evolveo StrongPhone X5


Summary of Contents for Evolveo StrongPhone X5
- Page 1 MANUAL MODEL VERSION / DATE StrongPhone X5 l. / 18. 8. 2023...
-
Page 2: Table Of Contents
Table of Contents INTRODUCTION ..........3 THE MOST UP-TO-DATE VERSION OF THE USER MANUAL ............. 4 SAFETY WARNINGS AND INSTRUCTIONS ..... 4 SAFETY WARNINGS AND INSTRUCTIONS (BATTERIES): ............. 7 PACKAGING CONTENT ......... 7 SPECIFICATIONS ..........8 DESCRIPTION OF INDIVIDUAL PARTS ....9 BEFORE FIRST USE ........... -
Page 3: Introduction
INTRODUCTION WELCOME TO THE EVOLVEO FAMILY OF PRODUCTS - Before putting this product into operation, please read this entire user manual carefully through to the end, even if you are familiar with the use of a similar type of product in the past. -
Page 4: The Most Up-To-Date Version Of The User Manual
QR code shown below with your mobile phone: SAFETY WARNINGS AND INSTRUCTIONS - The EVOLVEO StrongPhone X5 is designed to be significantly more durable than a regular mobile phone, but it is not indestructible. - Page 5 closed; the phone is not submerged more than 1.5 metres for more than 60 minutes; the water must be fresh. Occasional use in chlorinated swimming pools is possible provided you rinse the phone with clean water afterwards. Do not use in seawater or saltwater pools. Improper use of the equipment will void the warranty.
- Page 6 - all of these activities affect the functionality and tightness of the phone. - EVOLVEO StrongPhone X5 has been tested in accordance with EU standards for radio waves, WiFi and Bluetooth. If you want to limit the effect of radio frequency energy, limit the time of direct exposure to the radiation, e.g.
-
Page 7: Safety Warnings And Instructions (Batteries)
(more than 3 months), remove the batteries from the appliance, otherwise there is a risk of them leaking into the battery compartment and irreparably damaging the product. PACKAGING CONTENT • StrongPhone X5 - Batteries - Charging adapter - User manual - Quick User Guide... -
Page 8: Specifications
SPECIFICATIONS - Phone frequency: GSM 900, 1800 MHz - SIM cards: 2 SIM (miniSIM). Two SIM cards in standby mode - News: SMS • Bluetooth: V3.0 - Display: 2.4'', colour LCD display, 240x320 px - Camera: 0.3 MPx - FM radio: 87.5-108.0 MHz •... -
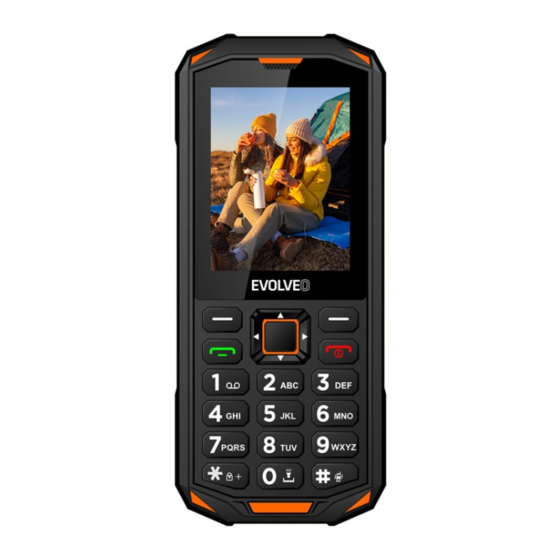
Page 9: Description Of Individual Parts
DESCRIPTION OF INDIVIDUAL PARTS... - Page 10 Handset (receiver) SOS button Control buttons Flashlight (right/left/up/down) Left function button Camera Call button Speaker Central button (OK) Battery cover Right function button Hole for lanyard End of call button (on/off) # button Cover with USB-C charging port and The * button 3.5 mm Jack port Volume buttons PRINTS...
- Page 11 Press this button to start a call to the selected phone number. You will receive Call button an incoming call. In standby mode, you can access your call history. Switching off the phone: Hold the standby button longer to turn off the phone.
- Page 12 international calls. In text writing mode, it allows you to insert special characters Button 0 - Long press the button to switch the flashlight flashlight on/off Switches the way you enter characters in Button # (16) text mode. Change profiles (long press). SOS button Long press the button to activate the (10)
- Page 13 Missed calls Inserted memory card The alarm is on Normal profile is on Silent profile is on Meeting profile is on Outdoor profile is on...
-
Page 14: Before First Use
The keyboard is locked Bluetooth is active BEFORE FIRST USE 1) Check the product for protective stickers, films or other materials designed only for transport to the customer to protect the phone from scratches or other damage. Remove such before use. SERVICE BATTERY INSERTION Follow these instructions to correctly and safely insert the... - Page 15 4. Screw the four screws on the battery cover until they are tight. INSERTING A SIM CARD AND A MICROSD MEMORY CARD 1. Remove the four screws on the battery cover. 2. Remove the battery cover. 3. Remove the battery. 4.
-
Page 16: Basic Functions
can set the keypad to lock automatically in Menu/Settings/Phone settings/Show properties/Automatic keypad lock CALLING Enter the desired number on the keypad and then press the green button (4) to make the call. To answer an incoming call, press the green button (4). To reject the call, press the red button (7). - Page 17 ADDING A PHONE NUMBER TO THE PHONE BOOK 1. Go to Phonebook → Add new entry. 2. Select the storage (On SIM or To phone). 3. Enter your name and phone number. 4. Press the left function button (3) and select Option → Save or Cancel, or press the central button (5) and save directly.
- Page 18 CALL SETTINGS Press the left function key (3) to open the settings for each of your SIM cards, such as call waiting and call forwarding, and you can also select the answer mode and set blocked numbers. Call waiting: Specify whether to signal a new incoming call with a call waiting tone when a call is already in progress.
-
Page 19: Profiles
BLOCKED NUMBERS - BLACKLIST You can block up to 20 phone numbers. If you use this feature, you will not be able to reach the phone numbers in the blocked numbers list. The caller will automatically receive a signal that your number is busy. ADD A PHONE NUMBER TO THE BLOCKED NUMBERS 1. -
Page 20: Settings
SETTINGS Left function button (3) /Menu/Settings Phone settings 1. Time and date: 2. Language: set the language of your phone 3. Typing language: setting the language when typing 4. Display: allows wallpaper setting, screen lock, keypad and LCD backlight, date and operator display on the home screen 5. -
Page 21: Multimedia
MULTIMEDIA Your mobile phone can display and play various forms of multimedia content (photos, music and videos). Various applications are available. 1. Use the left function button (3) /Menu/Multimedia to enter the menu 2. To play music stored on your device or on a micro-SD memory card, select Audio player. -
Page 22: Fm Radio
FM RADIO The mobile phone is equipped with an integrated radio that allows you to receive FM radio stations. 1. Use the left function button (3) /Menu/FM radio to enter the menu 2. Go to FM Radio/Options where you can either manually enter or automatically search for a channel, set to play in the background. -
Page 23: Organizer
ORGANIZER Use the left function key (3) /Menu/Organiser to enter the menu SOS SETTINGS This mobile phone is equipped with an SOS function - if you long press the side button and hold for 1.5 seconds, the phone will automatically call and/or send a text message to your selected emergency contacts. -
Page 24: Calendar
via SOS message after triggering the SOS alarm. The phone uses the GSM mobile network to determine its location. The accuracy of positioning depends on the density of GSM network coverage - in cities the accuracy is tens to hundreds of metres, outside cities the accuracy is significantly lower. -
Page 25: Budík
BUDÍK Five deactivated alarms are set by default. You can activate one, more or all of them as required. You can customize the settings for each alarm. 1. Go to Organiser/Alarm clock/Select alarm settings/Edit 2. Select Status/On to turn it on. 3. -
Page 26: Notes
The warranty does NOT cover: - Installing firmware other than the one originally installed on the EVOLVEO phone. - Electrical or mechanical damage to your phone caused by improper use (e.g. cracked display, cracked front or back cover, damaged USB power connector, SIM card slot, microSDHC card slot, headphone input, etc.) - Page 27 - Intentional damage. Warranty and post-warranty service Repairs and servicing can only be carried out at an authorized service point for EVOLVEO products (more at www.evolveo.com), otherwise you may damage your mobile phone and lose your warranty. Disposal: The crossed-out container symbol on...
- Page 28 The full text of the Declaration of Conformity can be found at http://ftp.evolveo.com/ce/ Importer / Manufacturer Abacus Electric, s.r.o. Planá 2, 370 01, Czech Republic Made in China Copyright © Abacus Electric, s.r.o. www.evolveo.com www.facebook.com/EvolveoCZ All rights reserved. The appearance and technical specifications of the product are subject to change without notice.
Need help?
Do you have a question about the StrongPhone X5 and is the answer not in the manual?
Questions and answers