
Related Manuals for LELY Discovery Collector C2


Summary of Contents for LELY Discovery Collector C2
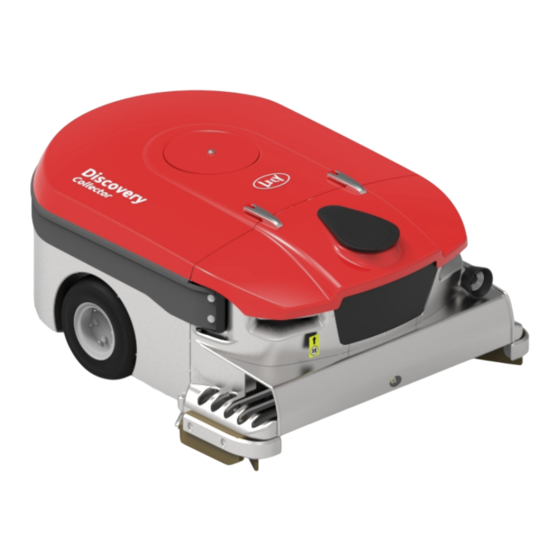
- Page 1 Lely Discovery Collector C2 Mobile Barn Cleaner Operator Manual en-US - English Original 5.4008.8573.0 B Lely Industries N.V. www.lely.com...
- Page 2 in n o vato rs in ag ric u ltu re INTENTIONALLY BLANK...
- Page 3 Lely cannot accept liability for any damage that might arise from errors or omissions in this publication. For more information on the right on exclusive use please refer to our trademark notice on www.lely.com. Copyright © 2024 Lely Holding B.V.
- Page 4 in n o vato rs in ag ric u ltu re INTENTIONALLY BLANK Trademarks, Copyright and Disclaimer...
- Page 5 in n o vato rs in ag ric u ltu re List of included Amendments Issue Date Revision Chapter(s) Remarks (yyyy/mm) 2024/01 Initial release 2021/10 Validation version List of included Amendments...
- Page 6 in n o vato rs in ag ric u ltu re INTENTIONALLY BLANK List of included Amendments...
- Page 7 Store this manual in a safe place for future reference. All information in this manual has been compiled with care. Lely shall not be liable for errors or faults in this manual. The recommendations are meant to serve as guidelines. All instructions, pictures and specifications in this manual are based on the latest information that was available at the time of publication.
- Page 8 in n o vato rs in ag ric u ltu re Figure 1. Type and serial number plate Type number Serial number Figure 2. Type and serial number plate Preface...
- Page 9 Technician Training All the technicians certified by Lely Industries have completed an approved training program, and passed written and practical examinations during and at the end of the training program. The training is given by...
- Page 10 in n o vato rs in ag ric u ltu re Left, Right, Rear and Front The positions left, right, rear and front in this manual refer to either: The machine, as seen in the driving direction. • The particular component, as seen when standing in front of it. •...
-
Page 11: Table Of Contents
Table of Contents The Lely Discovery Mobile Barn Cleaner ............1-1 Intended Use . - Page 12 . . . 5-6 5.4.2 Put the Machine into Operation and Take it Out of Operation with the Lely Control Plus Application ................5-7 Control the Machine with your Smartphone .
- Page 13 in n o vato rs in ag ric u ltu re Clean the Manure Tank ...............6-10 Hoist the Machine .
- Page 14 in n o vato rs in ag ric u ltu re INTENTIONALLY BLANK Table of Contents...
-
Page 15: The Lely Discovery Mobile Barn Cleaner
The Lely Discovery Mobile Barn Cleaner Intended Use The Lely Discovery Collector C2 is intended solely for use in an agricultural barn with closed concrete or emission reducing floors that have only small openings. The machine is used to take in manure from cows and to release this manure in a dump pit that is specially designed for this purpose. - Page 16 INTENTIONALLY BLANK The Lely Discovery Mobile Barn Cleaner...
-
Page 17: Safety
Safety The Lely Discovery is an autonomous driving machine. Therefore it is of the utmost importance to obey all safety instructions. Signal Icons Note the use of the signal words DANGER, WARNING and CAUTION with the safety messages. The signal... -
Page 18: Safety Instructions
Safety Instructions Contact your nearest Lely service provider if you have any questions concerning the safety instructions. 2.2.1 Stop the machine in case of an emergency Stop the machine with the pause button Push the pause button (1). -
Page 19: How To Act In Case Of An Acute Problem With The Battery
in n o vato rs in ag ric u ltu re Draw the slider to the left position. When the machine was moving, it stops immediately. It also stops taking in manure and sprinkling • water. The color of the slider turns to white •... -
Page 20: General Safety
Call the emergency number for the fire department and inform them about the situation. The machine has a 24V Li-ion rechargable battery. Call your Lely service provider to let a service technician remove the battery and have it collected by a specialized waste disposal company. See also Disposal of the battery (see page 9-1). -
Page 21: Electrical Safety
Have the charging station installed by a certified technician according to local rules and regulations. • • Have any damaged electrical lines, conduits, switches and components replaced immediately by a Lely technician. Before you start to clean or do maintenance on the machine, make sure it is not connected to the •... -
Page 22: Installation Safety
2.2.6 Installation Safety The machine, water station, dump pit with safeguards and charging station are installed by Lely. Do not • change anything to the installation. This includes the water supply and the tap water system and the connections to the power supply. -
Page 23: Safety Devices
in n o vato rs in ag ric u ltu re Only remove the air filter from the manure tank when the machine is in a well ventilated area. Be • aware of toxic fumes that may release from the manure tank. Before removing the air filter, release the manure from the tank. -
Page 24: Safety Devices On The Charger
in n o vato rs in ag ric u ltu re Figure 5. Battery KEY: 1. Battery - 2. Battery On/Off button The on/off button (2) on the battery (1) can be used to switch off the power to the machine. 2.3.2 Safety Devices on the Charger The software on the charger detects if the nose pad of the machine is under the charger. -
Page 25: Safeguard On The Open Dump Pit
in n o vato rs in ag ric u ltu re 2.3.3 Safeguard on the Open Dump Pit Figure 6. Dump pit KEY: 1. Safeguard - 2. Brackets - 3. Bar The safeguard (1) on a dump pit consists of metal bars that prevent people and animals from falling into the dump pit. -
Page 26: Safeguard On The Syphon
The fence and the dump pit extension frame installed near a large pit prevents people, animals and the machine from falling into the large dump pit. 2.3.4 Safeguard on the Syphon If your machine works in combination with a Lely Sphere the manure is dumped into a syphon. 2-10 Safety... - Page 27 in n o vato rs in ag ric u ltu re Figure 8. Safe guards on the syphon KEY: 1. Safeguard - 2. Brackets - 3. Bar - 4. Syphon The safeguard (1) consists of metal bars that prevent people and animals from stepping on the syphon (4). The brackets (2) prevent that the machine falls on the syphon.
-
Page 28: Safety Decals
in n o vato rs in ag ric u ltu re Safety Decals 2.4.1 Safety decals on the machine Decal Explanation Pause button position decal This decal shows the position of the pause button on the machine. Warning: Hot surface Risk of burned fingers when touching the charger part. -
Page 29: Safety Decals On The Charger
in n o vato rs in ag ric u ltu re 2.4.2 Safety decals on the charger Decal Explanation Warning: Magnetic fields Do not work near the magnets in the charger if you have a cardiac pacemaker or other implant that can be impaired by magnetic fields. -
Page 30: Safety Signs In The Barn
in n o vato rs in ag ric u ltu re 2.4.3 Safety signs in the barn Sign Explanation Caution: Risk of injury. Take the machine out of operation when you enter the working area of the machine and do work with livestock. - Page 31 Replace safety decals that are missing or that are illegible. • Safety decals can be purchased from your local Lely service provider. • Safety 2-15...
- Page 32 in n o vato rs in ag ric u ltu re INTENTIONALLY BLANK 2-16 Safety...
-
Page 33: Specifications
< 3% in longitudinal and transverse directions. Drive on thresholds and level < 10 mm (0.4 in). differences. Cleaning capacity. Cleaning capacity for your barn and cows can be calculated by Lely with the capacity calculator. Navigation sensors. Detection of the driving direction: Gyroscope. •... -
Page 34: Charging Station
in n o vato rs in ag ric u ltu re Table 1 Specifications Mobile Barn Cleaner (cont'd.) Noise emission in accordance ~76 dB [A]. with EN-ISO 4871 with a silencer (optional): <70 dB. Emission sound pressure level (LpA). Requirements Ambient temperature: –20 °C to +50 °C (-4 to 122 °f) •... -
Page 35: Dump Station
Large dump hole No recommendations. (lagoon) Syphon For more information see the documentation of the Lely Sphere, the syphon fits in a hole of: Width: 1200 mm (47 in). • Length: 500 mm (20 in). • Dump hole is required >160 m (525 ft) (on a closed floor). -
Page 36: Smartphone Requirements
in n o vato rs in ag ric u ltu re Smartphone Requirements Table 5. Requirements Smartphone Requirements Smartphone Requirements. Android 5 or higher. • Screen resolution 480 x 800 (or higher). • Bluetooth version 2.1, 3.0, 4.0 dual mode (4.0 single mode is not •... -
Page 37: Description And Operation
The water filling station • The charging station • User interface: the Lely Control Plus application • On your farm the dump station, water filling station and charge station can be combined in one location or all in a separate location. -
Page 38: Component Description
Three versions of the dump station are possible: A syphon, if the collected manure is processed by the Lely Sphere. • A hole in the floor of 1200 mm x 500 mm (47.2 in x 19.7 in) in or near the barn. - Page 39 in n o vato rs in ag ric u ltu re Figure 11. Overview of the bottom of the machine KEY: 1. Drain hole - 2. Ultrasonic sensor - 3. Wall guide - 4. Floor guide - 5. Manure inlet - 6. Manure scraper - 7. Wheel drive unit (left and right) - 8.
- Page 40 in n o vato rs in ag ric u ltu re Figure 12. Overview of the inside of the machine KEY: 1. Water bag - 2. Water filter - 3. Top cover latch - 4. Vehicle Input Output Box (VIOB) - 5. Battery box - 6. Vehicle Control Box (VCB) - 7.
- Page 41 The light in the pause button goes off. Similar functionality can be achieved by using the operational button in the Lely Control Plus application. If an alarm occurs, the LED in the pause button blinks. The alarm must be confirmed with the Lely Control Plus application.
-
Page 42: Water Filling Station
Water Filling Station Risk of contaminated drinking water The water filling station is installed by Lely according to the Lely installation instructions. Do not change anything to the installation of the water filling station to prevent contamination of drinking water! - Page 43 in n o vato rs in ag ric u ltu re Figure 13. Overview of the water filling station parts KEY: 1. Water reservoir - 2. Water outlet The machine refills the water bags at the water station. The water station has: •...
-
Page 44: Charging Station
in n o vato rs in ag ric u ltu re 4.2.3 Charging Station Figure 14. Charging station KEY: 1. Scraper - 2. Primary pad - 3. Knobs (mushroom shaped) - 4. Spring - 5. Spring - 6. LEDs Note: the secondary pad is on the machine The automatically driven routes always start and end at the charging station. -
Page 45: Dump Station
in n o vato rs in ag ric u ltu re The primary charger control box on the charger controls the primary pad. It has three indicator LEDs (6). The lights are visible if you look on the left or right side along the machine. When the secondary control box on the machine does not communicate with the chargers primary control box, the red LED will be flashing to indicate that there is no communication. - Page 46 An installed syphon closes off the manure cellar and makes the system suitable to use in combination with a Lely Sphere, a system that separates manure from urine to reduce nitrogen and ammonia emissions and to make it suitable for fertilisation.
-
Page 47: User Interface
in n o vato rs in ag ric u ltu re User Interface 4.3.1 Menu Structure Figure 17. Menu structure Description and Operation 4-11... -
Page 48: Home Page
Figure 18. Home page of a machine out of operation KEY: 1. Current route number and route action - 2. Next route number and start time - 3. Menu button Lely Control app - 4. Battery status - 5. On/Off switch - 6. Number of alarms, warnings and messages - 7. Menu... - Page 49 Sometimes a temporary status is displayed below this line. After a few seconds the status will return to normal again. Buttons shows the Lely Control app options. • to put the machine into operation or to take it out •...
-
Page 50: Manual Control
in n o vato rs in ag ric u ltu re 4.3.3 Manual Control Display Description The Manual Control page shows the buttons to drive the machine manually. The easiest way is to slide the icon of the machine in the direction you want to drive and/or turn. - Page 51 in n o vato rs in ag ric u ltu re 'Hold manure': The machine does not take new manure in, but holds the manure that is already • in the tank. 'Release manure': The machine releases the manure from the tank. •...
-
Page 52: Dayplanning
in n o vato rs in ag ric u ltu re 4.3.4 Dayplanning Display Description The page Dayplanning shows the set route and their start times during the day. For each route the day planning shows an estimation of how much time it takes to drive the route. -
Page 53: Routes
You can also add more routes to be driven, it is possible to add up to five routes. to go to the page with the route actions of the route. This • page will only be used by the Lely technician. Description and Operation 4-17... -
Page 54: Alarms
in n o vato rs in ag ric u ltu re Display Description Make sure the machine is connected to the charger in the correct direction. Tap to start driving the route. Buttons Continue dayplanning after route to set a green checkmark •... -
Page 55: Testing
Only do the procedures that are described in this manual. If the procedure is not written in this manual you must contact your local Lely technician. Buttons Failure info to go to the page with information for lely •... -
Page 56: Settings
in n o vato rs in ag ric u ltu re 4.3.8 Settings Display Description The page Settings shows: Name: name of the machine. The name of the machine has been • configured during the installation process. • Password: wifi password. Language: the displayed user language. -
Page 57: Cloud
in n o vato rs in ag ric u ltu re 4.3.8.2 Cloud Display Description Make sure the wifi settings are made and an internet connection is established before configuring the cloud connection. The row of LED indicators at the top of the screen display: •... -
Page 58: Wifi Configuration
in n o vato rs in ag ric u ltu re 4.3.8.3 WiFi Configuration Display Description The row of LED indicators at the top of the screen display: • • Router: the status of communication between the robot and the router (green: communication is active). -
Page 59: Gyroscope
When the machine is put into operation, it will be controlled by the day planning. When the machine is out of operation, the day planning has no control over the machine and you can control the machine yourself manually with the Lely Control Plus Application. Driving To drive the correct route the machine uses: •... - Page 60 in n o vato rs in ag ric u ltu re The ultrasonic sensors, they detect walls and obstacles on both sides of the machine along the route. • These are compared to the location of walls in the programmed route. Bump points, the machine bumps into a wall to detect where the wall is.
-
Page 61: Operating Instructions
Your smartphone must be paired to the machine. The Lely Control Plus app must be connected to the machine (this needs to be done every time you want to operate your machine with your smartphone) (see Connect the Lely Control Plus app to the Machine on page 5-8). - Page 62 in n o vato rs in ag ric u ltu re Moving machine Risk of injury. Before opening the top cover, take the machine out of operation! Make sure the top cover is closed when you control the machine manually or when it is in operation mode! Open the Top Cover Take the machine out of operation by pushing the PAUSE button (1).
-
Page 63: Switch The Machine On And Off
in n o vato rs in ag ric u ltu re Close the Top Cover Make sure the top cover is locked completely after closing it. Cows will try to open the top cover and may damage the machine. Tilt the top cover toward the front of the machine and hold it approximately 5 cm (2 inch) above its closed position. - Page 64 in n o vato rs in ag ric u ltu re Push the ON/OFF button (7) on the VIOB shortly. If the battery is just switched on, first wait until the battery is in operation before you switch on the VIOB. Figure 21.
-
Page 65: Put The Machine Into Operation And Take It Out Of Operation
in n o vato rs in ag ric u ltu re Open the top cover. Push the ON/OFF button (7) for 1.5 seconds to switch the machine OFF. The machine starts to shut down. • Wait until all LEDs (2, 3, 4, 5, 6) are turned off. If the LEDs do not turn off within 2 minutes, shut down the machine by pushing the ON/ OFF button for about 5 seconds until all LEDs (2,3,4,5, 6) are turned off. -
Page 66: Put The Machine Into Operation And Take It Out Of Operation With The Pause Button
The day planning can not control the machine. You can manually control the machine with the Lely Control Plus app. When the out of operation mode is switched on, the machine stops immediately when it is moving. -
Page 67: Put The Machine Into Operation And Take It Out Of Operation With The Lely Control Plus Application
The machine can be controlled manually now. • 5.4.2 Put the Machine into Operation and Take it Out of Operation with the Lely Control Plus Application The machine can be put into operation and taken out of operation by sliding the button Operation Status on the home page of the Lely Control Plus application. -
Page 68: Control The Machine With Your Smartphone
Control the Machine with your Smartphone 5.5.1 Connect the Lely Control Plus app to the Machine Every time you want to operate the machine with your smartphone, you need to connect the Lely Control Plus app to the machine. Switch the machine ON. -
Page 69: Synchronize The Clock Of The Discovery
Tap the name of the machine that you want to connect to. The name of your machine has been configured during the installation process by your local Lely service provider. -
Page 70: Manually Control The Machine
Risk of injury. Only control the machine remotely when the machine is in your line of sight. When the machine is taken out of operation it can be controlled manually with the Lely Control Plus application on your smartphone. When controlling the machine manually it is possible to: Manually drive the machine to a location. - Page 71 in n o vato rs in ag ric u ltu re Tap the menu Manual Control. You can drive the machine in the following directions: Tap and hold to drive forward. • Tap and hold to drive backward. • • Tap and hold to turn left.
-
Page 72: Drive The Machine Back To The Charging Station
Moving machine Risk of injury. Only control the machine remotely when the machine is in your line of sight. Connect the Lely Control Plus app to the machine. Slide the switch to the left ( ) to take the machine out of operation. -
Page 73: Use A Return Route To Drive The Machine Back To The Charging Station
Moving machine Risk of injury. Only control the machine remotely when the machine is in your line of sight. Connect the Lely Control Plus app to the machine. Slide the switch to the left ( ) to take the machine out of operation. -
Page 74: Drive The Machine To The Water Filling Station
Moving machine Risk of injury. Only control the machine remotely when the machine is in your line of sight. Connect the Lely Control Plus app to the machine. Slide the switch to the left ( ) to take the machine out of operation. -
Page 75: Manually Start A Route
Moving machine Risk of injury. Only control the machine remotely when the machine is in your line of sight. Connect the Lely Control Plus app to the machine. Slide the switch to the left ( ) to take the machine out of operation. -
Page 76: Manually Empty The Manure Tank Of The Machine
Moving machine Risk of injury. Only control the machine remotely when the machine is in your line of sight. Connect the Lely Control Plus app to the machine. Slide the switch to the left ( ) to take the machine out of operation. -
Page 77: View And Acknowledge Alarms
The alarm is displayed at the top of the list. Tap the line of the alarm to read the alarm. In the Lely Control Plus app you can mark the alarm as solved. In the WiFi configuration screen is displayed if the alarm notification is read in Horizon. -
Page 78: Modify The Day Planning
When the battery is too low, the machine will skip the coming route and will wait until the next scheduled route starts. Add a Route to the Day Planning Connect the Lely Control Plus app to the machine. Tap the menu Dayplanning. - Page 79 Put the machine into operation to start cleaning the barn according to the day planning. Replace a Route in the Day Planning by Another Route Connect the Lely Control Plus app to the machine. Tap the menu Dayplanning.
-
Page 80: Enable Or Disable Water Spraying On All Routes
Put the machine into operation to start cleaning the barn according to the day planning. Delete a Route from the Day Planning Connect the Lely Control Plus app to the machine. Tap the menu Dayplanning. -
Page 81: Prepare The Machine For Wintertime
Before the environmental temperature drops below freezing point, the water reservoir of the water filling station and the water bags in the manure tank of the machine must be drained. Lely Industries N.V. will not take any liability for damage due to frost. - Page 82 in n o vato rs in ag ric u ltu re Drive the machine manually to the charger and charge a few hours before you put it into operation. • If the battery was completely depleted (emptied to 0%) do the following: Bring back the machine to the charger by hoisting the machine (see Hoist the Machine on page 6-12).
- Page 83 in n o vato rs in ag ric u ltu re Switch the battery on with the On/Off button (1). The LED on the battery will not go on. Figure 25. On/Off buttons KEY: 1. Battery on/off button - 2. VIOB on/off button Make sure the button on the battery is pushed in (push it a few times and feel when the button •...
- Page 84 in n o vato rs in ag ric u ltu re The charger will not start charging automatically when the battery is depleted. Start charging as follows: Remove the bolts and back plate on the backside of the charger and push the On/Off button (1) for more than 3 seconds and then release it.
- Page 85 in n o vato rs in ag ric u ltu re Let the machine charge a few hours. Figure 26. Charge leds • Green led on: the charger has power Blue led flashing: the battery is charging • Blue led on: the battery is charged •...
- Page 86 in n o vato rs in ag ric u ltu re Tilt the charger top upwards as follows, this gives room to open the cover of the machine: Figure 27. Tilt the charger top Figure 28. Insert bolts for safety KEY: 1.
-
Page 87: Maintenance
When the machine is in operation mode, it operates autonomously and can move unexpectedly. Before doing maintenance on the machine always take the machine out of operation with the pause button or with the Lely Control Plus app. This also implicates maintenance to the water station, charging station and dump pit. -
Page 88: Shave The Tails
in n o vato rs in ag ric u ltu re Frequency Maintenance Clean the top air filter and the level sensor. Every two weeks. • • When the manure intake of the machine deteriorates. When the level sensors says full even when the •... -
Page 89: Clean The Pad And The Black Plate On The Machine
in n o vato rs in ag ric u ltu re Preparation Take the machine out of operation. Manually drive the machine away from the charger to disconnect it. Manually drive the machine to a clean and quiet location. Block the cow traffic. Switch the machine off. -
Page 90: Clean The Pad And Alignment Mechanism And Plate On The Charger
in n o vato rs in ag ric u ltu re Use a plastic scraper to remove the manure from the pad and the cover around the pad. After that use a moist cloth or a soft brush and clean the top and the sides of the pad (1) and clean the cover around the pad. - Page 91 in n o vato rs in ag ric u ltu re Moving vehicle Risk of being crushed. You must prevent that the machine drives into the charger while you work on it. Be aware that someone else may put the machine into operation during your cleaning actions.
-
Page 92: Clean The Top Air Filter And The Level Sensor
in n o vato rs in ag ric u ltu re Clean the following parts of the charger first with a plastic scraper, and then with a moist cloth or a soft brush and water. • Mushroom shaped knobs Charge pad •... - Page 93 in n o vato rs in ag ric u ltu re Manually drive the machine to the dump pit and empty the machine. Manually drive the machine away from the charger to disconnect it. Manually drive the machine to a clean and quiet location, which is safe away from manure gasses. Block the cow traffic.
-
Page 94: Clean The Ultrasonic Sensors
in n o vato rs in ag ric u ltu re Use a moist cloth to clean the level sensor (1). Installation Install the air filter (5) on the manure tank. Make sure the nails (11) point downwards, the air hole (6) of the air filter fits around the air tube (8), and the seal (7) is in the correct position. - Page 95 in n o vato rs in ag ric u ltu re Do not use a pressure cleaner to clean the ultrasonic sensors. When it is difficult to get the manure off, first make the surface of the ultrasonic sensors wet with a moist cloth, let the water soak the manure for a while and then wipe it off. Do not use sharp objects to clean the ultrasonic sensors.
-
Page 96: Clean The Manure Tank
in n o vato rs in ag ric u ltu re Clean Figure 33. Clean the ultrasonic sensors KEY: 1. Left ultrasonic sensor Clean the ultrasonic sensors on the left and right side of the machine with a moist cloth or soft brush. Especially the part within the red circle in the picture must be clean. - Page 97 in n o vato rs in ag ric u ltu re Toxic gasses. Risk of losing consciousness. Only remove the air filter from the manure tank when the machine is in a well ventilated area. Be aware of toxic fumes that may release from the manure tank.
-
Page 98: Hoist The Machine
in n o vato rs in ag ric u ltu re Remove the air filter (5). Cover the air tube (8) to prevent water leaks into the vacuum pump. Use water to flush the manure tank and dissolve the clog. Installation Remove the cover from the air tube (8). - Page 99 If it is not empty and it is possible, first clean the tank (see Clean the Manure Tank on page 6-10). Empty the water bags: Connect the Lely Control Plus app to the machine. Slide the switch to the left ( ) to take the machine out of operation.
- Page 100 in n o vato rs in ag ric u ltu re Figure 35. Remove or install the bracket KEY: 1. Bracket Remove the bracket (1). 6-14 Maintenance...
- Page 101 in n o vato rs in ag ric u ltu re Connect the hoisting tool to the hoisting point (1). Figure 36. Hoist the machine KEY: 1. Hoisting point Hoist the machine and carefully take it to its new location. Remove the hoisting tool and install the bracket and the filter.
- Page 102 in n o vato rs in ag ric u ltu re INTENTIONALLY BLANK 6-16 Maintenance...
-
Page 103: Test And Adjustment
Test and Adjustment Test the Ultrasonic Sensors Connect the Lely Control Plus app to the machine. In the main menu of the Lely Control Plus app tap Testing. Tap Ultrasound. A screen with testing results appears. The result should be Good or Excellent for both left and right •... -
Page 104: Set The Gyroscope Target Temperature
in n o vato rs in ag ric u ltu re Examine if the calibrated values are in the range between 280 - 315 mm (11 - 13 in). If not, do the calibration again. Set the Gyroscope Target Temperature Only change this setting if the gyroscope does not calibrate properly. -
Page 105: Troubleshooting
Multiple causes. Follow the procedure shown on PAUSE button is blinking / an the alarm detail page. alarm is popping up on the Lely Control Plus app). Machine is switched OFF. Switch ON the machine. The machine is standing still (but not at the charging / water filling Put the machine in operation. - Page 106 Table 8 Troubleshooting table machine (cont'd.) Symptom Possible cause Action The water hoses leak. Turn off the machine and contact your local Lely service provider. The water pump does not work. Contact your local Lely service provider. The wheels of the machine are The tires are worn out.
- Page 107 'The machine does not sprinkle water'. The wheel diameter is not Calibrate the wheels. correct anymore. The tires are worn out. Contact your local Lely service provider. Ultrasonic sensor(s) do not Clean the ultrasonic sensors. function properly. Ultrasonic sensors, gyroscope or...
- Page 108 Sensor on page 6-6). If the problem persists, contact your local Lely service provider. The manure tank is full, but the Contact your local Lely service machine is not driving to the provider. dumping station. There is a blockage due to dried...
- Page 109 (see Pair your Smartphone with the Discovery on page 5-1). The Lely Control Plus app is not Connect the Lely Control Plus connected to the machine. app to the machine. The Lely Control Plus app is...
- Page 110 OK. Green LED is ON No connection or fault Make sure the machine is in • Blue LED is OFF the correct position in the charger station. Red LED blinks Contact your local Lely • service provider. Troubleshooting...
-
Page 111: Disposal
Disposal of the battery If the battery is replaced, the Lely technician will leave the old battery at your farm. The old battery will be collected by a specialized waste disposal company that can handle and dispose the 24V Li-ion rechargeable battery. - Page 112 in n o vato rs in ag ric u ltu re INTENTIONALLY BLANK Disposal...
-
Page 113: Declaration Of Conformity
in n o vato rs in ag ric u ltu re Declaration of Conformity 10.1 EC Declaration of Conformity Declaration of Conformity 10-1... -
Page 114: Ukca Declaration Of Conformity
in n o vato rs in ag ric u ltu re 10.2 UKCA Declaration of Conformity 10-2 Declaration of Conformity... - Page 116 Lely Industries N.V. CornelisFvanFderFLelylaanF1 NL-3147FPB FMaassluis Tel +31F(0)88F-F12F28F221 Fax +31F(0)88F-F12F28F222 www.lely.com...
Need help?
Do you have a question about the Discovery Collector C2 and is the answer not in the manual?
Questions and answers