
Subscribe to Our Youtube Channel
Related Manuals for LELY Lely Discovery 90 S


Summary of Contents for LELY Lely Discovery 90 S
- Page 1 Lely Discovery 90 S Mobile Barn Cleaner Operator Manual EN - English Original 5.4002.8501.0 B Lely Industries N.V. www.lely.com...
- Page 2 in n o vato rs in ag ric u ltu re INTENTIONALLY BLANK...
- Page 3 No part of this publication may be copied or published by means of printing, photocopying, microfilm or any other process whatsoever without prior permission in writing by Lely Holding b.v. Although the contents of this publication have been compiled with the greatest possible care, Lely cannot accept liability for any damage that might arise from errors or omissions in this publication.
- Page 4 in n o vato rs in ag ric u ltu re INTENTIONALLY BLANK Trademarks, Copyright and Disclaimer...
- Page 5 in n o vato rs in ag ric u ltu re List of Included Amendments Issue Date Revision Chapter(s) Remarks (yyyy/mm) 2021/03 Added: General safety information (see General Safety on page 2-2). Added: Intended use information (see Intended Use on page 1-1). Changed: Layout and figures.
- Page 6 in n o vato rs in ag ric u ltu re INTENTIONALLY BLANK List of Included Amendments...
- Page 7 Store this manual in a safe place for future reference. All information in this manual has been compiled with care. Lely shall not be liable for errors or faults in this manual. The recommendations are meant to serve as guidelines. All instructions, pictures and specifications in this manual are based on the latest information that was available at the time of publication.
- Page 8 The type and serial number plate is attached to the upper side of the frame of the machine, under the red cover. Always include the type and serial number of your machine when you contact your local Lely service provider or order spare parts.
- Page 9 Technician Training All the technicians certified by Lely Industries have completed an approved training program, and passed written and practical examinations during and at the end of the training program. The training is given by...
- Page 10 in n o vato rs in ag ric u ltu re Left, Right, Rear and Front The positions left, right, rear and front in this manual refer to the machine, as seen in the driving direction. Preface...
-
Page 11: Table Of Contents
..................1-1 The Lely Discovery 90 S Mobile Barn Cleaner . - Page 12 Start the Lely Control Application ........
- Page 13 in n o vato rs in ag ric u ltu re 5.11.3 Modify a Route ............... 5-28 5.11.4 Reset a Modified Route to the Previous Version .
- Page 14 in n o vato rs in ag ric u ltu re Alarms and reports ................8-1 8.2.1 Recover Alarms .
-
Page 15: Lely Discovery
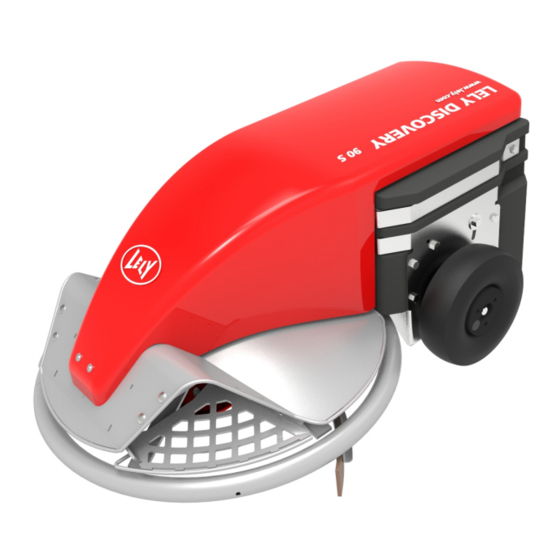
The Lely Discovery 90 S Mobile Barn Cleaner The Lely Discovery 90 S Mobile Barn Cleaner is a battery-driven vehicle that cleans the floor of a barn. The farmer (operator) uses the Lely Control app on the smartphone to program the route for the Discovery. - Page 16 INTENTIONALLY BLANK Lely Discovery...
-
Page 17: Safety
in n o vato rs in ag ric u ltu re Safety Introduction The Discovery 90 S is an automated machine. Therefore it is of the utmost importance to obey all safety instructions. Signal Icons Note the use of the signal words DANGER, WARNING and CAUTION with the safety messages. The signal word for each message uses the following guidelines: Danger Indicates a hazardous situation which, if not avoided, will result in... -
Page 18: Safety Instructions
in n o vato rs in ag ric u ltu re Safety Instructions YOU are responsible for the SAFE operation and maintenance of your machine. YOU must make sure that you and anyone else who is going to operate, maintain or work in the vicinity of the machine knows all the related SAFETY information in this manual. -
Page 19: Electrical Safety
• clean or do maintenance on the machine. Know the emergency medical center number for your area. • Contact your nearest Lely service provider if you have any questions. • Review safety related items with all operators frequently (annually). •... -
Page 20: Maintenance Safety
Always be alert for unexpected movement of the cow. Cows can transmit large forces to parts of the • machine. Contact your nearest Lely service provider if you have any questions. • Review safety related items with all operators frequently (annually). -
Page 21: Specifications
in n o vato rs in ag ric u ltu re Specifications Specifications Vehicle Dimensions and Weight. Length: 1285 mm (50.59 in). • Width: 860 mm (33.86 in). • Height: 575 mm (22.64 in). • Weight: 303 kg (668 lbs). •... - Page 22 in n o vato rs in ag ric u ltu re Specifications Charging station Dimensions and weight. Width: 380 mm (15.0 in). • Depth: 220 mm (8.7 in). • Height: 1650 - 2050 mm (65.0 - 80.7 in). • Weight(excluding floor column): 40 kg (88 lb). •...
-
Page 23: Dimensions
in n o vato rs in ag ric u ltu re Dimensions B000126-009 Figure 4. Machine dimensions KEY: A: 860 mm (33.86 in.) B: 575 mm (22.64 in.) C: 1285 mm (50.59 in.) D: 125 mm (4.92 in.) Specifications... - Page 24 in n o vato rs in ag ric u ltu re B000128-004 Figure 5. Dimension charging station KEY: A: 1650 - 2050 mm (65.0 - 80.7 in.) B: 380 mm (15.0 in.) C: 220 mm (8.7 in.) Specifications...
-
Page 25: Description And Operation
in n o vato rs in ag ric u ltu re Description and Operation Introduction This chapter describes the parts of the machine. It also explains how the parts work together to clean the barn floor. Figure 6. Main components KEY: 1. -
Page 26: Component Description
in n o vato rs in ag ric u ltu re Figure 7. Main components vehicle KEY: 1. Upper cover - 2. Lower cover - 3. Manure scraper - 4. Concrete frame - 5. PCB box - 6. Pause button - 7. Bluetooth antenna - 8. -
Page 27: Covers
in n o vato rs in ag ric u ltu re 4.2.1.1 Covers The machine has a red upper cover (1) (see figure 7 on page 4-2) with a fastener on the back side. At the front side of the vehicle a rotatable bracket holds the cover. Underneath the red upper cover, the lower cover gives extra protection to the main parts of the machine. -
Page 28: Power System
in n o vato rs in ag ric u ltu re Figure 8. Driving mechanism KEY: 1. Wheel bearing (2x) - 2. Motor (2x) - 3. Chain (2x) - 4. Wheel right - 5. Wheel left 4.2.1.4 Power System The machine is battery-operated and after each route it returns to the charging station, which is installed at a convenient point in the barn. - Page 29 in n o vato rs in ag ric u ltu re Encoders on the drive motors to measure the driven distance. • Ultrasonic sensor to measure the distance to a wall or fence. • Gyroscope to measure angle differences to keep the right direction. •...
- Page 30 The user interface on the smartphone displays a question to resume or cancel the route. • When the pause button or the button in the Lely Control app is pushed shortly while the machine is in pause mode, the machine goes back into work mode: The machine goes back into operation.
- Page 31 Lely Control app The Lely Control app controls and monitors the machine and communicates with the management software. The Lely Control app is available in the Google play store (Android) and the Apple app store (iOS). The user interface of the Lely Control app displays nine buttons that enable the user to give commands and change values in the machine.
-
Page 32: Charging Station
in n o vato rs in ag ric u ltu re Settings are saved. • The calibration of the gyroscope is finished. • Backup is finished (create / restore). • Programming a route. • 4.2.2 Charging Station The machine normally starts and ends at the charging station. The machine recharges itself at the charging station. -
Page 33: Work
Service • Figure 10. The Lely Control app menu structure Buttons to select a menu item. • to confirm an action. • to go to the previous menu. •... -
Page 34: Time Path On/Off
in n o vato rs in ag ric u ltu re Figure 11. Menu Work The level is indicated by a tab with a black dot on the right side of a display. There are four levels: Menu Work, indicated by the upper dot. •... -
Page 35: Manual Route
in n o vato rs in ag ric u ltu re Display Description Start or stop timed actions which are set in a time pat (see Time Path • on page 4-18). Display the status: • • Actual time. On or Off. •... -
Page 36: Manual Driving
in n o vato rs in ag ric u ltu re Buttons to start or stop the action. • to go to the previous menu. • to go to the next menu. • Soft button Reset to clear the selected line. •... -
Page 37: Manual Charger
in n o vato rs in ag ric u ltu re 4.3.1.4 Manual Charger Driving manually to the charger is only possible when the time path is switched Off. Display Description Let the vehicle automatically drive to the charging station, following •... -
Page 38: New Route
in n o vato rs in ag ric u ltu re 4.3.2.1 New Route New Route A new route is built from the following actions: Wall flw L or Wall flw R. • Straight. • • Turn L <– or Turn R –>. •... - Page 39 in n o vato rs in ag ric u ltu re Display Description Actionr: Sequence number for the action in this route. • RunDst: Distance traveled in mm. • Gyro: Angle value in gyroscope. • Speed: Wheel speed in mm/s. •...
- Page 40 in n o vato rs in ag ric u ltu re Display Description Turn left 60 degrees gradually, following wall, maximum cleaning. • Turn left 90 degrees. • Turn left 180 degrees, stop in adjacent lane 80 cm (31 in) to the left. •...
- Page 41 in n o vato rs in ag ric u ltu re to start or stop. • Soft button MAN to adjust the position of the vehicle. • The same description applies for turning to the left. Ultrasound L Tracking along a wall or fence on the left at a certain distance (200 cm, 78.7 in max.). The ultrasonic sensor is used to measure the distance to the wall.
-
Page 42: Delete Route
in n o vato rs in ag ric u ltu re Waiting Time Wait an adjustable time before continuing with the next action in a route (see Waiting Time on page 5-27). This action is used in a route through a waiting area. The vehicle stops before entering the area to give cows time to move out. -
Page 43: Blockage Route
in n o vato rs in ag ric u ltu re Display Description Time path; start times of set routes. • Buttons to select a route in the time path. • Soft button Del to delete a route from the time path. •... - Page 44 in n o vato rs in ag ric u ltu re If a routes has a failure probability of more than 2, the risk of failures is too high. This could be due to a number of factors like: • Few bump points.
-
Page 45: Speed Route
in n o vato rs in ag ric u ltu re Table 1 display Failure analysis (cont'd.) Display text Explanation Drift/bend action. Vehicle is forced to make a bend during an action (wall follow or ultrasound drive) less than 1.5 m (4.9 ft.) after the start of the action. -
Page 46: Beepfreq Route
in n o vato rs in ag ric u ltu re 4.3.2.8 Beepfreq Route This menu is used to set the beep frequency during the driving. The default frequency is every 2 seconds. The frequency can be set for each route separately. The display displays the value per second, so 0.5 equals one peep per two seconds. -
Page 47: 4.3.2.11 Wheel Correction
The menu Wheel corr. is used to correct the wheel diameter in the software and thus the driving distance (see Wheel Diameter on page 4-24). 4.3.2.12 Backup Route This menu is used to make a backup with the Lely Control app on the smartphone or to restore the information on the ADS3840 PCB. 4.3.3 Test The menu Test is used to do functional tests of components and actions. -
Page 48: Language
Average. • Low. • Do not modify the motor power without the consent of your local Lely service provider. 4.3.4.5 Wheel Diameter Specifies the diameter of the wheels. The default diameter is 250 mm. Do not modify this setting when the wheel diameter is not changed. This affects the route accuracy. -
Page 49: Alarms
in n o vato rs in ag ric u ltu re 4.3.5 Alarms The machine monitors itself continuously and informs you about the situation. The machine generates alarms and reports. Alarm list The alarm list gives a summary of the alarms received. This list stores up to 250 alarms. Once 250 alarms are stored, the next alarm overwrites the oldest alarm of the list (see Alarm List on page 8-3). -
Page 50: Control System
in n o vato rs in ag ric u ltu re Manual Cleaning with Manual Routes It is useful to enable MANUAL ROUTE. You then can clean a part of the barn whenever you want or test a route. It is also useful to program routes from different points in the barn back to the charging station for instance to pick up a lost vehicle. -
Page 51: Speed
in n o vato rs in ag ric u ltu re Figure 15. Bump points to correct the driving distance KEY: 1. Bump point - 2. Bump point 4.4.2.2 Speed The number of revolutions of the motors are also used to calculate the speed. The speed can be set for a route or for an action in a route. - Page 52 in n o vato rs in ag ric u ltu re Long actions Direct wall contact with the sensing wheel or indirect wall contact with the ultrasonic sensor are used to keep the machine in the correct direction (see Ultrasonic Sensor on page 4-5). This is the case during: Wall flw L.
- Page 53 in n o vato rs in ag ric u ltu re Figure 16. Example situation of short routes resulting in errors; left side: programmed route, right side: resulting route Number Explanation The vehicle doesn't reach the wall, due to skidding. There is no bump point to correct this error.
- Page 54 in n o vato rs in ag ric u ltu re 9-9600-2758-0 Figure 17. Alternation of short and long actions Number Explanation The vehicle follows the cubicles on the right side until the wall (bump point). The vehicle follows the wall on the right side up to a certain distance from where cows are eating, followed by Turn L <–.
-
Page 55: Obstacles
in n o vato rs in ag ric u ltu re Number Explanation The vehicle drives Straight until the start of the cubicles on the right, then Wall flw R, followed by Straight until the bump point. The vehicle drives back followed by Wall flw R. 4.4.2.5 Obstacles If the machine unexpectedly comes across an obstacle, for example the leg of a cow or a pile of manure,... - Page 56 in n o vato rs in ag ric u ltu re INTENTIONALLY BLANK 4-32 Description and Operation...
-
Page 57: Operating Instructions
The first time you start to control the machine with the software on the Android smartphone, you must enter a password. Ask your local Lely service provider for the password. The first time you start to control the machine with the software on the iPhone: You must pair the machine in the bluetooth list of devices on the iPhone and enter the password 0000. -
Page 58: Remove Or Install The Covers
in n o vato rs in ag ric u ltu re It is recommended to use the same password for all smartphone controlled machines on a farm. Remove or Install the Covers 5.4.1 Remove the Cover Stop the time path to take the machine out of operation (see Start or Stop the Time Path on page 5- 33). -
Page 59: Install The Cover
in n o vato rs in ag ric u ltu re Remove the carabiner hook (1) (see figure 18 on page 5-3). Figure 18. Remove or install the cover KEY: 1. Carabiner hook - 2. Fastener - 3. Lower cover - 4. Upper cover Pull the fastener on the rear (2) towards you. -
Page 60: Switch Off The Machine
in n o vato rs in ag ric u ltu re Manually drive the machine to the charging station (see Drive the Machine to the Charging Station on page 5-7). Start the time path to put the machine into operation (see Start or Stop the Time Path on page 5-33). Switch OFF the Machine Make sure the machine is not connected to the charger, if necessary drive the machine away from the charger (see Manually drive the Machine on page 5-7). -
Page 61: Start The Lely Control Application
If the distance is too big, it will not appear in the list on the smartphone display. The device name of the machine that is displayed on the smartphone can only be modified by a certified Lely technician. Operating Instructions... - Page 62 The machine can not be connected to more than 1 smartphone simultaneously. On the smartphone: Start the Lely Control app. If bluetooth was not in operation the following question (or similar) appears: The application tries to switch on bluetooth, continue? Push Yes.
-
Page 63: Manually Drive The Machine
in n o vato rs in ag ric u ltu re Manually drive the Machine Stop the time path to take the machine out of operation (see Start or Stop the Time Path on page 5- 33). Push twice to select the menu MANUAL DRIVING. The message SAFETY WARNING. - Page 64 in n o vato rs in ag ric u ltu re In the menu MANUAL CHARGER push: L if the charging station is on the left side. • R if the charging station is on the right side. • Push to start.
-
Page 65: Prepare For Route Programming
in n o vato rs in ag ric u ltu re 5.10 Prepare for Route Programming 5.10.1 Requirements for a good Route Be aware of the intended use before programming the Discovery (See chapter Intended Use). Make it possible for the machine to correct itself Include as many bump points as possible in all directions. - Page 66 in n o vato rs in ag ric u ltu re Route 3 The area between the cubicles and the feeding fence should be cleaned no more than 2 times a day, preferably at night (see figure 26 on page 5-11). Cows should not be disturbed when eating. Time path based on these routes To keep the battery healthy, the driving time must be less than 40% of the total time (so charging time is 60% or more of the total time).
- Page 67 in n o vato rs in ag ric u ltu re Figure 25. Route 2, like route 1 but also clean the walking alley, 4 times a day Figure 26. Route 3, clean the areas between the cubicles and the feed fence, 2 times a day Each route is built of many actions.
- Page 68 in n o vato rs in ag ric u ltu re Figure 27. Example actions (left side) Number Action Explanation Wall flw L Follow the wall is always the first action, necessary to leave the charging station. Turn R –> (90 degrees) Standard turn. Make sure the vehicle will not hit the cubicle wall after action 3.
- Page 69 in n o vato rs in ag ric u ltu re Number Action Explanation Straight Drive straight until the wall (bump point). Turn R –> (180 Standard turn R (180 degrees). degrees) Straight Turn R –> (90 degrees) Standard turn 90 degrees, modify if the nose of vehicle doesn't point in the correct direction.
- Page 70 in n o vato rs in ag ric u ltu re Number Action Explanation Wall flw R Follow the cubicle floor until the end of the cubicle row. Turn L <– (45 degrees) Straight Drive straight. Turn R –> (45 degrees) Wall flw L Follow the cubicle floor Turn R –>...
- Page 71 in n o vato rs in ag ric u ltu re Figure 29. Example actions (right side) Number Action Explanation Wall flw R Follow the wall until the end of the cubicle row. Straight Drive straight until bump point. Turn R –> (90 degrees) Wall flw L Turn R –>...
-
Page 72: Example Route, Barn With Milking Parlour
in n o vato rs in ag ric u ltu re Number Action Explanation Turn L <– (90 degrees) Wall flw R 5.10.3 Example Route, Barn with Milking Parlour In a barn with a milking parlour the situation is different from a barn with a milking robot. There is no free cow traffic to the milking parlour. -
Page 73: To Make A Turn
in n o vato rs in ag ric u ltu re Figure 31. To pass a crosswalk Number Action Explanation Wall flw R Follow the cubicles row, stop at the end. Turn L <– Turn left, 5 degrees. Straight Drive straight until middle of the next cubicle. Wall flw R Follow the wall, the machine automatically turns to the cubicles. -
Page 74: To Approach The Charging Station From The Opposite Direction
in n o vato rs in ag ric u ltu re KEY: A: 20 cm (8 in) B: 40 cm (16 in) C: 80 cm (31 in) 5.10.6 To approach the Charging Station from the opposite Direction Figure 32. Approach the charging station Number Action Explanation... -
Page 75: To Follow A Bend In A Wall
in n o vato rs in ag ric u ltu re Number Action Explanation Turn R –> Turn right 20 degrees. Wall flw R Follow the wall on the right side. Turn L <– Turn L 180 degrees. Wall flw L Follow the wall until 1.5 - 3 m (5 - 10 ft.) from the charging station. -
Page 76: Route Programming
Plan the route on a piece of paper. Open the Lely Control app on the smartphone (see Start the Lely Control Application on page 5-5). Stop the time path to take the machine out of operation (see Start or Stop the Time Path on page 5- 33). -
Page 77: Follow A Wall (Left Or Right)
in n o vato rs in ag ric u ltu re Program the next action in the route: Wall flw L. • Wall flw R. • Straight. • Turn R –> (see Turn Left or Right on page 5-25). • Turn L <–. - Page 78 in n o vato rs in ag ric u ltu re Build in as many bump points as possible in all driving directions. If the machine approaches a bump point (approx. 30 cm (12 in)): Push to smoothly reduce speed. Push to stop the machine immediately.
-
Page 79: 5.11.1.2 Go Straight
in n o vato rs in ag ric u ltu re Figure 35. Never make an angled start (>30 degrees) 5.11.1.2 Go Straight When moving straight forward, the deviation can be more than 10%. Take this into account when you set up a route. If possible, include a bump point after going straight. Before starting, make sure the machine points in the correct direction. - Page 80 in n o vato rs in ag ric u ltu re Push to start. If the vehicle approaches the wall from an angle: Push Turn the vehicle to a right-angled position to the wall (see figure 36 on page 5-25). Resume driving Straight.
-
Page 81: 5.11.1.3 Turn Left Or Right
in n o vato rs in ag ric u ltu re 9-9600-2746-0 Figure 36. Avoid angled bumping 5.11.1.3 Turn Left or Right If you want to turn left, select Turn L <– and push If you want to turn left, select Turn R –> and push Read the message on the display and push You can choose from 12 standard turns (see Turn Right or Left on page 4-15) and modify the turn afterwards. -
Page 82: Follow A Wall Or Fence On A Certain Distance (Ultrasound)
in n o vato rs in ag ric u ltu re If you want to drive back before making a turn: Push soft button > to select Back. Push to select the reverse distance. If you want to modify the radius of a turn: Push soft button >... -
Page 83: 5.11.1.5 Go To The Charging Station
in n o vato rs in ag ric u ltu re The display shows the status (Manual stop or Bump stop) and the travelled distance (in mm). Push soft button MAN to modify the position. Push soft button to turn left, or to turn right. -
Page 84: Copy A Route
Stop the time path to take the machine out of operation (see Start or Stop the Time Path on page 5- 33). In the main menu of the Lely Control app, select Routes and push Select Copy route and push... -
Page 85: Reset A Modified Route To The Previous Version
Stop the time path to take the machine out of operation (see Start or Stop the Time Path on page 5- 33). In the main menu of the Lely Control app, select Routes and push Select Modify route and push... -
Page 86: Set A Time Path
. To cancel push button Open the Lely Control app on the smartphone (see Start the Lely Control Application on page 5-5). Stop the time path to take the machine out of operation (see Start or Stop the Time Path on page 5- 33). -
Page 87: Make A Backup
Stop the time path to take the machine out of operation (see Start or Stop the Time Path on page 5- 33). In the main menu of the Lely Control app, select Routes and push Select Backup route and push . -
Page 88: Copy A Backup File From The Smartphone To A Pc
Android Connect the smartphone to a usb port of the PC. Use the data cable of the smartphone to connect. Use the PC to browse to the Lely backup folder on the smartphone. Select the applicable backup file (.bkp). Copy the backup file from the smartphone. -
Page 89: Start Or Stop The Time Path
Start the Lely Control Application (see page 5-5). In the main menu of the Lely Control app, select Work and push If the pane on the upper side of the menu, that displays the actual time, is grayed out, the time path is On. - Page 90 In the main menu of the Lely Control app, select Work and push Push to select the menu MANUAL ROUTE. Push to select the series of routes (A, B, C or D).
-
Page 91: Block A Route
Stop the time path to take the machine out of operation (see Start or Stop the Time Path on page 5- 33). In the main menu of the Lely Control app, select Routes and push Select Blockage route and push... - Page 92 in n o vato rs in ag ric u ltu re Push twice to confirm and go two levels up. Push Yes to save the modification. Push to confirm and go one level up. 5-36 Operating Instructions...
-
Page 93: Maintenance
in n o vato rs in ag ric u ltu re Maintenance Introduction This chapter contains the preventive maintenance schedule and the applicable preventive maintenance procedures for the Discovery. It also contains some basic corrective maintenance procedures. Preventive Maintenance Schedule The following table shows the preventive maintenance schedule. -
Page 94: Maintenance Procedures
in n o vato rs in ag ric u ltu re Maintenance Procedures 6.3.1 Clean the Charging Strips and the Charging Electrodes Make sure that after cleaning the charging electrodes slide over the middle of the charging strips when the machine parks. Preparation Disconnect the main power supply to the charging station. - Page 95 in n o vato rs in ag ric u ltu re Figure 39. Clean the charging strips and the charging electrodes KEY: 1. Charging strips right (upper strip: + , lower strip: -) - 2. Charging strips left (upper strip: + , lower strip: -) - 3. Charging electrodes Close-up Connect the charging station to the main power supply.
-
Page 96: Clean The Ultrasonic Sensor
in n o vato rs in ag ric u ltu re 6.3.2 Clean the Ultrasonic Sensor Inspect the black foam ring on the ultrasonic sensor after cleaning. Replace the foam ring if it is damaged. Preparation Manually drive the machine to a clean and quiet location (see Manually drive the Machine on page 5- Clean Unexpected cow movement. -
Page 97: Clean The Sensing Wheel
in n o vato rs in ag ric u ltu re Start the time path to put the machine into operation (see Start or Stop the Time Path on page 5-33). 6.3.3 Clean the Sensing Wheel Do not use water to clean the sensing wheel! Preparation Manually drive the machine to a clean and quiet location (see Manually drive the Machine on page 5- Clean... -
Page 98: Clean The Manure Scraper
in n o vato rs in ag ric u ltu re Figure 41. Remove the dirt between the sensing wheel and the concrete block KEY: 1. Sensing wheel - 2. Concrete block Close-up Manually drive the machine to the charging station (see Drive the Machine to the Charging Station on page 5-7) . -
Page 99: Clean The Covers
in n o vato rs in ag ric u ltu re Use a suitable lifting or tilting tool to lift the front of the machine and put the vehicle on its rear. To prevent damage of the electronics, do not clean the manure scraper with a high pressure cleaner! (see figure 42 on page 6-7) Clean the manure scraper with water and a brush (see figure 43 on page 6-7). -
Page 100: Replace The Manure Scraper
in n o vato rs in ag ric u ltu re Clean Do not spray water on the vehicle. Clean the upper cover with water and a brush. Close-up Manually drive the machine to the charging station (see Drive the Machine to the Charging Station on page 5-7) . - Page 101 in n o vato rs in ag ric u ltu re Remove the locking pin (1) and pin (2) and remove the scraper assembly (3) from the machine. Clean the manure scraper. Figure 44. Remove the scraper assembly KEY: 1. Locking pin - 2. Pin - 3. Scraper assembly Remove the ten bolts (4), nuts (6) and washers (5) that attach the clamping strip (7) and the manure scraper (8) to the fixation plate (9).
-
Page 102: Replace The Sliding Disc
Use a suitable lifting or tilting tool to put the machine back onto its wheels. Switch ON the Machine (see page 5-4). Start the Lely Control Application (see page 5-5). Push During the calibration process you must not move the machine. - Page 103 Use a suitable lifting or tilting tool to put the machine back onto its wheels. Switch on the machine (see Switch ON the Machine on page 5-4). Open the Lely Control app on the smartphone. Push During the calibration process you must not move the machine.
- Page 104 in n o vato rs in ag ric u ltu re INTENTIONALLY BLANK 6-12 Maintenance...
-
Page 105: Test And Adjustment
Settings 7.2.1 Set the Real-Time Clock Start the Lely Control Application (see page 5-5). In the main menu select Settings and push In the menu Settings select RealTime clock and push Push soft button (see RealTime clock on page 4-23) The real-time clock has a 24 hour format. -
Page 106: Set The Motor Power
Push to confirm and go one level up. 7.2.3 Set the Motor Power Start the Lely Control Application (see page 5-5). In the main menu select Settings and push Select Motor power and push Push to modify the power. -
Page 107: Tests
Stop the time path to take the machine out of operation (see Start or Stop the Time Path on page 5- 33). In the main menu of the Lely Control app, select Routes and push To Analyse the Reliability per Route Select Route analysis and push Select Fail. -
Page 108: Test A Route
Put the route into a manual route. Start the manual route (see Start, Stop or Pause a Manual Route on page 5-33). Find the actions and action numbers on the display of the user interface of the Lely Control app. Make sure the route is correct. -
Page 109: Make Sure The Bluetooth Connection Is Reliable
Stop the time path to take the machine out of operation (see Start or Stop the Time Path on page 5-33). In the main menu of the Lely Control app, select Work and push (three times). Read the safety message and confirm if you have a clear view on the machine. -
Page 110: Test The Ultrasonic Sensor
Machine on page 5-7). Make sure no object is between the ultrasonic sensor and the wall. In the main menu of the Lely Control app, select Test and push Select Ultrasound and push If the ultrasonic sensor is on the left, push soft button L, else push Make sure the machine is between you and the wall. - Page 111 in n o vato rs in ag ric u ltu re Close-up Drive the Machine to the Charging Station (see page 5-7). Start the time path to put the machine into operation (see Start or Stop the Time Path on page 5-33). Test and Adjustment...
- Page 112 in n o vato rs in ag ric u ltu re INTENTIONALLY BLANK Test and Adjustment...
-
Page 113: Troubleshooting
Start the Lely Control Application (see page 5-5). Stop the time path to take the machine out of operation (see Start or Stop the Time Path on page 5- 33). In the main menu of the Lely Control app, select Alarms and push Troubleshooting... -
Page 114: Read A Report
Stop the time path to take the machine out of operation (see Start or Stop the Time Path on page 5- 33). In the main menu of the Lely Control app, select Alarms and push Select Report list and push Table 3. -
Page 115: Alarm List
Charging on page 7-4). If the machine is still not charging, call your local service provider. 2 DOUBLE_ACTION • Software failure. Call your local Lely service provider. 3 DIS_OFF_RANGE No bump point found. Calibrate the gyroscope (see • Discovery lost -> searching... - Page 116 in n o vato rs in ag ric u ltu re Alarm code and message Description / cause Recovery procedure If the problem remains: Do a route analysis (see Analyse the Reliability of a Route on page 7-3). Modify the routes that are unreliable (see Modify a Route on page 5-28).
- Page 117 Reliability of a Route on page 7-3). Modify the routes that are unreliable (see Modify a Route on page 5-28). If the problem remains, call your local Lely service provider. 8 TURN ERROR More than 360 degree Calibrate the Gyroscope (see page •...
- Page 118 Replace the Manure Scraper on page 6-8) . Test a Route (see page 7-4). If the problem remains, call your local Lely service provider. 14 EXTRA CHARGE1 Voltage is too low, the machine recharges for an extra hour. For information only.
- Page 119 Modify the routes that are unreliable (see Modify a Route on page 5-28). 24 Flash error!! Call your local Lely service provider. 25 SHORT-CIR. 1R Call your local Lely service provider. 26 SHORT-CIR. 2R Call your local Lely service provider.
- Page 120 Make sure there are no worn parts (manure scraper, sliding disk). If the alarm is repeated more than 5 times a week, call your local Lely service provider. 33 FULL CHARGING Not enough charging time Modify the routes (see Modify a •...
- Page 121 Make sure the Battery is Charging • Discovery beeps for 1 hour. (see page 7-4). Charge the machine. 44 BATT_FATAL_ER Call your local Lely service provider. 45 GYRO_TYPE Call your local Lely service provider. 47 GYRO_AUTOSTOP Automatic gyro • Recalibrate the gyroscope in...
- Page 122 55 BACKUP ERROR2 • No backup on the Make a Backup. Smartphone. 56 Short-circuit brush Call your local Lely service provider. motors! 57 GYRO_SPI Call your local Lely service provider. 58 GYRO_I_INSTAB Call your local Lely service provider. 59 GYRO_TIMEOUT Call your local Lely service provider.
-
Page 123: Report List
Make sure the machine does not skid. 7 Ultrasonic sensor gives too many reflec Clean the Ultrasonic Sensor (see page 6-4) and the Check startpulse sensing wheel. Clean ultrason sensor Clean sensing wheel If the problem remains, call your local Lely service provider. Troubleshooting 8-11... - Page 124 Clean the Ultrasonic Sensor (see page 6-4) and the Check startpulse sensing wheel. Clean ultrason sensor Clean sensing wheel If the problem remains, call your local Lely service provider. 9 Left motor drives harder than the right Call your local Lely service provider. motor -> check the drive 10 Right motor drives harder than the left Call your local Lely service provider.
-
Page 125: Information Report List
Check startpulse Clean ultrason sensor Test the Ultrasonic Sensor (see page 7-6). Clean sensing wheel If the problem remains, call your local Lely service provider. 61 Bad signal of ultrasonic sensor-> clean: Clean the Ultrasonic Sensor (see page 6-4) and the - ultrasonic sensor sensing wheel. -
Page 126: Troubleshooting Tables
(see connection lost smartphone. Install or update the Lely Control App on your Smartphone on page 5-1). The smartphone is Make sure bluetooth of the smartphone not paired with the is switched on. - Page 127 OFF. The distance between Move the smartphone towards the machine the smartphone and and try to connect (see Start the Lely the machine is too big Control Application on page 5-5). The vehicle does not move. machine is switched Switch ON the Machine (see page 5-4).
-
Page 128: Troubleshooting Table Charging Station
Adjust the motor power to a lower level bump point. than before. (see Set the Motor Power on page 7-2). Other. Call your local Lely service provider. Bad route. Modify the route (see Modify a Route on page 5-28). The backup process of the... - Page 129 85 degrees C (185 degrees Connect plug and retry after one seconds rest. hour. Green and Yellow LED together Current too high (>20 A). Remove short-circuit, else: Call blink 7 times, followed by a few your local Lely service provider. seconds rest. Troubleshooting 8-17...
-
Page 130: Troubleshooting Table Iphone
in n o vato rs in ag ric u ltu re 8.3.3 Troubleshooting Table iPhone Symptom Possible cause Action iPhone does not connect to the Not logged off correctly the last On the iPhone go to Settings machine software time after you finished to >... -
Page 131: Recovery Procedures
Recovery Procedures 8.4.1 Reset the Control System Start the Lely Control Application (see page 5-5). Manually drive the machine away from the charging station (see Manually drive the Machine on page 5-7). Remove the upper cover (see Remove the Cover on page 5-2). -
Page 132: Charge The Machine
in n o vato rs in ag ric u ltu re Do not move the machine. Push soft button Yes and wait until you hear a beep sound (approximately 5 minutes). 8.4.3 Charge the Machine Drive the Machine to the Charging Station (see page 5-7). Make sure the machine is charging (orange and green LEDs are ON (see Charging Station on page 4-8) Let the machine be charged for one hour minimum. -
Page 133: Disposal
Lubricants and fluids must be disposed correctly to prevent pollution of the environment. Read the safety data sheets of the used lubricants and fluids for correct disposal. All lubricants and fluids must be disposed in compliance with the local rules and regulations. Contact your local authority or local Lely service provider for further details. Disposal... - Page 134 in n o vato rs in ag ric u ltu re INTENTIONALLY BLANK Disposal...
-
Page 135: Eg Declaration Of Conformity
in n o vato rs in ag ric u ltu re EG Declaration of Conformity EG Declaration of Conformity 10-1... - Page 136 in n o vato rs in ag ric u ltu re INTENTIONALLY BLANK 10-2 EG Declaration of Conformity...
- Page 138 Lely Industries N.V. CornelisFvanFderFLelylaanF1 NL-3147FPB FMaassluis Tel +31F(0)88F-F12F28F221 Fax +31F(0)88F-F12F28F222 www.lely.com...
Need help?
Do you have a question about the Lely Discovery 90 S and is the answer not in the manual?
Questions and answers