Advertisement
Quick Links
Advertisement

Subscribe to Our Youtube Channel
Related Manuals for Associated RC10


Summary of Contents for Associated RC10
- Page 1 #6004 RC10CC - Kit...
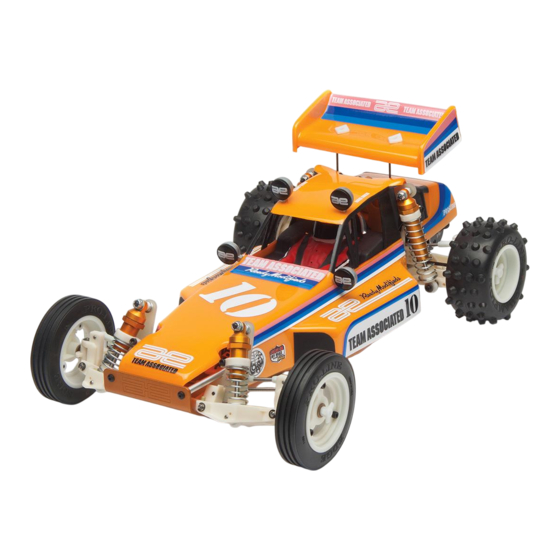
- Page 2 :: Introduction :: Introduction Thank you for purchasing this Team Associated product. This assembly manual contains instructions and tips for building and maintaining your new RC10CC Kit. Please take a moment to read through this manual to help familiarize yourself with these steps.
- Page 3 :: Hardware - 1:1 Scale View :: Hardware - 1:1 Scale View Cap Head (shcs) Button Head (bhcs) Flat Head (fhcs) 4-40x1/4” 4-40x3/8” 0-80x3/16” 4-40x5/16” 4-40x1/2” 4-40x3/16” 4-40x3/8” 4-40x1/4” 8-32x1/4” (6316) 4-40x1/2” 4-40x3/8” 4-40x5/8” (6926) 3x6mm (31531) 8-32x1/2” (6316) 4-40x3/4” Diff Balls 8-32x7/8”...
- Page 4 This symbols indicates a line up your hardare with the correct drawing special note or instruction until you find the exact size. in the manual. Associated Electrics, Inc. Customer Service 21062 Bake Parkway Tel: 949.544.7500 Lake Forest, CA 92630 Fax: 949.544.7501 http://www.AssociatedElectrics.com •...
- Page 5 8/23 :: Nose Plate / Steering Build - Bag A - Step 1 :: Nose Plate / Steering Build - Bag A - Step 1 #8 aluminum RC10 body washer (thick) mounts, Clear 6311 6311 RC10 front RC10 nose plate,...
- Page 6 E-clip RC10 (small) front arms, Clear 6299 (Left & Right) E-clip (small) RC10 front outer hinge pins RC10 king pins Build left and right sides! :: Front Suspension Front Suspension Build Build - Bag B - Bag B - - Step 3...
- Page 7 Drive gear pivot :: Transmission Transmission Build Build - Bag C - Bag C - - Step 2 Step 2 NOTE: Install washer (1) RC10 idler before bowed e-clip (2) gear pivot Bowed e-clip Curved side of bowed E-Clip should point...
- Page 8 :: Transmission Transmission Build Build - Bag C - Bag C - - Step 4 Step 4 Oilite RC10 idler 6299 bushing gear E-clip 3/16x5/16x1/8 (small) Carefully tighten screws in 0-80 x 3/16 x- pattern! BHCS Build 2 :: Transmission...
- Page 9 - Step 7 Caution: Do not get any grease on the back side of the diff drive rings or the outer hub. RC10 diff outer hub Make sure diff rings sit flat on hub! Diff drive Tighten locknut until spring is fully...
- Page 10 Build - Bag D - Bag D - Step 1 - Step 1 4-40 nuts 4-40 x 3/4 SHCS 4-40 x 1 4-40 x 5/8 RC10 rear SHCS SHCS shock tower :: Rear Rear Bulkhead Bulkhead Build Build - Bag D...
- Page 11 :: Rear Rear Bulkhead Bulkhead Build Build - Bag D - Bag D - Step 4 - Step 4 RC10 body #4 aluminum 4-40 x 1/2 mount, washer SHCS Clear Press wing RC10 wing tubes into tubes bulkhead! RC10 transmission...
- Page 12 Suspension Build Build - Bag E - Bag E - Step 3 - Step 3 Dogbone spacer Dogbone Dogbone spring RC10 rear outer hinge 6299 pins E-clip (small) Build left and right sides! Build left and right sides! :: Turnbuckles Build...
- Page 13 - Bag F - Step 3 - Step 3 Use a pair of pliers or wire cutters to carefully hold the turnbuckle while threading on ball cups. 6279 RC10 tie Ball cups rod set (white) (1.25”) Front Camber Turnbuckle 0.53” (13.5mm)
- Page 14 :: Shocks Build Shocks Build - Bag G - Bag G - Step 4 - Step 4 * Shock Bleeding Steps: RC10 1. Pull shock shaft down. shock cap 2. Fill shock body 3/4 full with silicone fluid. Silver 3. Slowly move the shock shaft up and down to remove air from under piston.
- Page 15 :: Shocks Build Shocks Build - Bag G - Bag G - Step 5 - Step 5 Front: 6.5mm Rear: Front shock RC10 shock spring, silver collar, (3.85lb) Clear RC10 Rear shock spring cup, 4-40 x 3/8 spring, silver Clear SHCS (2.10lb)
- Page 16 :: Chassis Build Chassis Build - Bag H - Bag H - Step 1 - Step 1 6338 RC10 nose Antenna tube brace tubes and cap 4-40 x 3/8 BHCS RC10 antenna mount, Clear 4-40 x 1/4 BHCS 4-40 x 3/8...
- Page 17 :: Electronics Build Electronics Build - - Bag I Bag I - Step 3 - Step 3 Follow steps below to properly install Z bend wire into servo horn and steering link. NOTE: Hole choice may vary depending on servo and servo horn used. #4 aluminum washer 1) Press down on the...
- Page 18 :: Wheels / Tires and Body - - Bag J Bag J - Step 1 - Step 1 TIP: For faster motors, it is recommended to glue the tire bead to the wheels! RC10 rear wheel, RC10 front Clear wheel,...
- Page 19 - Step 5 Painting Tips: Driver : RC10 driver Your RC10 Kit comes with a clear figure, clear polycarbonate driver figure. You will need to prep the driver figure before you can paint it. Wash the inside and outside thoroughly with warm water and liquid detergent.
- Page 20 - Step 6 6332 6332 Body Body clip clip 6312 RC10 Clear Edition Decal Sheet :: Wheels / Tires and Body :: Wheels / Tires and Body - - Bag J Bag J - Step 7 - Step 7 6159...
- Page 21 :: Notes :: Notes...
Need help?
Do you have a question about the RC10 and is the answer not in the manual?
Questions and answers