Advertisement
Advertisement

Related Manuals for PRORUN PRM48V38


Summary of Contents for PRORUN PRM48V38
- Page 2 1. PRODUCT SPECIFICATIONS Model PRM48V38 Battery LPC12-75 (Leoch) 48V (4 X 12V) Transmission Gear box Speed Forward 7.45 MPH (12 km/h) Speed Reverse 2.17 MPH (3.5 km/h) Frame Robotically Welded Tires Front 15.0 X 6.00 - 6 Tires Rear 16 X 6.5 -8 Turning Radius R17.7 inches (R 450 mm)
-
Page 3: Table Of Contents
2. TABLE OF CONTENTS 1. PRODUCT SPECIFICATIONS……………………………….……….2 2. TABLE OF CONTENTS……………………………………………...….3 3. GENERAL WARNINGS…………………………………………………4 4. GENERAL SAFETY REGULATIONS…………………..…………..5 5. SYMBOLS………………………………………………………...………..16 6. SET UP………………………………………………………………………18 7. CONTROLS AND OPERATIONS………….………………………23 8. MAINTENANCE…………………………………………….…………..41 9. TROUBLESHOOTING…………………………………………………49 10. EXPLODED VIEWS AND PARTS LIST…………………………56... -
Page 4: General Warnings
3. GENERAL WARNINGS FOLLOW THESE INSTRUCTIONS CAREFULLY! Before use, read and understand the installation and operation instructions in this manual to become familiar with how this riding mower works. Failure to follow all instructions listed below may result in electric shock, fire, and/ or serious injury. 1. -
Page 5: General Safety Regulations
This machine was built to be operated according to the safe practices in this manual. As with any type of power equipment, carelessness or error on the part of the operator can result in serious injury. This machine is capable of throwing objects and amputating fingers, hands, toes, and feet. - Page 6 48 VOLT BATTERY SYSTEM Servicing requires extreme care and knowledge of the system and should be performed only by a qualified service technician contact PRORUN Customer Service with questions or issues with this machine. Always use original equipment manufacturer’s (OEM) replacement parts when servicing.
- Page 7 PERSONAL SAFETY 1. Stay alert, watch what you are doing and use common sense when operating a machine. Do not use a machine while you are tired or under the influence of drugs, alcohol, or medication. A moment of inattention while operating machines may result in serious personal injury.
- Page 8 4. Store idle machines out of the reach of children and do not allow persons unfamiliar with the machine or these instructions to operate the machine. Machines are dangerous in the hands of untrained users. 5. Maintain machines and accessories. Check for misalignment or binding of moving parts, breakage of parts and any other condition that may affect the machine’s operation.
- Page 9 7. Follow all charging instructions and do not charge the battery pack or machine outside the temperature range specified in the instructions. Charging improperly or at temperatures outside the specified range may damage the battery and increase the risk of fire. SERVICE 1.
- Page 10 11. In case of a system fault or complete loss of battery power, the mower can freewheel. Depress the brake pedal to maintain control and stop the unit. Restart the mower if the problem persists contact PRORUN Customer Service. 12. Keep in mind that the operator or user is responsible for accidents or hazards occurring to other people or their property.
- Page 11 Be aware and pay attention to the safety system function that stops power to the blades when driving in reverse. If not functioning properly, contact PRORUN Customer Service or an authorized dealer for safety system inspection and repair.
- Page 12 34. Use only accessories and attachments approved for this machine by the machine manufacturer. Read, understand, and follow all instructions provided with the approved accessory or attachment. 35. Data indicates that operators aged 60 years and above are involved in a large percentage of riding mower related injuries.
- Page 13 DESIGNATED USE The riding mower is intended for mowing in domestic gardens and allotments with a Max Slope of 15°. Additional applications, such as for mulching, are only permitted if the original accessories are used and in compliance with the maximum load values. This appliance is intended solely for use in noncommercial applications.
- Page 14 Anyone using the riding lawn mower should first be acquainted with the instructions in this manual and completely familiarize themselves with the controls to ensure correct and safe machine use. 2. Never allow children under 14 years of age to operate the machine. Children 14 years and over should read and understand the instructions, observe safe operation practices as outlined in this manual and on the machine, and be trained and supervised by an adult.
- Page 15 Do not carry passengers. 1. Such overloads could negatively affect the stability of the machine and overstress the mechanical parts. 2. Do not make any changes to the machine. 3. Incorrect use of the machine as indicated in this paragraph will invalidate the warranty and relieve the manufacturer of any liability in case of any ensuring injuries or damage.
- Page 16 ▪ Lack of wheel grip. ▪ Too much speed. ▪ Inadequate breaking. ▪ Machine not suitable for job to be done. ▪ Lack of acquaintance with effects deriving from terrain conditions, especially on slopes. The Driver Must Be Suitably Prepared and Should Focus On: 1.
- Page 17 2. Disengage the blade during transport and every time it is not used. GENERAL SERVICE Contact PRORUN Customer Service with questions or issues with this machine. This will ensure that the safety of the riding mower is maintained. 2. Recharge only with the charger specified by the manufacturer. A charger that is suitable for one type of battery pack may create a risk of fire when used with another battery pack.
- Page 18 8. Periodically check to make sure the blades come to a complete stop within approximately 5 seconds after operating the blade disengagement control. If the blades do not stop within this time frame, contact PRORUN Customer Service. 9. Regularly check the Safety Interlock System for proper function as described later in this manual.
- Page 19 3. When the machine must be parked, stored, or left unattended, lower the blade deck, and remove the ignition Key to prevent unauthorized persons starting the machine. 4. Regularly check, or have an after-sale center check, the tightening of the blade and supporting bolts.
-
Page 20: Symbols
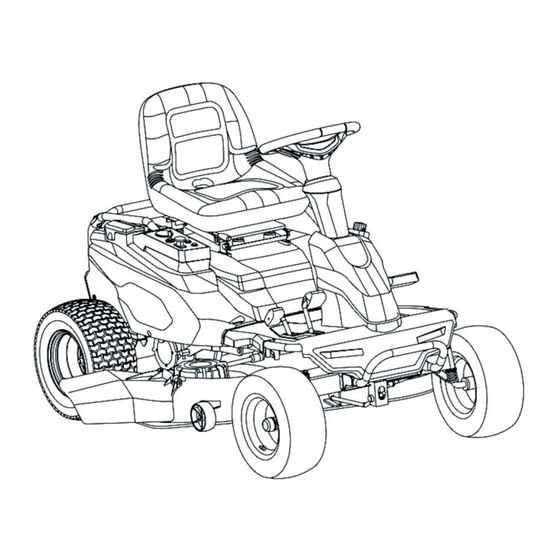
5. SYMBOLS This page depicts and describes safety symbols that may appear on this product. Read, understand, and follow all instructions on the machine before attempting to assemble and operate. The labels on the machine are to be considered an integral part of the machine. - Page 21 IDENTIFICATION OF THE MAIN COMPONENTS...
-
Page 22: Set Up
1) Cup Holder 10) Charging Port and Port Cover 2) Deck Height Index Bracket 11) Low Cutting Speed Button 3) Deck Lift Handle (Manual Lift) 12) Cruise Control Button 4) Park Brake Handle 13) Reverse Mode Operation Button 5) Brake Pedal 14) Blade Start / Stop Knob, Power Take 6) Forward Drive Pedal Off (PTO) - Page 23 2. MOUNT THE SEAT A. Remove the two nuts and bolt (1) from mower's mounting brackets (2). B. Place the Seat (3) on top of springs and align the holes on the seat's mounting bracket (4) with the holes in mower's mounting brackets (2).
- Page 24 4. MOUNT THE STEERING COLUMN 5. MOUNTING THE STEERING COLUMN COVER AND STEERING WHEEL A. Mount the Coupler (11) onto the A. Remove the Column Cover Screw mower's Steering Shaft (12) using M6 X 25 (17) from the bucket nut screw M8 x 20 (13).
- Page 25 6. DRIVE RIDING MOWER OFF THE PALLET Fully charge batteries before the first time you use the mower. A. After installing the steering wheel and seat, increase the tractor's cutting deck height to its maximum level. B. Remove the six bolts near the front of the riding mower's pallet (Fig 6A) and remove the wooden cross plank from the base pallet.
- Page 26 MACHINE ASSEMBLY MOUNTING THE FRONT BUMPER Mount the front bumper onto the bottom of the frame using the four M8 x 25 (3) Bolts and four M8 (2) Nuts. The front bumper is typically pre- installed before shipping. MOUNTING THE MULCHING KIT NOTE: The mulching kit can be into the corresponding slots located assembled on the cutting deck with...
-
Page 27: Controls And Operations
TIRE PRESSURE Correct tire pressure ensures machine stability and the correct alignment of the blade with the ground. Periodically check the pressure of the tires and regulate according to the pressures shown on the technical data table. To inflate the tires, use an inflation gun featuring pressure gauge (Fig 30). - Page 28 PARK BRAKE HANDLE (Part 4) The Park Brake Handle is located at the front of the console under the steering wheel. It is used to engage the Parking Brake when the mower is at rest. Refer to the operation section of this manual for detailed instructions.
- Page 29 REVERSE DRIVE PEDAL (Part 7) The Reverse Drive Pedal is located on the front right side of the steering column. The ground speed is controlled with this pedal. The further forward the pedal is moved the faster the mower will travel.
- Page 30 RIGHT HAND CONSOLE LOW CUTTING SPEED BUTTON (Part 11) The Low Cutting Speed Button is located on the Right Hand Console next to the Cruise Control Knob. Pressing the Low Cutting Speed Knob reduces the blade’s rotation to the lower speed of 2900 RPM (Normal rotational blade speed is 3200 RPM).
- Page 31 BLADE START / STOP KNOB, POWER TAKE OFF (PTO) (Part 14) The Blade Start / Stop Knob is located on the Right Hand Console in front of the Key Switch. The Blade Start / Stop Knob operates the electronic motors on the cutting deck.
- Page 32 ▪ DRIVE MOTORS OVERLOAD ▪ BATTERY FAULT (Overload and/or Temperature) Contact PRORUN Customer Service when audio fault indicators persist. SAFETY RECOMMENDATIONS The machine must only be used for the purpose for which it was designed (cutting grass). Do not tamper with or remove the safety devices fitted on the machine.
- Page 33 2. Carefully read the instructions for use. Make sure you are familiar with the controls and know how to stop the blades and the engine quickly. 3. SAFETY - Do not risk INJURY or DEATH. Allow only those who have become competent in its usage to operate this machine.
- Page 34 ▪ This mower is equipped with a Safety Interlock System for the protection of the operator. If the Interlock System should ever malfunction, do not operate the mower. Contact PRORUN Customer Service. ▪ The Safety Interlock System prevents the mower from starting unless the Parking Brake is set, and the blades are disengaged.
- Page 35 3. Do not start mowing if the blades vibrate or if you are unsure whether they are sharp enough. Always Remember That: 1. A badly sharpened blade pulls at the grass and causes the lawn to turn yellow. 2. A loose blade causes unwanted vibrations and can be dangerous. Do not use the machine if you are unsure whether it is working safely or efficiently.
- Page 36 In case of a system fault or a complete loss of battery power, the mower can freewheel. Depress the Brake Pedal to maintain control and stop the unit. Restart the mower. If the problem persists contact PRORUN Customer Service. 1. Release the Parking Brake Handle.
- Page 37 When driving the mower immediately after full charge (i.e., just after removing it from the charger) the mower will operate at lower speeds and start slowly, even when the mower pedals are fully depressed. The mower will also “pulse break” when traveling downhill during this period.
- Page 38 ▪ Mow across slopes, not up and down. If mowing a slope, start at bottom and work upwards to ensure turns are made uphill. ▪ Do not mow at a high ground speed, especially if a mulch kit (available separately) is installed. ▪...
- Page 39 The speed of the mower will affect the quality of the mowers cut. Mowing at full speed will adversely affect the cut quality. Control the ground speed with the drive petals. 5. When approaching the other end of the strip, slow down or stop before turning. 6.
- Page 40 END OF MOWING When You Have Finished Mowing: 1. Operate the parking brake. 2. Disengage blade rotation. 3. Lift the blade deck up as far as it will go. 4. Drive the machine to your destination. Always remove the ignition Key (15) before leaving the machine unattended! To keep the battery charged, do not leave the ignition Key (15) in the ON position when the engine is not running.
- Page 41 2. Stop the mower, disengage the blades, set the Parking Brake Handle, and turn the Key Switch to the OFF position. 3. Thread the hose coupler onto the end of your garden hose. 4. Attach the hose coupler to the Smart Jet System’s water port located on the left top surface of the mower’s cutting deck.
- Page 42 DRIVING AND TRANSPORT ON PUBLIC ROADS Check the relevant road traffic regulations before driving the machine on a public road. If transporting the machine on another vehicle always use approved securing devices and make sure that the machine is securely held. USING ON SLOPING GROUND Only mow on slopes with gradients up to the already mentioned maximum.
- Page 43 DO NOT: 1. Do not turn on slopes unless necessary; then turn slowly up put hill and use extra care when turning. 2. Do not mow near drop-offs, ditches, or embankments. The mower could suddenly turn over if a wheel is over the edge of a cliff, ditch, or if an edge caves in. 3.
- Page 44 To check the slope, proceed as follows: 1. Remove this page and fold along the dashed line. 2. Locate a vertical object on or behind the slope (e.g., a pole, building, fence, tree, etc.) 3. Align either side of the slope gauge with the object (see Figure 1 and Figure 2). 4.
- Page 45 6. The best height of the grass on a well-kept lawn is approximately 2.5 – 3.0 inches (6-7 cm). With one cut, you do not need to remove more than a third of the total height. If the grass is very tall, it should be cut twice in a twenty-four-hour period. The first time with the blades at maximum height, possibly reducing the cutting width, and the second cut at the desired height.
-
Page 46: Maintenance
Check Blades Charge Battery Check Hardware The electrical components on this mower are not serviceable contact PRORUN Customer Service with questions or issues with this machine. Contact PRORUN Customer Service for replacement parts. Use only identical replacement parts. This will ensure the safety of the mower is maintained. - Page 47 The batteries in your mower are not expected to last for the life of your mower. Rechargeable batteries degrade with time and use. The batteries may eventually need to be replaced. Contact PRORUN Customer Service for replacement batteries. Replace batteries if the battery’s capacity drops below 50% of the initial capacity.
- Page 48 The Safety Switch located on the left side of the Charging Port is a part of the Safety Interlock System. The power of the mower will disengage with opening of the Charging Port Cover. CHARGER MODEL WT4808PNG/ WT4808PMG: ▪ INPUT: 100-240V, 50/60Hz, Max. 4.5A / OUTPUT: 48Vd.c 8A ▪...
- Page 49 RIDING MOWER STORAGE Store the mower indoors, in a dry place, and out of the reach of children. If your mower is not going to be operated for an extended period of time (30 days to approximately 6 months) the mower should be prepared for storage. Store the mower in a dry and protected location.
- Page 50 LUBRICATION Before lubricating, repairing, or inspecting, always stop the mower, disengage the blades, set the Parking Brake Handle, and remove the Switch Key to prevent unintended starting. FRONT WHEELS Each of the Front Wheel Spindles are equipped with a grease fitting. Lubricate with a No.
- Page 51 LEVELING THE DECK (SIDE TO SIDE) Check the mower’s tire pressure before performing any deck leveling adjustments. If the cutting deck appears to be moving unevenly, a side-by-side adjustment can be performed. If Necessary, Adjust as Follows: 1. Place the machine on a flat ground and check the tire pressure.
- Page 52 If the mower does not come to a complete stop when the Brake Pedal is completely engaged, or if the mower’s rear wheels can roll with the Parking Brake Handle applied, the Brake is in need of adjustments. Contact PRORUN Customer Service with questions or issues with this machine.
- Page 53 Periodically inspect the blade adapter(s) for cracks, especially if you strike a foreign object. Replace them when necessary. Follow The Steps Below for Blades Service: 1. The Cutting Deck on the mower should not be removed. To access the Blade(s), the mower can be placed on a lift, driven on ramps, or placed on jack stands.
-
Page 54: Troubleshooting
9. TROUBLESHOOTING PROBLEM POSSIBLE CAUSE REMEDY Excessive 1. Damaged or bent cutting 1. Replace blade. Vibration. blade. 2. Tighten blade or remove and 2. Cutting blade loose or balance. unbalanced. Uneven 1. Uneven tire pressure. 1. Check the tire pressure on all four Cut. - Page 55 PRORUN Customer Service. 11. Check to see if Operator Presence Switch is plugged in. Shut off and restart mower. If the problem persists contact PRORUN Customer Service. 12. Unplug charger and return to the start- up prompt.
- Page 56 REMEDY The blades 1. Left cutting deck 1. Shut off and restart mower. If the do not communication failure. problem persists contact PRORUN rotate, or 2. Right cutting deck Customer Service. the blades communication failure. 2. Shut off and restart mower. If the stopped.
-
Page 57: Exploded Views And Parts List
10. EXPLODED VIEWS AND PARTTS LISTS... - Page 73 PRORUN regularly improves our products, and you may find slight differences between your machine and the descriptions contained within this operator’s manual. Modifications can be made to the machine without notice and without the obligation to update the manual, providing that the essential safety and functional characteristics remain unaltered.
Need help?
Do you have a question about the PRM48V38 and is the answer not in the manual?
Questions and answers