
Related Manuals for SeasonsComfort SDW2FCMB

Summary of Contents for SeasonsComfort SDW2FCMB
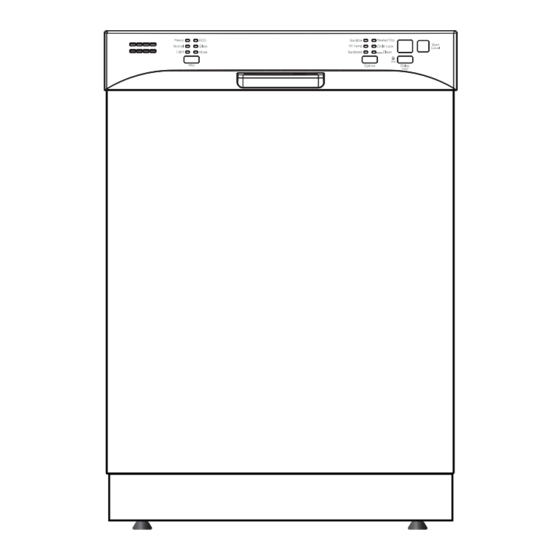
- Page 1 INSTALLATION INSTRUCTIONS SDW2FCMB SDW2FCMS SDW2FCMW Exclusively Distributed By: To Reorder: HD Supply Atlanta, GA 30339 1-800-431-3000 hdsupplysolutions.com © 2022 Made in China...
-
Page 2: Table Of Contents
Contents Introduction ..................3 IMPORTANT SAFETY INSTRUCTIONS . -
Page 3: Introduction
IMPORTANT SAFETY INSTRUCTIONS CAUTION RISK OF ELECTRIC SHOCK DO NOT OPEN This symbol indicates that dangerous voltage constituting a risk of electric shock is present within your refrigerator. This symbol indicates that there are important operating and maintenance instructions in the literature accompanying your refrigerator. -
Page 4: Preparing To Install Your Dishwasher
READ CAREFULLY. KEEP THESE INSTRUCTIONS. If you have an installation problem, contact your dealer or installer. You are responsible for providing adequate electrical, exhausting, and other connecting facilities. Preparing to install your dishwasher Parts supplied: Wood screws (4) Hose clamp Top mounting clips (2) Drain hose Tools needed:... -
Page 5: Enclosure Requirements
Materials needed (kit purchased separately): 90° Elbow, ferrule and compression nut. (3/8 Three wire nuts (UL listed) Teflon thread NPT external thread on one end. Other end (two included in kit) seal tape sized to fit water supply line New installations only Strain relief (for Gardenhose Hot water line (min. -
Page 6: Drain Requirements
If installing into a corner, allow 2 in. (5.08 cm) min. clearance between dishwasher and adjacent cabinet, wall, or other appliances. Allow 25.63 in. (65.1 cm) min. clearance from the front of the dishwasher for opening the door. Countertop Dishwasher 25.63”(65.1 cm) Clearance for door opening 2”... -
Page 7: Electrical Requirements
Method 1 - Air gap with a waste tee or garbage disposal connection Method 2 - High drain with a waste tee or garbage disposal connection You must provide a method to attach the drain hose to the underside of the countertop. 32 in. -
Page 8: Cabinet Preparation And Wire Routing
Power Cord Method • Install a 3-prong grounding type receptacle. The wall outlet can be installed in a cabinet or on a wall adjacent to the undercounter space in which the dishwasher is to be installed. • Use power cord kit (part number 5304504505) under Smart Choice brand marked with Dishwasher Install Kit With Power Cord, available for purchase from an authorized store. -
Page 9: Preparing The Hot Water Line
Preparing the hot water line • The water connection is on the left side of dishwasher. • The hot water line may enter the opening from either side, the rear, or the floor within the shaded area. • The hot water line may pass through the same hole as the electrical and drain hose. Or, you can drill an additional 1.5 in. (3.81 cm) maximum diameter hole for the hot water line. -
Page 10: Installation Instructions
Installation instructions Step 1: Check the door balance Caution: • Opening the door of your dishwasher before it is installed will cause it to tip forward. Do not open the door until you are ready to install your dishwasher. • If it is necessary to open the door, hold the top of the dishwasher securely with one hand and hold the door with the other hand. 1 Hold the top of the dishwasher firmly. -
Page 11: Step 3: Remove The Toekick
Step 3: Remove the toekick • Remove the two toekick screws with a Phillips screwdriver, then remove the toekick. You’ll need: Adjustable wrench Phillips screwdriver Step 4: Install to power Turn off the electricity to the dishwasher’s electrical circuit. Make sure that the electrical power is turned off at the source. Warning: •If your house wiring is not 2-wire with a ground, a ground must be provided by the installer. - Page 12 8 Replace the junction box cover on the right front of the dishwasher. Be sure that the wires are not pinched under the cover. Note: If you have trouble replacing the junction box cover, loosen the screws on the strain relief. Junction box Ground to green White to white...
-
Page 13: Step 5: Install The 90° Water Supply Elbow
Step 5: Install the 90° water supply elbow 1 Wrap the male thread of the 90° elbow with Teflon thread seal tape twice. Do not use plumber's putty. 2 Install the 90° elbow onto the water valve. Do not overtighten the 90° elbow. The water valve bracket could bend or the water valve fitting could break. -
Page 14: Step 6: Install The Drain Hose
Step 6: Install the drain hose 1 Make sure that the leveling feet are loosened before standing the dishwasher upright. They may be tight from shipping/packaging. 2 Turn the dishwasher upright. 3 Slide a screw-type hose clamp onto the right-angled end of the drain hose. 4 Install the drain hose to the dishwasher drain outlet on the back of the dishwasher, then tighten the screw-type hose clamp. -
Page 15: Step 7: Inserting The Drain Hose Through The Cabinet
Step 7: Inserting the drain hose through the cabinet • Insert the drain hose into the hole in the cabinet wall. If a power cord is used, guide the end through a separate hole. Tip: Position the water line and house wiring on the floor to avoid interfering with the base of the dishwasher. Maximum drain hose length 10 ft. -
Page 16: Step 9: Position The Dishwasher Under The Countertop
Step 9: Position the dishwasher under the countertop 1 Make sure that the wires are secure under the dishwasher and not pinched or in contact with door springs or other dishwasher components. Tip: Check tub insulation blanket, if equipped. It should be positioned so it is not bunched up or interfering with door springs. Check by opening and closing the door. -
Page 17: Step 11: Securing The Dishwasher To The Countertop
3 If the door hits the tub, the dishwasher is not installed correctly. Adjust the leveling legs to align the door to the tub. Note: Keep the dishwasher level. Turn the legs to adjust the level You’ll need: Adjustable wrench Level Step 11: Securing the dishwasher to the countertop •... - Page 18 Method 2 1 Remove the plastic tub caps from the inside of the dishwasher tub. 2 Drive a wood screw through the hole in the side of the dishwasher into the cabinet frame. IMPORTANT: Drive the screws straight and flush. Protruding screw heads will scratch the side if the dishwasher. This method is for attaching the dishwasher to the side of the cabinet, and it should be done when the countertop is made of granite or other breakable materials.
-
Page 19: Step 12: Connecting The Water Supply Line
Step 12: Connecting the water supply line 1 Make sure that you wrapped the 90° elbow with Teflon thread seal tape twice. 2 Slide the compression nut, then the ferrule over the end of the water supply line. Note: If you have a steel-grated line, you do not need a ferrule or compression nut. 3 Insert the water supply line into the 90°... - Page 20 2 If a longer drain hose is required, you can add up to 42" (1.1 m) of length, for a total of 10 ft. (3.01 m) to the factory installed hose. Use 5/8” or 7/8” inside diameter hose and a coupler to connect the two hose ends. Secure the connection with screw-type hose clamps.
-
Page 21: Step 15: Performing A Pre-Test Check
4 If connecting the drain line to a garbage disposal, make sure that the drain plug has been removed. Your dishwasher will not drain if the plug is left in place. Remove the plug You’ll need: Screw-type Coupler for hose clamps extending drain line Phillips screwdriver (if applicable) -
Page 22: Step 16: Wet Testing The Dishwasher
Step 16: Wet testing the dishwasher 1 Turn on the power supply (or plug the power cord into the outlet, if equipped). 2 Turn on your dishwasher (refer to the User Guide for instructions). 3 Close the door, select the Rinse only cycle, and press START/Cancel. 4 Make sure that water enters the dishwasher.
Need help?
Do you have a question about the SDW2FCMB and is the answer not in the manual?
Questions and answers
Remove child lock