
Related Manuals for Westinghouse VM-42F140S


Summary of Contents for Westinghouse VM-42F140S
- Page 1 USER’S MANUAL MANUEL DE L’UTILISATEUR MANUAL DEL USUARIO VM-42F140S VM-47F140S 1080p Monitor Moniteur 1080p...
-
Page 2: Table Of Contents
1.2 Important Safety Instructions………………………………………. 2 2. GENERAL INFORMATION………………. …………………………. ….. 4 2.1 Overview……………………………….…………………………….. 4 2.2 Feature………………….……………..………………………………. 7 2.3 Controls and Ports of the Monitor…………..………………………. 9 2.4 Accessories………………………………………………………….. 12 2.5 Remote Control……………………..…………………………... 13 3. INSTALLATION & FUNCTION ADJUSTMENT………….………… 15 3.1 Installation……………………………..………………………………15 3.2 How to assemble the Base…………..……………………………17... -
Page 4: Important Safety And Precautions
1. IMPORTANT SAFETY AND PRECAUTIONS This wide active matrix TFT (thin film transistor) liquid crystal monitor is designed for use as a stand alone MONITOR as well as a display device for video electronics appliances and personal computers. 1.1. Important Information Warning : To reduce the risk of fire or electric shock, do not expose this product to rain or moisture. -
Page 5: Important Safety Instructions
1.2 Important safety instructions Read these instructions. Keep these instructions. Heed all warnings. Follow all instructions. Do not use this apparatus near water. Clean only with dry cloth. Do not block any ventilation openings. Install in accordance with the manufacturer’s instructions. - Page 6 Unplug this apparatus during lightning storms or when unused for long periods of time. Refer all servicing to qualified service personnel. Servicing is required when the apparatus has been damaged in any way, such as power-supply cord or plug is damaged, liquid has been spilled or objects have fallen into the apparatus, the apparatus has been exposed to rain or moisture, does not operate normally, or has been dropped.
-
Page 7: General Information
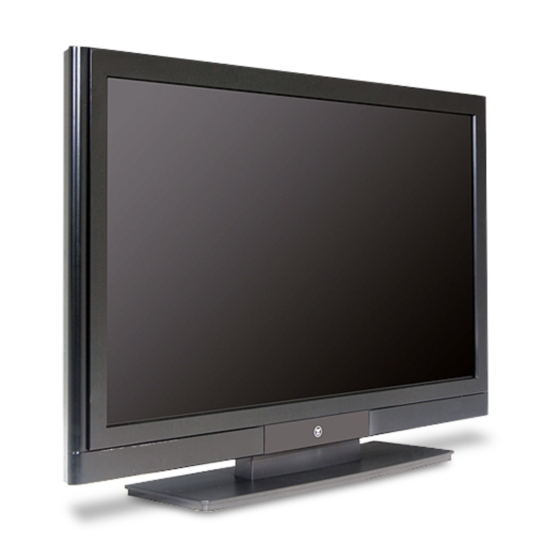
2. GENERAL INFORMATION 2.1 Overview A. Front View of the HD Video Monitor Left Channel Speaker IR receiver & Right Channel LED indicator Speaker... - Page 8 B. Rear View of the HD Video Monitor...
- Page 9 C. Side View of the HD Video Monitor Right Side Function Buttons Use the function buttons on the right side of the HD Monitor or on the remote control to display the On Screen Display (OSD).
-
Page 10: Feature
It’s the highest resolution 42”/47" 1080p monitor on the market. The Westinghouse VM-42/47F140S features a 1920 x 1080 resolution display with more than 2 million pixels. True 1080p The Westinghouse VM-42/47F140S 1080p monitor is a true 1080p monitor. It can accept, process and output any 1080p source input. Multi-Source Input... - Page 11 HD digital cable, HD satellite and an HD game console. Design Excellence The Westinghouse VM-42/47F140S 1080p monitor is the largest screen you can fit in a limited space. Because of its ingenious and efficient design, you can fit this 47" display in the same space that other brands can only squeeze in a 40"...
-
Page 12: Controls And Ports Of The Monitor
ORANGE LIGHT ─ Power Sleep OFF LIGHT NOTE 1: These buttons control the basic features of your MONITOR, including the on-screen menu. To use advanced features, you must use the remote control. NOTE 2: The picture of LCD MONITOR display is for reference only. - Page 13 DVI Input Using a DVI cable, connect to a computer, HD Digital cable/satellite receiver, HD Set-Top-Box, DVD or other device with a DVI output. DVI AUDIO Input (Left / Right) Connect an external DVI audio source to this jack. HDMI1 Video Input Connect to an external video device such as HD Digital cable/satellite receiver, HD Set-Top-Box, Media Center PC, or DVD player...
- Page 14 VGA Input Using a 15-pin VGA cable, connect to a computer. VGA Audio Input (Stereo) Connect to the audio out from a computer. 10. YPbPr1 / YPbPr2 Video Input Connect an external video device such as DVD or video game system with component output to these jacks 11.
-
Page 15: Accessories
2.4 Accessories VM-47F140S User’s Manual Remote Control & Batteries Quick connect Power Cord Quick Connect Guide Warranty Card Warranty Card Screw driver & Screws x4(base) -
Page 16: Remote Control
2.5 Remote Control Power Switch MONITOR power On/Off. Mute Turn the sound On/Off. Swap Not supported. Not supported. Backlight Adjust the LCD backlight level. Sleep Press to select a preset time interval for automatic power down. C.C. Not supported. Favorite Not supported. - Page 17 Guide Not supported. Info Display the source information. YPbPr1 Select YPbPr1 source input. MONITOR Not supported. Select VGA source input. HDMI Select HDMI 1, 2 or 3 source input. YPbPr2 Select YPbPr2 source input. Select DVI source input. Video Select Video input.
-
Page 18: Installation & Function Adjustment
3. INSTALLATION AND FUNCTION ADJUSTMENT 3.1 Installation Insert Batteries into Remote Control 1) Remove the battery cover. 2) Insert two size AAA batteries corresponding to (+) and (-) marks on the battery compartment. CAUTION ‧ Only use AAA batteries. ‧ Do not mix new and old batteries. -
Page 19: Turn Power On
Turn Power On Press the power button on the right side of the LCD MONITOR, or press the power (Red) button on the remote control. Select input source for the LCD MONITOR using the OSD menu or... -
Page 20: How To Assemble The Base
3.2 How to assemble the BASE a. Carefully place the TV face down on a soft clean surface. b. Position the BASE at bottom the TV. c. Install the four screws underneath the BASE. (See picture below) -
Page 21: How To Remove The Base
3.3 How to remove the BASE Carefully place the MONITOR face down on a soft clean surface. Remove the four screws underneath the BASE. (See picture below) Pull out the BASE from the MONITOR. -
Page 22: Function Adjustment
To display the main menu, press the Menu button on the right side of front control keys of the LCD MONITOR or the MENU key on the remote control. Press arrow keys to select desired OSD menu and Enter key to select desired setting. - Page 23 PICTURE PICTURE MODE < ENHANCE / MOVIE / SPORT / GAME / USER > Press arrow key to adjust your favorite picture mode setting. BRIGHTNESS (For Picture Mode set to USER Only) < 0 ~ 100 > Press arrow key to adjust brightness setting. CONTRAST (For Picture Mode set to USER Only) <...
- Page 24 AUTO (For PC Analog input only) Press Enter key to do PC auto-adjust function. CLOCK (For PC Analog input only) < 0 ~ 100 > Press arrow key to adjust PC clock setting. PHASE (For PC Analog input only) < 0 ~ 100 > Press arrow key to adjust PC phase setting. H-POSITION (For PC Analog input only) <...
- Page 25 AUDIO VOLUME < 0 ~ 100 > Press arrow key to adjust volume setting. EQUALIZER < STANDARD / MOVIE / MUSIC / USER > Press arrow key to adjust your favorite equalizer mode setting. BASS (For EQUALIZER set to USER Only) <...
- Page 26 SETTINGS MENU POSITION MENU H-POSITION MENU V-POSITION Press arrow key to adjust menu position. MENU TIMEOUT < OFF / 15S / 30S / 45S / 60S > Press arrow key to adjust OSD MENU timeout function setting. LANGUAGE < ENGLISH / 繁體中文 / SPANISH / FRENCH > Press arrow key to adjust OSD MENU timeout function setting.
- Page 27 7. REMOTE LOCK When REMOTE LOCK ON, press “ i ” key for about 7 sec to unlock. 8. SETUP MENU LOCK When REMOTE LOCK ON, press “ i ” key for about 7 sec to unlock. 9. SET ID Press arrow key to adjust additional feature function setting.
-
Page 28: Troubleshooting
4. TROUBLESHOOTING There is no picture or sound. ▪ Make sure the AC adapter is connected. ▪ Verify that there is a valid source signal. ▪ Make sure the correct input mode is selected. There is no picture from AV. ▪... - Page 29 Remote control does not work. ▪ Install new batteries. ▪ Make sure the remote sensor window isn’t blocked. ▪ Make sure the system is in the right mode (MONITOR / VCR / CBL / AUX) There are stripes on the screen or colors fade.
- Page 30 ▪ The provider may be experiencing difficulties. ▪ Check input connections. The picture is doubled or tripled. ▪ The source signal may be weak. ▪ Check input connections. The picture is spotted. ▪ There may be interference from other appliances nearby or around the LCD Monitor.
-
Page 31: Product Specification
Wall Mount For use only with UL Listed Wall Mount Bracket or M2010 Wall Mount Bracket. Dimension W x H x D Weight (net) Without Accessories VM-42F140S 42” LCD Panel 16:9 1920 x 1080 16.7 Million True Colors Hor./ 176 Ver. -
Page 32: Video Input
ITEMS Screen Size Aspect Ratio Panel Resolution Display colors Viewing Angle (CR>10) Composite Signal Y, C Signal Video Input Component Signal HDMI Connection VGA Connection PC Input DVI Connection Audio 1 Audio 2 Audio Input Audio 3 Audio 4 Audio 5 Speaker ( build-in) Audio Output RCA Out... - Page 33 Westinghouse Digital Electronics Santa Fe Springs, CA SE-UM-4208-0701...
Need help?
Do you have a question about the VM-42F140S and is the answer not in the manual?
Questions and answers