
Related Manuals for Oceanled OceanBridge

Summary of Contents for Oceanled OceanBridge
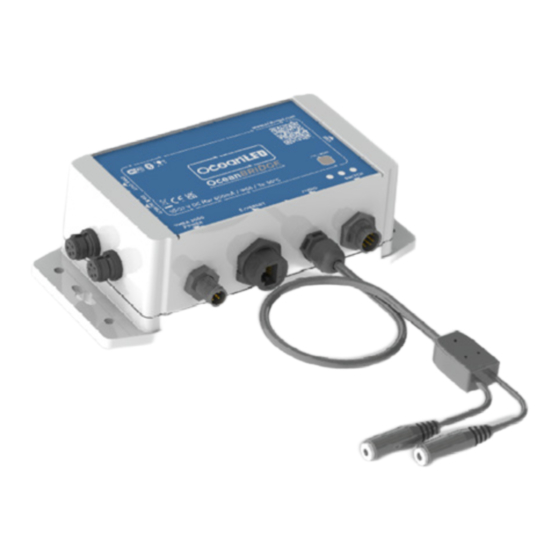
- Page 1 INSTALLATION & OPERATION MANUAL OceanBridge L I G H T. Y E A R S A H E A D . WWW.OCEANLED.COM OceanLED MAN-000052 / OceanBridge / Rev1...
-
Page 2: Preface
Danger: Risk of electric shock or electrocution This OceanBridge unit must be installed by a licensed or certified electrician in accordance with all applicable local codes and ordinances. Improper installation will create an electrical hazard which could result in death or serious injury to swimmers, installers, or others due to electrical shock, and may also cause damage to property. - Page 3 USB memory storage devices. Please DO NOT connect devices with AC power sources, such as PCs or Laptops, to the OceanBridge product using the USB port. This port is exclusively designed for USB memory storage devices only to ensure safe and optimal functionality.
- Page 4 Wi-Fi, be aware that the unit will need to reboot to apply the changes. This reboot will result in the temporary loss of the Wi-Fi connection with the OceanBridge unit, which will need to be manually restored based on the applied changes. Additionally the reboot will cause a temporary loss of the DMX output.
-
Page 5: Table Of Contents
2.1 Parts Supplied ..............................12 3 Mounting .................................. 13 3.1 Finding the Mounting Location ........................... 13 3.2 Mounting the OceanBridge Unit ......................... 14 4 Electrical Installation / Wiring ..........................15 4.1 Power Connection (without NMEA2000) ......................15 4.2 Connecting via NMEA2000 ..........................16 4.3 MFD Install –... - Page 6 9.2 OceanBridge Connectors Pinout........................83 9.3 Dimensions ................................. 84 9.4 RJ45 Waterproof Cover Kit Assembly ....................... 85 9.5 Optional Accessories ............................86 9.6 Furuno MFD – Installing the .enc file ......................... 88 9.7 OceanBridge System Installation Diagrams ...................... 90 10 Warranty ................................. 91...
-
Page 7: Introduction
Introduction 1.1 Product Overview The OceanBridge is a control unit designed to enable the management of OceanLED lights and third-party lights through a Multi-Functional Display (MFD) commonly used on marine vessels. Furthermore, it also offers the ability to manage and control the lighting systems via a Wi-Fi network using various devices such as smartphones, tablets, laptops, etc. - Page 8 INSTALL & OPERATION MANUAL Supported Lighting Configurations The OceanLED OceanBridge allows for the configuration of lighting setups, including the setup of zones and addresses of connected lights via Remote Device Management (RDM). The lighting setup configuration can be performed through the web-based interface accessible via the Wi-Fi link or the MFD unit.
- Page 9 OceanBridge Wi-Fi network to access its features and functionalities. ▪ Client Mode: In this mode, the OceanBridge device functions as a client and can connect to an existing Wi-Fi network created by a separate router or access point. Users can configure the OceanBridge to connect to their preferred Wi-Fi network, enabling the device to communicate with other devices on that network.
- Page 10 DMX Merge (Values takes precedence) – where one DMX connection is used as an input, and the other as an output. The output DMX values are a ‘merge’ between the incoming DMX from the input and the OceanBridge generated values. The higher value from either source will be passed to the output.
-
Page 11: Connections Overview
Press once (short press; less than 1s) connected devices Press and hold until Amber LED ON (approx. 5s) Reboot/Reload the OceanBridge App Press and hold until Red LED ON (approx. 30s) Factory Reset – All data and settings will be erased... -
Page 12: System Configuration Examples
A schematic diagram showing the locations of all components and cables is an essential aspect of planning any installation. Furthermore, it proves useful for potential future system additions or maintenance. Below, you can find examples of basic OceanBridge system installations. See Appendix 9.7... -
Page 13: Planning The Installation
OceanBridge INSTALL & OPERATION MANUAL Planning The Installation INSTALLATION CHECKLIST 1. Plan your installation. 2. Obtain all required equipment and tools. 3. Mount the system components. 4. Route all cables. 5. Drill holes for cable routing and mounting as required. -
Page 14: Mounting
For optimum function of the Wave Motion mode, please consider mounting location and position of the OceanBridge device, see the illustration below. The unit should be mounted in or as close as possible to the rotational centre of the vessel – to maximise the accelerations the unit can detect due to wave motion. -
Page 15: Mounting The Oceanbridge Unit
OceanBridge INSTALL & OPERATION MANUAL 3.2 Mounting the OceanBridge Unit Once a suitable location has been found, use the following steps to mount the unit: 1. The unit's mounting holes are located at the four corners of the lid. 2. The provided mounting screws are designed to be compatible with various surfaces, such as wood or fibreglass. -
Page 16: Electrical Installation / Wiring
Electrical Installation / Wiring 4.1 Power Connection (without NMEA2000) 1. For a straightforward power connection, use the OceanBridge Power Cable (p/n: 013202; not included with OceanBridge – p/n: 013201). Connect the end with the socket to the OceanBridge NMEA2000/Power port ①... -
Page 17: Connecting Via Nmea2000
T-connector (not provided). Connect the female end of the drop cable to the OceanBridge NMEA2000/Power port ① and the male end to the NMEA2000 installation backbone ② (T-connector female port). Power for the unit will be supplied through the NMEA2000 network (Bus Powered). -
Page 18: Mfd Install - Ethernet Connection
Obtain the Raymarine RayNet (F) to RJ45 (M) cable (not provided). Pull back or remove the RJ45 connector boot from the cable and install the RJ45 Cover Kit supplied with the OceanBridge. Connect the RJ45 plug with the fitted cover kit to the OceanBridge Ethernet port and connect the other end to the Raymarine MFD device. - Page 19 Obtain Shielded Ethernet cable (min Cat5e, not provided). Fit the RJ45 Cover Kit supplied with the OceanBridge over one of the RJ45 plugs and connect to OceanBridge Ethernet port. Connect the other end of the Ethernet cable to the Furuno MFD fly lead RJ45 socket.
-
Page 20: Lan Ethernet Connection - No Mfd
Ethernet cable (for PCs) or Wi-Fi. Please obtain a Shielded Ethernet cable (min Cat5e, not provided). Use the RJ45 Cover Kit supplied with the OceanBridge to cover one end of the Ethernet cable's RJ45 plug. - Page 21 OceanBridge INSTALL & OPERATION MANUAL Below, you can find examples of typical OceanBridge Audio system connections: OceanBridge Simple Audio Setup OceanBridge Audio Setup with an Advanced Audio System...
-
Page 22: Dmx Connections
Appendix 9.5). Connect the male plug of the cable with the OceanBridge DMX OUT port and connect the other end to the first light in the DMX chain. Ensure to terminate the last device in the DMX chain with the DMX terminator (not provided;... - Page 23 For the connection with the OceanConnect JB, use the DMX Control Output Cable*. Connect the male plug of the cable with the OceanBridge DMX OUT port and connect the bare end to the first OceanConnect JB. If only one OceanConnect JB has been used, ensure to switch ON the onboard terminator in the OceanConnect JB. For more than one OceanConnect JB installation use the DMX Control Cable* to link the OceanConnect JB or use Control Input Cable* to link with the Explore series lights.
- Page 24 For the connection with the 2-Way Junction Box (JB) (p/n: 013205) use the DMX Control Output Cable*. Connect the male plug of the DMX Control Output Cable* with the OceanBridge DMX OUT port and connect the bare end to the first 2-Way JB.
- Page 25 INSTALL & OPERATION MANUAL 2010, 3010 Single Colour/ Colours (Legacy Lights) Please contact OceanLED for more information on how to connect the 2010 and 3010 series lights to the OceanBridge unit. OceanBridge DMX Connection - Pro-Series 2010, 3010 (AC Drivers)
-
Page 26: External Dmx Controller Connection
To connect the external DMX controller, wire the bare end of the DMX Control Output Cable (not included see Appendix 9.5) to the DMX output of the control device and connect the other end to the OceanBridge DMX In/Out. Please refer to the controller's own Installation Manual for instructions on connecting the control cable. -
Page 27: External Switches Connections
4.8 External Switches Connections Switch Input Cable To connect external switches, wire the push button switches to the OceanBridge Switch Input Cable (p/n: 013203 – Appendix 9.5) according to the diagram below. Then, connect the Switch Input Cable plug to the OceanBridge Switch Input Connector. -
Page 28: Final Installation Checks
Wait for the startup procedure to complete (approx. 18 seconds), the Green LED should be ON. • Test the OceanBridge unit device by short-pressing the test/reset button (approx. less than 1s) located on the front of the device to power on the connected lights. No prior setup in the User Interface (UI) is required... -
Page 29: System Setup
TURNING THE SYSTEM ON AND OFF The system is turned on by applying power to the OceanBridge unit device. Wait for the startup procedure to complete (approximately 18 seconds); the Green LED on the unit should be ON. To turn off the system, turn off the power to the device. - Page 30 “Controls whether RGBW Lighting features are shown” option is ticked. Ensure that the OceanBridge device is recognized by the MFD device. Go to: Settings > Network > Device List to check if the OceanBridge device is listed. If there is no OceanBridge device ensure that the MFD unit and the OceanBridge device are connected to the NMEA2000 Backbone.
- Page 31 Mode, allowing connections from external devices such as a laptop/ PC, smartphone and tablets using the Wi-Fi connection. 1. On your device, open the Wi-Fi settings, and the OceanBridge device should appear in the list of available networks. 2. Select the OceanBridge Network and type in the password 'password' when requested.
- Page 32 LAN Ethernet Connection If you opt to connect the OceanBridge device to your local LAN network via an Ethernet cable, ensure that the control device, such as a laptop/PC, tablet, or smartphone, is also connected to the same local network, either through a wired Ethernet connection (PC) or Wi-Fi.
- Page 33 3. Terminate the OceanBridge Wi-Fi device connection on your device and connect to Router Wi-Fi. 4. Type the IP address in the device's browser address bar to connect with the OceanBridge HTML5 App (e.g., http://192.168.1.100). Be aware that the IP address may change after power cycling the connected...
-
Page 34: How To Setup The Equipment
The Discover method is employed in setups where all lights are of the DMX type supporting the RDM protocol, including OceanConnect setups. This is a fully automated process in which the OceanBridge device will search and automatically add the devices attached to the DMX network. In this case, the user's role will be limited to making any necessary changes to the name (e.g. - Page 35 OceanBridge INSTALL & OPERATION MANUAL Lighting Zones Explained Lighting zones can be configured for various areas of the vessel. A zone may include underwater lights, strip lights, downlights, courtesy lights, or any combination of these, as long as they are the same light type*. The Zone Setup page allows users to identify (blink) the zone, edit the name/light type, include devices, and delete the zone.
- Page 36 DMX Address Settings when Setting Up Devices When using the fully RDM-compatible DMX device, the internal DMX address of the device can be changed from the OceanBridge user interface during the setup process. Note: The Sweep function effect requires the lights to have unique/individual DMX addresses.
-
Page 37: Quick Start Launch - Preloaded Simple Setup
Please refer to action was performed via the Wi-Fi control device, the other paragraphs in this document for a guide the connection with the OceanBridge unit will be on how to use the OceanBridge app. terminated and will need to be restored. -
Page 38: Device Setup
OceanBridge INSTALL & OPERATION MANUAL 5.4 Device Setup Adding Devices - Discover Method 1. From the main page select the three horizontal lines 2. Select 'Settings' from the menu to open the icon “ ” to open the menu. submenu. - Page 39 OceanBridge INSTALL & OPERATION MANUAL Adding Devices - Manual Add Method 1. From the main page select the three horizontal lines 2. Select 'Settings' from the menu to open the icon “ ” to open the menu. submenu. 3. Select "Device Setup".
- Page 40 OceanBridge INSTALL & OPERATION MANUAL Identify Device The 'Identify Device' function allows the user to 'blink' the light to physically identify its location on the vessel, and this location can be added to the device name. This feature proves to be useful when setting up zones or configuring the order for the sweep effect.
- Page 41 ‘DELETE’ button. The pop-up will close, and the list 'SAVE' to confirm the changes. The pop-up will of the devices will update. close, and the updated values will be saved. 5. To return to the home page, select the OceanLED logo or choose 'Home' from the menu.
-
Page 42: Zone Setup
OceanBridge INSTALL & OPERATION MANUAL 5.5 Zone Setup Creating Single Zone 1. From the home page select the three horizontal 2. Select 'Settings' from the menu to open the lines “ ” icon to open the menu. submenu. 3. Select ‘Zone Setup’. - Page 43 'START BLINK.' To edit the name or delete the zone from the system, choose 'EDIT.' Alternatively, select the OceanLED logo or choose 'Home' from the menu to return to the home page, where the zone card will be displayed.
- Page 44 OceanBridge INSTALL & OPERATION MANUAL Creating Multiple Zones 1. From the home page select the three horizontal 2. Select 'Settings' from the menu to open the lines “ ” icon to open the menu. submenu. 3. Select ‘Zone Setup’. 4. Choose 'NEW' to open the pop-up and create 1 zone.
- Page 45 'START BLINK.' To edit the name or delete the home page as zone cards. zone from the system, choose 'EDIT.' Alternatively, select the OceanLED logo or choose 'Home' from the menu to return to the home page, where the zone cards will be displayed.
- Page 46 OceanBridge INSTALL & OPERATION MANUAL Identify Zone The 'Identify Zone' function allows the user to 'blink' the group of lights included in the zone, helping them physically identify the locations on the vessel and ensuring that the correct lights were added to the zone.
- Page 47 5. If more lights have been added to a zone, there 6. To return to the home page, select the OceanLED will be a warning pop-up message. Select 'OK' to logo or choose 'Home' from the menu confirm your choice or 'CANCEL' to cancel the change.
-
Page 48: Sweep Setup
OceanBridge INSTALL & OPERATION MANUAL 5.6 Sweep Setup The sweep setup should only be performed after all devices have been added to the system. Please note that the sweep effect can only be set for one light type (e.g. Colours RGBW or Single Dimmable). Additionally, it's important to be aware that the RGB and RGBW light types are interchangeable. -
Page 49: Audio Source Setup
• Bluetooth • Line In Tap the OceanLED logo or home button in the menu to return to the home page; the selection will be automatically saved. 5.8 Timer Setup The timer function allows to power on or off the saved scene at the user specified time. Prior to setting the timer there have to be saved scenes in the system. - Page 50 OceanBridge INSTALL & OPERATION MANUAL 3. Select ‘APPLY’ to save/update the current time. 4. Select “ ” icon to add new timer. Add New Timer 5. Select ‘clock’ icon to edit the time. 6. Tap on the field next to ‘Effect’ to change the effect/ assign a scene.
- Page 51 OceanBridge INSTALL & OPERATION MANUAL Delete the timer: To delete the timer select the ‘bin’ icon. Deactivate the timer: To deactivate the timer tap the toggle switch on top of the timmer card. Timer settings overview...
-
Page 52: External Trigger Setup - Switch Functionality
OceanBridge INSTALL & OPERATION MANUAL 5.9 External Trigger Setup - Switch Functionality Prior to assigning the functionality to the external switches/buttons there have to be saved scenes in the system. 1. To assign functionality to the buttons/switches, 2. From the list, select the field below the button/switch navigate to: Menu ( ) >... -
Page 53: System Options
System options 6.1 Network Settings 6.1.1. Ethernet To ensure compatibility with the MFD, keep the OceanBridge unit's IP address set to: 'Obtain an IP address automatically’. Ethernet Configurations: Setting a Fixed IP Address 1. To view or edit the ethernet settings, navigate to: 2. -
Page 54: Wi-Fi Ap Mode
6.1.2. Wi-Fi AP Mode Direct Access Point (AP) Mode (default): In this mode, the OceanBridge device acts as an access point itself, creating its own Wi-Fi network. Users can connect their devices (such as smartphones, tablets, or laptops) directly to the OceanBridge Wi-Fi network to access its features and functionalities. -
Page 55: Wi-Fi Client Mode
6.1.3. Wi-Fi Client Mode Client Mode: In this mode, the OceanBridge device functions as a client and can connect to an existing Wi-Fi network created by a separate router or access point. Users can configure the OceanBridge to connect to their preferred Wi-Fi network, enabling the device to access the local network and communicate with other devices on that network. - Page 56 At this point, you won’t be able to connect to the OceanBridge device due to the change of the IP address. The IP address can be retrieved from the OceanBridge app, either via the MFD, or if not using the MFD, the best method is to connect with a laptop and attempt to connect via the http://oceanled-bridge route.
- Page 57 OceanBridge INSTALL & OPERATION MANUAL Disabling/Enabling Wi-Fi To disable/enable the Wi-Fi select the toggle switch on top of the page.
-
Page 58: Bluetooth
Disconnecting the Bluetooth device: To disconnect the Bluetooth device from the OceanBridge system, follow these steps: navigate to the Bluetooth settings in the OceanBridge app and choose 'STOP PAIRING.' This action will remove the device from the system. Additionally, on your device, open the connection... -
Page 59: Dmx
INSTALL & OPERATION MANUAL 6.1.5. DMX In addition to the standard dual output, the OceanBridge device enables the connection of an external DMX controller. This allows the external DMX signal to either merge with the OceanBridge's own output or pass through, thereby disabling the functionality of the OceanBridge device. - Page 60 Wi-Fi, be aware that the unit will need to reboot to apply the changes. This reboot will result in the temporary loss of the Wi-Fi connection with the OceanBridge unit, which will need to be manually restored based on the changes using the new credentials.
- Page 61 OceanBridge INSTALL & OPERATION MANUAL Delete a backup 1. Navigate to: Menu ( ) > System > Backup & 2. Select ‘DELETE BACKUP’ Restore. 3. Select the location the backup was saved, either 4. Select the backup name and confirm the pop-up Internal or USB.
-
Page 62: How To Perform Factory Reset
5. Select 'Restore' to initiate the factory reset. All data, including locally stored files, will be erased, except for the 'System_Database_Reset' file. Please note that if the process is performed from a remote device connected by Wi-Fi, the connection with the device will be lost, and the user will need to reconnect with the OceanBridge device. -
Page 63: Background Image
6.4 Background Image To change the OceanBridge App background: 1. Prepare the graphic file in the PNG format, rename it 2. Plug the USB stick into the OceanBridge USB port. to “background.png” and copy to the root of the USB stick. -
Page 64: Firmware Update
Download the latest OceanBridge app firmware version from the OceanLED website (update-x.x.x-release.tar.gz) and transfer it to the root directory of the provided USB stick. Insert the USB stick into the OceanBridge USB port and follow the firmware upgrade procedure outlined below. -
Page 65: Security
OceanBridge INSTALL & OPERATION MANUAL 6.6 Security The Security section enables the user to lock the access to selected settings of the OceanBridge device, preventing unauthorized users from making changes. Note: Default PIN to access the Security Settings: “1234”. 1. Navigate to: Menu ( ) >... - Page 66 If you forget the PIN, you can reset it to the default '1234' using a factory reset. Please refer to the 'Factory Reset' chapter or contact OceanLED technical support for assistance.
-
Page 67: General User Guide
OceanBridge INSTALL & OPERATION MANUAL General User Guide 7.1 Home Page 7.2 Menu Options... -
Page 68: Adjusting Lights Settings And Effect
OceanBridge INSTALL & OPERATION MANUAL 7.3 Adjusting Lights Settings and Effect The user interface had multiple panes, making it easy to navigate between different functions. Zone colours and effects adjustment panes Colours Adjustments – Colour Light Type... - Page 69 OceanBridge INSTALL & OPERATION MANUAL Colours Adjustments – Dual Colour Light Type Effects The OceanBridge allows to select between five different effects (subject to light type). Effect Light type Static Cycle Strobe Audio Movement Colours RGB Colours RGBW Dual Blue/White...
- Page 70 OceanBridge INSTALL & OPERATION MANUAL Static Effect - It refers to static colour of the selected light. User can select single colour. Cycle – Light cycles between the selected colours. Up to four colours can be set for colours and dual-colour light types.
- Page 71 "x" (Stern → Bow) and "y" (Port → Starboard) axis. Please note that the Stern → Bow and Port → Starboard axis settings / orientation will depend on how and where the OceanBridge box...
- Page 72 The OceanBridge also supports DC switched OceanLED light models, where toggling the power on/off allows for mode changes. The 'Power Toggle' functionality is only supported with the use of the OceanConnect Junction Box (JB) device. The OceanConnect JB device interprets the signal send from OceanBridge to activate the desired mode of the ‘Power Toggle’ light model.
-
Page 73: How To Activate The Zone, Change Colour, And Apply Effects
OceanBridge INSTALL & OPERATION MANUAL 7.4 How to Activate the Zone, Change Colour, and Apply Effects 1. Select the zone cards toggle button to power on 2. Select the gears icon area in the top right corner of the zone. - Page 74 OceanBridge INSTALL & OPERATION MANUAL 7. To copy the effect to different zones, tick the box 8. Confirm the changes with ‘DONE’ to save it and next to the zone name in the 'Also apply to' return to home page.
-
Page 75: How To Save / Delete A Scene
OceanBridge INSTALL & OPERATION MANUAL 7.5 How to Save / Delete a Scene Save Scene The 'SAVE SCENE' option enables users to save the current zone setup to an action-call button, facilitating the storage and recall of different configurations as needed. Users can save up to 10 scenes. -
Page 76: Sweep Effects
The OceanBridge sweep function entails a lighting effect where the illumination or colour changes gracefully move across the lights. The feature enables the creation of dynamic and visually appealing effects. The OceanBridge sweep function provides users with the ability to choose from three distinct sweep effects. -
Page 77: How To Activate The Sweep, Change Sweep Effect, And Save As Scene
OceanBridge INSTALL & OPERATION MANUAL 7.7 How to Activate the Sweep, Change Sweep Effect, and Save as Scene Select the Sweep icon from the home page to From the new window select the desired effect. open Sweep effect settings page. - Page 78 OceanBridge INSTALL & OPERATION MANUAL In the save scene pop-up add the new scene The new scene will appear on the home screen. name, select the check box next to Sweep, and choose ‘SAVE’ to save the scene configuration. The Sweep can be switched off by navigating to the Sweep setting page (Sweep icon) and selecting the ‘Off’...
-
Page 79: Nmea2000 Lighting
The lighting PGN* can primarily be used to control the lighting, recall saved scenes, and does not allow for saving any settings. All the setups can be done only from the OceanBridge App. Navico Group supported MFDs as time of writing. - Page 80 INSTALL & OPERATION MANUAL Lighting PGN Main Options All changes made in the Lighting PGN interface will be reflected in the OceanBridge app; however, the effect functionality support may be limited for some light types. Therefore, OceanLED strongly recommends using the OceanBridge app as the main tool for effect and scenes setup.
-
Page 81: Troubleshooting
Problem Check Cause Solution Unit does not power on Check power input to No power Check main supply fuse the OceanBridge / breaker Check power input connections If using NMEA2000 Backbone - check connection with the backbone (T-connector) Power OK, but... - Page 82 Lighting PGN shows Check drop cables Not connected Connect the device to Not Connected connections for both the NMEA2000 the OceanBridge unit backbone and MFD device Wait a bit longer after Lighting PGN powering on the MFD successfully unit; it takes some time to...
-
Page 83: Appendix
Wi-Fi capability • Client Mode - Users can configure the OceanBridge to connect to their preferred Wi-Fi network, enabling the device to access the internet and communicate with other devices on that network (smartphones, tablets, or laptops). -
Page 84: Oceanbridge Connectors Pinout
On-board sensors • Thermal Sensor: The OceanBridge device is equipped with a thermal sensor that allows for monitoring the temperature of the printed circuit board (PCB) within the bridge unit. This sensor helps in maintaining optimal operating conditions and monitoring potential overheating issues. -
Page 85: Dimensions
OceanBridge INSTALL & OPERATION MANUAL 9.3 Dimensions... -
Page 86: Rj45 Waterproof Cover Kit Assembly
OceanBridge INSTALL & OPERATION MANUAL 9.4 RJ45 Waterproof Cover Kit Assembly 1. Slide the cover kit parts (A, B, C) over the interconnection cable. Depending on the plug boot type, use/cut to fit, or discard the provided spacer (C). 2. Fit the RJ45 plug into the main part (D) and tighten the cover kit gland (A). -
Page 87: Optional Accessories
INSTALL & OPERATION MANUAL 9.5 Optional Accessories OceanBridge Power Cable P/N: #013202 The OceanBridge Power Cable is a 2-meter optional power cable designed for OceanBridge. It provides a reliable power connection when not connected to the NMEA 2000 network. Key Features: ➢... - Page 88 DMX Control Input Cable (15m), P/N: #011053 DMX Control Input Cable (20m), P/N: #011054 Explore E6 & E7 Control Link Cables – to connect OceanBridge with Explore Series Lights or to link Explore lights (male Binder – female Binder). Explore E6 & E7 Control Link Cable (3m), P/N: #012924 Explore E6 &...
-
Page 89: Furuno Mfd - Installing The .Enc File
9.6 Furuno MFD – Installing the .enc file Before using the Furuno MFD device with the OceanBridge app, the user must install the “OceanLED.enc” configuration file. The file is provided on the USB memory stick supplied with the OceanBridge device. - Page 90 8. After implementing the OceanLED.enc file on the MFD, power on the OceanBridge device. On the home page, select the 'Add Page' (plus icon) to add the OceanLED Bridge app. In the 'Edit Page' section, choose the OceanLED logo from the menu on the right and move it to the centre of the screen. Select the green checkmark to confirm.
-
Page 91: Oceanbridge System Installation Diagrams
OceanBridge INSTALL & OPERATION MANUAL 9.7 OceanBridge System Installation Diagrams... -
Page 92: Warranty
OceanBridge INSTALL & OPERATION MANUAL Warranty For technical assistance: Europe: service@oceanled.com The Americas: warranty@oceanledusa.com Warranty Serial Code(s): © 2023 Ocean LED Marine LTD Ocean LED Marine LTD Ocean LED USA LLC All Rights Reserved Unit 1 Jacknell Road 778 South Military Trail...
Need help?
Do you have a question about the OceanBridge and is the answer not in the manual?
Questions and answers