Table of Contents
Advertisement
Document No.: Airray Revision No.:1.0
Date of Issue: 2020-06-29
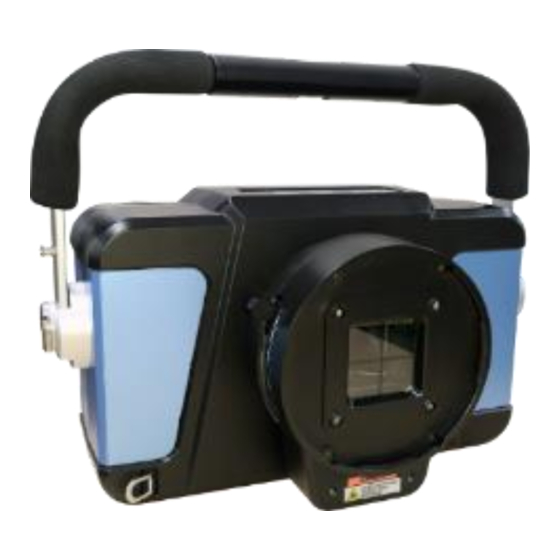
Airray 20 / For Veterinary
Battery Powered Portable X-ray System
Product Manual (Operation & Service)
POSKOM Co., Ltd.
POSKOM Tower, 227 Sowon-ro, Deogyang-gu, Goyang-si,
Gyeonggi-do, 10534, Korea
Tel : +82–31–906–9007, Fax : +82–31–908–4208
Http://www.poskom.com
E-mail: sales@poskom.com
Advertisement
Table of Contents

Subscribe to Our Youtube Channel
Related Manuals for Poskom Airray 20


Summary of Contents for Poskom Airray 20
- Page 1 Document No.: Airray Revision No.:1.0 Date of Issue: 2020-06-29 Airray 20 / For Veterinary Battery Powered Portable X-ray System Product Manual (Operation & Service) POSKOM Co., Ltd. POSKOM Tower, 227 Sowon-ro, Deogyang-gu, Goyang-si, Gyeonggi-do, 10534, Korea Tel : +82–31–906–9007, Fax : +82–31–908–4208 Http://www.poskom.com...
-
Page 2: Table Of Contents
Document No.: Airray Revision No.:1.0 Date of Issue: 2020-06-29 TABLE OF CONTENTS PART I. OPERATION MANUAL General description ---------------------------------------------------------------------- Operational safety ---------------------------------------------------------------------- Operating environment ---------------------------------------------------------------------- Radiation safety ---------------------------------------------------------------------- System configuration ---------------------------------------------------------------------- Specification ---------------------------------------------------------------------- Parts description ---------------------------------------------------------------------- Operation --------------------------------------------------------------------- How to operate --------------------------------------------------------------------- Remote control function &operation ----------------------------------------------------------------------... -
Page 3: Part I. Operation Manual
All POSKOM Portable series x-ray units are equipped with ripple free, high frequency generators that produce up to 40~50% stronger power output efficiency when compared to conventional x-ray systems. - Page 4 Document No.: Airray Revision No.:1.0 Date of Issue: 2020-06-29 SAFETY SYMBOLS The following safety symbols will be used in the equipment. Their meaning is described below. Alternating current Protective earth sground) Caution ON spower) Non-ionizing radiation OFF spower) General prohibition sign Ionizing radiation Type B Applied Part General warning sign...
- Page 5 Indication: The POSKOM Battery Type Portable X-ray Unit is intended for use by a qualified/trained doctor or technician on both adult and pediatric subjects for taking diagnostic radiographic exposures of the skull, spinal column, chest, abdomen, extremities, and other body parts.
- Page 6 5.EN 60825-1: 2007 Safety of laser products -Part 1: Equipment classification and requirements POSKOM and its distributors assume no responsibility or liability for post-sales operating and safety practices, nor can it be responsible for personal injury or damage resulting from misuse of its X-ray systems.
- Page 7 5) The coefficient of variation of measured values of air kerma shall not be greater than 0.05 for any combination of loading factors. Note: The device fundamental performance shall be tested once a year contacting POSKOM service or a qualified agent.
-
Page 8: Operational Safety
Date of Issue: 2020-06-29 2. Operational safety 2.1. Safe Use Expected service-life of POSKOM X-ray units is 7 years. Please see the manufacture date on the device label. 2.2. General Rules for Safe Use The user’s safety, ease of operation and product reliability were our major concerns when designing this X-ray system. - Page 9 Document No.: Airray Revision No.:1.0 Date of Issue: 2020-06-29 X-radiation may be interrupted by strong electromagnetic interference. Do not use X-ray (14) equipment at not suitable environment e.g. near active HF surgical equipment and the RF shield room of an ME System for magnetic resonance imaging, where the intensity of EM disturbances is high Checking before operating Make sure this unit is connected to a well-grounded power supply.
- Page 10 Document No.: Airray Revision No.:1.0 Date of Issue: 2020-06-29 2.3. Electromagnetic compatibility (EMC) information (1) General Airray X-ray Units fulfill the requirements on electromagnetic compatibility according to EN 60601-1-2:2015 sEd. 4). The equipment is built so that the generation and emission of electromagnetic interference is limited to the extent that other devices are not disturbed in their use in accordance with the regulations and so that the equipment itself is suitably immune to electromagnetic interference in hospitals, transports and home healthcare use environment.
- Page 11 Airray should assure that it is used in such an environment. Electromagnetic environment – guidelines Emissions test Compliance The POSKOM Portable X-ray Unit uses RF energy only for its RF emissions internal function. Therefore, its RF emissions are very low and CISPR 11.
- Page 12 Batteries are not alterable or replaceable by the end user. Approved replacement batteries are only available through POSKOM and its authorized dealers and may only be serviced by POSKOM or an approved POSKOM service agency. Unapproved batteries have the potential danger of damaging the device and should not be attempted.
- Page 13 Document No.: Airray Revision No.:1.0 Date of Issue: 2020-06-29 (1) Charge your Lithium-Ion batteries to full capacity before beginning use of your unit in battery mode. (2) Try to use the Lithium-Ion battery every 2-3 weeks. (3) Keep Lithium-Ion batteries at a minimum 30% charge when not in use. (4) Charge Lithium-Ion batteries regularly and at the end of every day of use.
-
Page 14: Operating Environment
Document No.: Airray Revision No.:1.0 Date of Issue: 2020-06-29 3. Operating environment 3.1. For proper operation and the longevity of your system, please avoid exposing this equipment to the following conditions: (1) Exposure to water vapor. (2) Direct exposure to sunlight for prolonged periods of time. (3) Exposure to heavy air contaminants and/or dust. -
Page 15: Radiation Safety
Document No.: Airray Revision No.:1.0 Date of Issue: 2020-06-29 4. Radiation safety CAUTION Ionized radiation produced by the unit may be hazardous to patients and operators unless the following safety regulations are strictly observed. (1) Users and operators are required to wear appropriate protective clothing and gear. (2) Users and operators are required to leave a minimum safe distance from any radiant source and secondary radiation zones. -
Page 16: System Configuration
Document No.: Airray Revision No.:1.0 Date of Issue: 2020-06-29 5. System configuration - Wire and wireless charging using QC2.0 and QC3.0 are possible, and Bluetooth communication is possible by connecting Bluetooth Dongle to the product. - kV and mAs can be checked through LCD and FND and kV and mAs can be changed using the main body’s button. -
Page 17: Specification
Document No.: Airray Revision No.:1.0 Date of Issue: 2020-06-29 6. Specification 6.1. ELECTRONIC SPECIFICATION Contents Specification Input Power Equipment power supply DC9V±0.1V / 1.67A Charger power supply 100~240VAC, 50/60Hz MODEL EP-TA20KWK Output Power Max. Output 1.6kW Max. kV / mA 90kV / 20mA Tube Voltage Range [kV] 50 ~ 90kV in 1kV steps... - Page 18 Document No.: Airray Revision No.:1.0 Date of Issue: 2020-06-29 6.2. Main Body and Carrying Case (1) Main Body <Veterinary use> <Human medical use> (2) Carrying Case...
- Page 19 Document No.: Airray Revision No.:1.0 Date of Issue: 2020-06-29 3) X-ray Tube Specifications (1) General details s1) kV scopesMax. kV): 50 – 100kV s2) Focal spot size: 1.0mm s3) Heat Storage: 7 kJ s4) Cooling rate: 110W s5) Inherent Filtration: 0.5mmAl s6) Target angle: 16°...
- Page 20 Document No.: Airray Revision No.:1.0 Date of Issue: 2020-06-29 (4) Anode Heat characteristic curve (5) Dimension...
-
Page 21: Parts Description
Document No.: Airray Revision No.:1.0 Date of Issue: 2020-06-29 7. Parts description 7.1. Part Names Collimator knob Collimator Handle Operation panel Battery charge connector Hand switch connector MINI OP USB A TYPE USB MINI B TYPE... - Page 22 Document No.: Airray Revision No.:1.0 Date of Issue: 2020-06-29 7.2. OP Console and panel display Name Description kV Control Switch Select kV value by up or down buttons mAs Control Switch Select mAs value by up or down buttons Store, A-K Check Switch Save the selected APR Data, Calib Data, etc…...
- Page 23 Document No.: Airray Revision No.:1.0 Date of Issue: 2020-06-29 value 1. Ready on LED indicator charge Exposure indicator 3. Wait LED 10. kV unit LED 4. Bluetooth on 9. DAP LED 8. DAP unit LED Battery 7. mAs unit LED indicator 6.
- Page 24 Document No.: Airray Revision No.:1.0 Date of Issue: 2020-06-29 Name Function The indicator for “Ready” for X-ray exposure Ready indicator Exposure indicator The indicator for X-ray exposure Stand by indicator The indicator for power conversion state after X-ray exposure kV value display The display for kV value mAs value display The display for mAs value...
- Page 25 Document No.: Airray Revision No.:1.0 Date of Issue: 2020-06-29 7.3. Label Attachment Location (2) High-Voltage Generator Label...
-
Page 26: Operation
±0.1V of the stated values. CAUTION Please check the connection between the power cable and the other cables before operating the equipment and producing exposures. WARNING In case of any trouble, Turn off the unit immediately and contact POSKOM or an authorized distributor. - Page 27 Document No.: Airray Revision No.:1.0 Date of Issue: 2020-06-29 8.2. Positioning of patient s1) Place the loaded cassette on the patient’s backside. s2) Arrange the SID sFocal Spot to Image Receptor Distance) with measuring tape. s3) Turn on the collimator laser pointer with the “Laser Pointer Switch.” s4) Arrange the beam size according to the scale of the X-ray film with the collimator knob.
-
Page 28: How To Operate
CAUTION Third party parts si.e. adaptors, hand switches, etc.) are not compatible and cannot be used with this equipment sexcept those provided by POSKOM and its affiliates). s3) Startup display: sDefault Option : OP05, DAP ON) s4) Turn on the generator pressing the Power Button for 2 seconds. - Page 29 Document No.: Airray Revision No.:1.0 Date of Issue: 2020-06-29 ※ If the first step button of Hand Switch is pressed at Default Option OP05, Laser is turned On and the LAMP is turned on when the Ready LED is turned on after preheating is completed. sPossible to Option change) 9.2.
- Page 30 Document No.: Airray Revision No.:1.0 Date of Issue: 2020-06-29 9.3. Airkerma Display (1) After X-ray emitted, display exposure dose for 1 sec.sunit: μGy) If you press the A-K/STOR button continually, the display shows Feedback kV, Feedback mA, Sec, Airkerma, how many times can be exposed under the same setting value at current battery charging state.
- Page 31 Document No.: Airray Revision No.:1.0 Date of Issue: 2020-06-29 9.5. Lamp Timer Setting Mode s1) Start the Lamp Option Mode. s2) Press the kV + Button, access to the Lamp Timer Setting Mode. s3) Press the mAs +, - Button and set the Lamp On Timer. s4) Press the A-K/STOR Button for 1 second and save the Lamp On Timer.
- Page 32 Document No.: Airray Revision No.:1.0 Date of Issue: 2020-06-29 9.8. Buzzer Option Mode s1) Start the DAP ON/OFF Mode. s2) Press the kV + Button, access to the Buzzer Option Mode. s3) Press the mAs +, - Button, select the Buzzer Option. s4) Press the A-K/STOR Button for 1second, save the Buzzer Option.
-
Page 33: Remote Control Function &Operation
Document No.: Airray Revision No.:1.0 Date of Issue: 2020-06-29 10. Remote control function &operation 10.1.Introduction The exposure hand switch consists of two steps hand switch. The 1 step of the hand switch is called the Preparation sPREP or Ready) step. The 2 step of the hand switch is called the Exposure sExp. - Page 34 Document No.: Airray Revision No.:1.0 Date of Issue: 2020-06-29 ATTENTION Click the “Prep.” hand switch three s3) times consecutively. This will allow you to enter into the “remote hand control” menu mode for operation. <TRIPLE CLICK> 10.3. Memory selection When you click the PREP stage hand switch rapidly three s3) times, the Pre-set Memory station LED and the kV and mAs LED readouts will blink sequentially.
- Page 35 Document No.: Airray Revision No.:1.0 Date of Issue: 2020-06-29 ATTENTION Double click the Prep. stage of the hand switch. The collimator lamp and laser pointer beam will illuminate for X-ray exposure positioning. <DOUBLE CLICK> With the exposure technique smAs& kV) set with your remote hand switch, you are ready to make a radiographic exposure for examination.
- Page 36 Document No.: Airray Revision No.:1.0 Date of Issue: 2020-06-29 CAUTION In order to apply the lowest Dose to patient, it is recommended to use the larger SID that film size allows. Image/Reception Area: The collimator projects a lighted area with reference axis on the image reception area that coincides with X-ray projection area.
-
Page 37: Cleaning And Disinfection
Physical Inspection: Any negative findings should be brought to the attention of the Asset Manager so appropriate action may be taken and, if necessary, informed to the responsible service engineer or POSKOM. -
Page 38: Storage, Transport And Package
- Air cargo incidents are caused by mechanical damage or external short circuiting of cells Standards and regulations that apply to the transport of POSKOM Battery Type X-ray Unit Air Freight Land Freight... - Page 39 Document No.: Airray Revision No.:1.0 Date of Issue: 2020-06-29 12.2. Package symbols 12.3. Unpacking and check s1) The whole loading and unloading process shall be steady and slow. Handle carefully in transport and placement. No tilt, collision, flipping or vibration. s2) The unit should be placed in the direction according to the box symbol.
-
Page 40: Exclusion Of Liability
In the following cases the manufacturer declines all liability: If you have any questions, contact your dealer or POSKOM. • Use of POSKOM Portable X-ray Unit for purposes and applications that differ from the specific requirements made in this User Manual. -
Page 41: Technique Chart And Equine Tech Chart
Document No.: Airray Revision No.:1.0 Date of Issue: 2020-06-29 15. Technique Chart and Equine Tech Chart s1) Small animal technique chart - 100 cm s40”) SID - Grid : 103 lines / 6:1 ratio - Flim/Screen : Fuji RX-U/ Rare earth Skull / Pelvis / Extrim Thorax Abdomen... - Page 42 Document No.: Airray Revision No.:1.0 Date of Issue: 2020-06-29 - Alternative Techinques Mid Contrast Anatomy View Distance (cm) kVp / mAs 80 / 1.2 Stifle 80 / 2.5 70 / 2.5 Navicular 70 / 2.0 Sinus 88 / 1.2 88 / 3.2 Shoulder 88 / 4.0...
-
Page 43: Part Ii. Service Manual
1.4. This equipment should be used only by certified persons and practitioners. 1.5. Only use the AC cable and software developed and supplied by POSKOM. 1.6. POSKOM is not responsible for any infringement of patients or other rights for third parties alterations which many results from the misuse of this manual. -
Page 44: Regular Maintenance
Document No.: Airray Revision No.:1.0 Date of Issue: 2020-06-29 2. Regular maintenance 2.1. Overview This device should be inspected regularly in accordance with the instructions described in this manual. 2.2. Periodical Inspections 1) Every 6 Month: A. Check all visual displays: display readout windows sFNDs), LEDs and other indicators. B. -
Page 45: Block Diagram
Document No.: PMH-HUM20BT Revision No.: 1.0 Date of Issue: 2019-06-04 3. Block diagram... -
Page 46: Calibration
Document No.: PMH-HUM20BTRevision No.: 1.0 Date of Issue: 2019-10-15 4. Calibration * Preparation Following tools and instruments are required for technical calibration. 1) Tools: Screwdrivers sNo.1 & 2), Straight slot screwdriver 2) Instruments: DVM, oscilloscope sTektronix TDS 3032 or equivalent device) 4.1. - Page 47 Document No.: PMH-HUM20BTRevision No.: 1.0 Date of Issue: 2019-10-15 -Next, observe the kV waveform 50kV s2.5V) of Oscilloscope Channel 2. - Set kV to 90kV and mAs to 0.4mAs s15mA), then observe the mA and kV waveforms of Oscilloscope Channel 1 and 2. - If Channel 1 is not at 3V s15mA), control the mA via the Calibration Mode.
- Page 48 Document No.: PMH-HUM20BTRevision No.: 1.0 Date of Issue: 2019-10-15 - If Channel 1 is not at 4V s20mA), the mA output may be adjusted on the OP B/D controls. - SW1의 DIP SW No.2 ON of SW1 or press the kV UP+kV Down+mAs UP button to access Calibration Mode.
- Page 49 Document No.: PMH-HUM20BTRevision No.: 1.0 Date of Issue: 2019-10-15 - Filament Preheat calibration data is applied to each Tube mA. - Power ON. -Turn “SW1 Dip S/W pin 2” on OP or Push the button “kV +, kV – and mAs +”. - As you press “APR Key No.1”...
- Page 50 Document No.: PMH-HUM20BTRevision No.: 1.0 Date of Issue: 2019-10-15 The following display will be seen: Preheat Calibration Code Preheat Calibration Data P01 is the Filament Preheat Calibration Code. sPreheat Calibration Code of 60~69kV/20mA). ‘-45’ is the Filament Preheat Calibration Value. sPreheat Calibration Data of 60~69kV/20mA). - You can adjust the value with mAs up/down Switch.
-
Page 51: Calibration Code And Data
3.6 ~ 20 50kV~60kV -99~99 61kV ~ 70kV -99~99 71kV ~ 80kV -99~99 81kV ~ 90kV -99~99 NOTICE When encountering continuous “Err” messages, discontinue use of your device immediately and contact POSKOM or one of its authorized distributors for assistance. -
Page 52: Error Code
Document No.: PMH-HUM20BTRevision No.: 1.0 Date of Issue: 2019-10-15 6. Error code 6.1. When the hand switch is non-operational, check to see if the hardware values are more than kV=10kV, mA=5mA, FIL=0.1V F/B, Code No. Description Resolution Err. 10 Filament feedback over Calibration or change OP B/D Err. - Page 53 Document No.: PMH-HUM20BTRevision No.: 1.0 Date of Issue: 2019-10-15 6.6. Deadman check code When the hand switch is turned off during X-ray exposure, then it displays the mAs of the exposured X- ray and informs the user of Deadman check by beep sound.
-
Page 54: How To Replace The Battery
Document No.: PMH-HUM20BTRevision No.: 1.0 Date of Issue: 2019-10-15 7. How to replace the battery 7.1. Loosen the bolt located on the bottom of the unit as seen below. 7.2. Move the grip towards the rear of the unit as shown by the arrow in the picture below. The battery cover will slide off easily. - Page 55 Document No.: PMH-HUM20BTRevision No.: 1.0 Date of Issue: 2019-10-15 7.3. Grab a hold of the handle and gently pull upwards until the battery is separated from main body of the unit. 7.4. Replace the new battery into the body of the unit and follow the above steps in reverse order to reassemble your unit.
-
Page 56: Service Request Form
Document No.: PMH-HUM20BTRevision No.: 1.0 Date of Issue: 2019-10-15 8. Service request form This form must be completed fully and submitted with any POSKOM x-ray products returned for warranty considerations or repair services. General Information A. Product name : B. Serial number : C. - Page 57 Document No.: PMH-HUM20BTRevision No.: 1.0 Date of Issue: 2019-10-15 POSKOM Co., Ltd. POSKOM Tower, 227, Sowon-ro, Deogyang-gu, Goyang-si, Gyeonggi-do 10534, REPUBLIC OF KOREA Tel: +82-31-906-9007 Fax: +82-31-908-4208 E-mail: sales@poskom.com...
Need help?
Do you have a question about the Airray 20 and is the answer not in the manual?
Questions and answers
What kind of detector fit to it