Table of Contents
Advertisement
Document No.: PMV-VET20BT-1303
Date of Issue: 2015-05-21
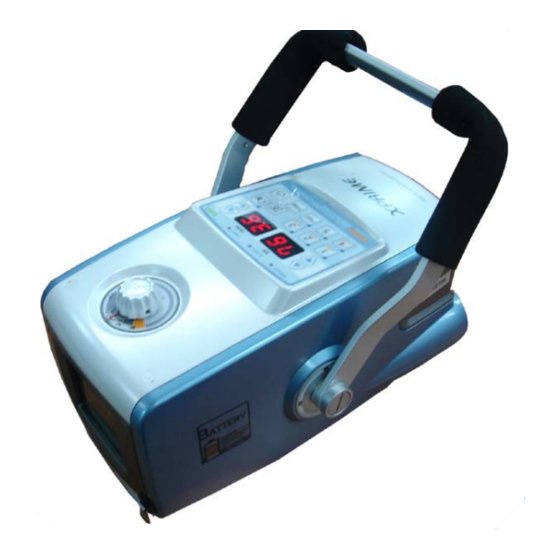
VET-20BT
Battery Powered Portable X-ray System
Product Manual (Operation & Service)
POSKOM Co., Ltd.
Room 262, 404~406, 415 Unitech Ville Bldg., 142, Ilsan-ro, Ilsandong-gu,
Goyang-si, Gyeonggi-do, 410-722, Korea
Tel : +82–31–906–9007, Fax : +82–31–908–4208
Http://www.poskom.com
E-mail: sales@poskom.com
Revision No.: 2
Advertisement
Table of Contents

Subscribe to Our Youtube Channel
Related Manuals for Poskom VET-20BT


Summary of Contents for Poskom VET-20BT
- Page 1 Revision No.: 2 Date of Issue: 2015-05-21 VET-20BT Battery Powered Portable X-ray System Product Manual (Operation & Service) POSKOM Co., Ltd. Room 262, 404~406, 415 Unitech Ville Bldg., 142, Ilsan-ro, Ilsandong-gu, Goyang-si, Gyeonggi-do, 410-722, Korea Tel : +82–31–906–9007, Fax : +82–31–908–4208 Http://www.poskom.com...
-
Page 2: Table Of Contents
Product Manual: VET-20BT POSKOM Co., Ltd. TABLE OF CONTENTS PART I. OPERATION MANUAL General Description -------------------------------------------------------- -------------------------------------------------------- Important Safety Information* -------------------------------------------------------- Operating Environment** Radiation Safety -------------------------------------------------------- Composition -------------------------------------------------------- Specification -------------------------------------------------------- Parts List -------------------------------------------------------- Preliminary Operating Procedures -------------------------------------------------------- Standard Operating Procedures -------------------------------------------------------- Hand Switch Functions &... -
Page 3: Part I. Operation Manual
1. General Description 1.1 Introduction Thank you for purchasing the VET-20BT, BATTERY POWERED portable x-ray system. The VET- 20BT is the lightest weight, most compact sized high frequency x-ray machine on the market today. All POSKOM Portable series x-ray units are equipped with ripple free, high frequency generators that produce up to 40~50% stronger power output efficiency when compared to conventional x-ray systems. -
Page 4: Important Safety Information
POSKOM certifies that each system complies with the Radiation Control for Health Safety Act in Title 21, Chapter I, subchapter J of the Code of Federal Regulation in the USA and EN 60601, general requirements for radiation protection in diagnostic X-ray equipment for IEC 601-1-3 in European Nations. - Page 5 3) The VET-20BT should be used for diagnostic purposes only. There are no therapeutic applications or effects associated with this device. 4) The VET-20BT is specified as a Class I Type B device under IEC 601-1, 2 standards. CAUTION This equipment is not protected against the ingress of water or other liquids.
- Page 6 Product Manual: VET-20BT POSKOM Co., Ltd. 2.2 Disposal Instructions This equipment and its accessories must be disposed of safely at the end of the device’s life span. All local and national regulations pertaining to the safe disposal of such devices must be observed.
- Page 7 4) Batteries are not alterable or replaceable by the end user. Approved replacement batteries are only available through POSKOM and its authorized dealers and may only be serviced by POSKOM or an approved POSKOM service agency. Unapproved batteries have the potential danger of damaging the device and should not be attempted.
-
Page 8: Operating Environment
Product Manual: VET-20BT POSKOM Co., Ltd. 3. Operating Environment 3.1. For proper operation and maintenance, please avoid the following areas: 1) Exposure to a moist or highly humid atmosphere. 2) Exposure to extended periods of direct sunlight and high heat conditions. -
Page 9: Radiation Safety
5) Users and are requested to use minimum kV and mAs values when testing this equipment. 6) Users must exercise caution as to not to exceed the radiogram limits in any exposure area. 5. Composition 5.1. VET-20BT consists of following parts and devices: 1) Operation Panel 2) Inverter... -
Page 10: Specification
Product Manual: VET-20BT POSKOM Co., Ltd. 6. Specification 6.1 Technical specifications Output Power 1.6 kW Battery Voltage 14.8VDC Input Capacity 4.8AH 20C Power1 Current Short time 96 A Capacitor Voltage 15VDC Input Power2 Current Short time 96 A 20mA (50 ~ 80kV / 0.4 ~ 3.2mAs) 10mA (50 ~ 80kV / 3.6 ~ 20mAs) - Page 11 Product Manual: VET-20BT POSKOM Co., Ltd. 6.2 Dimension 1) Main Body 2) Carrying Case...
- Page 12 Product Manual: VET-20BT POSKOM Co., Ltd. 6.3 Tube Specifications 1) General Data A. kV scope(Max. kV): 50 – 100kV B. Focal spot size: 1.2mm C. Heat Storage: 10kHU D. Cooling rate: 110W E. Inherent Filtration: 0.5mmAl F. Target angel: 19°...
- Page 13 Product Manual: VET-20BT POSKOM Co., Ltd. 4) Anode Thermal characteristics 5) Dimension...
-
Page 14: Parts List
Product Manual: VET-20BT POSKOM Co., Ltd. 7. Parts List 7.1 OP Consol and Panel Display kV Control Switch Wait Mode LED mAs Control Switch On / Off Switch APR Store Switch Battery Charge Display Laser Pointer Switch [10] APR Selection Switch... - Page 15 Product Manual: VET-20BT POSKOM Co., Ltd. 7.2 Product Label Warning: This X-ray unit maybe dangerous to patients and operators unless safe exposure procedures and operational instructions are observed.
-
Page 16: Preliminary Operating Procedures
Product Manual: VET-20BT POSKOM Co., Ltd. 8. Preliminary Operating Procedures 8.1 Preparation 1) Always wear a lead apron during x-ray exposures. 2) Please leave at least 2 meters (≈ 6.5 feet) between the operator and the unit. Use the supplied extended hand switch cable in order to keep minimum safe distance from the unit. - Page 17 Product Manual: VET-20BT POSKOM Co., Ltd. 8.3 Preheat 1) Overview All portable x-ray units require preheat procedure to protect the x-ray tube from an instant surge of current that may damage your device and to insure the longevity and continued safe operation of your system.
-
Page 18: Standard Operating Procedures
A. Open the carrying case and make sure all the parts are accounted for and there is no damage to your device. B. Connect the hand switch to VET-20BT”s main body via the provided hand switch cord. CAUTION Third party parts (i.e. adaptors, hand switches, etc.) are not compatible and cannot be used with this equipment (except those provided by POSKOM and its affiliates). - Page 19 Product Manual: VET-20BT POSKOM Co., Ltd. 9.2 APR Procedures A. After turning your unit on, the below display will appear: B. Select 1-5 APR switch. (15EA APR available) Switch Combination : 1, 1+2, 1+3, 1+4, 1+5, 2, 2+3, 2+4, 2+5, 3, 3+4, 3+5, 4, 4+5, 5 C.
-
Page 20: Hand Switch Functions & Operation
Product Manual: VET-20BT POSKOM Co., Ltd. 10. Hand Switch Functions & Operation 10.1 Introduction The remote control hand switch is capable of controlling all technical parameters, collimator lamp and laser pointer functions. The hand switch is designed with two stages or steps. The first stage of the hand switch preps and readies your unit while the second stage of the hand switch controls the exposure. - Page 21 Product Manual: VET-20BT POSKOM Co., Ltd. 10.3 kV Selection Rapidly click the hand switch 3 times to the “Ready Step” position. The APR selection LED, kV and mAs display will begin to flash. Press the “Ready Step” of hand switch one time while the APR switch is flashing and you are ready to enter the kV setting mode.
- Page 22 Product Manual: VET-20BT POSKOM Co., Ltd. Turn the power on. Press and hold the lamp button for 3 seconds. The LED lights on APR buttons (numbers 1- 4) will turn on and the LED light of the selected mode will blink for 20 seconds.
- Page 23 Wireless RF devices (main & sub-modules) are optional accessories (e.g. DR flat panels) to be integrated with the VET-20BT generator and a DR controller computer. RF mode setup is only applicable with compatible DR systems. The RF Mode should be set to the “OFF”...
- Page 24 Down button = RF OFF E. After making your selection, press and hold the LAMP button for 3 seconds and wait for 2 audible beeps that will confirm your selection has been successfully saved into the VET-20BT’s PROM Memory.
-
Page 25: Equine Techniques
Product Manual: VET-20BT POSKOM Co., Ltd. EQUINE CHART FOR THE VET-20BT BATTERY PORTABLE 26" (66 cm) Distance 400 Speed Rare Earth Film / Screen High Contrast Mid- Contrast Anatomy View Navicular Fetlock Knee AP/Flex LAT/Obi Splint Bone Hock AP/ High... -
Page 26: Small Animal Techniques
Product Manual: VET-20BT POSKOM Co., Ltd. SMALL ANIMAL TECHNIQUE CHART FOR THE VET-20BT HYBRID BATTERY PORTABLE 100 cm ( 40”) SID, GRID : 103 lines / 6:1 ratio Film/Screen : Fuji RX-U/ Rare earth Skull / Pelvis / Thickness Thorax... -
Page 27: Notice
Ionized radiation may be dangerous to patients and operators unless the following safety regulations are strictly observed. 1.2. This manual is designed to ensure correct use and operation of the VET-20BT. Please read this manual entirely before using this equipment. -
Page 28: Regular Maintenance
Product Manual: VET-20BT POSKOM Co., Ltd. Regular Maintenance 2.1. Overview This device should be inspected regularly in accordance with the instructions described in this manual. 2.2. Periodical Inspections 1) Every 6 Month: A. Check all visual displays: display readout windows (FNDs), LEDs and other indicators. -
Page 29: Block Diagram
Product Manual: VET-20BT POSKOM Co., Ltd. Block Diagram... -
Page 30: Calibration
Product Manual: VET-20BT POSKOM Co., Ltd. 4. Calibration * Preparation Following tools and instruments are required for technical calibration. 1) Tools: Screwdrivers (No.1 & 2), Straight slot screwdriver 2) Instruments: DVM, oscilloscope (Tektronix TDS 3032 or equivalent device) 4.1 Power Supply 1) The device should be turned off before beginning. - Page 31 Product Manual: VET-20BT POSKOM Co., Ltd. - Set kV to 50kV and mAs to 0.4mAs (20mA), then check the mA waveform of Oscilloscope Channel 1. - If Oscilloscope Channel 1 is not at 4V (20mA), adjust the mA output via the Calibration Mode.
- Page 32 Product Manual: VET-20BT POSKOM Co., Ltd. - Set kV to 50kV and mAs to 1.2mAs (20mA), then observe the mA waveform on oscilloscope Channel 1. - If Channel 1 is not at 4V (20mA), the mA output may be adjusted on the OP B/D controls.
- Page 33 -If the measured value is not 4V (20mA), you will need to re-set the calibration value. C. Self-Measurement of kV, mAs & Sec. - The VET-20BT generator has a built-in, Self-Measurement Tool (SMT). Technique factors, KV, mAs & time (seconds) can be measured without an external meter and the actual technique factors will be displayed on VET-20BT’s display window immediately after exposure.
- Page 34 Product Manual: VET-20BT POSKOM Co., Ltd. P0 is the Filament Preheat Calibration Code. (Preheat Calibration Code of 20mA). 55 is the Filament Preheat Calibration Value. (Preheat Calibration Data of 20mA). - You can adjust the value with mAs up/down Switch. (Refer to the “OP sheet”).
- Page 35 Product Manual: VET-20BT POSKOM Co., Ltd. E. VR Info Direction Adjusted VR Number LEFT RIGHT REMARK Values (Anticlockwise) (Clockwise) Preheat Increase Decrease...
-
Page 36: Calibration Code And Data
Data Range 20mA 0 ~ 199 15mA 0 ~ 199 10mA 0 ~ 199 0 ~ 199 NOTICE When encountering continuous “Err” messages, discontinue use of your device immediately and contact POSKOM or one of its authorized distributors for assistance. -
Page 37: Error Code And Resolution
Product Manual: VET-20BT POSKOM Co., Ltd. 6. Error Code and Resolutions 6.1 When the hand switch is non-operational, check to see if the hardware values are more than EP=10kV, IP=5mA, FIL=0.1V F/B, Code No. Description Resolution Err. 10 Filament feedback over Calibration or change OP B/D Err. -
Page 38: Schematics
Product Manual: VET-20BT POSKOM Co., Ltd. 7. Schematics... - Page 39 Product Manual: VET-20BT POSKOM Co., Ltd.
- Page 40 Product Manual: VET-20BT POSKOM Co., Ltd.
- Page 41 Product Manual: VET-20BT POSKOM Co., Ltd.
- Page 42 Product Manual: VET-20BT POSKOM Co., Ltd.
- Page 43 Product Manual: VET-20BT POSKOM Co., Ltd. AV_CC DV_CC...
- Page 44 Product Manual: VET-20BT POSKOM Co., Ltd. ISET READY X-RAY WAIT...
- Page 45 Product Manual: VET-20BT POSKOM Co., Ltd.
- Page 46 Product Manual: VET-20BT POSKOM Co., Ltd. EP_DRV1 EP_DRV2...
-
Page 47: How To Replace Battery
Product Manual: VET-20BT POSKOM Co., Ltd. 8. How to replace Battery 8.1 Loosen the bolt located on the bottom of the unit as seen below (red circle). 8.2 Move the grip towards the front of the unit as shown by the red arrow in the picture below. - Page 48 Product Manual: VET-20BT POSKOM Co., Ltd. Grab a hold of the handle and gently pull upwards until the battery is separated from main body of the unit. 8.4 Replace the new battery into the body of the unit and follow the above steps in reverse order to...
-
Page 49: Composition
Product Manual: VET-20BT POSKOM Co., Ltd. 9. Composition 9.1 Operation Panel 9.2 Power Board 9.3 Ultra Capacitor Board... - Page 50 Product Manual: VET-20BT POSKOM Co., Ltd. 9.4 Battery 9.5 Battery Charger...
-
Page 51: Service Request Form
Product Manual: VET-20BT POSKOM Co., Ltd. Service Request Form This form must be completed fully and submitted with any POSKOM x-ray products returned for warranty considerations or repair services. General Information Product name : Serial number : C. Date received : D.
Need help?
Do you have a question about the VET-20BT and is the answer not in the manual?
Questions and answers