Table of Contents
Advertisement
Quick Links
Advertisement
Table of Contents

Summary of Contents for Delta Electronics DRV70/90L7
- Page 1 Delta Electronics Articulated Robot Controller User Manual www.deltaww.com...
- Page 2 This manual is applicable to the DCV series robot controllers. The DRV70/90L7, DRVA1/A4L7 and DRVA1/A4LC series robots can only be used with the DCV series controllers from our company. Do not modify the robots and controllers by yourself or use them with other robots and controllers;...
- Page 3 If you have any other questions concerning the usage, please contact your dealer or the customer service center of our company. The copyrights of this user manual belongs to Delta Electronics Inc; this manual and any part of its contents may not be copied or reproduced without written permission of our company and its contents may not be passed on to third parties or used for any unauthorized purposes.
- Page 4 Safety Instructions Contents of this manual include safety precautions for personnel safety and preventing robot damages; warnings and cautions are used to describe them in this article based on their safety importance. Users must read the items described in these warnings, dangers and prohibitions before use to prevent dangers or personal injuries.
- Page 5 Definitions of Prohibited, Danger and Warning signs For your safety, please read this manual before using the robot and clearly understand all contents regarding safety and warnings. Robot operators must receive training, read and understand how to use the safety measures, follow and implement all rules described in this manual.
- Page 6 ➢ The DRV70/90L7 series can only be used with the DCV-2J00-AA controller from our company, the DRVA1/A4L7 series can only be used with the DCV-2J01-AA controller from our company and the DRVA1/A4LC series can only be used with the DCV-1K02- AA controller from our company.
- Page 7 ➢ The DRV70/90L7A series robot itself is suitable for IP40 environments; it can resist solid objects over 1mm in diameter, but has no protection against liquid substances. ➢ The DRV70/90L7B and DRVA1/A4L7B series robots are suitable for IP65 environments. ➢ The DRVA1/A4LCC series robot is suitable for IP54 environments.
- Page 8 ➢ It is prohibited to expose and use this product in locations with substances such as corrosive gases and flammable gases, otherwise electric shock or a fire may occur. ➢ The robot cables are not flexible cables; it is prohibited to install the robot cables in moving situations such as drag chains.
- Page 9 ➢ Disconnect the power completely if there is the need to remove the teach pendant cable on the controller, otherwise the teach pendant may get damaged. ➢ The structure of the safety protection devices and the position of the interlocking switches associated with the protection devices should comply with EN ISO 14120 and EN ISO 14119 and the safety distance should be designed in accordance with EN ISO 13857.
- Page 10 ➢ Power can only be connected and the robot can only be operated after the installation and wiring of the safety protection devices have been completed. ➢ Please perform the installation and wiring of the safety protection devices according to the contents of this manual, otherwise our company will not be responsible for any personal injuries.
- Page 11 Repair and Maintenance Prohibitions ➢ It is prohibited to change the maintenance schedule, maintenance oils and components arbitrarily. ➢ Personnel who did not receive related training may not implement troubleshooting tasks ➢ It is prohibited to maintain and inspect the robot and controller while power is connected, otherwise it may cause electric shock or personal injuries.
-
Page 12: Table Of Contents
Table of Content 1. Descriptions of Warning Labels ......................23 1.1 Controller Label Locations ........................23 1.2 Descriptions of the Controller Product Labels..................25 1.3 Locations of the Robot Sticker Labels ....................28 1.4 Robot Dimensions..........................31 1.5 Robot Moving Range .......................... 37 2. - Page 13 6.1 Descriptions of the Robot Components ..................... 93 6.2 Robot Operating Direction ......................... 94 6.3 DRV70/90L7 and DRVA1/A4L7 Air Hoses and Signal Connectors ............94 6.4 DRVA1/A4LC Air Hose, Signal and Force Release Brake Connectors ..........100 6.5 Robot Heavy Duty Connector ......................103 6.6 Robot Battery Location ........................
- Page 14 8.2.2 Handheld Teach Pendant ......................118 8.2.3 Robot Cable ........................... 118 8.2.4 Signal Cable ............................ 119 8.2.5 Wiring Saving Module ........................124 8.2.6 DMCnet DI/O Module ........................127 9. Maintenance ............................128 9.1 Robot Checklist ..........................128 9.2 Maintenance and Replacement of the Robot Battery ..............129 9.3 Fan Replacement ..........................
- Page 15 Figure 1. 6 Locations of product labels ....................25 Figure 1. 7 Product label styles ......................26 Figure 1. 8 DRV70/90L7 sticker locations .................... 28 Figure 1. 9 DRVA1/A4L7 sticker locations ................... 28 Figure 1. 10 DRVA1/A4LC sticker locations ..................29 Figure 1.
- Page 16 Figure 3. 6 Cooling direction of the DCV-1K02-AA controller’s regenerative resistor ......46 Figure 3. 7 Locations of the J6 flange blind holes of the DRV70/90L and DRVA1/A4L7 series ... 46 Figure 4. 1 Emergency stop button ..................... 48 Figure 4. 2 Resetting methods of the emergency stop switch ............48 Figure 4.
- Page 17 Figure 5.15 PNP wiring for User. DI using the power of the controller itself ........68 Figure 5.16 User. DI uses the power of the upper level controller with NPN connection ....68 Figure 5.17 User. DI uses the power of the upper level controller with PNP connection....69 Figure 5.18 User.
- Page 18 Figure 5.55 Use partition boards to separate the installation of the cables and hoses inside the drag chain ................92 Figure 6.1 Locations of the various axes of DRV70/90L7 ..............93 Figure 6.2 Locations of the various axes of DRVA1/A4LC..............93 Figure 6.3 Movement direction of the various axes of the DRV series robot ........
- Page 19 Figure 8.3 DRV70/90L7 and DRVA1/A4LC robot cable icon .............. 118 Figure 8.4 DRVA1/A4LC robot cable icon ..................119 Figure 8.5 DRV70/90L7 and DRVA1/A4L7 robot signal extension cord ..........119 Figure 8.6 DMCnet cable ........................120 Figure 8.7 System. DI/O extension cord (3081425800)..............120 Figure 8.8 User.
- Page 20 Figure 8.10 Ext. Encoder extension cord (3081427000)..............122 Figure 8.11 RS-232/485 extension cord (3081427100) ..............123 Figure 8.12 System. DI/O conversion module ................... 124 Figure 8.13 System. DI/O conversion cable ..................124 Figure 8.14 User. DI/O conversion module ..................125 Figure 8.15 User.
- Page 21 Table 1. 2 Descriptions of product labels .................... 26 Table 1. 3 Controller model number table ..................27 Table 1. 4 Descriptions of DRV70/90L7, A1/A4L7 and DRVA1/A4LC sticker contents ......29 Table 2. 1 Controller specifications ..................... 40 Table 3.1 Angles of each axis when moving the robot ................ 44 Table 4.1 DRVA1/A4L7-J1 axis screw specifications and screw locking torque ........
- Page 22 Table 8.4 EMI filter specifications...................... 117 Table 8.5 Handheld teach pendant options list ................. 118 Table 8.6 DRV70/90L7 and DRVA1/A4L7 robot cable specifications and order part number ..118 Table 8.7 DRVA1/A4LC robot cable specifications and order part number ........119 Table 8.8 DRV70/90L7 and DRVA1/A4L7 robot signal extension cord specifications...
-
Page 23: Descriptions Of Warning Labels
1. Descriptions of Warning Labels The locations and descriptions of the safety warning labels are as described below; please know the locations of each safety warning label and understand the meaning of each safety warning before use to avoid danger while in use. 1.1 Controller Label Locations There are 2 stickers on the front of the DCV-2J00 and DCV-2J01 controller;... -
Page 24: Figure 1.3 Location Of The Label In Front Of The Dcv-1K02 Controller
There are 3 stickers in front of the DCV-1K02 controller; one is a high voltage warning sticker, one is the power lock sticker and one is the read before use sticker. They are attached to the left and right sides of the controller and their locations are as shown in Figure 1.3 below. Read before use High voltage Power lock... -
Page 25: Descriptions Of The Controller Product Labels
Table 1. Descriptions of the 1sticker label names Item Name Flag NOTE The high voltage power warning label means that high voltage power exists in High voltage the switch or component and do not warning dismantle the component arbitrarily while the power is on;... -
Page 26: Figure 1.7 Product Label Styles
The styles of the product label stickers are as shown in Figure 1.7 below, and detailed descriptions are as shown in Table 1.2 below. Figure 1.7 Product label styles Table 1.2 Descriptions of product labels Descr Item iptio MODEL Controller model number Controller product serial number Rated Current Controller rated current... -
Page 27: Table 1. 3 Controller Model Number Table
2. The DCV -2J00-AA controller can only be used with the DRV70/90L7 series robot, the DCV -2J01-AA controller can only be used with the DRVA1/A4L7 series robot, and the DCV -1K02-AA controller can only be used with the... -
Page 28: Locations Of The Robot Sticker Labels
1.3 Locations of the Robot Sticker Labels Figure 1.8 ~ Figure 1.10 shows the locations of all warning stickers of robots DRV70/90L7, DRVA1/A4L7 and DRVA1/A4LC; Table 1.4 shows the descriptions of the sticker contents. Figure 1.8 DRV70/90L7 sticker locations Figure 1.9 DRVA1/A4L7 sticker locations... -
Page 29: Figure 1.10 Drva1/A4Lc Sticker Locations
Figure 1.10 DRVA1/A4LC sticker locations Table 1.4 Descriptions of DRV70/90L7, A1/A4L7 and DRVA1/A4LC sticker contents Flag Item Part No. Name Note It is prohibited to enter the working range of the robot while it is operating, otherwise personnel may... - Page 30 Model number and specification Product sticker descriptions related to the product Dangerous areas where hands and other body parts should not be placed Crushing while the robot is operating, prevention sticker otherwise it may get crushed by the robot and result in injuries The moving direction labels of the J1 to T6 axis robot axis...
-
Page 31: Robot Dimensions
1.4 Robot Dimensions Figure 1.11 ~ Figure 1.16 below are the dimensions of the robot with the unit mm. Figure 1.11 Dimensions of the DRV70L7 series robot... -
Page 32: Figure 1.12 Dimensions Of The Drv90L7 Series Robot
Figure 1.12 Dimensions of the DRV90L7 series robot... -
Page 33: Figure 1.13 Dimensions Of The Drva1L7 Series Robot
Figure 1.13 Dimensions of the DRVA1L7 series robot... -
Page 34: Figure 1.14 Dimensions Of The Drva4L7 Series Robot
Figure 1.14 Dimensions of the DRVA4L7 series robot... -
Page 35: Figure 1.15 Dimensions Of The Drva1Lc Series Robot
Figure 1.15 Dimensions of the DRVA1LC series robot... -
Page 36: Figure 1.16 Dimensions Of The Drva4Lc Series Robot
Figure 1.16 Dimensions of the DRVA4LC series robot... -
Page 37: Robot Moving Range
1.5 Robot Moving Range Figure 1.17 ~ Figure 1.22 below are the moving ranges of each robot model. Figure 1.17 Moving range of the DRV70L7 series robot Figure 1.18 Moving range of the DRV90L7 series robot... -
Page 38: Figure 1.19 Moving Range Of The Drva1L7 Series Robot
Figure 1.19 Moving range of the DRVA1L7 series robot Figure 1.20 Moving range of the DRVA4L7 series robot... -
Page 39: Figure 1.21 Moving Range Of The Drva1Lc Series Robot
Figure 1.21 Moving range of the DRVA1LC series robot Figure 1.22 Moving range of the DRVA4LC series robot... -
Page 40: Controller Specifications
2. Controller Specifications This chapter introduces the specifications of the controller and the descriptions of its dimensions; please use according to the specifications properly. 2.1 Controller Specifications The robot controller is an integration of the servo driver and the safety circuit; do not change the components and circuits arbitrarily, otherwise it will not be able to operate normally or may burn. -
Page 41: Figure 2.1 Appearances And Dimensions Of The Dcv-2J00-Aa And Dcv-2J01-Aa Controllers
Elevation Below 1000m altitude Atmospheric 86kPa ~ 106kPa Pressure Ambient C ~ 40 C (if the ambient temperature exceeds 45 C, please force surrounding Temperature air circulation) Humidity Under 0 ~ 90% RH (no fogging) Vibration Under 20Hz 9.80665 m/s (1G), 20 ~ 50Hz 5.88 m/s (0.6G) IP Level... - Page 42 Controller installation notes: ◼ Do not place your fingers and foreign objects into the cooling fan of the controller, otherwise there may be injuries. ◼ This controller is not an explosion-proof or splash-proof structure; do not place it in locations with excessive moisture or prone to splashing.
-
Page 43: Transportation And Installation
3. Transportation and Installation Please transport and install the robot according to the instructions in the manual, otherwise the robot may fall and get damaged. 3.1 Transportation 3.1.1 Transport the Robot and Controller Together There are 2 ways to transport the robot, by fork type pallet trucks or by forklifts, as shown in Figure 3.1 below Fork type pallet truck Forklift... -
Page 44: Transporting The Controller Only
DRV70/90L series, DRVA1/A4L7 series and DRVA1/A4LC series. Table 3.1 Angles of each axis when moving the robot Robot J1 axis J2 axis J3 axis J4 axis J5 axis J6 axis model number DRV70/90L7 0° -30° 64° 0° 56° 0° DRVA1/A4L7 0° -30°... -
Page 45: Installation
DRV70/90L7 series DRVA1/A4L7 series DRVA1/A4LC series Figure 3.4 Robot moving posture 3. Remove the controller and place both hands under the controller to transport it. Or transport it with a trolley; please consider whether the surface of the road is bumpy when using a trolley, otherwise the electronic components and precision components inside the controller may get damaged. -
Page 46: J6 Flange Installation And Usage Methods
Since there is a regenerative resistor installed behind the DCV-1K02-AA controller and a fan to help cooling, please reserve a space of at least 150mm on top of the controller for the cooling fan to discharge the heat, as shown in Figure 3.6 below. Poor cooling will trigger the temperature protection switch of the regenerative resistor and cause the controller to stop operating. -
Page 47: Robot Safety Protection
4. Robot Safety Protection 4.1 Robot Safety Protection Devices Robot safety protection devices refer to the protection devices set up around the robot to prevent personnel from getting close the robot and getting hit while the robot is operating; or an emergency stopping device that stops the robot from moving urgently when unexpected errors or safety hazards occur while operating the robot. -
Page 48: Setting Up And Installing Robot Safety Protections
4.2 Setting Up and Installing Robot Safety Protections Industrial robots are only applicable to partially completed machines. Grippers are not provided for this robot system. The final user or final system integrator is responsible for related risks. Control systems related to safety provides safety protection interfaces (such as interlocking switches for fences and grating) for the system;... -
Page 49: Installation Of The Emergency Pull-Rope Switch Device
Please install multiple emergency stop devices according to the actual overall equipment system, and consider the installation distance of each emergency stop so that they are not too far apart, to prevent them from being unable to be pressed immediately when emergencies occur. The height where the emergency stop button is installed should not be too high or too low;... -
Page 50: Installation Of Safety Fences
4.2.3 Installation of Safety Fences Make sure to disconnect the power of the controller before adjusting the equipment and confirm that the robot has stopped operating completely before performing adjustments. According to EN ISO 13857 (EN294&EN811), the upper and lower limbs are close to the safety distances of hazardous areas. -
Page 51: Figure 4.7 Example Of Installing Multiple Emergency Stop Devices Outside The Fence
Please install multiple emergency stop buttons according to the actual length of the equipment; it is recommended that the distance between the emergency stop buttons should not be more than the length of two human arms to ensure that the emergency stop buttons can be quickly pressed under emergencies. -
Page 52: Installation Of Safety Mat
4.2.4 Installation of Safety Mat Safety mats must comply with EN 1760-1 (ISO 13856-1), and must be able to detect operators over 35kg. Safety mat is another type of protective system installed around the robot; since safety mats are laid on the floor, it does not have height protection like fences do; therefore, the laying of the safety mats must be calculated based on the entire stroke range of the robot. -
Page 53: Adjusting The Active Blocking Points Of Drva1/A4L7
4.3.1 Adjusting the Active Blocking Points of DRVA1/A4L7 When the working range of the robot needs to be restricted, the active blocking points can be adjusted to restrict the working range of the robot. The extreme blocking point of the J1 axis is ±170 degrees, and the movement range limit of the active blocking point is ±... -
Page 54: Figure 4.10 Drva1/A4L7-J2 Axis Active Blocking Point Position And Working Angle
The installation location and working angle of the DRVA1/A4L7’s J2 axis active blocking point (+135°, -105°) are as shown in Figure 4.10 below. J2=135° J2=-105° Figure 4.10 DRVA1/A4L7-J2 axis active blocking point position and working angle Table 4.2 is the J2 axis active blocking point screw specifications and screw locking torque for the DRVA1/A4L7 installation. -
Page 55: Figure 4.11 Drva1/A4L7-J3 Axis Active Blocking Point Position And Working Angle
The installation location and working angle of the DRVA1/A4L7 J3 axis active blocking point (- 205°, 62°) are as shown in Figure 4.11 below. J3=-205° J3=62° Figure 4.11 DRVA1/A4L7-J3 axis active blocking point position and working angle Table 4.3 is the J3 axis active blocking point screw specifications and screw locking torque for the DRVA1/A4L7 installation. -
Page 56: Adjusting The Active Blocking Points Of Drva1/A4Lc
4.3.2 Adjusting the Active Blocking Points of DRVA1/A4LC When the working range of the robot needs to be restricted, the active blocking points can be adjusted to restrict the working range of the robot. The extreme blocking point of the J1 axis is ±170 degrees, and the movement range limit of the active blocking point is ±... -
Page 57: Figure 4.13 Drva1/A4Lc-J2 Axis Active Blocking Point Position And Working Angle
The installation position and working angle of the DRVA1/A4LC J2 axis active blocking point (- 90°, + 155°) are as shown in Figure 4.13 below. -90° +155° Figure 4.13 DRVA1/A4LC-J2 axis active blocking point position and working angle Table 4.5 is the J2 axis active blocking point screw specifications and screw locking torque for the DRVA1/A4LC installation. -
Page 58: Figure 4.14 Drva1/A4Lc-J3 Axis Active Blocking Point Position And Working Angle
The installation location and working angle of the DRVA1/A4LC J3 axis active blocking point (- 150°, +80°) are as shown in Figure 4.14 below. -150° +85° Figure 4.14 DRVA1/A4LC-J3 axis active blocking point position and working angle Table 4.6 is the J3 axis active blocking point screw specifications and screw locking torque for the DRVA1/A4LC installation. -
Page 59: Wiring
5. Wiring Since robots are semi-finished systems, therefore, please install safety protection systems, operating buttons and indicators around the robot by following the instructions in this manual to ensure the integrity and safety of the entire system. 5.1 Composition of the Systems Around the Controller The robot controller is driver and controller in one;... -
Page 60: Descriptions Of The Controller Interfaces
Figure 5.2 Composition of the peripheral systems of the DCV-1K02-AA controller 5.2 Descriptions of the Controller Interfaces Figure 5.3 is the interfaces of the DCV-2J00-AA and DCV-2J01-AA series controllers, and Figure 5.4 is the interface of the DCV-1KJ02-AA series controller. This chapter describes the functions and wiring of the controller interface. -
Page 61: Figure 5.4 Controller Interface Of Dcv-1K02-Aa
14 15 Figure 5.4 Controller interface of DCV-1K02-AA 1. EtherNet port: Able to connect to a computer or the upper level controller 2. DMCnet communication port: Able to connect to Delta products with DMCnet communications 3. DC output connector: Provides customers with external 24Vdc power (1A) for DI/O wiring. 4. -
Page 62: Power Input
5.2.1 Power Input The power input terminal block is located behind the controller for customers to connect the master power, as shown in Figures 5.5 and 5.6 below. The input power specification of Delta robot controllers is 200Vac±10%, single phase, 50/60 Hz. Customers need to connect the master power manually;... -
Page 63: Figure 5.7 Power Terminal Block Wiring
Figure 5.7 Power terminal block wiring Since the robot is a partially completed robot system, please add an isolated master power switch in front of the controller and add an EMI filter, reactor and ferrite core to the power cable connected to the controller in order to reduce noise and harmonic interference, as shown in Figure 5.8 Isolated power switch... -
Page 64: Robot Connection
5.2.2 Robot Connection For the cable connection between the robot and DCV controller, connect them using cables with heavy-duty connectors on both ends. Please make sure that the heavy-duty connector buckle is buckled properly first before turning on the power. Figure 5.9 Robot cable connection The locations to install the robot cables on the DCV controller are as shown in Figure 5.10;... -
Page 65: Table 5.2 Drv70/90/A1/A4L7 Robot Cable Pin Definitions
Table 5.2 DRV70/90/A1/A4L7 robot cable pin definitions Module 1 Module 2 Module 3 Module 4 Module 4 12Pos 12Pos 12Pos 25Pos 25Pos J1-U J3-U J5-U J1-5V J4-5V J1-V J3-V J5-V J1-0V J4-0V J1-W J3-W J5-W J1-T+ J4-T+ J1-Ground J3-Ground J5-Ground J1-T- J4-T- J1-Brk+... -
Page 66: External Encoder
5.2.3 External Encoder The controller provides 4 sets of A, B and Z signals that can connect to external optical rulers or encoders, and it can be connected with the controller to form a fully closed loop, or used for the conveyor belt tracking system. -
Page 67: User Output Input Connector
5.2.4 User Output Input Connector Standard D-Sub50P/Female/3 row connector that provides 24 point input and 12 point output for users to connect by themselves. The location of the connector is as shown in Figure 5.13 below and the definitions of the pins are as shown in Table 5.5 below. Figure 5.13 User. -
Page 68: Figure 5.14 Npn Wiring For User. Di Using The Power Of The Controller Itself
Figure 5.14 NPN wiring for User. DI using the power of the controller itself The PNP wiring method is as shown in Figure 5.15 below; please connect the DI COM (Pin50) of User. DI/O (D Sub-50P) to N24G (Pin2) of the DC Output, and connect the buttons, power, sensor and other output signals with DI. -
Page 69: Figure 5.17 User. Di Uses The Power Of The Upper Level Controller With Pnp Connection
Upper level controller Figure 5.17 User. DI uses the power of the upper level controller with PNP connection The output signal DO is Pin25~Pin48 with a total of 24 points output; the output method can be NPN. For the output voltage signal, customers can choose whether to use controller voltage output or upper level controller voltage output themselves. -
Page 70: System Digital Output Input Connector
5.2.5 System Digital Output Input Connector Standard D-Sub25P/Female connector; the System. DI/O provides 7 points of input and 8 points of output that users can use to connect to the upper level controller or buttons and indicators, etc. The System. DI/O pin definitions are as shown in Table 5.6; the location of the connector interface is as shown in Figure 5.19. -
Page 71: Figure 5.21 System. Do Uses The Power Of The Controller Itself With Npn Wiring
Note: 1. All System. DI signals are NPN (Sink) connections. 2. The controller’s DC Output connector already provides N24G power; do not connect the System. DI signal to other power sources otherwise signals cannot be sent or the DI contact may be burned. -
Page 72: Table 5.7 Operation Mode Selection Table
DI3 functional pause release: When functional pause is triggered, the robot will stop after finished executing the current line of instructions of the program; to continue executing the program, please trigger DI3 functional pause release, and the program will continue operating at this time. Please refer to the DRAStudio manual for detailed usage information. -
Page 73: Table 5.8 Run/Pause/Stop Selection Table
DI6 and DI7 Run/Stop elections 1 and 2: The Run/Pause/Stop selections are as shown in Table 5.5; there is a total of 3 modes. Table 5.8 Run/Pause/Stop selection table Function Pause Stop Under Auto mode: 1. When the DI6 and DI7 signals are High, program operations will be executed. 2. -
Page 74: Table 5.9 Project Operating Status Output Table
DO3 robot in-position status: When the robot is moving, the DO3 signal is outputted continuously; when the robot stops moving, the DO3 output is OFF. DO4 functional pause status: Please refer to the DRAStudio manual for detailed information. DO5 and DO6 project operation status 1 and 2: DO5 and DO6 will output the corresponding status based on the operation status of the project, as shown in Table 5.9 below. -
Page 75: Safety Connector
5.2.6 Safety Connector The controller provides 8 point safety signals for users to connect. Users can use these 8 point safety signals to build complete robot safety protection. The location of the safety connector is as shown in Figure 5.22; the pin definitions are as shown in Table 5.10 below. Figure 5.22 Safety connector location Table 5.10 Safety connector pin definitions Name... -
Page 76: Table 5.11 Dcv-1K02 Safety Connector Cable Color Table
Table 5.11 DCV-1K02 safety connector cable color table Color Function Color Function Color Function Brown E-Stop1 Blue White E-Stop1 E-Stop2 Protective Protective Green E-Stop2 Pink Yellow device1 device1 Protective Protective Black Gray device2 device2 Purpul Gray/Pink Red/Blue Reset Reset Precautions for connecting external emergency stops: ⚫... -
Page 77: Figure 5.23 Robot Emergency Stop Operationssequence Diagram
AC Power Input Safety protection device signal Emergency stop signal Driver power Figure 5.23 Robot emergency stop operationssequence diagram The correct wiring method of a single emergency stop button is as shown in Figure 5.24. Figure 5.24 Correct wiring example of a single emergency stop button Figure 5.25 below shows the wiring method of using only one emergency stop button NC contact;... -
Page 78: Figure 5.26 Wiring Example For Multiple Emergency Stop Buttons
When connecting multiple emergency stop buttons, please perform wiring according to Figure 5.26, and distribute the positions of each emergency stop button appropriately. When dangers occur, the emergency stop button can be quickly pressed to stop robot operations. Figure 5.26 Wiring example for multiple emergency stop buttons Pin5 to Pin8 of the safety connector are the contacts for safety protection devices;... -
Page 79: Figure 5.28 Safety Door Lock Switch
Figure 5.28 Safety door lock switch A safer practice is to use an electromagnetic safety door switch where the safety switch will generate magnetic force when the safety door is closed; insert the door lock plug to prevent users from opening the door and entering the fence by accident and resulting in danger. In addition, electromagnetic safety door power switches can be installed inside the fence. -
Page 80: Dc Output Connector
Figure 5.30 Schematic diagram for the wiring of pressure pad, grating or laser scanner When the DCV-1K02-AA controller is used, after the emergency stop or protective stopping device is triggered and reset, or every time power is supplied to the controller, safety pins 11 and 12 need to be short-circuited to reset once. -
Page 81: Teach Pendant
Figure 5.32 DC output connector location Table 5.12 Definitions of the DC output connector pins Name Description DC24V Connect to the positive potential DC24G Connect to the negative potential 5.2.8 Teach Pendant Users can operate the robot, teach points, edit robot programs and monitor I/O conveniently through the handheld teach pendant. -
Page 82: Figure 5.34 Correct Holding Method Of The Teach Pendant
4. When JOGGING the robot with the handheld teach pendant, the left hand must hold down the enable switch behind the teach pendant to the center location in order to JOG the robot. If it is pressed to other positions, the controller will disconnect the power of the driver. The correct usage method of the handheld teach pendant is as shown in Figure 5.34. -
Page 83: Figure 5.35 Dtv Series Teach Pendant Interface Structure
Emergency stop button Selection/adjustment knob Power indicator Hardware Touch button screen Figure 5.35 DTV series teach pendant interface structure Since the cable length of the teach pendant is too long, make sure to hang the teach pendant on the side of the safety fence when it is not used, as shown in Figure 5.36 below. Please place the teach pendant cable correctly;... -
Page 84: Serial Transmission (Rs-232, Rs-485)
5.2.9 Serial Transmission (RS-232, RS-485) Standard D-Sub 9P/Female connector; users can use controllers with RS-232/485 functions such as PC, PLC and HMI to communicate with the controller and read the robot data through this connector. The location of the RS-232/485 connector is as shown in Figure 5.37. Figure 5.37 RS-232/485 connector location To ensure that data transmission has no interference, please use twisted pair cable with isolation net for connection. -
Page 85: Communication Port (Ethernet)
5.2.10 Communication Port (Ethernet) Connect to the Ethernet using network cables and the PC can perform communication connection with the controller. Also, through the DRAStudio software, users can: 1. Edit the robot language and save the program into the controller for project management. 2. -
Page 86: Figure 5.40 Dmcnet Connection Icon
3. When connecting external DMCnet products, please insert a terminal resistor in the communication output port of the DMCnet product at the last station, otherwise the communication signal may become unstable. 4. When the connecting DMCnet does not have drivers connected, a maximum of 4 DI/O modules can be connected. -
Page 87: Figure 5.41 Asd-Dmc-Rm32Mn
Model numbers of DI/O output/input modules that can be connected are as follows: ASD-DMC-RM32MN 32 point input module. Input signal: Users can choose whether the input signal is PNP or NPN through the connecting COM point. Figure 5.41 ASD-DMC-RM32MN Short circuit COM and 24V: The common point of the input signals is GND. Short circuit COM and GND: The common point of the input signals is 24V. -
Page 88: How To Turn Off The Power
Input/output module: ASD-DMC-RM32PT 16 point input/16 point output module. Input signal: Users can choose whether the input signal is PNP or NPN through the connecting COM point. Output signal type: NPN. Output current specification of each point: 100mA. Output circuit type: Transistor. Figure 5.43 ASD-DMC-RM32PT 5.2.12 How to Turn Off the Power When the robot is not used, make sure to turn off the power of the controller, and leave after... -
Page 89: Precautions For Installing The Robot Cable Inside The Drag Chain
3. Lock the fuse-less switch with the power lock device included with the accessory pack of the controller to prevent the power from turning on unexpectedly. The power locking method is as shown in Figure 5.55 below. Figure 5.45 Locking method of the fuse-less switch power 4. -
Page 90: Figure 5.47 Installation And Placement Of Drag Chains With Multiple Cables Inside
For the DRV70/90L7 and DRVA1/4L7 series robots, the motor cable diameter is 18±0.5mm and the encoder cable diameter is 13±0.5mm. -
Page 91: Figure 5.50 Installation And Placement Of Partition Boards In Drag Chains With Multiple Cables Inside
➢ When the cables inside the drag chain differs greatly, please separate the cables with big differences with partition board; otherwise the cables will intertwine, the thin cables will be oppressed by the tick cables, which will reduce the cable life significantly and even cause the cables to deform and get damaged. -
Page 92: Figure 5.53 Fixing Method Of The Cables Inside The Drag Chain
Figure 5.53 Fixing method of the cables inside the drag chain ➢ Do not tie multiple cables together with one cable tie, otherwise the stress between the cables will not be even and can damage the cables easily. Figure 5.54 Incorrect tying of multiple cables ➢... -
Page 93: Descriptions Of The Robot Components
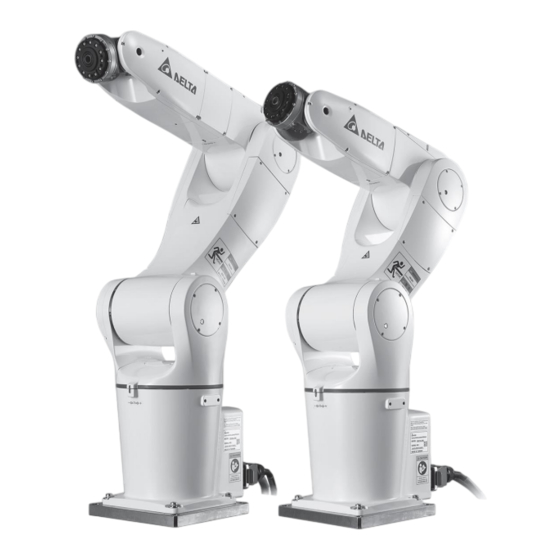
This chapter will introduce the names, functions and operating directions of the various parts of the robot 6.1 Descriptions of the Robot Components The locations of the various axes of the DRV70/90L7 and DRVA1/A4L7 robots are as shown in Figure 6.1 below. Axis4... -
Page 94: Robot Operating Direction
Figure 6.3 Movement direction of the various axes of the DRV series robot 6.3 DRV70/90L7 and DRVA1/A4L7 Air Hoses and Signal Connectors Since various types of clamps and fixing devices will be installed on the flange surface of the robot in actual applications, therefore, a 12Pos circular connector is configured by the J4 wrist of the robot for customers to connect signals. -
Page 95: Figure 6.4 Drv70/90 And A1/A4L7 Series Robots Signal Connector Locations
Figure 6.4 DRV70/90 and A1/A4L7 series robots signal connector locations The relationship curve between the bursting force and temperature of the 2 hoses set inside the robot is as shown in Figure 6.5 below. Please consider the impact that the ambient temperature has to the hoses while using. -
Page 96: Figure 6.6 Solenoid Valve Functions - 5/3-Way Locked In Neutral Position
3 solenoid valves are equipped inside the J4 axis of the DRV70/90L7 and DRVA1/A4L7 series robots for customers to quickly connect and use; the functions of the solenoid valve are as shown in Figure 6.6. Figure 6.6 Solenoid valve functions - 5/3-way locked in neutral position These 3 solenoid valve drive coils are 24Vdc and the circuit is connected from inside the J4 axis of the robot to pins 13~24 of the 24Pos circular connector at the base of the robot. -
Page 97: Figure 6.8 Wiring Location Of The Solenoid Valve Connector
Figure 6.8 Wiring location of the solenoid valve connector built in the DRVA1/A4L 7 series robot Note: 1. The drive coil of these 3 solenoid valves is 24Vdc; do not connect AC power to pins 13~24 of the 24Pos connector at on the base. 2. -
Page 98: Figure 6.10 Wiring Example For The Air Hose And Sensor
Table 6.1 Robot end solenoid valve signals and pin definitions Robot end solenoid valve signal and pin definitions/JR25WR-24P (71) [HIROSE] Name Name Name 12Pos-1 12Pos-2 12Pos3- 12Pos-4 12Pos-5 12Pos-6 12Pos-7 12Pos-8 12Pos-9 12Pos-11 12Pos-11 12Pos-12 Solenoid valve -1A+ Solenoid valve -1A- Solenoid valve -2A+ Solenoid valve -2A- Solenoid valve -3A+... -
Page 99: Figure 6.11 Locations Of The Base Signal And Solenoid Valve Gas Source
Solenoid valve gas source input Signal and solenoid valve connector Figure 6.11 Locations of the base signal and solenoid valve gas source of the DRV70/90L7 series robot Solenoid valve gas Signal and solenoid source input valve connector Figure 6.12 Locations of the DRVA1/A4L7 series robot base signal and solenoid valve Note: 1. -
Page 100: Drva1/A4Lc Air Hose, Signal And Force Release Brake Connectors
Figure 6.13 Wiring example of controller providing the 24Vdc to drive the solenoid valve 6.4 DRVA1/A4LC Air Hose, Signal and Force Release Brake Connectors DRVA1/A4LC has a 12Pos circular connector configured on the side of the J3 axis of the robot for customers to connect signals. -
Page 101: Figure 6.15 Location Of The 12Pos Signal Built In Drva1/A4Lc
Figure 6.15 Location of the 12Pos signal built in DRVA1/A4LC Table 6.2 DRVA1/A4LC client end signal connector 12Pos pin definitions Color Color Color Brown Blue White Green Pink Yellow Black Gray Violet Gray/Pink Red/Blue Figure 6.16 DRVA1/A4LC client end 12Pos signal connector pin definitions 1 ø6 air hose connectors are provided at the base of the robot for customers to input gas sources. -
Page 102: Figure 6.17 Location Of The Drva1/A4Lc Air Hose
IP testing air hole Customer gas source input port Figure 6.17 Location of the DRVA1/A4LC air hose The robot base also provides 1 M12/8Pos connector for users to force release the brake, as shown in Figures 6.18 ~ 6.20 below. Table 6.3 is the positioning of the connector pins. Figure 6.18 DRVA1/A4LC force release brake connector robot end location Table 6.3 DRVA1/A4LC force release brake connector client end pin definition Force release brake connector pin definition... -
Page 103: Robot Heavy Duty Connector
Figure 6.20 DRVA1/A4LC force release brake connector client end pin definition The force release robot brake wiring is as shown in Figure 6.21. Do not release the motor brakes of all 6 axes simultaneously, otherwise the robot may slide very quickly due to factors such as the posture of the robot or gravity. -
Page 104: Figure 6.22 Location Of The Robot's Heavy Duty Connector
Figure 6.22 Location of the robot’s heavy duty connector Figure 6.23 Robot heavy duty connector cable Please reserve at least 20cm space behind the base of the DRV70/90L7 and DRVA1/A4L7 robots, and reserve at least 25mm space behind the base of the DRVA1/A4LC robot to allow the robot cable and robot integration to have sufficient wiring space. -
Page 105: Robot Battery Location
6.6 Robot Battery Location Figures 6.24 ~ 6.26 below are the battery locations of the DRV70/90L7, DRVA1/A4L7 and DRVA1/A4LC robots; there are 3 batteries in the battery box. Batteries are responsible for memorizing the positions of the various axes of the robot. Please perform battery replacement operations correctly according to the maintenance table to ensure that the encoder positions of the robot can be saved correctly. -
Page 106: Figure 6.27 Drva1/A4Lc Battery Location
Battery inside the J3 axis*2 Battery inside the base*2 Figure 6.27 DRVA1/A4LC battery location... -
Page 107: Quick Wiring
7. Quick Wiring The chapter only provides quick wiring manual operation methods. Make sure to add safety protection devices (refer to Chapter 4 for details) whether running in Auto or T1 mode to ensure personnel safety. 7.1 Quick Wiring Sequence (1) Please finish setting up the safety protection devices (Refer to the descriptions in Chapter 4 and the wiring in Chapter 5). -
Page 108: Figure 7.2 Wiring For The Emergency Stop Button And Safety Signal For Dcv-1K02-Aa
Figure 7.2 Wiring for the emergency stop button and safety signal for DCV-1K02-AA (3) Please connect the handheld teach pendant to the controller properly, as shown in Figure 7.3. If you did not purchase the handheld teach pendant optionally, please take out the handheld teach pendant short-circuit connector from the accessory pack and install it on the handheld teach pendant connector on the electric control box. -
Page 109: Figure 7.4 Example Of Manual Operating Quick Wiring
(4) Please connect the cables of the robot and controller properly and fix them in place. (5) Mode selection wiring DI4 and DI5 operation mode selection: There are 3 operation modes available for selection: Auto, T1, and T2. Since you may be unfamiliar with the operation when operating for the first time, please use T1 mode to avoid causing personal injuries or machine damages due to being unfamiliar with the operations. -
Page 110: Figure 7.5 Power Input Wiring Quick Wiring Example
Figure 7.5 Power input wiring quick wiring example (7) Turning on the power, flip the fuse-less switch from OFF to ON, as shown in Figure 7.6. Figure 7.6 Power on (8) Please refer to the DRAStudio software instruction manual on how to operate the robot. -
Page 111: System Di/O Wiring Example
7.2 System DI/O Wiring Example Figure 7.7 below is the complete quick wiring example for DCV-2J00-AA and DCV-2J01-AA; use the power NPN method provided by the controller for wiring. Figure 7.7 Quick wiring example for DCV-2J00-AA and DCV-2J01-AA... -
Page 112: Figure 7.8 Dcv-1K02-Aa Quick Wiring Example
Figure 7.8 below is the complete quick wiring example for DCV-1K02-AA; use the power NPN method provided by the controller for wiring. Figure 7.8 DCV-1K02-AA quick wiring example... -
Page 113: Figure 7.9 Quick Wiring Example For The System Do Using Power Npn Of The Controller
Figure 7.9 below is the complete quick wiring example; use the power NPN method provided by the controller for the wiring of the system DO. Figure 7.9 Quick wiring example for the System DO using power NPN of the controller Note: 1. -
Page 114: User Di/O Wiring Example
7.3 User DI/O Wiring Example Figure 7.10 below is the complete User DI/O NPN quick wiring example; the power of the controller or the upper level controller is used for wiring. DI NPN signal wiring DO NPN signal wiring Upper level controller/controller DC Output connector Figure 7.10 User DI/DO quick wiring example using NPN method Note: 1. -
Page 115: Accessories
8. Accessories This chapter introduces the optional peripherals of the controller and the standard shipment controller accessories; users can choose and use them as needed. 8.1 Accessory Package Since robots are semi-finished products, the complete robot environment needs to match the usage scenario of the customer to perform system installation, integration and establishing safety protection devices. -
Page 116: Table 8.2 Dcv-1K02-Aa Controller Package Content List
Table 8.2 DCV-1K02-AA controller package content list Item Name Delta part number Photo TP short-circuit head 3534847700 3534847200 System output/input connector 3534846500 (D-SUB 25P/Male) User output input connector 3534846800 (D-SUB 50P/Male) RS232/485 signal connector 3534846400 (D-SUB 9P/Male) Ext. Encoder signal connector 3534846700 (D-SUB 37P/Male) Terminal resistor... -
Page 117: Controller Optional Peripherals
8.2 Controller Optional Peripherals 8.2.1 Filter In order to prevent the controller from being affected by interference from surrounding circuits and power, it is recommended for customers to purchase the applicable filter. Its installation dimensions and specifications are as follows: Table 8.4 EMI filter specifications Item Name Specification... -
Page 118: Handheld Teach Pendant
8.2.3 Robot Cable Robot cables are cables used to connect the controller and robot; we provide 3m and 5m cables for customers to choose from additionally. Table 8.6 DRV70/90L7 and DRVA1/A4L7 robot cable specifications and order part number Item Specification... -
Page 119: Signal Cable
12 point signals on the J4 axis of the robot and the 3 sets of built-in solenoid signal to the controller or upper level controller for control. Table 8.8 DRV70/90L7 and DRVA1/A4L7 robot signal extension cord specifications and order part number Item... -
Page 120: Figure 8.6 Dmcnet Cable
DMCnet cable: Users can connect Delta DMCnet communication related products through the DMCnet connector on the controller interface. Table 8.10 DMCnet cable specifications and order part number Item Name Specification Order part number DMCnet cable 3m, not drag chain resistant 3864699800 DMCnet cable 5m, not drag chain resistant... -
Page 121: Figure 8.8 User. Di/O Extension Cord (3081425700)
The User. DI/O extension cord (3081425700) is as shown in Figure 8.8 and Table 8.12 below; users can use this extension cord to connect to upper level controllers or buttons or indicators and other peripheral components Figure 8.8 User. DI/O extension cord (3081425700) Table 8.12 User. -
Page 122: Figure 8.9 Drv70/90L7 And Drva1/A4L7 Safety Extension Cord (3081735000)
Figure 8.9 DRV70/90L7 and DRVA1/A4L7 Safety extension cord (3081735000) Table 8.13 DRV70/90L7 and DRVA1/A4L7 safety extension cord (3081735000) cable color chart NAME Color... -
Page 123: Figure 8.11 Rs-232/485 Extension Cord (3081427100)
The RS-232/485 extension cord (3081427100) is as shown in Figure 8.11 and Table 8.15 below; users can use this extension cord to connect to communication devices with RS-232 or RS-485, and perform connection, control or data transmission with the controller. Figure 8.11 RS-232/485 extension cord (3081427100) Table 8.15 RS-232/485 extension cord (3081427100) cable color chart NAME... -
Page 124: Wiring Saving Module
8.2.5 Wiring Saving Module Provides system with digital output input (SYS. DI/O) optional modules for users to choose; it can be connected to the system digital output input (SYS. DI/O) connector to the terminal block conversion module. Table 8.16 System. DI/O conversion module specifications and order part number Name Item Specification... -
Page 125: Figure 8.14 User. Di/O Conversion Module
User digital output input (User. DI/O) optional module: Provides user digital output input (User. DI/O) with optional modules for users to choose; it can connect to user digital output input (User. DI/O) connector to the terminal block conversion module. Table 8.17 User. DI/O conversion module specifications and order part number Item Name Specification... -
Page 126: Figure 8.16 Ext. Encoder Conversion Module
Ext. Encoder optional module: Provides Ext. Encoder with optional purchase modules for users to choose; it can connect the Ext. Encoder connector to the terminal block conversion module. Table 8.18 Ext. Encoder conversion module specifications and order part number Item Name Specification Order part number... -
Page 127: Dmcnet Di/O Module
8.2.6 DMCnet DI/O Module Delta DMCnet communication related DI/O product specifications and order part number are as follows: Table 8.19 DMCnet module Item Name Specification Order part number Remote digital input 32 point signal input ASD-DMC-RM32MN expansion module 24Vdc/Sink/Source Remote digital output 32 point signal output ASD-DMC-RM32NT expansion module... -
Page 128: Maintenance
9. Maintenance To prolong the usage life of the robot and to ensure the accuracy of usage and reduce malfunctions, maintenance and inspection needs to be performed correctly according to the maintenance schedule. 9.1 Robot Checklist Table 9.1 is the DRV series robot checklist During the inspection process, please switch off all power switches correctly and press the emergency stop button to ensure the safety of workers, otherwise danger may occur. -
Page 129: Maintenance And Replacement Of The Robot Battery
Table 9.2 is the list of reducer lubricants that need to be replaced for the robot during maintenance. Please perform maintenance by using the oils described in the table in order to ensure normal usage of each component. Table 9.2 Specification table for the lubricants of each axis reducer DRV70/90L7 DRVA1/A4L7 DRVA1/A4LC Part... -
Page 130: Fan Replacement
9.3 Fan Replacement There are two cooling fans behind the controller. Please clean the fans during the specified maintenance time to prevent the fan from being blocked by dust, and causing the temperature inside the controller to become too high and unable to operate normally. - Page 131 Delta Electronics Inc. No. 18, Xinglong Rd., Taoyuan Dist., Taoyuan City 33068 TEL:886-3-3626301 FAX:886-3-3716301 * No further notice will be given should there be changes in the contents of this user manual...
Need help?
Do you have a question about the DRV70/90L7 and is the answer not in the manual?
Questions and answers