
Related Manuals for Parrot Uncle F6115-SMART


Summary of Contents for Parrot Uncle F6115-SMART
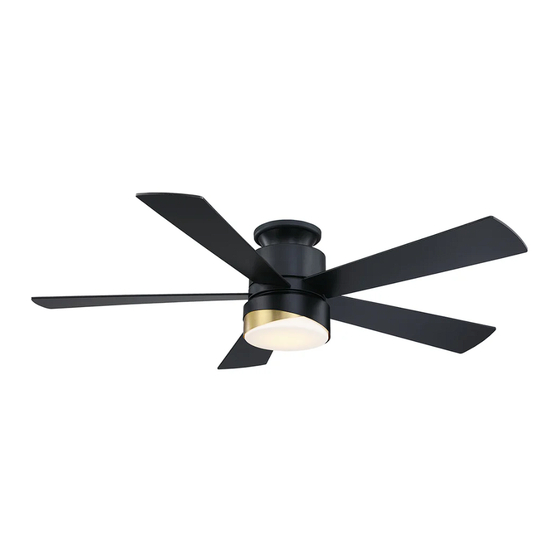
- Page 1 CEILING FAN Need more help, please visit https://faq.parrotuncle.com or scan this QR code to watch the video...
- Page 2 WARNING: SHUT POWER OFF AT FUSE OR CIRCUIT BREAKER...
-
Page 3: Safety Tip
WARNING: SHUT POWER OFF AT FUSE OR CIRCUIT BREAKER THANK YOU FOR YOUR PURCHASE Thank you for purchasing this quality product. To ensure correct function and safety, please read and save all instructions before using the product SAFETY TIP To avoid possible electric shock, tur he electricity at the main fuse box or circuit panel before you begin the fan installation or installing accessories... - Page 4 F6115-SMART Installation & Operating Instructions for the Parrot uncle Owner's Installation ,Manual WARNING: SHUT POWER OFF AT FUSE OR CIRCUIT BREAKER Plastic wire nut (4PCS) Mounting screws (2PCS) Blade screw (16PCS) Screws (2PCS) Washer (2PCS) Ceiling Plate REMOTE CONTROL ( 1PC )
- Page 5 F6115-SMART Installation & Operating Instructions for the Parrot uncle Owner's Installation ,Manual WARNING: SHUT POWER OFF AT FUSE OR CIRCUIT BREAKER Check existing outlet box (not included) to ensure it is securely fastened to at least two points in a structural ceiling member and can support the full weight of the fan.Once verified, install ceiling plate to the outlet...
-
Page 6: Outlet Box
F6115-SMART Installation & Operating Instructions for the Parrot uncle Owner's Installation ,Manual WARNING: SHUT POWER OFF AT FUSE OR CIRCUIT BREAKER Outlet box WHITE (AC IN N) RED (AC IN L) BLUE (FOR LIGHT L) BLUE (FOR LIGHT) WHITE (TO MOTOR) - Page 7 WARNING: SHUT POWER OFF AT FUSE OR CIRCUIT BREAKER Remove and retain two opposing screws from the motor assembly, then loosen the remaining two screws. Hang the motor assembly as shown. Make sure the electrical supply wires, including the ceiling bracket grounding wire is pulled through the center hole of ceiling bracket, between the ceiling bracket and the motor assembly so that electrical connections can be made later.
- Page 8 WARNING: SHUT POWER OFF AT FUSE OR CIRCUIT BREAKER Remove one of the three screws in the support bracket at the bottom of the motor assembly. Retain the screw for later and slightly loosen the remaining two screws. Assemble the switch housing assembly to the support bracket using the two key slots in the switch housing assembly.
- Page 9 WARNING: SHUT POWER OFF AT FUSE OR CIRCUIT BREAKER Connect the 2 single pin connectors from the light kit to the 2 single pin connectors from motor assembly. Assemble the light kit to the switch housing assembly using the two key slots. Replace the removed screw and secure all three screws.
- Page 10 WARNING: SHUT POWER OFF AT FUSE OR CIRCUIT BREAKER APP Control Connection 1. First search and download the free ParrotUncle Smart app from the App Store or Google Play or scan the QR Code as below. 2. Open the ParrotUncle Smart app to create your account. The account with "ParrotUncle Smart"...
- Page 11 F6115-SMART Installation & Operating Instructions for the Parrot uncle Owner's Installation ,Manual WARNING: SHUT POWER OFF AT FUSE OR CIRCUIT BREAKER CODE LEARN CODE LEARN...
- Page 12 WARNING: SHUT POWER OFF AT FUSE OR CIRCUIT BREAKER...
- Page 13 WARNING: SHUT POWER OFF AT FUSE OR CIRCUIT BREAKER...
- Page 14 WARNING: SHUT POWER OFF AT FUSE OR CIRCUIT BREAKER SIZE OF PRODUCT...
-
Page 15: Troubleshooting Guide
WARNING: SHUT POWER OFF AT FUSE OR CIRCUIT BREAKER TROUBLESHOOTING GUIDE Table of Contents 1. Fan / Remote is not working 2. Fan is noisy 3. Fan Wobbles 4. Light is not working Please refer to the instruction sheet for detailed directions and descriptions of installation steps and requirements. - Page 16 WARNING: SHUT POWER OFF AT FUSE OR CIRCUIT BREAKER 3. THE FAN WOBBLES Verify all blades and blade bracket screws are secure (most fan wobble roblems are caused by loose arts). Once fan is erly installed, run the ceiling fan for 10 minutes to let the fan self-adjust. If wobble occurs a er running the fan for 10 minutes, verify blade level using the following ocess: a) select a...
-
Page 17: After Installation
WARNING: SHUT POWER OFF AT FUSE OR CIRCUIT BREAKER AFTER INSTALLATION WOBBLE” The fan blades have been adjusted in the factory to minimize any wobble NOTE:CEILING FANS TEND TO MOVE DURING OPERATION DUE TO THE FACT THAT THEY ARE MOUNTED ON A RUBBER CROMMET. IF THE FAN WAS MOUNTED RIGIDLY TO THE CEILING, IT WOULD CAUSE EXCESS VIBRATION. - Page 21 F6115-SMART Instrucciones de instalación y funcionamiento del Propietario Instalación de Parrotuncle, manue ADVERTENCIA: DESCONECTE LA ALIMENTACIÓN EN EL FUSIBLE O DISYUNTOR Tuerca de alambre Tornillos de montaje Tornillo de la cuchilla de plás�co (4PZAS) (2PZAS) (16PZAS) Tornillos (2PZAS) Arandela (2PZAS)
- Page 22 F6115-SMART Instrucciones de instalación y funcionamiento del Propietario Instalación de Parrotuncle, manue ADVERTENCIA: DESCONECTE LA ALIMENTACIÓN EN EL FUSIBLE O DISYUNTOR Compruebe la caja de salida existente (no incluida) para asegurarse de que está firmemente sujeta al menos a dos puntos de un elemento estructural del techo y de que puede soportar todo el peso del ven�lador.
- Page 23 F6115-SMART Instrucciones de instalación y funcionamiento del Propietario Instalación de Parrotuncle, manue ADVERTENCIA: DESCONECTE LA ALIMENTACIÓN EN EL FUSIBLE O DISYUNTOR Caja de salida BLANCO (AC EN N) ROJO (AC EN L) AZUL (PARA LUZ) AZUL (PARA LUZ) BLANCO(PARA MOTOR)
- Page 28 F6115-SMART Instrucciones de instalación y funcionamiento del Propietario Instalación de Parrotuncle, manue ADVERTENCIA: DESCONECTE LA ALIMENTACIÓN EN EL FUSIBLE O DISYUNTOR CÓDIGO APRENDER CÓDIGO APRENDER...
- Page 38 F6115-SMART Instructions d'installation et d'utilisation pour le Installation du propriétaire de Parrotuncle, manue VERTISSEMENT: COUPER L'ALIMENTATION AU FUSIBLE OU AU DISJONCTEUR Vis de montage (2PCS) Tornillo de la cuchilla Écrou pour fil en plas�que (16PCS) (4PCS) Vis (2PCS) Rondelle (2PCS) Plaque de plafond TÉLÉCOMMANDE (1 PCS)
- Page 39 F6115-SMART Instructions d'installation et d'utilisation pour le Installation du propriétaire de Parrotuncle, manue VERTISSEMENT: COUPER L'ALIMENTATION AU FUSIBLE OU AU DISJONCTEUR Vérifier la boîte de sor�e existante (non fournie) pour s'assurer qu'elle est solidement fixée à au moins deux points d'un élément structurel du plafond et qu'elle peut supporter tout le poids du ven�lateur.
- Page 40 F6115-SMART Instructions d'installation et d'utilisation pour le Installation du propriétaire de Parrotuncle, manue VERTISSEMENT: COUPER L'ALIMENTATION AU FUSIBLE OU AU DISJONCTEUR Boîte de sortie BLANC (AC EN N) ROUGE (AC EN L) BLUE (POUR LUMIÈRE L) BLUE (POUR LUMIÈRE) BLANC(POUR MOTEUR)
- Page 45 F6115-SMART Instructions d'installation et d'utilisation pour le Installation du propriétaire de Parrotuncle, manue VERTISSEMENT: COUPER L'ALIMENTATION AU FUSIBLE OU AU DISJONCTEUR CODE APPRENDRE CODE APPRENDRE...
- Page 47 WARNING: SHUT POWER OFF AT FUSE OR CIRCUIT BREAKER...
- Page 48 SIZE OF PRODUCT...
Need help?
Do you have a question about the F6115-SMART and is the answer not in the manual?
Questions and answers