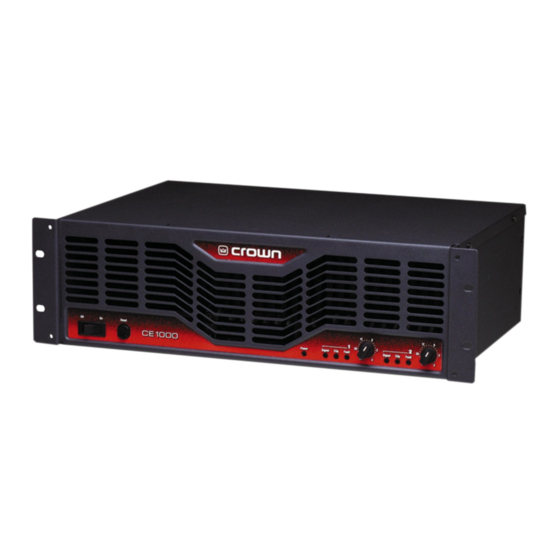
Crown CE 1000 Operation Manual
Ce series power amplifiers
Hide thumbs
Also See for CE 1000:
- Operation manual (28 pages) ,
- Specifications (2 pages) ,
- Service manual (581 pages)
Table of Contents
Advertisement
CE Series
CE 1000
Operation Manual
CE 2000
Obtaining Other Language Versions: To obtain information in another language about the use of this product, please contact your
local Crown Distributor. If you need assistance locating your local distributor, please contact Crown at 574-294-8000.
This manual does not include all of the details of design, production, or variations of the equipment. Nor does it cover every possible
situation which may arise during installation, operation or maintenance.
The information provided in this manual was deemed accurate as of the publication date. However, updates to this information may have
occurred. To obtain the latest version of this manual, please visit the Crown website at www.crownaudio.com.
Trademark Notice: Crown and Amcron are registered trademarks of Crown International. Other trademarks are the property of their
respective owners.
®
Some models may be exported under the name Amcron.
©2002 by Crown Audio Inc., P.O. Box 1000, Elkhart, Indiana 46515-1000 U.S.A. Telephone: 574-294-8000
125645-7A
5/02
Advertisement
Table of Contents

Related Manuals for Crown CE 1000


Summary of Contents for Crown CE 1000
-
Page 1: Operation Manual
Trademark Notice: Crown and Amcron are registered trademarks of Crown International. Other trademarks are the property of their respective owners. ® Some models may be exported under the name Amcron. ©2002 by Crown Audio Inc., P.O. Box 1000, Elkhart, Indiana 46515-1000 U.S.A. Telephone: 574-294-8000 125645-7A 5/02... -
Page 2: Important Safety Instructions
Important Safety Instructions Read these instructions. Keep these instructions. Heed all warnings. Follow all instructions. Do not use this apparatus near water. Clean only with a dry cloth. Do not block any ventilation openings. Install in accordance with the manufacturer’s instruc- tions. -
Page 3: Table Of Contents
CE Series Power Amplifiers Table of Contents Important Safety Instructions ... 2 Table of Contents ... 3 1 Welcome ... 4 1.1 Features ... 4 1.2 How to Use This Manual ... 4 2 Setup ... 5 2.1 Unpack Your Amplifier ... 5 2.2 Install Your Amplifier ... -
Page 4: Welcome
page 4 1 Welcome • Versatile; handles a wide range of speaker impedances and outputs. CE Series amplifiers provide professional • Advanced protection circuitry guards audio amplification for a wide range of applica- against shorted outputs, open circuits, DC, tions, including digital cinema. The amplifiers mismatched loads, general overheating, are very affordable, and feature front-panel con- high-frequency overloads and internal... -
Page 5: Setup
NOTE: When transporting, amplifiers should be supported at both front and back. Figure 2.1 CE 1000 and CE 2000 Dimensions 2.3 Ensure Proper Cooling When using an equipment rack, mount units directly on top of each other. Close any open spaces in rack with blank panels. -
Page 6: Choose Input Wire And Connectors
CE Series Power Amplifiers 2 Setup 2.4 Choose Input Wire and Connectors You have three choices of input connectors: 1/4-inch (6.35-mm) phone, 3-pin XLR, or barrier strip. You can also use either balanced or unbalanced wiring. Figure 2.3 shows balanced connector pin assignments for XLR and phone. -
Page 7: Choose Output Wire And Connectors
CE Series Power Amplifiers 2 Setup 2.5 Choose Output Wire and Con- nectors Crown recommends using pre-built or profes- sionally wired, high-quality, two- or four-con- ductor, heavy gauge speaker wires. They should be terminated with Neutrik Speakon NL4FC con- nectors (Figure 2.6) at one end and appropriate connectors to fit your speakers at the other end. -
Page 8: Wire Your System
2 Setup 2.6 Wire Your System 2.6.1 Stereo Mode Make sure the amplifier is turned off and the level controls are turned down before you wire the system. Typical input and output wiring is shown in Figure 2.9. INPUTS: Connect input wiring for each channel. OUTPUTS: Maintain proper polarity (+/–) on output connectors. -
Page 9: Bridge-Mono Mode
CE Series Power Amplifiers 2 Setup 2.6.2 Bridge-Mono Mode Make sure the amplifier is turned off and the level controls are turned down before you wire the system. Typical input and output wiring is shown in Figure 2.10. INPUTS: Connect input wiring to CH 1. OUTPUTS: Connect the speaker across the posi- tive (+) output terminals. -
Page 10: Input Sensitivity Switch
2 Setup 2.7 Input Sensitivity Switch A two-position Input Sensitivity switch is located on the back panel near the input connectors (Figure 2.11). Your amplifier is shipped from the factory with this switch set to the 1.4V position. At this setting, a 1.4V input signal will drive the amplifier to full power into an 8-ohm load when the level controls are turned to maximum. -
Page 11: Operation
CE Series Power Amplifiers 3 Operation 3.1 Precautions Your amplifier is protected from internal and exter- nal faults, but you should still take the following precautions for optimum performance and safety: 1. Before use, your amplifier first must be config- ured for proper operation, including input and output wiring hookup. -
Page 12: Controls, Indicators And Connectors
CE Series Power Amplifiers 3 Operation 3.2 Controls, Indicators and Connectors Figure 3.1 Controls, Indicators & Connectors page 12 Operation Manual... -
Page 13: Front Panel Controls And Indicators
CE Series Power Amplifiers 3 Operation 3.3 Front Panel Controls and Indicators Power Switch The power switch turns the amplifier on (“I”) or off (“O”). Note that dangerous voltages may still be present in the amplifier even when the power switch is in the off (“O”) position. Before moving the amplifier or making any wiring or installation changes, it is important to also discon- nect the power cord from the amplifier or power... -
Page 14: Advanced Features And Options
4 Advanced Features and Options NOTE: For detailed information about these Crown amplifier features, please consult the Crown Amplifier Application Guide, available on the Crown website at www.crownaudio.com. 4.1 Protection Systems CE Series amplifiers are protected against shorted, open or mismatched loads; over- loaded power supplies;... - Page 15 CE Series Power Amplifiers 4 Advanced Features and Options SST-SBSC (Summed Bass Stereo Crossover) Module See Figure 4.1. Features include: • Stereo biamp. • Ten user-specified crossover frequencies. • 12-, 18- and 24-dB/octave (Linkwitz-Riley) filters. • CD horn equalization. • Mono summing of sub-bass output for driving subs.
-
Page 16: Fault Monitoring
4 Advanced Features and Options 4.2.2 Fault Monitoring The Fault (RJ-11) jack, which looks like a telephone jack, is located on the back of your CE Series ampli- fier (Figure 4.3). It gives you an easy way to remotely monitor the amplifier’s fault status. To set up a circuit that will cause an LED to light whenever a fault status occurs, you can simply use the sug- gested circuit shown in Figure 4.4. -
Page 17: Advanced Features
They are available from Crown’s Sales Department; just ask for “CE Handles.” CE-S1 Speakon to barrier output adapter. Compatible with CE versions CE 1000 and CE 2000 amplifiers (ini- tial release). CE-S2 Speakon to 5-way binding post adapter.Compatible with CE versions CE 1000 and CE 2000 amplifiers (initial release). -
Page 18: Principles Of Operation
5 Principles of Operation For the sake of simplicity, only channel one of the amplifier is described. Signal is presented to the CE amplifier through one of three connectors when using the stan- dard input module. Each channel is outfitted with a balanced XLR/phone jack and a barrier strip. - Page 19 CE Series Power Amplifiers 5 Principles of Operation TO CLIP INDICATOR Figure 5.1 CE Series Amplifier Block Diagram BALANCED INPUTS (Shown with Standard Input BALANCE Module) INPUT STAGE Operation Manual + HI-VOLTAGE BOOTSTRAP CURRENT SOURCE COMPRESSOR CONTROL TRANSLATOR BUFFER ERROR VARIABLE GAIN STAGE –VCC...
-
Page 20: Troubleshooting
6 Troubleshooting page 20 CONDITION: Power indicator is off. POSSIBLE REASON • The amplifier has lost AC power. • The amplifier’s Power switch is off. • The amplifier’s power cord is not plugged in at either end. • The amplifier’s circuit breaker has tripped. Allow the amplifier to cool, remove excessive loads, and press the reset switch on the front panel. -
Page 21: Specifications
26 dB setting 1.4V setting Required AC Mains (configured country-specific) Power Draw at Idle Cooling Dimensions: Width, Height, Depth Net Weight, Shipping Weight Operation Manual CE 1000 560 W 450 W 275 W 1,100 W 900 W CE 1000 ± 0.2 dB ±... -
Page 22: Service
8 Service Crown amplifiers are quality units that rarely require servicing. Before returning your unit for servicing, please contact Crown Technical Support to verify the need for servicing. This unit has very sophisticated circuitry which should only be serviced by a fully trained techni- cian. -
Page 23: Warranty
CE Series Power Amplifiers 9 Warranty SUMMARY OF WARRANTY Crown International, 1718 West Mishawaka Road, Elkhart, Indiana 46517-4095 U.S.A. warrants to you, the ORIGINAL PURCHASER and ANY SUB- SEQUENT OWNER of each NEW Crown product, for a period of three (3) years from the date of purchase by the original purchaser (the “warranty period”) that the new Crown product is free of defects in materials and workmanship. - Page 24 9 Warranty SUMMARY OF WARRANTY Crown International, 1718 West Mishawaka Road, Elkhart, Indiana 46517-4095 U.S.A. warrants to you, the ORIGINAL PURCHASER and ANY SUB- SEQUENT OWNER of each NEW Crown1 product, for a period of three (3) years from the date of pur- chase by the original purchaser (the “warranty period”) that the new Crown product is free of defects in materials and workmanship, and we...
-
Page 25: Crown Factory Service Information Form
CE Series Power Amplifiers Owner’s Name : ________________________________________________________________________________________________________________________________________________________________ Shipping Address: ______________________________________________________________________________________________________________________________________________________________ Phone Number: ________________________________Fax Number: ________________________________ Email ________________________________________________________________________________ Model: __________________________________________________________________________________ Serial Number: ________________________________________________________________________ Purchase Date : ________________________________________________________________________________________________________________________________________________________________ (Be sure to describe the conditions that existed when the problem occurred and what attempts were made to correct it.) ______________________________________________________________________________________________________________________________________________________________________________ ______________________________________________________________________________________________________________________________________________________________________________ ______________________________________________________________________________________________________________________________________________________________________________... - Page 26 CE Series Power Amplifiers This page intentionally left blank. page 26 Operation Manual...
- Page 27 CE Series Power Amplifiers This page intentionally left blank. Operation Manual page 27...
Need help?
Do you have a question about the CE 1000 and is the answer not in the manual?
Questions and answers