Table of Contents
Advertisement
Quick Links
Advertisement
Table of Contents

Related Manuals for Bosch HBA573B 1 Series


Summary of Contents for Bosch HBA573B 1 Series
- Page 1 Oven HBA573B.1 User manual and installation instructions [en]...
-
Page 2: Table Of Contents
en Safety Further information and explanations are available online: Table of contents ¡ Do not connect the appliance if it has been damaged in transit. INFORMATION FOR USE 1.2 Intended use Safety .............. 2 This appliance is designed only to be built into kitchen units. Read the special installation Preventing material damage ...... 5 instructions. -
Page 3: Safety
Safety en Hot steam may escape when you open the WARNING ‒ Risk of fire! appliance door. Steam may not be visible, de- Combustible objects that are left in the cook- pending on the temperature. ing compartment may catch fire. ▶ Open the appliance door carefully. ▶... - Page 4 en Safety If the insulation of the power cord is dam- 1.6 Cleaning function aged, this is dangerous. WARNING ‒ Risk of fire! ▶ Never let the power cord come into contact Loose food remnants, fat and meat juices with hot appliance parts or heat sources. may catch fire when the cleaning function is in ▶...
-
Page 5: Environmental Protection And Saving En- Ergy
Preventing material damage en Preventing material damage 2 Preventing material damage Leaving the appliance to cool down with the door open 2.1 General will damage the front of neighbouring kitchen units over ATTENTION! time. Alcoholic vapours may catch fire in the hot cooking Always allow the cooking compartment to cool ▶... - Page 6 en Environmental protection and saving energy For longer cooking times, you can switch the appli- ance off 10 minutes before the cooking time ends. ¡ There is sufficient residual heat to finish cooking the dish. Remove any accessories that are not being used from the cooking compartment.
-
Page 7: Familiarising Yourself With Your Appliance
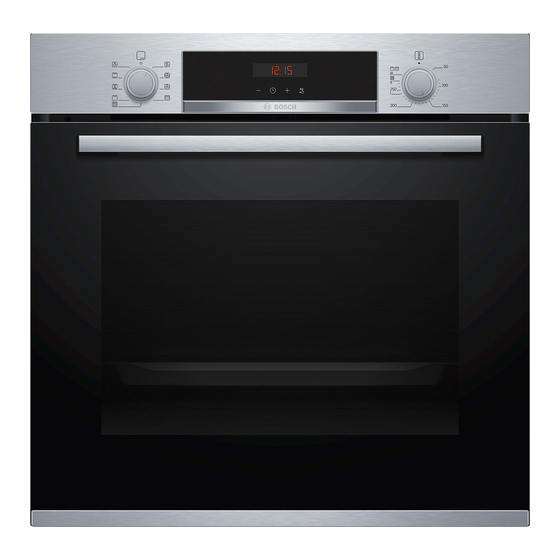
Familiarising yourself with your appliance en Familiarising yourself with your appliance 4 Familiarising yourself with your appliance 4.1 Controls Buttons and display The buttons are touch-sensitive surfaces. To se- You can use the control panel to configure all functions lect a function, simply press lightly on the relev- of your appliance and to obtain information about the ant field. - Page 8 en Familiarising yourself with your appliance Symbol Type of heating What it's used for/how it works Gentle hot air Cook selected dishes gently on one level without preheating. The fan distributes the heat from the ring-shaped heating element in the back wall evenly around the cooking compartment.
-
Page 9: Accessories
Accessories en Lighting 4.5 Cooking compartment The oven lamp lights up the cooking compartment. The functions in the cooking compartment make your With most types of heating and functions, the lighting appliance easier to use. lights up during operation. When the function selector is turned to bring operation to an end, the lighting goes Shelf supports out. - Page 10 Push the accessory all the way in, making sure that your appliance in our brochures and online: it does not touch the appliance door. www.bosch-home.com Accessories vary from one appliance to another. When Note: Take any accessories that you will not be using...
- Page 11 Basic operation en Basic operation 7 Basic operation When your food is ready, switch off the appliance. 7.1 Switching on the appliance Tips Turn the function selector to any position other than ▶ ¡ The most suitable type of heating for your food can the "Off"...
- Page 12 en Time-setting options Press the button repeatedly until is highlighted is highlighted on the display. Requirement: in the display. Change the cooking time using the button. ▶ Use the or button to set the timer duration. a The appliance applies the change after a few seconds.
- Page 13 Programme en Reset the end time to the current time plus the set Press the button. ▶ cooking time using the button. a The time that is set appears on the display. a After a few seconds, the appliance applies the Tip: You can go to the basic settings → Page 15 to change and starts heating up.
- Page 14 en Programme No. Food Cookware Weight setting Add liquid Shelf Information posi- tion Roasting dish with Weight of meat Almost cover Do not sear the meat 06 Pot-roasted beef E.g. prime rib, the meat with beforehand shoulder, rump or mar- liquid inated beef roast Roasting dish with Total weight of all...
- Page 15 Childproof lock en Childproof lock 11 Childproof lock You can secure your appliance to prevent children 11.1 Activating and deactivating the from accidentally switching it on or changing the set- childproof lock tings. Requirement: The function selector must be set to the Note: You can go to the basic settings → Page 15 to "Off"...
- Page 16 en Cleaning and servicing Turn the function selector. 12.3 Discarding changes to the basic ▶ a All changes are discarded and not saved. settings Cleaning and servicing 13 Cleaning and servicing Do not use cleaning products with a high alcohol To keep your appliance working efficiently for a long ▶...
- Page 17 Pyrolytic self-cleaning en Cooking compartment Area Suitable cleaning agents Information Enamel surfaces ¡ Hot soapy water Soak any heavily soiled areas and use a brush or steel wool. Leave the appliance door open to dry the cooking compartment ¡ Vinegar water after cleaning it.
- Page 18 en Shelf supports The outside of the appliance gets very hot when the The outside of the appliance gets very hot when the cleaning function is in progress. cleaning function is in progress. Never hang combustible objects, e.g. tea towels, on ▶...
- Page 19 Appliance door en Pull the whole rail to the front and remove it. ¡ For both rails, ensure that the curved rods are at the front. First, push the rail into the middle of the rear socket until the rail rests against the cooking compartment wall, and then push this back ...
- Page 20 en Appliance door Close the appliance door fully . Grab hold of the Using both hands, press down on the left and right appliance door with both hands (on the left and of the door cover from above to check whether the right) and pull it upwards and out ...
- Page 21 Appliance door en Undoing and removing the left- and right-hand Turn the intermediate pane until the arrow is in screws on the appliance door the top right. Place a folded-up tea towel in the appliance door. Pull the front pane up and out ...
-
Page 22: Troubleshooting
en Troubleshooting Put the door cover in position and push down on it Close the appliance door. until you hear it click into place. Note: Do not use the cooking compartment again until the door panes have been correctly fitted. Troubleshooting 17 Troubleshooting You can rectify minor faults on your appliance yourself. - Page 23 Troubleshooting en Fault Cause and troubleshooting lights up in the dis- Childproof lock is activated. play and no settings Use the button to deactivate the childproof lock. ▶ can be made on the → "Childproof lock", Page 15 appliance. flashes in the dis- The cooking compartment is too hot for the selected operation.
- Page 24 en Disposal Disposal 18 Disposal 18.1 Disposing of old appliance This appliance is labelled in accord- ance with European Directive Valuable raw materials can be reused by recycling. 2012/19/EU concerning used elec- Unplug the appliance from the mains. trical and electronic appliances Cut through the power cord.
-
Page 25: How It Works
How it works en ¡ Place the food to be grilled on the wire rack. In ad- 20.3 Notes on roasting and grilling dition, slide the universal pan in at least one shelf The setting values are based on the assumption that position lower, with the slanted edge facing the ap- unstuffed, chilled, ready-to-roast poultry, meat or fish is pliance door. - Page 26 en How it works Food Accessories/cookware Shelf pos- Type of Temperature Cooking ition heating in °C/grill time in mins setting Biscuits, 2 or 3 levels Universal pan 140-160 15-25 Baking tray 5+3+1 Bread, 1000 g (in a loaf tin or free- Universal pan 200-220 35-50 form)
-
Page 27: 21.1 General Installation Instructions
Installation instructions en Shelf positions for baking on three levels: Shelf positions Shelf positions for baking on two levels: ¡ Baking tray: Level 5 Universal pan: Level 3 Note: Items that are placed in the oven on baking trays Baking tray: Level 1 or in baking tins/dishes at the same time will not ne- cessarily be ready at the same time. - Page 28 en Installation instructions ▶ Only use extension cables that are certified, ¡ The safe operation of this appliance can have a minimum cross section of 1.5 mm² only be guaranteed if it has been installed and comply with the applicable national to a professional standard in accordance safety requirements.
- Page 29 Installation instructions en ¡ Observe different national installation instructions for ¡ Ensure that air exchange is guaranteed in accord- the hob. ance with the diagram. 21.4 Installation in a tall unit Observe the installation dimensions and the installation instructions when installing in a tall unit. ¡...
- Page 30 en Installation instructions ¡ Contact protection must be guaranteed by the in- For handleless kitchens with vertical bar handle stallation. strips: Attach a suitable filling piece in order to cover ‒ Electrically connect the appliance with the any sharp edges and to guarantee a safe install- protective contact plug ation.
- Page 32 Expert advice for your Bosch home appliances, help with problems or a repair from Bosch experts. Find out everything about the many ways Bosch can support you: www.bosch-home.com/service Contact data of all countries are listed in the attached service directory.
Need help?
Do you have a question about the HBA573B 1 Series and is the answer not in the manual?
Questions and answers