Table of Contents
Advertisement
Quick Links
Advertisement
Table of Contents

Related Manuals for JVC GZ-HD10AA


Summary of Contents for JVC GZ-HD10AA
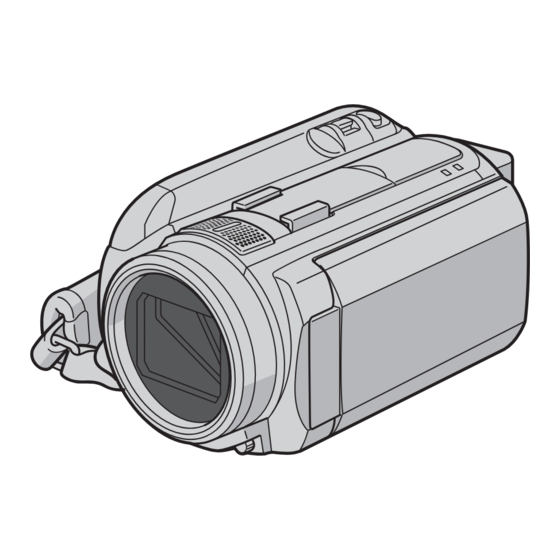
- Page 1 INSTRUCTIONS HD HARD DISK CAMCORDER GZ-HD10 Dear Customers Thank you for purchasing this hard disk camera. Before use, please read the safety information and precautions contained on pages 6 and 7 to ensure safe use of this product. ENGLISH...
- Page 2 Close the LCD monitor after you fi nish recording. CAUTION • Charge the battery pack before use. ( p. 16) • Be sure to use JVC battery packs. If you use any other battery packs besides JVC battery packs, safety and performance can not be guaranteed.
- Page 3 Before recording, charge the battery and set the date/time. See the next page for recording videos. Preparation Open the LCD monitor to turn on the camera Power Button Select [YES] within Set the date and time 10 seconds Select Select CLOCK ADJUST SET DATE/TIME! DATE...
- Page 4 Before recording an important scene, it is Video recording recommended to conduct a trial recording. CAUTION • This camera records video in accordance with the AVCHD format. • Try recording with easy [AUTO] mode fi rst. Select recording mode SELECT When recording PLAY/REC The mode changes when...
- Page 5 Playing back Select playback mode SELECT PLAY/REC The mode changes when you press the button Select the desired fi le Index screen VIDEO SELECT SORT Press down the set lever Playback screen Press down the set lever to start playback, and press it again to stop To perform operations such as fast forwarding or fast rewinding ( p.
- Page 6 fi re or electric shock. Contact • Do not disassemble and do not dispose of in fi re. your JVC dealer. Do not attempt to repair the malfunction yourself. • To prevent shock, do not open the cabinet. No When the equipment is installed in a cabinet or on a shelf, make sure that it has suffi...
- Page 7 Do not point the lens directly into the sun. This Remember that this camera is intended for can cause eye injuries, as well as lead to the private consumer use only. malfunctioning of internal circuitry. There is also a Any commercial use without proper permission risk of fi...
-
Page 8: Table Of Contents
Contents GETTING STARTED PLAYBACK Accessories ..........10 Playing Back Files ........24 Preparing the Remote Control ...... 11 Video Playback ..........24 Attaching the Core Filter to the DC cord ..11 Still Image Playback ........25 Index ............12 Watching Images on TV......26 Connection with TV........ - Page 9 # Click camera. Precautions on handling batteries • NOTE Be sure to use the JVC BN-VF808U/ VF815U/VF823U battery packs. Refer to the PC OPERATION GUIDE for the • If the camera is subjected to electrostatic system requirements of the provided software.
-
Page 10: Getting Started
GETTING STARTED Accessories AC Adapter Power Cord Battery Pack AP-V14E/ AP-V20M BN-VF808U Component Cable Audio/Video Cable USB Cable Shoulder Strap p. 26) p. 27, 33) p. 18) CD-ROM Remote Control Lithium Battery Core Filter p. 9) RM-V750U ( p. 11) CR2025 p. -
Page 11: Preparing The Remote Control
Preparing the Remote Control A battery is included inside the remote control at the time of purchase. Remove the insulation sheet before use. Beam Effective Area To Reinsert the Battery Pull out the battery holder by pressing the lock tab. Remote Sensor Lock Tab Lithium Battery... -
Page 12: Index
Index NOTES • The LCD monitor can rotate 270°. • Power-linked operation You can also turn on/off the camera by opening/closing the LCD monitor. • Be careful not to cover sensors 7, > and ? during shooting. - Page 13 9 HDMI Connector [HDMI] ( p. 26) Camera : DC Connector [DC] ( p. 16) ; Microphone Input Connector [MIC] ! Index Button [INDEX]/Remaining Space < LED Light Button/Data Battery Button [ 0 / 1 ] ( p. 16) = USB Connector [ # Set Lever >...
-
Page 14: Indications On Lcd Monitor
Indications on LCD Monitor During both Video and Still Image During Video Recording Only Recording [ 4 h 5 9 m ] 0 : 0 4 : 0 1 1080p PHOTO 200X FOCUS 1/4000 ! Mode Indicator ( p. 20) 1 6 : 5 5 # Wind Cut Indicator 2 0 . - Page 15 During Video Playback During Still Image Playback 1080p X - 6 0 1 0 1 - 0 0 9 8 1080p 1 : 5 5 : 0 1 1 6 : 5 5 1 6 : 5 5 2 0 . 0 1 . 2 0 0 8 2 0 .
-
Page 16: Necessary Settings Before Use
Necessary Settings before Use To detach the battery pack Charging the Battery Pack Slide and hold BATT. (step 2), then remove the battery pack. Close the LCD monitor to turn off the camera. Attach the battery pack. BATT. NOTES • You can also use the camera with just the AC adapter. -
Page 17: Date/Time Setting
Date/Time Setting Language Setting The language on the display can be changed. Open the LCD monitor to turn on the Open the LCD monitor to turn on the camera. camera. Press MENU. Press MENU. MENU MENU Select [BASIC SETTINGS]. Select [BASIC SETTINGS]. Select GAIN UP Select... -
Page 18: Other Settings
Other Settings Grip Adjustment Lens Cover Open the pad and make grip adjustments. When not using the camera, close the lens cover to protect the lens. Lens Cover Lens Cover Switch NOTE Do not push the lens cover strongly. Doing so may cause damage to the lens. -
Page 19: When Using A Microsd Card
R Change the recording medium When Using a microSD Card The camera is programmed to record on the If you want to record to a microSD card, the built-in hard disk when it is shipped from the following 3 operations need to be performed. factory. -
Page 20: Recording
RECORDING Recording Files Video Recording Preparation: Open the LCD monitor to turn on the camera. Press PLAY/REC to select the Slide the mode switch to select (video) mode. recording mode. SELECT PLAY/REC Press START/STOP to start recording. [ 4 h 5 9 m ] 0 : 0 1 : 3 0 START /STOP... -
Page 21: Still Image Recording
Still Image Recording Preparation: Open the LCD monitor to turn on the camera. Slide the mode switch to select Press PLAY/REC to select the (still image) mode. recording mode. SELECT PLAY/REC Press and hold SNAPSHOT halfway. 1920 FINE The ? indicator becomes green when the captured image is focused. -
Page 22: Zooming
Recording Files (Continued) Zooming Registering Files to Events Preparation: If you select an event to register the fi le to • Select mode. before starting recording, the fi le will be • Select the recording mode. registered to the selected event, thus making the fi... -
Page 23: Manual Recording
Manual Recording • SPOTLIGHT: To Change to Manual Recording Select this when a spotlight makes a Mode subject appear too bright. • TWILIGHT: Preparation: Makes evening scenes look more natural. • Select mode. * # mode only • Select the recording mode. AUTO INFO Manual Setting in Menu... -
Page 24: Playback
PLAYBACK Playing Back Files Video Playback Select the playback mode. Slide the mode switch to select (video) mode. VIDEO SELECT PLAY/REC SELECT SORT The index screen appears. Select the desired fi le. Select To return to the index screen Press INDEX. To check the fi... -
Page 25: Still Image Playback
Still Image Playback Slide the mode switch to select Select the playback mode. (still image) mode. IMAGE SELECT PLAY/REC SELECT SORT The index screen appears. Select the desired fi le. Select To return to the index screen Press INDEX. To check the fi le information Press AUTO/INFO. -
Page 26: Watching Images On Tv
Watching Images on TV This camera is designed to be used with high- To connect using the COMPONENT defi nition or PAL-type colour television signals. connector It cannot be used with a television of a different standard. To AC Outlet AV Connector COMPONENT Connection with TV... -
Page 27: Playback Operation
To connect using the AV connector Playback Operation To AC Outlet After the connection with TV is completed AV Connector Turn on the camera and the TV. Set the TV to its VIDEO mode. (Only when connecting the camera to the VCR/DVD recorder) Turn on the VCR/DVD recorder, and set the VCR/DVD recorder to its AUX... -
Page 28: Editing/Printing
EDITING/PRINTING Managing Files CAUTION Deleting/ Protecting Files Do not remove the recording medium or perform any other operation (such as turning • Protected fi les cannot be deleted. To delete off the power) while accessing fi les. Also, them, release the protection fi rst. be sure to use the provided AC adapter, as •... -
Page 29: Changing The Event Registration
Changing the Event Registration Dividing Files Preparation: You can divide the selected video into two. • Select mode. Preparation: • • Select the playback mode. Select mode. • Select the playback mode. Changing the Event of the Currently Press MENU. Displayed File MENU Press MENU. -
Page 30: Playlists
Playlists It is a list that enables you to organise Select the fi le to add to playlist. recorded videos in order of preference. Select 01.09.2008 0/999 Preparation: TOTAL TOTAL • Select mode. • Select the playback mode. SELECT REGISTER •... -
Page 31: Copying
DVD recorder. ( p. 33) To AC Outlet USB Connector It is recommended to use the JVC DVD burner (CU-VD50/CU-VD3). When using CU-VD20 or CU-VD40, the recording time may take approx. 2 times longer than the time that is described in the instruction manual of DVD burner. - Page 32 Copying Files (Continued) Select [YES] or [NO]. Backup All Files • [YES]: Displays the thumbnails by group Preparation: • [NO]: Displays the thumbnails by date • Connect the camera to the DVD burner. Select ALL SCENES • Select mode. DO YOU WANT TO MAKE •...
-
Page 33: Standard-Defi Nition Dubbing
Preparation: Create a playlist. Standard-defi nition Dubbing Set the VCR/DVD recorder to its AUX You can dub videos in standard-defi nition to a input mode. DVD recorder. Check that the images from the camera are Preparation: Turn off all units. input correctly to the VCR/DVD recorder. -
Page 34: Further Information
If the problem is not solved, reset the functioning properly. camera. • If the problem persists, please consult your The following phenomena are not nearest JVC dealer. malfunctions. • The camera heats up when it is used for a long time. •... - Page 35 Trouble Action • Operate the camera. If the camera is not operated for a certain length of time when The LCD monitor using the AC adapter, it will enter sleep mode, and the LCD appears blank. monitor will turn off. •...
-
Page 36: Warning Indications
Warning Indications Indication Action • Set the date and time. (Connect the camera to an AC outlet using the AC adapter for over 24 hours to charge the clock’s SET DATE/TIME! built-in lithium battery. Then set the date/time.) • Set [REC MEDIA FOR VIDEO] in the [BASIC SETTINGS] to CANNOT USE IN [HDD]. -
Page 37: Specifi Cations
Specifi cations Recording mode (video) Camera XP: VBR, average of 17 Mbps SP: VBR, average of 12 Mbps For general EP: VBR, average of 5 Mbps Power supply Recording mode (audio) DC 11 V (Using AC adapter) 48 kHz, 256 kbps DC 7.2 V (Using battery pack) Power consumption For still image... - Page 38 Specifi cations (Continued) Dimensions (W x H x D) Remote Control 42 mm x 14.5 mm x 91 mm Weight Power supply Approx. 30 g (incl. battery) DC 3 V Battery life Design and specifi cations subject to change Approx. 1 year without notice.
-
Page 39: Cautions
Cautions Battery Packs Recording Medium • Be sure to follow the guidelines below The supplied battery pack is Terminals to prevent corruption or damage to your a lithium-ion battery. Before recorded data. using the supplied battery • Do not bend or drop the recording medium, or pack or an optional battery subject it to strong pressure, jolts or vibrations. - Page 40 Cautions (Continued) • To prevent the unit from dropping, Main Unit • Attach the shoulder strap securely and fasten the grip belt securely. • For safety, DO NOT • When using the camera with a tripod, attach the ... open the camera’s chassis. camera to the tripod securely.
- Page 41 MEMO...
- Page 42 MEMO...
-
Page 44: Terms
Terms AC Adapter ............16 Manual Recording ..........23 AV Connection ..........27, 33 Menu Settings ...........19 Microphone ............13 microSD Card ............19 Battery Pack ..........16, 39 Playlist ...............30 Clock Adjust ............17 Program AE ............23 Component Connection ........26 Protecting Files ..........28 Copying (Moving) Files ........31 Recordable Time/Number of Images ....38 Deleting Files ............28 Recording Medium ..........39...
Need help?
Do you have a question about the GZ-HD10AA and is the answer not in the manual?
Questions and answers