Table of Contents
Advertisement
Available languages
Available languages
Quick Links
Advertisement
Chapters
Table of Contents

Related Manuals for JideTech P9

Summary of Contents for JideTech P9
- Page 1 DOME CAMERA DOME CAMERA MODEL P9 USER MANUAL...
-
Page 2: Table Of Contents
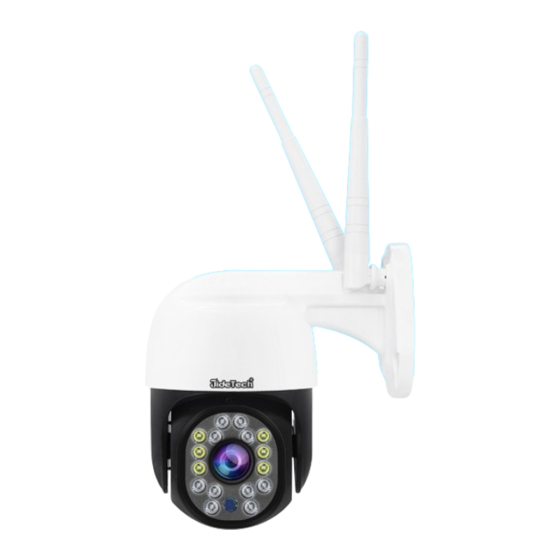
Thank you for purchasing the JideTech Dome Camera! We appreciate your trust and have done our best to meet your expectations. Our JideTech dome camera is designed with advanced technology to help users in ensuring their security through non-stop monitoring. - Page 3 JIDETECH DOME CAMERA MODEL P9 USER MANUAL PRODUCT OVERVIEW: Front View Fill light Lens Photosensitivity Back View TF slot Reset button Speaker Email: support@jidetech.com Page: 02...
- Page 4 JIDETECH DOME CAMERA MODEL P9 USER MANUAL INTRODUCTION: Our JideTech dome cameras are designed with advanced technology which o ers 5MP HD non-stop monitoring. The best camera focus can enable you to get a crystal clear full-HD picture. The more innovative and adjustable night vision allows you to record a visible image even in a dim environment.
-
Page 5: Product Mounting
JIDETECH DOME CAMERA MODEL P9 USER MANUAL PRODUCT MOUNTING: 1. Do the unboxing of the product. 2. Clean the camera with a soft cloth. 3. Align the camera with the wall. 4. Mount it on the wall by using the screws required. -
Page 6: Register An Account
JIDETECH DOME CAMERA MODEL P9 USER MANUAL REGISTER AN ACCOUNT: 1. Search and download the “EseeCloud” app on your mobile phone then choose to register as shown in the gure. 2. Once the registration is done, enter the Phone number or Email as shown in the gure. -
Page 7: Login
JIDETECH DOME CAMERA MODEL P9 USER MANUAL 3. A veri cation code will be received, after receiving the veri cation code, enter the password, con rm the password, and click Con rm as shown in the gure. LOGIN: APP supports account login and third-party login. - Page 8 JIDETECH DOME CAMERA MODEL P9 USER MANUAL Third-Party Log-In 1. APP supports third-party login. 2. Click the third-party application icon, go to the APP to complete the authorization and log in. Android Note: Apple mobile phones support Apple login. (If you enter the wrong password more than 5 times, the account will be locked for ve minutes).
-
Page 9: Adding The Device
JIDETECH DOME CAMERA MODEL P9 USER MANUAL ADDING THE DEVICE: Adding Camera by QR Code Scanning 1. Once the log in is done, go to device list. 2. Click "+" add button on the interface (Figure 3.1). 3. Go to the “QR code” scanning interface (Figure 3.2). - Page 10 JIDETECH DOME CAMERA MODEL P9 USER MANUAL 9. Con gure the device as shown in (Figure 3.7). After the con guration gets successful, complete the device name (Figures 3.8). Fig 3.4 Fig 3.5 Fig 3.6 Fig 3.7 Fig 3.8 Email: support@jidetech.com...
- Page 11 JIDETECH DOME CAMERA MODEL P9 USER MANUAL Connecting Camera Through Hotspot 1. Go to the mobile phone system settings and select the device hotspot starting with IPC. The default password is 11111111 (Figure 3.9). Note: Please keep connected with the device hotspot.
-
Page 12: Functions Description
JIDETECH DOME CAMERA MODEL P9 USER MANUAL FUNCTIONS DESCRIPTION: Icon Functions Details Switch de nition Switch the de nition of previewing Light control Switch the ll light on/o Select whether to play the sound of the Audio area that is captured by the device. -
Page 13: Device Setting
JIDETECH DOME CAMERA MODEL P9 USER MANUAL DEVICE SETTING: Note: The function in the list will only be displayed if the camera hardware supports it. If the camera does not support a function in the list, the app will hide the function setting item. - Page 14 JIDETECH DOME CAMERA MODEL P9 USER MANUAL PTZ speed setting, cruise selection, PTZ control 5. PTZ control direction setting. Cloud storage purchase, TF card status check and 6. Storge settings TF card video download. Camera language setting, wireless 7. Advanced settings setting, time zone setting and Alexa service authorization, deleting and resetting the camera.
-
Page 15: Installation On Computer
JIDETECH DOME CAMERA MODEL P9 USER MANUAL INSTALLATION ON COMPUTER: Installation login Installation and Operation Step 1: Step 2: Run the EseeCloud_Setup_3.0.1.exe Select the display language when installation package. installing. 1. Running Program 2. Choose a language Step 3: Step 4:... - Page 16 JIDETECH DOME CAMERA MODEL P9 USER MANUAL Step 5: Installation is complete and you can choose to run immediately. 5. The Installation is Complete User Registration and Login User Login 1. Enter ‘account + password’ remember the password and automatic login (optional).
- Page 17 JIDETECH DOME CAMERA MODEL P9 USER MANUAL 1. Login Account 2. Register a New Account 3. Veri cation Code and 4. Retrieve Password Passward Interface Note: 1. The login should be logged in with the registered account (the account registered by the mobile app can be logged in).
- Page 18 JIDETECH DOME KAMERA MODELL P9 BENUTZERHANDBUCH Danke schön! Wertvoller Kunde, Vielen Dank für den Kauf der JideTech Dome-Kamera! Wir wissen Ihr Vertrauen zu schätzen und haben unser Bestes getan, um Ihre Erwartungen zu erfüllen. Unsere JideTech-Kuppelkamera ist mit fortschrittlicher Technologie ausgestat- tet, um Benutzern dabei zu helfen, ihre Sicherheit durch ununterbrochene Überwachung zu gewährleisten.
- Page 19 JIDETECH DOME KAMERA MODELL P9 BENUTZERHANDBUCH PRODUKTÜBERSICHT: Vorderansicht Mikrofon Fülle Licht Linse Lichtemp ndlichkeit Rückansicht TF-Steckplatz Reset-Knopf Lautsprecher Email: support@jidetech.com Seite: 18...
- Page 20 JIDETECH DOME KAMERA MODELL P9 BENUTZERHANDBUCH EINFÜHRUNG: Unsere JideTech-Domekameras sind mit fortschrittlicher Technologie ausgestat- tet, die eine ununterbrochene 5-MP-HD-Überwachung bietet. Der beste Kamerafokus ermöglicht Ihnen ein kristallklares Full-HD-Bild. Dank der innovativeren und einstellbareren Nachtsicht können Sie auch in einer dunklen Umgebung ein sichtbares Bild aufnehmen.
-
Page 21: Produktmontage
JIDETECH DOME KAMERA MODELL P9 BENUTZERHANDBUCH PRODUKTMONTAGE: 1. Nehmen Sie das Auspacken des Produkts vor. 2. Reinigen Sie die Kamera mit einem weichen Tuch. 3. Richten Sie die Kamera an der Wand aus. 4. Befestigen Sie es mit den erforderlichen Schrauben an der Wand. -
Page 22: Einen Account Registrieren
JIDETECH DOME KAMERA MODELL P9 BENUTZERHANDBUCH EINEN ACCOUNT REGISTRIEREN: 1. Suchen Sie die “EseeCloud” -App, laden Sie sie auf Ihr Mobiltelefon herunter und registrieren Sie sich dann wie in der Abbildung gezeigt. 2. Sobald die Registrierung abgeschlossen ist, geben Sie die Telefonnummer oder E-Mail-Adresse ein, wie in der Abbildung gezeigt. -
Page 23: Anmeldung
JIDETECH DOME KAMERA MODELL P9 BENUTZERHANDBUCH 3. Ein Bestätigungscode wird empfangen. Geben Sie nach Erhalt des Bestäti- gungscodes das Passwort ein, bestätigen Sie das Passwort und klicken Sie auf Bestätigen, wie in der Abbildung gezeigt. ANMELDUNG: Die APP unterstützt die Kontoanmeldung und die Anmeldung bei Drittanbiet- ern. - Page 24 JIDETECH DOME KAMERA MODELL P9 BENUTZERHANDBUCH Anmeldung bei Drittanbietern 1. APP unterstützt die Anmeldung von Drittanbietern. 2. Klicken Sie auf das Symbol der Drittanbieteranwendung, gehen Sie zur APP, um die Autorisierung abzuschließen und sich anzumelden. Android Hinweis: Apple-Mobiltelefone unterstützen die Apple-Anmeldung.
-
Page 25: Hinzufügen Des Geräts
JIDETECH DOME KAMERA MODELL P9 BENUTZERHANDBUCH HINZUFÜGEN DES GERÄTS: Hinzufügen einer Kamera durch QR-Code-Scannen 1. Sobald die Anmeldung abgeschlossen ist, gehen Sie zur Geräteliste. 2. Klicken Sie auf der Benutzerober äche auf die Schalt äche"+" zum Hinzufügen (Fig 3.1). 3. Gehen Sie zur Scanober äche “QR code” (Fig 3.2). - Page 26 JIDETECH DOME KAMERA MODELL P9 BENUTZERHANDBUCH 9. Kon gurieren Sie das Gerät wie in (Fig 3.7) gezeigt. Nachdem die Kon gura- tion erfolgreich war, vervollständigen Sie den Gerätenamen (Fig 3.8). Fig 3.4 Fig 3.5 Fig 3.6 Fig 3.7 Fig 3.8 Email: support@jidetech.com...
- Page 27 JIDETECH DOME KAMERA MODELL P9 BENUTZERHANDBUCH Kamera über Hotspot verbinden 1. Gehen Sie zu den Systemeinstellungen des Mobiltele- fons und wählen Sie den Geräte-Hotspot beginnend mit IPC aus. Das Standardpasswort lautet 11111111 (Fig 3.9). Hinweis: Bitte bleiben Sie mit dem Geräte-Hotspot verbunden.
-
Page 28: Funktionsbeschreibung
JIDETECH DOME KAMERA MODELL P9 BENUTZERHANDBUCH FUNKTIONSBESCHREIBUNG: Icon Funktionen Einzelheiten De nition des Ändern Sie die De nition der Vorschau Schalters Lichtsteuerung Fülllicht ein-/ausschalten Wählen Sie aus, ob der Ton des vom Gerät erfassten Bereichs wiedergegeben Audio werden soll. Erfassen Sie den Vorschaubildschirm des Geräts, der auf dem aktuellen Telefon-... -
Page 29: Geräteeinstellung
JIDETECH DOME KAMERA MODELL P9 BENUTZERHANDBUCH GERÄTEEINSTELLUNG: Hinweis: Die Funktion in der Liste wird nur angezeigt, wenn die Kamera-Hard- ware sie unterstützt. Wenn die Kamera eine Funktion in der Liste nicht unterstützt, blendet die App das Funktionseinstellungselement aus. Funktionen Einzelheiten 1. - Page 30 JIDETECH DOME KAMERA MODELL P9 BENUTZERHANDBUCH PTZ-Geschwindigkeitseinstellung, Kreuzfahr- 5. PTZ-Steuerung tauswahl, Einstellung der PTZ-Steuerrichtung. 6. Einstellungen Kauf von Cloud-Speicher, Überprüfung des speichern TF-Kartenstatus und Herunterladen von TF-Karten- videos. Kameraspracheinstellung, WLAN-Einstellung, 7. Erweiterte Zeitzoneneinstellung und Alexa-Dienstautoris- Einstellungen ierung, Löschen und Zurücksetzen der Kamera.
-
Page 31: Installation Auf Dem Computer
JIDETECH DOME KAMERA MODELL P9 BENUTZERHANDBUCH INSTALLATION AUF DEM COMPUTER: Installations-Login Installation und Betrieb Schritt 1: Schritt 2: Führen Sie das Installationspaket Wählen Sie bei der Installation die EseeCloud_Setup_3.0.1.exe aus. Anzeigesprache aus. 1. Laufendes Programm 2. Wählen Sie eine Sprache... - Page 32 JIDETECH DOME KAMERA MODELL P9 BENUTZERHANDBUCH Schritt 5: Die Installation ist abgeschlossen und Sie können sich für die sofortige Ausführung entscheiden. 5. The Installation is Complete Benutzerregistrierung und Anmeldung Benutzer-Anmeldung 1. Geben Sie "Konto + Passwort" ein. Merken Sie sich das Passwort und die automatische Anmeldung (optional).
- Page 33 JIDETECH DOME KAMERA MODELL P9 BENUTZERHANDBUCH 1. Anmeldekonto 2. Registrieren Sie ein neues Konto 3. Veri zierungscode und 4. Passwort abrufen Passward-Schnittstelle Notiz: 1. Die Anmeldung sollte mit dem registrierten Konto erfolgen (das von der mobilen App registrierte Konto kann angemeldet werden).
- Page 34 24H Technical & Installation Support WhatsApp: +86 189 2933 7423 Email: support@jidetech.com https://www.jidetech.com WhatsApp...
Need help?
Do you have a question about the P9 and is the answer not in the manual?
Questions and answers