Table of Contents
Advertisement
Quick Links
THIS FURNITURE MUST BE FIXED TO THE WALL
Children have died from furniture tip over. To reduce the risk
of tip over:
ALWAYS secure this furniture to the wall using a wall anchor.
NEVER allow children to stand, climb, or hang on drawers, doors
or shelves.
Do not defeat or remove the drawer interlock system.
Place heaviest items in the lowest drawers.
NEVER put a TV on this furniture.
To ensure the safety of those using this cabinet, it is crucial to properly secure it to the wall
using a wall anchor . This product includes the necessary items for fixing the furniture
to the wall. However, it is important to note that incorrect installation or failure to use
the tip-over device can result in serious injury or even death.
For this reason, we highly recommend that a professional installer handle the
ASSEMBLY INSTRUCTIONS
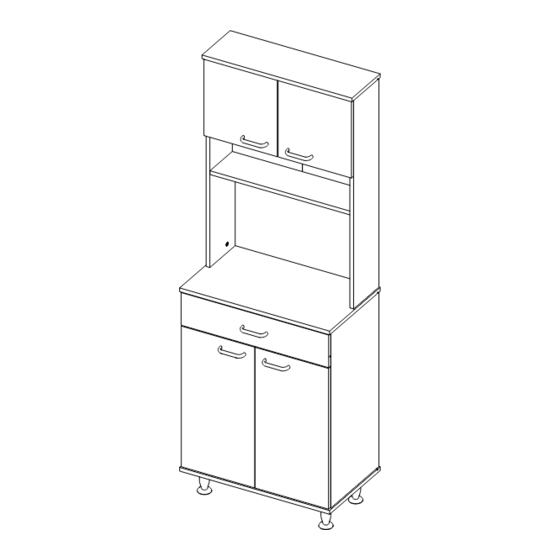
60 PANTRY CABINET
!
WARNING
installation of the cabinet to the wall.
Advertisement
Table of Contents

Subscribe to Our Youtube Channel
Related Manuals for TUHOME Furniture DELLA 60 PANTRY CABINET


Summary of Contents for TUHOME Furniture DELLA 60 PANTRY CABINET
- Page 1 ASSEMBLY INSTRUCTIONS 60 PANTRY CABINET THIS FURNITURE MUST BE FIXED TO THE WALL WARNING Children have died from furniture tip over. To reduce the risk of tip over: ALWAYS secure this furniture to the wall using a wall anchor. NEVER allow children to stand, climb, or hang on drawers, doors or shelves.
-
Page 2: Important Recommendations
IMPORTANT RECOMENDACIONES RECOMMENDATIONS IMPORTANTES Do not paint the cabinet. No pintar el mueble. The cabinet MUST be used exclusively indoors, El mueble debe ser usado únicamente en interiores, do not expose to direct sun. no exponer al sol directo. Clean metallic hardware with a dry cloth. Limpiar los herrajes metálicos con un paño seco. -
Page 3: Required Tools
INDEX ÍNDICE Assembly Hardware Herrajes para Armado Assembly Parts Piezas de Armado Suggested Loads Cargas Sugeridas Assembly Recommendations Recomendaciones de Ensamble 7-23 7-23 Assembly Steps Pasos de Armado Warranty Garantía REQUIRED TOOLS* HERRAMIENTAS NECESARIAS* *No incluidas y no se muestran en tamaño real. *Not included, and not shown actual size. -
Page 4: Assembly Hardware
ASSEMBLY HARDWARE HERRAJES PARA ARMADO Please check that the hardware content is correct. Compruebe que el contenido de los herrajes sea If any item is missing, please call to our customer el correcto. En caso de que falte alguna pieza, por service line. -
Page 5: Assembly Parts
ASSEMBLY PARTS PIEZAS DE ARMADO M - x1 A - x1 G - x1 S - x1 N - x1 B - x1 H - x1 T - x1 C - x1 I - x1 O - x1 U - X1 D - x1 J - x1 P - x1... -
Page 6: Assembly Recommendations
MAX SUGGESTED LOADS CARGAS MÁXIMAS SUGERIDAS 17,63lb 17,63lb 17,63lb 15kg 33,06lb 6 kg 13,22lb 10kg 22,04lb ASSEMBLY RECOMENDACIONES RECOMMENDATIONS DE ENSAMBLE Two people are recommended to assemble Ensamble el mueble entre dos personas. the product. Assemble the cabinet on a flat, smooth Ensamble el mueble sobre una superficie surface, preferably on a carpeted floor plana y lisa, preferiblemente sobre un... - Page 7 Repeat this in the following steps. Repita esto en todos los ensambles Page 7...
- Page 8 Page 8...
- Page 9 Rotate to tighten. Gire para apretar. Page 9...
- Page 10 Turn Over Voltear Page 10...
- Page 11 Rotate to tighten. Gire para apretar. Slide the back panels inside the cabinet Deslice los fondos dentro del mueble Page 11...
- Page 12 Turn Over Voltear Page 12...
- Page 13 Rotate to tighten. Gire para apretar. Page 13...
- Page 14 Page 14...
- Page 15 Rotate to tighten. Gire para apretar. Turn Over Voltear Page 15...
- Page 16 Rotate to tighten. Gire para apretar. Slide the back panels inside the cabinet Deslice los fondos dentro del mueble Page 16...
- Page 17 Turn Over Voltear Rotate to tighten. Gire para apretar. Page 17...
- Page 18 Rotate to tighten. Gire para apretar. Page 18...
- Page 19 2" Page 19...
- Page 20 Page 20...
- Page 21 Fix your cabinet to the wall / Fija el mueble a la pared You must drill the bottoms guided by the holes in the structures wiht a 3/16" drill bit. Debes perforar los fondos guiandote de las perforaciones delas estructuras con una broca 3/16" On the wall, measure and mark the points shown below.
- Page 22 Rotate to tighten. Gire para apretar. Slide the drawer inside the cabinet Deslice el cajón dentro del mueble Page 22...
- Page 23 Hinge adjustment Ajuste de las bisagras Depht adjustment Side adjustment Height adjustment Ajuste de profundidad Ajuste lateral Ajuste de altura After you finish the adjustment After you finish assembling the of the cams, cover them with cabinet, take off the adhesive the cover caps.
-
Page 24: Warranty Policy
WARRANTY POLICY Furniture has a 1 year warranty coverage in wooden parts and hardware pieces since its manufacturing date, which you can see in the lot number printed on the product box and the assembly instructions leaflet. Warranty covers materials and workmanship imperfections which impair the assembly or correct functioning of the cabinet.
Need help?
Do you have a question about the DELLA 60 PANTRY CABINET and is the answer not in the manual?
Questions and answers