Table of Contents
Advertisement
Quick Links
Advertisement
Table of Contents

Related Manuals for Acer CAM570


Summary of Contents for Acer CAM570
- Page 1 CAM570 — — User Manual...
- Page 2 Warning Hold the bottom of the camera with both hands to carry the camera. Whether the camera is connected to power or not, do not grab any part of the lens or the lens holder to carry the camera or adjust pan and tilt. ...
- Page 3 Warning This is a class A product. In a domestic environment this product may cause radio interference in which case the user may be required to take adequate measures. Caution Risk of explosion if battery is replaced by an incorrect type. Dispose of used batteries according to the instructions.
- Page 4 DISCLAIMER No warranty or representation, either expressed or implied, is made with respect to the contents of this documentation, its quality, performance, merchantability, or fitness for a particular purpose. Information presented in this documentation has been carefully checked for reliability; however, no responsibility is assumed for inaccuracies.
- Page 5 More Help For FAQs, technical support, software and user manual download, please visit: Headquarters Download Center: https://www.aver.com/download-center Technical Support: https://www.aver.com/technical-support USA Branch Office Download Center: https://www.averusa.com/business/support Technical Support: https://averusa.force.com/support/s/contactsupport Europe Branch Office Download Center: https://www.avereurope.com/download-center Technical Support: https://www.avereurope.com/technical-support Contact Information Headquarters AVer Information Inc.
-
Page 6: Table Of Contents
Contents Warning ..........................2 Overview ..........................1 Package Contents ......................1 Optional Accessories* ...................... 1 Pan and Tilt Angle ......................2 Parts Info ......................... 3 LED Indicator ........................3 Remote Control........................ 4 Shortcuts ........................5 Connection .......................... 6 Device Connection......................6 Power Connection ...................... - Page 7 Overview of PTZ Control ................... 26 Save, Load and Clear a Preset ..................27 Add and Delete Available Presets (Presets 10-127) ............27 Setting ........................... 28 Overview of the Floating Live View ................32 Tracking Mode ......................33 Gesture Control ......................35 Video Format .........................
-
Page 8: Overview
Overview Package Contents CAM570 Power Adapter & Remote Control AAA Battery (x2) Power Cord* (US only) USB 3.1 Type-B to Mini Din 9 to Mini Din 8 HDMI Cable (3m) Wall Mount Type-A Cable (3m) RS-232 Adapter Cable Bracket (x2) 46.00[1.81]... -
Page 9: Warning
Pan and Tilt Angle... -
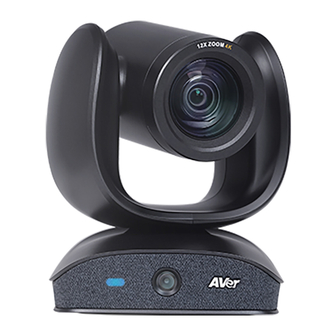
Page 10: Parts Info
Parts Info 1. Optical Zoom Main Lens 6. PoE Port 2. IR Sensor (compatible with IEEE 802.3at) 3. Status LED 7. Audio Input Port 4. AI Lens* 8. HDMI Port 5. Built-in Microphone Array 9. USB 3.1 Type-B Port (audio tracking only, cannot be used as a 10. -
Page 11: Remote Control
Remote Control Name Function 1. Camera No selection is required by default to operate the Select camera. Camera Binding is turned off by default and all three selections can operate the camera. To specify a number, go to Setting > Camera Binding on the web interface or in PTZ App2. -
Page 12: Shortcuts
Shortcuts Press and Hold for 2 sec Turn wide dynamic range (WDR) on or off. for 2 sec Enable Audio Tracking. for 2 sec Enable Presentation Mode. for 2 sec Turn SmartFrame on or off. Change the picture-in-picutre (PiP) position when streaming for 2 sec over USB or IP. -
Page 13: Connection
Connection Device Connection Use the included USB cable. The USB 3.1 port is compatible with USB 2.0. Maximum resolution/fps for USB 2.0 and USB 3.1 ports: USB 2.0 USB 3.1 HDMI M-JPEG M-JPEG - 640x480 or less, - 1080p/60fps - Up to - Up to 4k/30fps - 1080p/60fps... -
Page 14: Power Connection
Power Connection Connect the included power adapter and power cord to a wall outlet. Or connect a CAT 5e FTP cable (not included) to the PoE Switch or Ethernet. PoE port is compatible with IEEE 802.3at. When streaming over IP, use a CAT 5e FTP cable (not included) for a smooth video. -
Page 15: Hdmi Connection
HDMI Connection Connect with TV or monitor through the HDMI port to display camera video on the screen. Hold button for 1 second on the Remote Control to call out the screen layout option. Select the camera image layout firstly. The default is PIP1, showing optical zoom lens image as main screen and AI lens image as small view. - Page 16 PIP View Lens 1 The PTZ camera focuses on speaker Lens 2 Shows all participants After choosing the image layout, short press the OSD Menu button on the Remote Control and then the setting page will show up. Press right direction button to enter and configure the parameters of the camera.
-
Page 17: Rs-232 Connection
RS-232 Connection RS-232 Port Pin Definition Function Mini DIN9 I/O Type Signal Description PIN # VISCA IN Output Data Terminal Ready Input Data Set Ready Output Transmit Data Input Receiver Data VISCA OUT Output Data Terminal Ready Input Data Set Ready Output Transmit Data Input... -
Page 18: Computer/Keyboard Controller And Camera Connection
Computer/Keyboard Controller and Camera Connection Direct Connection If users do not use AVer RS-232 adapter cable, please refer to the pin connection shown below. Mini DIN9 to DB9 Cable Camera controller Mini DIN9 Camera Camera controller, PC 1. DTR (IN) 6. - Page 19 Use the supplied RS-232 mini DIN9 to mini DIN8 cable RS232 mini DIN9 to mini DIN8 cable** VISCA in (Female) Mini DIN8 to DB9 cable* VISCA out (Female) Camera controller Mini DIN8 Camera controller, PC Camera 1. DCD 6. GND (IN) ...
- Page 20 * Mini DIN8 to D-Sub9 (DB9) cable 064AOTHERBPK is an optional item. ** RS-232 mini DIN9 to mini DIN8 Cable Pin Definition Mini DIN9 Connect to AVer camera Mini DIN8 (IN) Connect to next camera Connect to camera controller or PC Mini DIN8 (OUT) Mini DIN8 Pin Definition...
-
Page 21: Camera Cascade Connection
Camera Cascade Connection Direct Connection If users do not use AVer RS-232 adapter cable, please refer to the pin connection shown below for cascading cameras. Total can connect up to 7 cameras. Mini DIN9 Mini DIN9 Camera 1 Camera 2 1. - Page 22 Use the RS-232 mini DIN9 to mini DIN8 cable Total can connect up to 7 cameras. To facilitate the camera cascade, users can use AVer RS-232 adapter cable. Connect camera with AVer mini DIN9 to mini DIN8 adapter cable. Connect the mini DIN8 female side to male mini DIN8 Visca cable (Users have to buy it in the market) and then connect AVer mini DIN9 to mini DIN8 adapter cable again to connect to next camera.
-
Page 23: Installation
Installation The AI lens has a 95-degree field of view but lacks ePTZ functionality. Install the camera at a minimum height of 1.5 meters and avoid placing the camera on a table as it may obstruct the AI lens view. ... - Page 24 3. Then, assemble the L-mount brackets with screws (included in package). Screw size: M4 x8mm (x2) 4. After assembling the L-mount brackets, use the screws (not included) to secure the lower part of L-mount brackets on the wall. Screw For Cement wall: M4 x20mm self-tapping screws (x2) + Plastic conical anchor For Wooden wall: M4 x20mm self-tapping screws (x2)
- Page 25 5. Pass the cables through the hole on the L-mount bracket and connect the cables to corresponding connection ports. 6. Use the remaining screws (included in package) to secure the camera on the L-mount bracket. 1/4”-20 L=7.5mm (x2) Screw:...
-
Page 26: Ceiling Mount Installation (Optional)
Ceiling Mount Installation (Optional) Use the ceiling mount bracket to install the camera to the ceiling. Package Content Mount bracket x 1 Camera bracket x 1 Back cover x 1 Screw (M4*8) x 8 Washer x 8 Dimension Unit=mm... - Page 27 To mount the camera to the ceiling: 1. Drill the hole on the ceiling. Use screw to secure the mount bracket on the ceiling. Screw: 4 M6 x 50mm (Not included in package) 2. Use the supplied screws with washers to secure the camera bracket to the mount bracket.
- Page 28 To mount the camera to the calcium silicate ceiling: 1. Please purchase support bracket for supporting camera mount bracket on calcium silicate ceiling. Then, secure the support bracket on the light steel frame structure. 2. Drill the hole on the calcium silicate ceiling. Open a hole on the calcium silicate ceiling to allow camera cables to pass through.
-
Page 29: Secure The Cables
7. Next, secure the back cover with screws and washer. Screw: 4 M8 x 4 + 4 Washer Completed. Secure the Cables Plug in your USB cable or RS-232 cable and tighten the cable screw to secure. -
Page 30: Get Started
Get Started Make a Video Call The CAM570 is a plug-n-play camera. 1. Connect your CAM550 to a computer using the included USB cable. ® 2. Open your video conferencing software such as Microsoft Teams, Skype and Zoom. 3. Set the... -
Page 31: Web Interface
Web Interface Access the Web Interface You can access your camera’s web interface and change the default static IP to DHCP using the following software: AVer IP Finder PTZApp 2 AVer IP Finder 1. Download and install AVer IP Finder to your computer from AVer Download Center. (https://www.aver.com/download-center). -
Page 32: Ptzapp 2
PTZApp 2 1. Download and install PTZApp 2 to your computer from AVer Download Center. (https://www.aver.com/download-center). 2. Make sure your camera and computer are connected to the same network. 3. Double-click the PTZApp 2 icon to open PTZApp 2 in your browser. ... -
Page 33: Ptz Control
PTZ Control Overview of PTZ Control 1. Presets 0-9 7. Log Out Log out of your account and close the web 2. Preset Function Buttons interface. Save, load and clear a preset. 8. Live View 3. Add Available Presets There are 10 available presets 0-9 by default. 9. -
Page 34: Save, Load And Clear A Preset
Save, Load and Clear a Preset To save a preset: 1. Use the pan, tilt and zoom controls to position your camera. 2. Select Set, then a preset number to save that position. 3. Select Yes when prompted. A thumbnail of your preset will appear. Add and Delete Available Presets (Presets 10-127) There are 10 available presets 0-9 by default. -
Page 35: Setting
Setting Camera Item Description Tracking Mode Select a tracking mode. Refer to <Tracking Mode> for details. AI Detection Source Select a lens to perform for AI detection. Entire group must fit inside the selected lens’s field of view. Voice Sensor Array Turn Voice Sensor Array on or off. - Page 36 Slow Speed: 4 second before audio tracking. Middle Speed: 2 seconds before audio tracking. High Speed: Fastest audio tracking response speed. Audio Tracking Idle Interval Select a duration for the camera to frame entire group after it detects no sound.
- Page 37 Item Description PIP Layout Turn picture-in-picture (PiP) on to see live view from both lenses. HDMI Screen Layout Select a layout for HDMI output. Click the arrows button to switch the position of the smaller video. USB / IP Streaming Screen Layout Select a layout for streaming over USB and IP.
- Page 38 RS-232 Item Description ADDR Select your settings to set up an RS-232 connection. Baud Rate Protocol VISCA over IP...
-
Page 39: Overview Of The Floating Live View
Overview of the Floating Live View The floating live views opens automatically in the Setting tab. To open the floating live view again after closing, click on the camera icon on top of Setting, Video Format, Network and System tabs. 1. -
Page 40: Tracking Mode
Tracking Mode Frames manually using the SmartFrame button Manual Frame to frame entire group on screen once. Frames entire group on screen automatically. If no Auto Frame one is in view, the camera will default to preset 0. The camera auto frames every time a subject enters or leaves the screen. - Page 41 Frames active speaker on screen. Audio Tracking If no one is speaking, the camera will stay at the last position or default to group framing after your selected Audio Tracking Idle Interval. You can set a duration before the camera default to group framing in the Setting tab >...
-
Page 42: Gesture Control
Gesture Control Turn on Gesture Control in the Setting tab > Gesture Control. AI lens must be set as AI detection lens. You must be inside the AI lens field of view. The effective distance is up to 5 meters. Gesture Description Place your hand next to your face with your palm open and facing the... -
Page 43: Video Format
Video Format Item Description H.264 Profile Select a profile for streaming live. IP Stream Resolution Select a resolution for streaming over IP. Frame Rate Select a frame rate. Bit Rate Select a bit rate. To live stream on Facebook, we recommend a bit rate under 4Mbps. -
Page 44: Network
Network Item Description Hostname Click the pencil icon to edit a hostname. Use upper and lowercase letters and numbers. Static IP, DHCP Set up static IP or DHCP. If Static IP is selected, enter your network settings to set up a static IP connection and click Confirm. -
Page 45: System
System Item Description Language Select a language for the web interface. Update your camera’s firmware. Firmware Update Auto Update: Checks and updates online. Manual Update: Update the firmware using a file offline. Note: The camera will reboot and the connection will be lost. Please wait a few minutes and keep the power cable connected. - Page 46 Usage Data Information Displays your camera information such as IP address.
-
Page 47: Ptzapp 2
PTZApp 2 Install PTZApp 2 1. Download PTZApp 2 to your computer from the official website (https://communication.aver.com/model/ptzapp2) or AVer Download Center. (https://www.aver.com/download-center). 2. Double-click the downloaded .exe file. 3. Follow the instructions displayed on the setup wizard to install PTZApp 2. 4. -
Page 48: Use Ptzapp 2 With Usb Devices
Use PTZApp 2 with USB Devices 1. Run your video application and make a video call. 2. During your video call, you can use the PTZApp 2 to pan, tilt and zoom the camera in/out and enable/disable the WDR, brightness, and sharpness feature. 3. - Page 49 Choose “USB device” and connect CAM570 to PC/laptop with USB cable When the camera is detected, the product card will show up. Set up IP address. The camera default IP address is 192.168.1.168. Click pencil icon ( ) to edit IP address.
- Page 50 Hotkey Control: User can control the camera by using keyboard. This is a general list for all AVer USB Cameras. Backlight control equals to WDR function in CAM570. PTZApp Update: Get current PTZApp 2’s version number and do auto update here.
- Page 51 Information: Click the drop-down triangle icon to review the information of camera. To minimize the information, click the triangle or the bottom area of the information icon. Camera: Click the camera icon to view the camera live view. IP address is displayed as well. Click the X icon to close the camera live view.
- Page 52 Full Screen: PTZApp 2 can switch to full screen mode. Click icon and video screen will switch to full screen mode. In full screen mode, user can use direction panel to control camera ” icon to go back to normal screen view. direction.
- Page 53 People Count and Stream Interval: Click the icon to show people count number and stream interval. Click the icon to hide the stream interval. Control Panel: To control the camera direction, zoom in and out during your video call.
- Page 54 Setting: Click “Setting” button to set up parameters of the camera and speakerphone. Click arrow icon to leave the Setting page. PTZ Control: Use control panel to set up preset positions. Most settings are the same as those on the web interface. Refer to <PTZ Control>...
-
Page 55: Virtual Stream
Virtual Stream Virtual Stream allows you to send camera video over IP networks to video conferencing software such as Teams, Skype and Zoom. Video latency may vary depending on your CPU. We recommend Intel Core i5 or higher. Video Stream transmits video only. To start a virtual stream: 1. -
Page 56: Smart Gallery
Smart Gallery Smart Gallery creates a close-up frame for each participants and present them in a single stream composited gallery. Smart Gallery supports 10-20 people depending on your AVer camera model. To create better close-ups, allow some space between participants. ... -
Page 57: Audio Setting
Audio Setting After enabling the Audio Tracking function, you can further set up the Audio Setting to avoid the camera from tracking to the sound from the audio-output devices rather than the live sound from the presenters or participants. The audio-output device could be a standalone speaker, PC, HDMI devices or speakers used to play the RTSP/RTMP streams. - Page 58 Please refer to the instructions in the below scenarios. Scenario 1: For the environment with a camera and a standalone speaker on the local side. The speaker is not connected to the computer; and the Audio Input port of the camera is not in use (not connected to an external microphone), please use Set 1, which is set as default.
- Page 59 Select Off in the Line In for External Microphone field. Select the speaker you are using for the conference from the Speaker Source. A dialog will appear “The function needs to restart the system. It will take around 20~60 seconds.”. Click Confirm. The setup is completed.
- Page 60 Scenario 3: For the environment with an external microphone connected to the Audio-Input port of the camera, while the camera is also connected to multimedia devices, such as a TV, monitor, computer or the devices used to play the RTSP/RTMP video/audio streams, in this circumstance, please use Set 2. Since an external microphone has been connected to the camera, the voices received from the external microphone can be transferred to the multimedia devices connected to the camera, e.g.
- Page 61 Click the Confirm button in the above dialog field. The setup is completed.
-
Page 62: Ezlive
EZLive Please go to http://www.aver.com/download-center to download the AVer EZLive software. After downloading, double-click on the file and follow the on-screen instructions to complete the installation. Use AVer EZLive During a video call, EZLive can help user to do: (1) Camera ePTZ (2) Volume control for the speaker connected (3) Capture camera’s still images (4) Record video...
Need help?
Do you have a question about the CAM570 and is the answer not in the manual?
Questions and answers