
Related Manuals for livn 5963000


Summary of Contents for livn 5963000
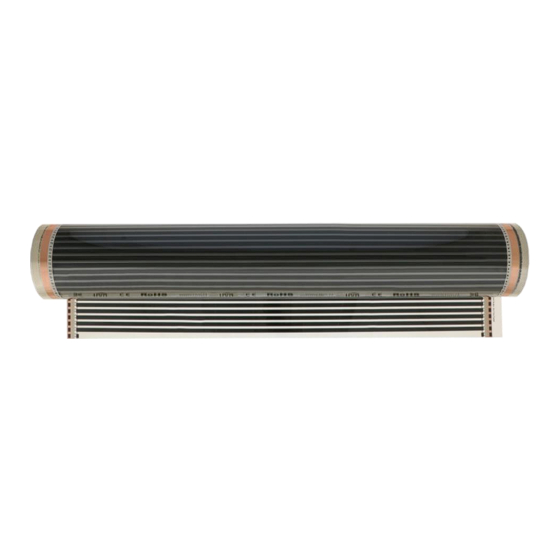
- Page 1 EN INFRARED FLOOR HEATING NL INFRAROOD VLOERVERWARMING FR CHAUFFAGE AU SOL INFRAROUGE DE INFRAROT-FUSSBODENHEIZUNG EN Instruction manual NL Handleiding FR Manuel d'instructions DE Bedienungsanleitung...
- Page 2 • Do not put heavy things like a piano, refrigerator which could cause overheating on heating film. Livn heating foil may only be installed in dry places. • Thick rugs or other insulating materials should never be placed on a floor with electrical heating.
-
Page 3: Section 1: Installation Tools And Material
Tip: after installation measure the resistances of all heating films installed by a resistance meter. SECTION 1: INSTALLATION TOOLS AND MATERIAL We highly appreciate you purchasing Livn infrared floor heating. We hope this installation guidance helps the safe installation and solves any problems during this process. - Page 4 1.2 Materials Name Standard Usage Heating film 100 cm width Heating material Insulating underfloor* Advised: minimum 3 mm Prevention of floor coldness and thickness. Minimum humidity insulation value 0.14 (m²K)/W Electric wire 1.5 mm 2.5 mm Copper wire Eyelet terminal Combination of pressed terminal and heating film Pressed terminal...
-
Page 5: Section 2: Installation Process
SECTION 2: INSTALLATION PROCESS Installation Planning Before installing the heating foil, make a sketch or drawing of the installation. Plan where the thermostat should be placed. The thermostat should not be placed in direct sunlight. It must be convenient for the user and near to the electrical supply, at a height of 1.5 m approx. Plan where the wiring and the connection to the electrical supply should be placed. - Page 6 2.3 Preparation before heating-film installation 1. Check materials and tools once again before installation. 2. Check the total electrical power of the building to prevent any problem using heating-film and other devices at the same time. When the electric capacity is not enough, you must increase the capacity.
- Page 7 2.4 Preparing the thermostat slot and laying the subfloor and heating film 1. Make sure the floor is clean and free from dust. 2. If the heating film is installed on a concrete or cement subfloor that is not yet completely dry, or in a humid environment, we recommend installing a vapour-resistant foil on the base floor.
- Page 8 2.5 Connecting the wiring After the entire floor area has been covered with heating foil, the wiring can be connected. On the side where no connecting wires are connected, you must cover all copper conductors with insulating tape. Pay attention! Take a good look at the laying schedule below. This diagram shows how the wiring must be connected in parallel between the strips of heating film.
- Page 9 2.6 Testing the installation 1. All heating foils must be connected during testing! 2. Measure the total resistance value of the heating foils and record this value on the check/control card in this manual. Hang this check control card in the meter cupboard). 3.
- Page 10 Installing the thermostat The thermostat is designed to be flush mounted and requires a back box of 35 mm (minimum depth) to be sunk into the wall prior to installation. Step 1: Using a small screwdriver, slightly loosen the screw from the bottom face of the thermostat. Then carefully separate the front half from the back plate.
-
Page 11: Section 3: Disposal
Product reference 5963000 Livn infrared floor heating Basic set 5 m2 8712757481873 5963010 Livn infrared floor heating Basic set 10 m2... - Page 12 SYSTEM! DO NOT DRILL OR SCREW INTO THE FLOOR! PLEASE SEE THE DRAWING FOR THE POSITION OF THE HEATING FOIL. Control measurements: Type of heating foil which is installed: Livn heating foil 150 W/m2 Total length of heating foil installed:...
- Page 13 DRAWING OR PICTURES OF THE HEATING FOIL INSTALLATION...
- Page 14 • Plaats geen zware dingen, zoals een piano of koelkast, die oververhitting kunnen veroorzaken op de verwarmingsfolie. Livn verwarmingsfolie mag alleen worden geïnstalleerd op droge plekken. • Dikke tapijten en andere isolatiematerialen dienen nooit op een vloer met elektrische •...
- Page 15 ONDERDEEL 1: INSTALLATIE VAN TOOLS EN MATERIALEN Wij zijn u zeer erkentelijk voor het aanschaffen van Livn infrarood vloerverwarming. We hopen dat deze installatiegids helpt bij een veilige installatie en dat de gids een oplossing kan bieden voor eventuele problemen tijdens het proces.
- Page 16 1.2 Materialen Naam Standaard Gebruik Verwarmingsfolie 100 cm breedte Verwarmingsmateriaal Isolerende ondervloer* Advies: minimaal 3 mm Voorkomen van koude en vochtige dikte. Minimale vloer isolatiewaarde 0,14 (m²K)/W Elektrische draad 1,5 mm 2,5 mm Koperdraad Oog aansluiting Combinatie of ingedrukte aansluiting en verwarmingsfolie Ingedrukte aansluiting Vertinde koperen...
- Page 17 ONDERDEEL 2: INSTALLATIEPROCES Installatieplanning. Maak vóór het installeren van de verwarmingsfolie een schets of tekening van de installatie. Plan waar de thermostaat moet worden geplaatst. De thermostaat moet niet in direct zonlicht worden geplaatst. Hij moet praktisch zijn voor de gebruiker en zich bevinden nabij een stroomvoorziening, op een hoogte van ongeveer 1,5 m.
- Page 18 2.3 Voorbereiding vóór installatie van de verwarmingsfolie 1. Controleer de materialen en tools nogmaals voorafgaand aan de installatie. 2. Controleer het totale elektrische vermogen van het gebouw ter voorkoming van problemen bij gebruik van verwarmingsfolie en andere apparatuur op hetzelfde moment. Wanneer het elektrisch vermogen niet voldoet, dient u dit te verhogen.
- Page 19 2.4 Voorbereiden van de thermostaatsleuf en het leggen van de ondervloer en verwarmingsfolie 1. Zorg dat de vloer schoon en stofvrij is. 2. Als de verwarmingsfolie wordt geïnstalleerd op een ondervloer van beton of cement die nog niet geheel droog is, of zich in een vochtige omgeving bevindt, raden wij aan om een dampbestendige folie op de basisvloer aan te brengen.
- Page 20 2.5 Aansluiten van de bedrading Nadat het gehele vloeroppervlak is bedekt met verwarmingsfolie kan de bedrading worden aangesloten. Aan de kant waar geen verbindingsdraden zijn aangesloten, dient u alle koperen geleiders te bedekken met isolatietape. Pas op! Kijk goed naar het onderstaande legschema. Dit schema toont hoe de bedrading in parallel moet worden verbonden tussen de verwarmingsfolie strips.
- Page 21 2.6 Testen van de installatie 1. Alle verwarmingsfolies moeten worden aangesloten tijdens het testen! 2. Meet de totale weerstandswaarde van de verwarmingsfolies en leg deze waarde vast op de check- /controlekaart in deze handleiding. Hang deze check-/controlekaart in de meterkast). 3.
- Page 22 VERWARMINGSFOLIE (N) Verwarmingskabel aansluitkabel (aansluiting 1) Voedingsspanning (Nul) (aansluiting 2) Voedingsspanning (Fase) (aansluiting 3) VERWARMING (L) Verwarmingskabel aansluitkabel (aansluiting 4) VLOERSENSOR Aansluiting vloersensor (aansluiting 6 / 7) Het installeren van de thermostaat De thermostaat is ontworpen voor inbouwmontage en er is een inbouwdoos van 35 mm (minimale diepte) nodig, om te verzinken in de muur, voordat installatie plaatsvindt.
- Page 23 Maak bij het weggooien van uw verpakking gebruik van de lokale recyclingfaciliteiten. Met het correct afvoeren van het verpakkingsafval helpt u mogelijke schade aan het milieu en de volksgezondheid te voorkomen. Product referentie 5963000 Livn infrarood vloerverwarming Basis set 5 m2 8712757481873 5963010 Livn infrarood vloerverwarming Basis set 10 m2 8712757481880...
- Page 24 VERWARMINGSFOLIE SYSTEM! NIET BOREN OF SCHROEVEN IN DE VLOER! RAADPLEEG AUB DE TEKENING VOOR DE POSITIES VAN DE VERWARMINGSFOLIE. Controlemetingen: Soort verwarmingsfolie die is geïnstalleerd: Livn verwarmingsfolie 150 W/m2 Totale lengte aan geïnstalleerde verwarmingsfolie: ________ meter Gemeten weerstandswaarde van de totale installatie...
- Page 25 TEKENING OF FOTO’S VAN DE GEÏNSTALLEERDE VERWARMINGSFOLIE...
- Page 26 Ne place pas de choses lourdes comme un piano ou un réfrigérateur qui pourrait causer une surchauffe sur le film chauffant. Le film chauffant de Livn ne peut être installé que dans des endroits secs. • Ne place jamais de tapis épais ou de matériaux isolant sur un sol doté d'un chauffage électrique.
- Page 27 SECTION 1 : OUTILS ET MATÉRIEL D'INSTALLATION Nous te remercions d'avoir acheté un chauffage au sol infrarouge Livn. Nous espérons que ce guide d'installation participera à l'installation sûre et à la résolution des problèmes pendant ce processus. 1.1 Outils...
- Page 28 1.2 Matériaux Standard Usage Film chauffant 100 cm de largeur Matériau de chauffage Sous-plancher isolant* Conseillé : minimum 3 Prévention du froid et de l'humidité du mm d'épaisseur. Valeur d'isolation minimale de 0,14 (m²K)/W Fil électrique 1,5 mm 2,5 mm Fil électrique en cuivre Borne à...
-
Page 29: Section 2 : Processus D'installation
SECTION 2 : PROCESSUS D'INSTALLATION Planification de l'installation Avant d'installer le film chauffant, fais un croquis ou un schéma de l'installation. Planifie la manière dont le thermostat doit être placé. Le thermostat ne doit pas être placé à la lumière directe du soleil. Il doit être pratique pour l'utilisateur et proche de l'alimentation électrique, à... - Page 30 2.3 Préparation avant l'installation du film chauffant 1. Vérifie une nouvelle fois les matériaux et outils avant installation. 2. Vérifie la puissance électrique totale du bâtiment pour éviter tout problème en utilisant le film chauffant et d'autres dispositifs en même temps. Lorsque la capacité électrique n'est pas suffisante, tu dois augmenter la capacité.
- Page 31 2.4 Préparation de la fente du thermostat et pose du sous-plancher et du film chauffant 1. Assure-toi que le sol soit propre et exempt de poussière. 2. Si le film chauffant est installé sur un sous-plancher en béton ou en ciment qui n'est pas encore complètement sec, ou dans un environnement humide, nous recommandons d'installer un film résistant à...
- Page 32 2.5 Raccordement du câblage Une fois que toute la surface du sol a été recouverte de film chauffant, le câblage peut être connecté. Du côté où aucun fil de raccordement n'est connecté, tu dois couvrir tous les conducteurs en cuivre de ruban isolant.
- Page 33 2.6 Tester l'installation 1. Tous les films chauffants doivent être connectées pendant le test ! 2. Mesure la valeur de résistance totale des films chauffant et enregistre cette valeur sur la carte de contrôle/vérification de ce manuel. Accroche cette carte de contrôle de vérification dans l'armoire du compteur.
- Page 34 FILM CHAUFFANT (N) Fil de raccordement câble chauffant (borne 1) Alimentation électrique (neutre) (borne 2) Alimentation électrique (sous tension) (borne 3) CHAUFFAGE (L) Fil de raccordement câble chauffant (borne 4) CÂBLE AU SOL Raccordement capteur au sol (borne 6 / 7) Installation du thermostat Le thermostat est conçu pour être monté...
- Page 35 Jette l'emballage par le biais des installations de recyclage locales. En jetant l'emballage et les déchets de manière adéquate, tu participes à prévenir d'éventuels risques pour l'environnement et la santé publique. Référence produit 5963000 Livn kit chauffage au sol infrarouge 5 m2 8712757481873 5963010 Livn kit chauffage au sol infrarouge 10 m2 8712757481880...
- Page 36 REVÊTEMENT DE SOL ! NE PERCEZ PAS LE SOL ET NE LE VISSEZ PAS ! VEUILLEZ CONSULTER LE SCHÉMA POUR LA POSITION DU FILM CHAUFFANT. Mesures de contrôle : Type de film chauffant installé : Livn film chauffant 150 W/m2 Longueur totale du film chauffant installé : ________ mètres...
- Page 37 SCHÉMA OU IMAGES DE L'INSTALLATION DU FILM CHAUFFANT...
- Page 38 • Stelle keine schweren Gegenstände wie ein Klavier oder einen Kühlschrank auf die Heizfolie, die eine Überhitzung verursachen könnten. Livn-Heizfolie darf nur an trockenen Orten angebracht werden. • Dicke Teppiche oder andere isolierende Materialien sollten nie auf einem Fußboden mit •...
- Page 39 Tipp: Miss nach der Installation die Widerstände aller installierten Heizfolien mit einem Widerstandsmessgerät. ABSCHNITT 1: INSTALLATIONSWERKZEUG UND -MATERIAL Wir schätzen es sehr, dass du dich für eine Livn-Infrarot-Fußbodenheizung entscheidest. Wir hoffen, dass diese Installationsanleitung zur sicheren Installation beiträgt und eventuelle Probleme während dieses Prozesses löst.
- Page 40 1.2 Materialien Name Standard- Verwendung Heizfolie 100 cm Breite Heizmaterial Unterbodenisolierung* Empfohlen: mindestens Verhinderung von Bodenkälte und 3 mm Dicke. Feuchtigkeit Mindestdämmwert 0,14 (m²K)/W Elektrischer Draht 1,5 mm 2,5 mm Kupferdraht Ösenterminal Kombination aus Kabelschuh und Heizfolie Kabelschuh Verzinnte Kupferklemme Stromzufuhr zur Heizfolie Isolierband Isolationsbehandlung an der...
- Page 41 ABSCHNITT 2: INSTALLATIONSPROZESS Installationsplanung Bevor du die Heizfolie installierst, solltest du eine Skizze oder Zeichnung der Installation anfertigen. Plane, wo der Thermostat platziert werden soll. Der Thermostat sollte keine direkte Sonneneinstrahlung haben. Er muss für Nutzende bequem zu erreichen sein und sich in der Nähe des Stromanschlusses befinden, in einer Höhe von ca.
- Page 42 2.3 Vorbereitung vor der Heizfolienverlegung 1. Überprüfe erneut die Materialien und Werkzeuge vor der Installation. 2. Überprüfe die gesamte elektrische Leistung des Gebäudes, um Probleme bei der gleichzeitigen Verwendung von Heizfolien und anderen Geräten zu vermeiden. Wenn die elektrische Leistung nicht ausreicht, musst du die Leistung erhöhen.
- Page 43 2.4 Vorbereiten des Thermostatschlitzes und Verlegen des Unterbodens und der Heizfolie 1. Achte darauf, dass der Boden sauber und staubfrei ist. 2. Wenn die Heizfolie auf einem noch nicht ganz trockenen Beton- oder Zementuntergrund oder in einer feuchten Umgebung verlegt wird, empfehlen wir, eine dampfbeständige Folie auf dem Unterboden zu verlegen.
- Page 44 2.5 Verkabelung Nachdem die gesamte Bodenfläche mit Heizfolie bedeckt wurde, kann die Verkabelung vorgenommen werden. Auf der Seite, an der keine Anschlussdrähte angeschlossen sind, musst du alle Kupferleiter mit Isolierband abdecken. Achtung! Sieh dir den Verlegeplan unten genau an. Dieses Diagramm zeigt, wie die Verkabelung zwischen den Heizfolienstreifen parallel geschaltet werden muss.
- Page 45 2.6 Testen der Installation 1. Alle Heizfolien müssen während der Prüfung angeschlossen sein! 2. Miss den Gesamtwiderstandswert der Heizfolien und notiere diesen Wert auf der Kontrollkarte in dieser Gebrauchsanweisung. Hänge diese Kontrollkarte in den Zählerschrank. 3. Berechne die tatsächliche Leistung (Wattzahl) mit folgender Formel: Leistung (230 V X 230 V) = 52.900 geteilt durch den gemessenen Widerstandswert.
- Page 46 HEIZFOLIE (N) Anschlussdraht des Heizkabels (Terminal 1) Stromversorgung (Neutral) (Terminal 2) Stromversorgung (Live) (Terminal 3) HEIZUNG (L) Anschlussdraht des Heizkabels (Terminal 4) BODENSENSOR Anschluss Bodensensor (Terminal 6 / 7) Installieren des Thermostats Der Thermostat ist für die Unterputzmontage vorgesehen und erfordert eine Dose von 35 mm (Mindesttiefe), die vor der Installation in die Wand eingelassen werden muss.
- Page 47 Entsorge die Verpackung bei deinem örtlichen Recyclinghof. Durch die ordnungsgemäße Entsorgung der Verpackungen und Verpackungsabfälle, trägst du dazu bei, mögliche Gefährdungen für die Umwelt und die öffentliche Gesundheit zu vermeiden. Produktreferenz 5963000 Livn-Infrarot-Fußbodenheizung Basis-Set 5 m² 8712757481873 5963010 Livn-Infrarot-Fußbodenheizung Basis-Set 10 m² 8712757481880 5963020 Livn-Infrarot-Fußbodenheizung Basis-Set 20 m²...
- Page 48 ACHTUNG! UNTER DEM BODENBELAG BEFINDET SICH EIN 230-VOLT- HEIZFOLIENSYSTEM! BOHRE ODER SCHRAUBE NICHT IN DEN BODEN! DIE POSITION DER HEIZFOLIE KANNST DU DER ZEICHNUNG ENTNEHMEN. Kontrollmessungen: Typ der installierten Heizfolie: Livn-Heizfolie 150 W/m2 Gesamtlänge der installierten Heizfolie: ________ Meter Gemessener Widerstandswert der Gesamtinstallation...
- Page 49 ZEICHNUNG ODER BILDER DER HEIZFOLIENINSTALLATION...
- Page 50 GIMEG Atoomweg 99 3542 AA Utrecht The Netherlands...
Need help?
Do you have a question about the 5963000 and is the answer not in the manual?
Questions and answers