
Subscribe to Our Youtube Channel
Related Manuals for VistaQuest VQ-7015


Summary of Contents for VistaQuest VQ-7015
- Page 1 Quick-Start Guide DIGITAL CAMERA VQ7015...
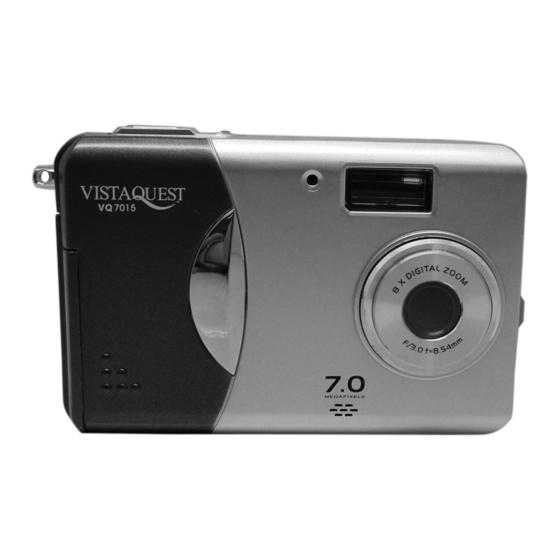
- Page 2 Name of Parts The following illustrations show the names of each component, button, and switch on the camera. 1. Shutter (OK) Button 2. Power Button 3. Self Timer Lamp 4. Flash 5. Lens 6. Focus Switch 7. USB Port Terminal 8.
-
Page 3: Digital Zoom
Indicators 1.Indicator Lamp (Green) 2.Self-Timer Lamp (Red) 3.Power Lamp Digital Interface: USB 1.1 DIGITAL ZOOM During shooting, user can push to zoom in and zoom out. Display Button Press the Right button and the current information on the LCD monitor will be displayed. Menu Button You can turn the menu ON or OFF by pressing the Menu button. -
Page 4: Display Information
Display Information Note: If the icon appears on the LCD when you take pictures in dark conditions. Please keep your hands steady; otherwise you may capture a blur picture. - 3 -... - Page 5 - 4 -...
- Page 6 • Installing Camera Batteries 1.Slide open the battery compartment cover 2.Load the batteries and the SD card into the camera. 3.Slide close the battery compartment cover. • Inserting SD Card: 1. Turn off the camera and open the battery compartment cover. 2.
- Page 7 • Reviewing a Picture 1.Turn on the camera. 2.Slide the Function switch to 3.Use to scroll through the pictures or videos on the monitor screen. • Deleting a Picture 1.Turn on the camera. 2.Slide the Function switch to 3.Use to display the picture you want to delete. 4.Press the Mode button to turn on the menu and then use on the screen.
- Page 8 • Taking a Video 1. Turn on the camera. 2. The LCD monitor will display image and symbols. 3. Slide the Function switch to 4. Press the Mode button once, the icon on the LCD monitor. (Video Mode) 5. Frame your subject on the LCD, then press the Shutter button to take the video.
- Page 9 “Ctrl+V” to paste the photos. The VistaQuest Corporation is proud that you have chosen its product and hopes you will enjoy sharing “a clearer vision” of your memories and special moments captured with your new camera with friends and family for many years.
Need help?
Do you have a question about the VQ-7015 and is the answer not in the manual?
Questions and answers