
Related Manuals for Hacona E-420

Summary of Contents for Hacona E-420
- Page 1 E-type impulse sealer User manual BEFORE USING THE MACHINE PLEASE CAREFULLY READ THE INSTRUCTIONS! Program: v3.4 DOC000290_001 1/57...
-
Page 2: Table Of Contents
TABLE OF CONTENTS Introduction ..................8 Introduction ....................8 The scope of application ................. 8 Foils that can be used ..................8 Machine identification ..................8 Machine types ....................9 Technical descriptions ..............11 Technical parameters ..................11 Max. sealable packaging sizes ...............12 Build up ......................13 Safety function ....................14 Machine interface (KPAD) ................15... - Page 3 Mounting the machine to the stand ..............23 Accessories ....................23 Adjustments of the machine ............24 Switching on the machine ................24 Sealing time ....................24 Cooling time ....................25 Sealing temperature (machines with sealing wire temperature sensor only) .26 Cooling temperature (machines with sealing wire temperature sensor only) 26 Cycle time......................27 ED and EB function..................27 Start the sealing .....................27...
- Page 4 Items which cannot be packed ...............34 Machine overheating ..................34 Safety standards ................34 Warnings .......................34 Maintenance of the machine ............35 Precautions for maintenance interventions ............35 Cleaning ......................35 Required tools ....................35 The changing of the wear parts ..............36 Wiring diagram standard machines ...............50 Wiring diagram with external POC ...............51 Wear parts for standard machines ..............52 Wear parts for machines with sealing wire temperature sensor.....53...
- Page 5 FIGURE LIST 1. fig., Data table ..............................8 2. fig., Machine types ............................... 9 3. fig., Sealing types ..............................9 4. fig., E-type front ..............................13 5. fig., E-type back ..............................14 6. fig. Hand pinch protection..........................15 7. fig., User interface (KPAD) ..........................15 8.
- Page 6 39. fig., Replace the cutting blade ......................... 45 40. fig., Remove the arm cover ..........................46 41. fig., Unscrew the retaining screws ........................47 42. fig., Push down the sealing bar ........................47 43. fig., Remove the cutting knife assembly ......................48 44.
- Page 7 Added required tools list Change the upper PTFE in gloves Added decommissioning information Added EC declaration of conformity Figure reference correction in all document Adding Hacona Kft address to first page 2020.04.09 Switching on the machine Boxing the machine Machine overheating...
-
Page 8: Introduction
You have bought a machine with outstanding features and performance and we thank you very much for your confidence in choosing it. The HACONA system is unique in its kind. The technological development and quality of the components, as well as the materials used in the manufacturing and the testing process are the best guarantee of proper operation and long-lasting liability. -
Page 9: Machine Types
Machine types for example: 4 2 0 2. fig., Machine types E: machine family I: Inox (silver anodized aluminium surface treatment). The other machines without “I” sign has powder painted surface B: Bi-Active sealing machine is heating the foil from the upper and lower sealing bar. This assures, that the heat flows through the material from both sides and 800 micron foil can be sealed D: Double sealing. - Page 10 420: sealing length in millimeters EIBD ✔ ✔ ✔ ☑ ☑ ☑ ✔ ✔ ☑ ✔ ✔ ✔ ✔ ✔ ✔ ✔ ✔ ✔ ☑ ☑ ☑ ☑ ☑ ☑ ✔ ✔ ✔ ☑ ☑ ☑ ✔ ✔ ☑ ✔ ✔ ✔ ✔ ✔ ✔ ✔ ✔ ✔ ☑ ☑...
-
Page 11: Technical Descriptions
Technical descriptions Technical parameters • Power supply EU and GB: ……...………………………………………….……………. 230V, 50Hz • Power supply USA: ……..……...…………………………………………….……………. 110V, 60Hz • Recommended circuit breaker EU / USA: ……..……………………………… C16A / C15A • The electric power of every machine during standby mode is less than …. 30 W •... -
Page 12: Max. Sealable Packaging Sizes
Max. sealable packaging sizes Max. film width Type Max. film width [mm] [inch] E-420 / EB-420 / ED- 420 / EI-420 / EIB-420 / EID-420 / EIBD-420 E-620 / EB-620 / ED- 620 / EI-620 / EIB-620 / EID-620 / EIBD-620... -
Page 13: Build Up
Build up The main switch is located on the right side of the machine. To switch on, set the main switch to "I". Note: When turned on, the main switch lights up in orange. 4. fig., E-type front 1. Main switch 6. -
Page 14: Safety Function
5. fig., E-type back 1. Foot pedal connector 2. Foilstop profile Safety function The machine has a built in hand pitch protection. If the fingers are between the sealing bars while they are closing the magnet can not turn on and the motor is still running so the sealing bar will automatically open then close again until you take out your hand. -
Page 15: Machine Interface (Kpad)
6. fig. Hand pinch protection Machine interface (KPAD) There are three buttons on the right of the machine and a small display. 7. fig., User interface (KPAD) 1. Setting the sealing time (upper button)- the first number is changing 2. Setting the cooling time (middle button)- the second number is changing 3. -
Page 16: Weight And Dimensions Of The Packed Machine
Size [mm] /[inch] Weight [kg] / [pounds] Type Length x Width x Height E-420 / EB-420 / ED- 732,8 x 262,8 x 265,6 mm 420 / EI-420 / EIB-420 / 17,8 kg / 39 lb 28.8 x 10.3 x 10.45 “... -
Page 17: Machine Weight And Dimensions Without Stand
Type Weight [kg] / [pounds] Length x Width x Height 600 x 213 x 240 mm E-420 / EB-420 / ED-420 / 16,6 kg / 36 lb 23.6 x 8.4 x 9.5 “ EI-420 / EIB-420 / EID-420 800 x 213 x 240 mm... -
Page 18: Machine Weight And Dimensions With Stand
Size [mm] / [inch] Type Weight [kg] / [pounds] Length x Width x Height E-420 / EB-420 / ED- 550 x 560x 1040 mm 420 / EI-420 / EIB- 26,6 kg / 58 lb 21.6 x 22 x 40.9 “... -
Page 19: Machine Installation
Machine installation Transport and positioning of the machine Handle the machine with the greatest care at transport and positioning. Cut the strap with scissors and remove the machine out of the carton box. The machine has to be placed in dry and well ventilated room on stable floor, so that the working flow is not impeded. Environmental conditions Place the machine in a suitable environment, free from humidity, gases, explosives and combustible materials. -
Page 20: Using The Machine Without Stand
Using the machine without stand The machine can be used without fixing on a table or on a stable surface when no support are available. Assembling the support and the accessories Assemble the stand, table and the stand table as shown below. Care should be taken when assembling, to tighten the bolts in any case. - Page 21 13. fig., Assembling the table 21/57 DOC000290_001...
- Page 22 14. fig., Assembling the support table 22/57 DOC000290_001...
-
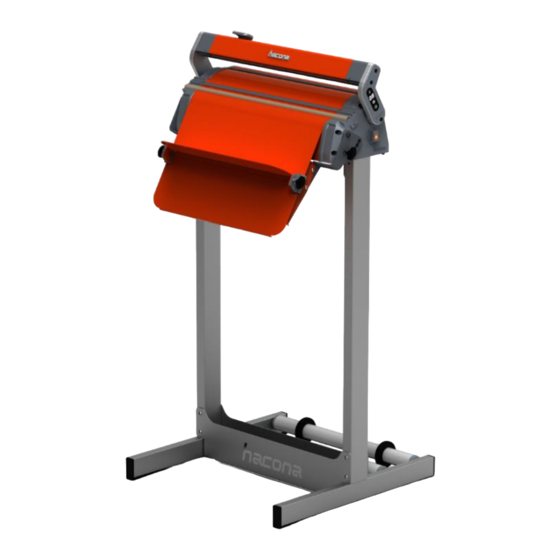
Page 23: Mounting The Machine To The Stand
Mounting the machine to the stand 15. fig., Mounting E-type to the stand Accessories On the following link you can check the accessories list for the E-type machine: https://hacona.com/en/pricelist/accessories-etype 23/57 DOC000290_001... -
Page 24: Adjustments Of The Machine
9.4 blink 3.2 blink 3.3 blink 12. If the machine is Attention: Check the machine type on the KPAD and in reality. Hacona takes no responsibility if the electronic boards are changed and the machine will be faulty because of different machine types. -
Page 25: Cooling Time
The standard E-type machines does not have built in temperature sensor. The sealing times are calculated by the program (ASCC – Adapted sealing cycle control) and is depending by the sealing setting set by the user and the rate of the sealing cycles. The sealing parameters don’t have to be readjusted after continues work with the machine. -
Page 26: Sealing Temperature (Machines With Sealing Wire Temperature Sensor Only)
For the machines with sealing wire temperature sensor the cooling time is calculated below: cooling time = 0,33 * sealing time + 0,5 * the second character on display For example: if on the display is 34 then the cooling time = 0,33 * 3 + 0,5 * 4 = 3 sec Sealing temperature (machines with sealing wire temperature sensor only) If the machine is in base position, the sealing temperature can be set with pushing both the 1. -
Page 27: Cycle Time
Cycle time The machine’s cycle time is the sum of the sealing time, cooling time and the opening and closing times of the sealing bar. Sealing time setting 10,9 13,4 17,1 Machine length 10,6 10,5 13,1 19,4 1020 11,3 10,7 13,8 15,7 18,8... - Page 28 To make a test sealing you have to adjust the sealing time to 0 and cooling time to 1. Place the bag between the sealing bars and then start the sealing. The built-in SNS sensor observes the position of the sealing bar and the electro magnet makes the needed pressure, and keeps the sealing bar closed during the adjusted sealing- and cooling time.
-
Page 29: Operation Of The Cutting Knife
4.10 Operation of the cutting knife While the foil is sealed and before the sealing bar is opened, the foil can be cut with the cutting knife. The blade is pulled back by spring for safety reasons. By pressing the knife head down and moving it right or left, you can cut the excess foil during the sealing time. -
Page 30: Positioning The Film Reel
4.11 Positioning the film reel Place the foil reel in the center of the roller pair on the back of the machine stand. Foilstop Working table Roller pair Leading rubber ring 19. fig., Positioning the film reel Place the leading rubber rings next to the two sides of the foil roller so that it runs loosely. Pull up the foil at the back of the machine and lead it under the foilstop. -
Page 31: The Use Of The Working Table And Bag Support (Option)
4.12 The use of the working table and bag support (option) The tilt angle of the working table can be adjusted in six positions from the horizontal to the almost vertical. To adjust the support table, unscrew the knob on its side and then screw it back after adjusting the correct angle. -
Page 32: Advanced Adjustments Of The Machine
Advanced adjustments of the machine Activate the security lock The sealing, cooling and function settings can be locked with the using of an own password. After activating the security lock, the settings can not be modified only after the security lock is inactivated. For activating the security lock do the followings: push at the same time the upper and the middle button on the KPAD (2.5) for 3 sec the numeric display is starting to blink and writes 00... -
Page 33: Cycle Counter
release the buttons, the security lock is deactivated Cycle counter The KPAD is counting the number of sealing cycles that has been made with the machine. This is an absolute counter can not be deleted. For reading the cycle counter please do the followings: push at the same time all buttons (upper, middle and the lower) on the KPAD. -
Page 34: Conditions And Limits In The Use Of The Machine
Conditions and limits in the use of the machine Items which cannot be packed It is strictly prohibited to pack the below listed products, to avoid damages to the machine and serious injuries to the operator in charge: Wet and unstable products, liquids of any kind, flammable and explosive materials and any other materials and products not listed but which might harm the operator and cause damages to the machine. -
Page 35: Maintenance Of The Machine
Check whether the machine is screwed properly to the support! Check before every use, there is no damage on the cutting device and that the cutting knife is in the proper position! Check it the foil reel on the foil holder roller pair is positioned as prescribed! Maintenance of the machine Precautions for maintenance interventions... -
Page 36: The Changing Of The Wear Parts
The changing of the wear parts How to change PTFE cover and sealing wire If the PTFE cover and/or the sealing wire of the sealing bar is damaged or broken it has to be replaced. First remove the two perlon wires (21. fig.), then remove the PTFE cover from the groove (22. - Page 37 Turn the sealing wire tensioner latch on both sides by 90 ° (23. fig.) to open the thread tension lid (24. fig.), to remove the sealing wire, the lower PTFE and the self-adhesive silicone profile (25. fig.). 90° 23. fig., Turning the latch of tensioner 24.
- Page 38 25. fig., Remove the silicone profile DANGER OF INJURY!!! Attention: When replacing the self-adhesive silicone profile, take care of the sharp cutter in the sealing bar! Use only original spare parts from Hacona! 26. fig., Cutting knife 38/57 DOC000290_001...
- Page 39 Before stick up the new self-adhesive silicone profile, carefully remove the glue residue from the machine body and then stick it up. Then, stick up the new lower PTFE. Insert the new sealing wire and attach it to the faston terminal (27. fig.). 27.
- Page 40 How to change PTFE cover and sealing wire on machines with sealing wire temperature sensor VERRY IMPORTANT!!! Attention! The first lower sealing wire be black painted version. This painted side should be seen by the temperature sensor. Place the painted side of the sealing wire on the right side of the machine If normal sealing wire is placed, or the painting on the sealing wire is in bad position, then the sealing wire, PTFE cover, lower PTFE and...
- Page 41 Replacing the upper PTFE cover and the sealing wire The replacement of the upper PTFE cover and the sealing wire is similar to replacing the lower parts only in this case, the left arm cover should be removed (30. fig.) to perlon wires can be pulled out (31.
- Page 42 Then the upper PTFE cover can be removed (Figure 26). 32. fig., Remove the PTFE cover After removing the two screws (33. fig.), you can open the sealing wire tensioners (34. fig.) to remove the sealing wire, the lower PTFE and the self-adhesive silicone profile. Note: Remove the self-adhesive silicone profile slowly to minimize the glue residue on the surface 33.
- Page 43 When replacing the self-adhesive silicone profile, take care of the sharp cutter in the sealing bar! Use only original spare parts from Hacona! 35. fig., Cutting knife Before stick up the new self-adhesive silicone profile, carefully remove the glue residue from the machine body and then stick it up.
- Page 44 36. fig., Connect the sealing wire to the faston terminal Note: To facilitate the assembly, lead the perlon wire to both apertures of the PTFE cover before installing it and then remove it. 37. fig., Lead the perlon wire to PTFE cover Insert one side of the PTFE cover into the second groove (from the front) and gently pushing perlon wire through the arm, so that it go into the PTFE cover aperture which was inserted into the groove, thereby fasten it in place.
- Page 45 Pull the blade out from its holder with a plier. Replace it to new one. DANGER OF INJURY!!! Attention: In all cases, wear protective gloves during the work and remove or insert the blade with pliers!! Attention: Use only original spare parts from Hacona! 39. fig., Replace the cutting blade 45/57 DOC000290_001...
- Page 46 In all cases, wear protective gloves during the work and remove or insert the blade with pliers!! Attention: Use only original spare parts from Hacona! Worn or damaged cutting knife assembly should be replaced. Remove the plastic arm covers (40. fig.).
- Page 47 Next, completely unscrew sealing bar retaining screws (41. fig.). 41. fig., Unscrew the retaining screws Push down the sealing bar between the two aluminum arms (42. fig.). Note: If you own EB-type (Bi-active) machine, remove the PTFE cover and the sealing wire according to the section "Replacing the upper PTFE cover and the sealing wire", because the only way to be removed the sealing bar! 42.
- Page 48 Remove the sealing bar end cap on one side. Pull out the cutting knife assembly and insert the new one (43. fig.). 43. fig., Remove the cutting knife assembly After replacing the cutting knife assembly, reinstall the parts in reverse order of the operations described above.
- Page 49 After opening the fuse cap, you can pull it out and replace the old fuse to the new one and then close the fuse cap back in place. Attention: Use only original spare parts from Hacona! 49/57 DOC000290_001...
-
Page 50: Wiring Diagram Standard Machines
Wiring diagram standard machines KPAD CON5 CON4 CON3 CON1 CON-FS CON2 MSPE CPU: central processing unit main fuse EM1: electromagnet fuse (motor, magnet and electromagnet (ED-620, 820, KPAD: keypad FU1: EM2: control) 1020, 1320) main fuse (sealing, motor, SNS: sealing bar position sensor FU2: EM3: electromagnet (1320) -
Page 51: Wiring Diagram With External Poc
Wiring diagram with external POC KPAD CON5 CON4 CON6 CON3 ST-SW CON-FS CON1 CON2 MSPE FAN1 FAN2 CPU: central processing unit main fuse EM1: electromagnet fuse (motor, magnet and electromagnet (ED-620, 820, KPAD: keypad FU1: EM2: control) 1020, 1320) main fuse (sealing, motor, SNS: sealing bar position sensor FU2:... -
Page 52: Wear Parts For Standard Machines
Wear parts for standard machines Position Description 1020 1320 Sealing wire set HA 008-476 HA 008-477- HA 008-479 HA 008-480 PTFE coating set HA 008-487 HA 008-488 HA 008-490 HA 008-491 Silicone rubber set HA 008-481 HA 008-482 HA 008-484 HA 008-485 ED sealing wire set HA 010-554... -
Page 53: Wear Parts For Machines With Sealing Wire Temperature Sensor
Wear parts for machines with sealing wire temperature sensor Position Description 1020 1320 -T Sealing wire set HA 010-557 HA 010-558 HA 010-559 HA 010-560 PTFE coating set HA 008-487 HA 008-488 HA 008-490 HA 008-491 Silicone rubber set HA 008-481 HA 008-482 HA 008-484 HA 008-485... -
Page 54: Wear Parts Structure
PTFE cover 1 pcs ED sealing wire set for machines with sealing wire temperature sensor Lower PTFE thicker 1 pcs Lower PTFE 1 pcs Self-adhesive silicone profile 1 pcs Cutting knife blades set Cutting knife blades 6 pcs https://hacona.com/en/pricelist/wearparts-etype 54/57 DOC000290_001... -
Page 55: Service
8.10 Service The service is available through our webpage after registration. https://hacona.com/en/service/e 8.11 Disassembling of the machine Attention: All operations about disassembling must be done by qualified personnel only with mechanical and electrical expertise required to work in security conditions. -
Page 56: Guarantee
If the machine is no longer in the property of the first buyer. Hacona Kft is legally entitled to decline any responsibility for damage to people or things in case of inappropriate installation or connection to the power mains or omissions of connections to earth or in case of any mishandling of the machine. -
Page 57: 10. Ec Declaration Of Conformity
10. EC declaration of conformity The manufacturer and/or his authorized representative established in the Community HACONA Kft. HUNGARY, 1165 Budapest, Bokenyfoldi street Nr 106. TEL: +36 (1) 401-3030 FAX: +36 (1) 401-3031 Email: mail@hacona.com Web: www.hacona.com declares at own responsibility that the following E-type industrial impulse vacuum sealing machine Type:......
Need help?
Do you have a question about the E-420 and is the answer not in the manual?
Questions and answers