Table of Contents
Advertisement
Quick Links
Advertisement
Table of Contents

Related Manuals for Trinnov Audio NOVA


Summary of Contents for Trinnov Audio NOVA
- Page 1 USER MANUAL...
-
Page 2: Welcome
This manual includes the essential information you need to start using your device in your studio setup. We will help you through every step of the setup process, using NOVA as a room optimizer, a monitor controller, an audio interface, or all of the above. -
Page 3: Safety Instructions
1. Read the following instructions carefully. Save all instructions for future reference. 2. Follow all warnings and instructions. 3. TRINNOV Audio expressly forbids unauthorized modification of this equipment. 4. Using the unit in the following locations can result in a malfunction: •... -
Page 4: Table Of Contents
Network connection................................10 Product description..............................10 Network connection..............................11 Power on/off....................................11 Power On....................................11 Power Off....................................11 Trinnov Application..................................12 NOVA is controlled by the Trinnov App..........................12 Home Page....................................13 Top Menu....................................14 Volume Control................................... 15 Sources....................................15 Monitoring.....................................16 Speakers....................................16 Flip buttons...................................16 System Settings.................................. - Page 5 NOTIONS....................................24 Presets......................................24 Network......................................25 Network Mode..................................25 Information................................... 25 DHCP...................................... 26 Fixed IP....................................26 Trinnov Audio Server................................. 26 Clocking......................................26 Output Selection..................................28 Speaker Sets..................................28 Headphones..................................29 Monitoring..................................... 29 La Remote configuration..............................29 Direct Outputs..................................30 Downmixes...................................31 Optimization....................................32 The Optimizer..................................32 Graphs....................................34 Basic Mode...................................34 Expert Mode.................................35...
-
Page 6: Introduction
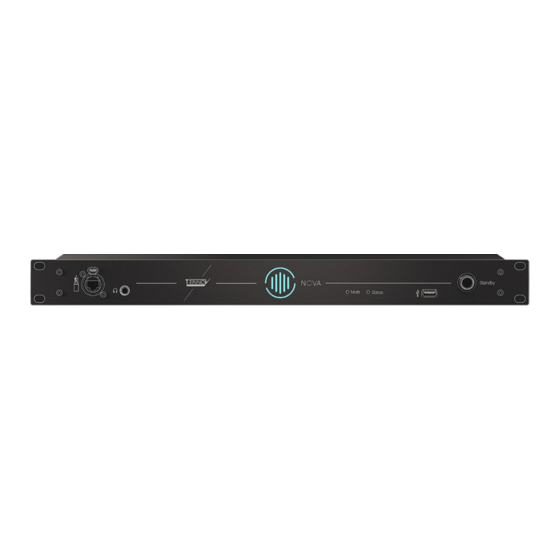
INTRODUCTION YOUR NOVA Package content The package of the NOVA contains the following items: ● NOVA ● Protection bag One power cord ● One cat5e network cable ● ● Printed quick start guide. Inputs & Outputs On the front panel are located, from left to right, the etherCON microphone input, Headphones input, and La Remote input. -
Page 7: Software Licenses
Your computer and NOVA are connected to the same network and the internet. As you start the application for the first time and NOVA is detected, you will be prompted to update your unit, which will install your additional licenses. More in System updates and License upgrades. -
Page 8: Dimension And Weight
Dimension and weight: NOVA weighs 2.6 kilograms or 5.7 pounds. User Manual... -
Page 9: Important Information
The hardware research team has designed a fanless unit to keep your environment as quiet as possible. They successfully achieved this by using the top lid of NOVA for heat dissipation. Don’t be worried if NOVA is getting hot, that’s normal behavior. -
Page 10: Configuration And Start-Up
A network connection is also required in most cases for daily operation. Except for NOVA owners also using La Remote, which only requires a USB connection to NOVA (or to the computer running the Trinnov application (MAC OS app only, but a network connection is then needed too). -
Page 11: Network Connection
1. Ensure that the power inlets are correctly connected to a power source. 2. Press the front panel Standby button to boot the device. Important note: if the front panel LEDs do not light up after the second step, please check the NOVA fuse next to the AC socket. -
Page 12: Trinnov Application
Download the free Trinnov App from our website, https://www.trinnov.com/en/support, to discover and take control of your NOVA device. This software must be installed on a computer connected to the network NOVA has been connected to. NOVA is controlled by the Trinnov App. -
Page 13: Home Page
Home Page This new, completely redesigned homepage shows everything at one glance. User Manual... -
Page 14: Top Menu
Top Menu The top menu is always visible and includes: This is the home page shortcut. Clicking it will always bring you back to the home page. Main menu items Preset selection and management Optimizer Status. Blue means Activated Red means Bypassed Quick access to the configuration of User Manual... -
Page 15: Volume Control
NOVA’s Home Page. You can always reconfigure them after you have run the wizard by using the gear icon located in the top-right corner of the Sources selection panel. -
Page 16: Monitoring
Monitoring The middle section of the home pages includes basic monitoring controls such as individual speaker mute and solo. But with the flip button located at the bottom of this section, you can also access downmixes functions. This item is called Speaker Visualisation. From this page, you can play pink noise, solo or mute . -
Page 17: System Settings
System Settings By clicking on SYSTEM on the toolbar, you will access the configuration of your settings. General In the general section, you can adjust several parameters. Startup Default preset : the current preset loaded at startup. Auto mute: The unit will automatically mute at startup. Volume : You can either boot at a fixed volume or resume the level used during the last session User Manual... -
Page 18: Preferences
Preferences Language: Select the main language of NOVA (only English available currently). Front panel brightness: Select the preferred LED luminosity. Your unit name: Apply a specific name for NOVA. Volume In this section, you can configure all the volume parameters. -
Page 19: About
Volume modification: Level display offset affects the displayed level only and does not impact the level itself. It cannot be stored in presets. About Critical information about the software version, serial number of NOVA, and the number of licenses installed. User Manual... -
Page 20: Latency
Latency Master delay : can be used to apply an additional delay to all channels and all presets. It is not stored in the preset. The following latency information is available: ● Processing Latency corresponds to the latency of the processor algorithms. It can be modified by changing the Optimizer settings (Amplitude + Phase has higher latency than Amplitude only). -
Page 21: Hardware
NOVA. Memory used: Percentage of the current memory used . Quick Setups Configuration Wizard The Setup Wizard will start automatically the first time you use your NOVA or anytime you create a new preset. User Manual... - Page 22 The configuration Wizard takes you through different steps to guide you along the configuration of NOVA. The different successive steps are indicated at the bottom of the screen. You can navigate through each step using the Next and Previous buttons unless missing information prevents NOVA from letting you through the next step.
-
Page 23: Calibration Wizard
After completing the last step of the configuration, you can go back to the home page and start using NOVA. This allows you to play audio from any of the configured sources through any of the configured outputs. However, if you cannot wait to enjoy the benefit of our Optimizer technology, you can jump straight to the calibration Wizard. -
Page 24: Notions
NOTIONS Read this section if, despite running NOVA’s initial configuration and calibration, you still need to understand general concepts and more specific features in detail. Presets NOVA configurations are saved in presets, which include: ●... -
Page 25: Network
Information • Status: indicates the connection status of the Ethernet • MAC address: indicates the MAC address of the network interface of your NOVA • IP address: indicates the IP address of the Ethernet interface of your NOVA. • Netmask: indicates the netmask of the local area network joined as a DHCP client via Ethernet. -
Page 26: Dhcp
To perform maintenance, your unit must be connected to the Trinnov Audio Server. Port 22 is the port used by your unit to access the Trinnov Audio Server. If you want Trinnov Audio to assist you remotely, please enable the outgoing port 22. - Page 27 If NOVA locks to an external clock source, it will automatically follow the external clock source’s sampling rate. If NOVA is using its internal clock, you can then select which sampling rate you want to use, from 44,1kHz to 192kHz. 48kHz is the default sampling rate.
-
Page 28: Output Selection
Output Selection Speaker Sets Speaker sets are divided into two categories: Optimized Speaker Sets: acoustically optimized with Trinnov Optimizer technology ● ● Non-optimized Speaker Sets: non-optimized but aligned in level and delay with the Optimized speaker sets to ensure a smooth transition as you switch between optimized and non-optimized speaker sets. -
Page 29: Headphones
Headphones NOVA has a dedicated Headphone output on the front panel of the unit. This output uses specific DACs which have been optimized for headphone listening. Click on the ON/OFF button to activate/deactivate the headphones. Use the drop-down menu to select the monitor source – you can choose any of the sources. -
Page 30: Direct Outputs
La Remote configuration can be done from the NOVA interface in the MONITORING menu. From this page, you can assign any functions of NOVA to any assignable buttons with a simple drag-and-drop interface. This is also where layers are managed. -
Page 31: Downmixes
To configure a Direct Output, all you have to do is to: 1. Type a name for your Direct Output 2. Select the sources for your Direct Output 3. Edit the routing of your Direct Output. Note that only available outputs will be visible for a Direct Output. Downmixes Downmixes are available in the monitoring... -
Page 32: Optimization
Optimization The Optimizer technology is probably the main reason why you purchased a NOVA. Loudspeaker/Room Optimization is Trinnov Audio’s main area of expertise, and mostly how the company has built its reputation since 2005. - Page 33 The Optimizer aims to achieve the best response from your loudspeakers, whatever the listening conditions. The Optimizer precisely measures the acoustic response of your speakers at several positions in the ● room. Variations in the acoustic response are often due to acoustic problems, which is why it is important to perform in-room measurements.
-
Page 34: Graphs
Graphs The graphs generated after the calibration are designed to help you better understand your room and the way your speakers interact within it. Basic Mode By default, the layout of the Optimizer graphs is fixed, with preconfigured tabs used to show you the essential information about your system. -
Page 35: Expert Mode
Optimizer Graphs menu provides a lot of additional acoustic information and much greater flexibility in terms of display. In Expert mode, the graphs truly turn NOVA into a comprehensive stand-alone measurement system. As an example, you can create your own graph layouts and save them as presets. - Page 36 Layouts The different layouts are created by adjusting options in the Display menu. You can determine what information you want to overlay, what information you would like to display in different frames, and what information to visualize in each of these frames. The number of options is huge, and more than most people actually need.
-
Page 37: Graph Analysis
Zoom Zoom can be used in 3 different ways. ● using your pointer on the axis of the graph (x or y). ● using your pointer on the curve. ● using the -/+ under the zoom tab. A reset button lets you switch back to the default position. Graph analysis In expert mode, you can access different analysis tools by clicking on the Tools tab. -
Page 38: Bass Management
You have the possibility to add points on a curve and compare the delta between points. You can also add markers. Those lines are fixed and won’t follow the zoom. Bass Management Bass management is used to redirect the low frequency portion of a speaker signal to a more capable subwoofer. - Page 39 In Basic mode, every speaker is bass managed by every subwoofer with default 80Hz Linkwitz-Riley 24dB/octave crossover filters. Bass management: Crossover frequency: the frequency that will be applied for the cut-off between the speakers and ● subwoofer. Subwoofers receive low frequencies from the main channels below the chosen Crossover Frequency.
- Page 40 In Expert mode, Bass Management is very flexible. Once engaged, the expert modes give you multiple bass management options for every channel: Use any combination of subwoofers to bass manage each channel ● Add gain to increase the gain of the bass-managed portion of the signal sent to the subwoofer(s). ●...
-
Page 41: Target Curves
Target Curves To understand what the behavior of a Target Curve is, let’s compare it to an equalizer: With an equalizer, you directly apply corrections to achieve a certain acoustic response of the ● system With a Target Curve, you draw the acoustic response you want to achieve and let the Optimizer ●... -
Page 42: Excursion Curves
Excursion curves The Excursion Curves function sets boundaries for the Optimizer filters. In other words, the Excursion Curves limit the boost or attenuation the Optimizer can apply to the original acoustic response to achieve the target curve. The Excursion Curves can be edited independently for each loudspeaker or subwoofer and allows for setting different maximum boost and attenuation at all frequencies. -
Page 43: Settings
The Excursion Curves also include a special feature called Adaptive Limiter. When the Adapt limiter is on, the excursion curve will be automatically set to limit the correction in frequency regions where too much noise was measured. Indeed, too much noise in the original measurement may result in somewhat irrelevant processing, as we would rather not correct noise but correct actual signals. -
Page 44: Algorithm
Algorithm Algorithm limits Maximum boost: defines, in dB, the maximum amount of boost that will be performed by the algorithms. This parameter is used to avoid distortion. Its default value is 6dB. This parameter has an important impact on the behavior of the automatic equalization and is applied to both the time- and amplitude-based approaches. -
Page 45: Filters
Filters The optimizer uses two types of filters : IIR and FIR IIR (Infinite Impulse Response) Digital equivalent of what is typically used in analog electronic filters composed of resistors, capacitors, inductors (or even linear amplifiers) ; also found in early and low-cost digital processing. The infinite response can be explained by using capacitors with a “memory”... -
Page 46: Iir Settings
IIR Settings ● Number of IIR filters (default is 30): the number of IIR filters that will be used on every channel. ● IIR filters minimal/maximal frequency (default is 20 Hz/300 Hz): IIR filters will be positioned from the minimal frequency up to the maximal frequency. Note: In Automatic, the lower frequency of your speaker’s bandwidth will be set as the minimal frequency used for the IIR filter. -
Page 47: Calibration
– for example, at the mixing position, the producer’s couch, etc. For each measurement position, NOVA follows the same calibration sequence: it first samples the noise floor and then generates a measurement test signal, which is played 3 times through every loudspeaker declared during the configuration. -
Page 48: Microphone
Microphone The microphone input of NOVA is located on the front panel and uses an etherCON connector. (Note that any CAT6 cable up to 50 meters will work). NOVA uses the latest version of the Trinnov 3D measurement microphone, which brings two major upgrades and benefits:... -
Page 49: Multipoint Measurement
The main listening position is named appropriately: it should be as close as possible to your main mixing position. Multipoint measurement One of the most advanced features of the Optimizer is its unique multipoint measurement technology. Instead of using an averaged response out of multiple measurement points, the Trinnov multipoint algorithm takes every single measurement point into account and tries to achieve the best result in both frequency and phase for each position. -
Page 50: Dante
Dante Certification Although NOVA supports Dante, the purpose of this user guide is not to educate people about Audio over IP, which is of course a vast and complex subject. Instead, we strongly recommend everyone sign up for the Dante certification, which is free of charge and available online, free of charge at the following address: https://www.audinate.com/learning/training-certification/dante-certification-program... -
Page 51: Warning About Usb To Network Adapters
(Dante Controller) and provides you with access to every Dante device on the network. In other words, NOVA (or any other Dante device) connects to DVS via the Dante controller, which is another essential free software developed by Audinate. From there, DVS provides you with access to NOVA I/Os from your DAW as a virtual sound interface. -
Page 52: Help
HELP System updates and License upgrades Using the Trinnov application (macOS or Windows), you will be able to check the version on NOVA and see if a new version is currently available. If a new version is available, a pop-up will appear. -
Page 53: Latency
Latency Unlike more basic acoustic correction solutions available on the market, we developed expertise in time/frequency analysis. Sound is essentially a phenomenon that you can explain if you look at the time domain, and operating in the time domain necessarily implies latency to correct phase issues. As such, you can expect an average latency of 20ms with the Optimizer engaged, although this may vary based on the buffer size, sampling rate, and some optimization parameters. -
Page 54: Appendix
Mute LED : : all the speaker outputs of the NOVA unit are muted Yellow : DIM is engaged, the speaker output is lowered Optimizer LED : (blinking) : optimizer is in bypass mode Blue : optimizer is calibrated and running...
Need help?
Do you have a question about the NOVA and is the answer not in the manual?
Questions and answers