Table of Contents
Advertisement
Advertisement
Table of Contents

Related Manuals for Trinnov Audio D-Mon Series


Summary of Contents for Trinnov Audio D-Mon Series
- Page 3 Edition: 28/09/2018 Copyright © 2017 by Trinnov Audio All rights reserved. No part of this publication may be reproduced, distributed, or transmitted in any form or by any means, including photocopying, recording, or other electronic or mechanical methods, without the prior written permission of the publisher, except in the case of brief quotations embodied in critical reviews and certain other noncommercial uses permitted by copyright law.
-
Page 5: Table Of Contents
WELCOME ..........................7 ............................. 7 BOUT THIS ANUAL ............................. 7 OFTWARE PDATES ............................7 EGISTRATION IMPORTANT SAFETY INSTRUCTIONS ..................8 INTRODUCING THE D-MON SERIES ..................9 ..............................9 VERVIEW ..........................10 OMPARISON OF ODELS ..........................11 YSTEM OMPONENTS ..........................11... - Page 6 Table of Contents EXTERNAL CONTROL ......................87 AVID E ............................... 87 UCON AVID I ............................88 ERIES APPENDICES ........................92 ............................92 IRING IAGRAMS MIDI I ..........................93 MPLEMENTATION ............................94 ECHNICAL 6/95 D-Mon Series User Guide...
-
Page 7: Welcome
This document describes how to install, setup and operate the D-Mon|4, D-Mon|6, D-Mon|8 and D-Mon|12. We recommend that you read this manual carefully before installing or operating a D-Mon Series system. The specification is valid for Version 4.2.x. Note that most of the examples in this document show a D-Mon|12. The operation and setup of other models are identical, but some functionality such as the number of Optimizer ®... -
Page 8: Important Safety Instructions
IMPORTANT SAFETY INSTRUCTIONS ATTENTION! To ensure optimal performance, please pay attention to the instructions in this Quick Start Guide: • Read these instructions. • Keep these instructions. • Follow all instructions. • Install the apparatus on a solid, flat, level surface that is dry, well ventilated and out of direct sunlight. Be sure that all four feet are supported. -
Page 9: Introducing The D-Mon Series
This chapter introduces the D-Mon Series. OVERVIEW The D-Mon Series provides comprehensive monitoring solutions for professional recording, mixing and/or mastering studios. The different processor models are designed to meet varying needs ranging from simple stereo loudspeaker setups to more demanding surround sound installations. In each case, the processor provides three main functions: an advanced monitoring controller, loudspeakers to room tuner (Optimizer ®... -
Page 10: Comparison Of Models
COMPARISON OF MODELS The D-Mon model describes the number of available Optimizer channels. Also, there are variations in the amount of I/O, and the ® internal summing and routing capabilities. The differences are summarized in the table below. Note that each model has been designed with the following applications in mind: D-Mon|4: for studios (recording, mixing, mastering) where two stereo speaker sets would be the Main and Alternate selections. -
Page 11: System Components
SYSTEM COMPONENTS To configure and operate the system, you will need three hardware components: • D-Mon Processor (always supplied): handles all audio processing, routing, mixing and I/O. • Trinnov 3D-Microphone (optional): required during setup to perform the speaker/room calibration. • Controlling Device (not supplied): this can be a networked device with a web browser interface or a physical controller. - Page 12 3.4.2 EXTERNAL CONTROLLERS The D-Mon processor can also be remotely controlled. The level of integration depends on the protocol used. The options are: Protocol or Hardware Connection Method Level of Integration Avid EUCON IP/Ethernet (requires the D-Mon App) Specific Functions + GPIOs Avid ICON “ICON”...
-
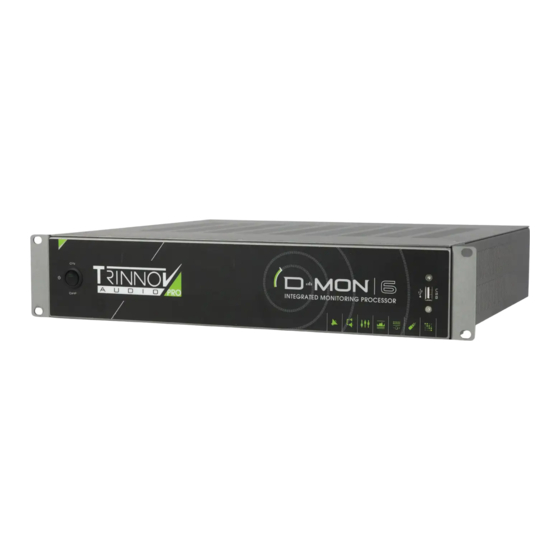
Page 13: The D-Mon Processor
BEFORE using the rear panel ON/OFF switch to cut the power. 1 x USB 2.0 port Used to attach a remote controller like a mouse or a volume knob, or for inserting a USB key to save your preset and setup. “D-Mon|8” label Indicates the D-Mon Series model number. -
Page 14: Rear Panel
REAR PANEL Function Connector D-Mon Model Power plug: 220/110V (specified on order) CEE Main ON/OFF mains switch: applies power to the whole unit. VGA Output SubD 15p HDMI HDMI Output 4 x USB 2.0 Mouse, keyboard or memory-stick inputs Ethernet port (Cat5/6) RJ-45 AES Inputs &... -
Page 15: Quick Start
QUICK START This chapter provides a quick start to get you up and running as quickly as possible. We will assume that the D-Mon processor is already installed and configured – i.e., all connections made; all speaker sets defined and calibrated; the correct clock signal selected; etc. If not, please see Chapter 6: Installation & Setup. Note that all the functions of the D-Mon Control Panel GUI are covered in more detail later in Chapter 7. -
Page 16: Opening The Gui
OPENING THE GUI The D-Mon Control Panel (DMCP) can be accessed by opening a browser connection to the D-Mon processor from a networked device such as a desktop computer, laptop, smart phone or tablet. System Requirements • The device must be connected to the same IP network as used by the D-Mon processor. •... -
Page 17: Resizing The Gui
RESIZING THE GUI Before using the GUI, please check the screen resolution. In our example below, some functions are “missing” from the bottom of the CONTROLLER page as the GUI is being viewed on a 16:9 computer screen. CONTROLLER Page (viewed at 16:9) The GUI is optimized for 4:3. -
Page 18: Pages & Navigation
PAGES & NAVIGATION The D-Mon Control Panel supports six pages – use the icons at the bottom of the GUI to change page: If you hover the cursor over an icon, then the page name is displayed (e.g. CONTROLLER). The six pages are: •... -
Page 19: Recalling A Preset
RECALLING A PRESET At this stage, it is a good idea to recall a preset to be sure that the processor’s speaker sets, and other studio-related parameters, are configured correctly. Presets will be described in more detail later. For now, use the following steps to reset your system: ... -
Page 20: Day-To-Day Operation
DAY-TO-DAY OPERATION Once your processor is configured, all everyday tasks can be operated from the CONTROLLER page: Area Primary Function Click to monitor an incoming source (e.g. Main) on the selected speaker set (#3). SOURCES Speaker Level Click and drag to adjust the speaker level. SPEAKERS Click to select a speaker set (e.g. - Page 21 In more detail… Area Operations Manages all incoming sources defined in the SESSION SETTINGS. SOURCES (IN) Click to monitor a source on the selected speaker set. Use the TOGGLE and SUM buttons to determine whether selections are exclusive or additive. You can listen to any combination of sources (#1) and/or outputs (#4).
-
Page 22: Modifying The Configuration
MODIFYING THE CONFIGURATION If the contents of the CONTROLLER page do not meet the needs of the session, then you will need to modify the configuration. First, it is useful to understand how the GUI pages interact, and how settings are saved using snapshots and presets. 5.8.1 USING THE GUI PAGES The diagram below shows how the CONTROLLER page is affected by the SESSION SETTINGS and STUDIO SETUP parameters:... - Page 23 5.8.2 ABOUT SNAPSHOTS AND PRESETS To save and load settings, the system uses two different file types: • A studio preset stores everything required to reset the D-Mon processor – i.e. all the D-Mon Control Panel GUI parameters plus other lower-level settings defined during installation (such as the Optimizer channels •...
-
Page 24: Editing The Session Settings
EDITING THE SESSION SETTINGS At the top of the SESSION SETTINGS page, you will see the available SOURCES, MIX BUSES and OUTPUTS for the session. These determine what resources are available in the main CONTROLLER, SESSION ROUTING and MONITORING MIXER pages as described earlier (see Using the GUI Pages). - Page 25 Available Parameters • Name – click to edit the name. You can click once to position the cursor, or double-click to select the text you wish to overwrite. Type in a name; the usual copy, cut and paste functions are available. Each name can be up 16 characters, and all alphabetical and numerical signs are accepted.
-
Page 26: 5.10 Saving A Snapshot
5.10 SAVING A SNAPSHOT To save any changes to the SESSION SETTINGS, you should save a snapshot. There are two possibilities: overwrite an existing snapshot or create a new file. To overwrite an existing snapshot: First, select CONFIGURATION PRESETS from the page icons at the bottom of the GUI – a pop-up menu appears. ... -
Page 27: Installation & Setup
INSTALLATION & SETUP This chapter covers the installation and setup of the system. Here we will focus on a stand-alone installation to be controlled via the D-Mon Control Panel GUI. If you wish to connect an external control surface, then please see Chapter 8: External Control for additional information. ATTENTION! You should read and observe ALL of the Important Safety Instructions BEFORE installing or operating your system. -
Page 28: Whats In The Box
WHAT’S IN THE BOX? Your shipping box includes the following items. Note that some items are optional. Please check the contents, and in the event of any transport damage, contact the Trinnov service department at support@trinnov.com. Item Processor (19”, 2U Rack) Mandatory. -
Page 29: Starting Up The D-Mon Processor
STARTING UP THE D-MON PROCESSOR Before passing any audio signals, you should make sure that the D-Mon processor is booted and correctly setup. We recommend you do this before installing the unit into its final location (rack or housing), so that it is easier to access the connectors and switches. - Page 30 By default, the system is set to receive its IP The “IP address” and “Netmask” fields are properly completed. address via DHCP. Therefore, if the unit has The sentence “Connected to Trinnov Audio Server” is displayed. been connected to a DHCP network, you should see the following: If any of the above conditions are missing, check your Ethernet cabling and IP settings.
-
Page 31: Studio Integration & Wiring
STUDIO INTEGRATION & WIRING This section describes each of the rear panel connectors and their intended signal assignments. D-Mon Processor Rear Panel 6.3.1 AUDIO CONNECTORS All SubD-25 audio connectors are wired according to the Tascam standard – see 9.1.1: Audio SubD-25 Connectors. Connector Model Function... - Page 32 Connector Model Function ANA IN 1-4 D-Mon|4 Designed to connect incoming signals from analog studio equipment like recorders, players, and external signal processors. Inputs 1 & 2 are reserved for Talkback and D-Mon|6, 8, 12 ANA IN 1-8 Listen-back and include phantom power (see note below). SubD-25 When performing an acoustic calibration via the Optimizer , you will need to connect...
- Page 33 6.3.2 MPIO & BNC CONNECTORS Connector Model Function This multi-purpose connector carries the following signals: Multi-Purpose I/O • SubD-25 MIDI input & output: compliant with the General MIDI 2 standard • Talkback input: balanced input (with phantom power) • Listen-back input: balanced input (with phantom power) •...
-
Page 34: Configuring The System
CONFIGURING THE SYSTEM There are some configuration tasks which should be performed when you install a system. These are: • ® Define and calibrate the speakers (using the Optimizer • Define the audio clock signal. • Define other studio-related parameters such as the talkback and listen-back inputs. •... - Page 35 6.4.2 USING THE OPTIMIZER & 3D-MICROPHONE Before calibrating the system, it is useful to understand more about the Optimizer and 3D-Microphone. 6.4.2.1 “OPTIMIZER”: THE TRINNOV DIGITAL ACOUSTIC CORRECTION The “Optimizer” is a digital processing module included in every D-Mon processor. It provides studio monitoring loudspeakers with the best possible response according to the particular room where they are installed.
- Page 36 6.4.2.2 THE TRINNOV 3D-MICROPHONE The Trinnov 3D-Microphone has been designed specifically for Optimizer room On/Off LED correction. It is equipped with measurement transducers and is not designed for any other application (such as sound recording). The design has been conceived alongside the Optimizer algorithms to sample the characteristics of the monitoring loudspeakers and their layout in the control room.
- Page 37 6.4.3 PREPARING FOR CALIBRATION 6.4.3.1 DEFINING THE SPEAKER SETS Before running the first calibration, you will need to define the speaker sets. This is handled from the D-Mon Control Panel GUI, as described later in 7.5.2: STUDIO SETUP -> Speaker Sets. Note that: •...
- Page 38 Extract from the Recording Academy Recommendations 6.4.3.3 RECOMMENDATIONS FOR 3D-MICROPHONE PLACEMENT The Optimizer algorithms support both single-point and multi-point calibrations. In most cases, a single-point calibration will achieve the best possible result from the loudspeakers. Multi-point calibration should be used if a larger sweet-spot is required (e.g. in front of a large-scale mixing desk); if there are simultaneous mixing positions;...
- Page 39 In both scenarios, a reference measurement position should be chosen carefully, since it will be used by the Optimizer to calculate the loudspeakers’ relative delay and level alignment as well as the Master delay and level. The “M” position is the best choice for presets to be used for mixing.
- Page 40 6.4.4 RUNNING THE FIRST CALIBRATION (STEP-BY-STEP) SEVERE NOISE INJURY MAY OCCUR DURING THE CALIBRATION PROCESS IF THE FOLLOWING INSTRUCTIONS ARE NOT STRICTLY APPLIED. ANY PERSON PRESENT IN THE ROOM DURING CALIBRATION SHOULD BE WARNED ABOUT THE RISK OF NOISE OVERLOAD AND THE LARSEN EFFECT. The Optimizer requires a minimum Sound Pressure Level for proper calibration.
- Page 41 Select the “Optimizer Settings” page followed by the “Calibration” sidebar tab. From here: Change the Measurement name if you wish (e.g. Measurement 1). Click on Configure to check and, if necessary, change the 3D-Microphone compensation file. 6.4.2.2: Trinnov 3D-Microphone. ...
- Page 42 To add more measurement points, for a multi- point calibration, click on the Add button and repeat steps 5 and 6: Use the value to the right of the “Calibrated” field to set the importance factor. A value of 0 means ignores the point.
- Page 43 6.4.4.1 WARNING MESSAGES & TROUBLESHOOTING During calibration, you may see a warning message indicating that there is a problem. The list below describes the most likely causes of each message and the steps which should be taken to provide a solution. IMPORTANT: if several digital “acoustic tuning”...
- Page 44 6.4.5 OPTIMIZER SETTINGS Having completed the first calibration, the “Optimizer Settings” page can be used for fine-tuning. The page has four sidebar tabs: • “Runtime” – allows you to manage the overall Optimizer process. • “Settings” – provides access to all normal and advanced parameters. •...
- Page 45 Optimizer Settings -> Settings (Continued) The Main Settings are: • Optimize: Amplitude + Phase (default): with this setting, the Optimizer will improve both the amplitude and phase response of the loudspeaker. This greatly reduces the group delay of the speakers (starting from about 150Hz). Amplitude only: in this mode, the Optimizer will work only on the amplitude response;...
- Page 46 6.4.6 DEFINING THE AUDIO CLOCK The audio clock source must be defined in the OPCP GUI using the “Setup” page and “Clock” tab. Note that the clock settings and status can also be checked (but not adjusted) from the D-Mon Control Panel GUI, see 7.5.4 STUDIO SETUP ->...
- Page 47 6.4.7 OTHER STUDIO-RELATED PARAMETERS At this stage it is a good idea to check the rest of the STUDIO SETUP parameters in the D-Mon Control Panel GUI, so that when you save a preset, it will include all the settings required to reset the D-Mon processor for the studio. In particular, check the following tabs: •...
-
Page 48: The D-Mon Control Panel (Gui)
THE D-MON CONTROL PANEL (GUI) This chapter covers all the functions available from the D-Mon Control Panel. Please read Chapter 5: Quick Start for a short introduction to the GUI and its operating principles. THE CONTROLLER PAGE The CONTROLLER page is the main operational page for everyday tasks. It is divided into five main areas: Area Function SOURCES... - Page 49 7.1.1 PREPARING THE CONTROLLER PAGE The diagram below shows how the CONTROLLER page is affected by the SESSION SETTINGS and STUDIO SETUP parameters: The available SOURCES and OUTPUTS & TALKS are determined by the SESSION SETTINGS, and the available SPEAKERS by the STUDIO SETUP ->...
- Page 50 7.1.3 MONITORING AUDIO (ON THE SPEAKERS) Click to select speaker set (always exclusive) Click to select monitor source: TOGGLE = exclusive; SUM = additive From either the SOURCES or OUTPUTS & TALKS areas, click to choose a monitor source - the selected source or output (e.g.
- Page 51 7.1.5 CHECKING INDIVIDUAL LOUDSPEAKERS Speakers Muted Centre Speaker in Solo Pink Noise to Right Surround Using the buttons at the bottom of the SPEAKERS area, you can solo, deliver pink noise to, or mute an individual speaker: First, choose the function – e.g. MUTE. ...
- Page 52 While listening to a Downmix, you can use the SOLO or MUTE functions to interrogate individual speakers. Note that downmixing occurs automatically whenever there is a mismatch between a source and a destination – for example, if you listen to a 5.1 source on a stereo speaker set. Also, you can force a downmix to occur by changing the routing assignments in the SESSION ROUTING page, see 7.2.5: Downmixing.
- Page 53 About the Talkback Inputs The system supports two talkback inputs which can be used to talk to an individual mix bus or all buses (via the SLATE button). For each mix, you can determine whether talkback is enabled and which input will be used (TB1 or TB2), see 5.9 Editing the Session Settings.
- Page 54 Click on the AES INSERT ON/OFF button to switch the insert return in and out of circuit. For example, to compare your “dry” mix (INSERT OFF) with a “wet” mix (INSERT ON) returning from a digital effects processor. Note that: •...
- Page 55 7.1.11 MONITORING AUDIO (ON THE HEADPHONES) Click to turn ON the Click and drag to adjust the headphones headphone listening level Click to select the headphone monitor source Analog outputs 9 & 10 are reserved for the stereo headphones (see note below). ...
-
Page 56: Session Routing
SESSION ROUTING This page controls the routing matrix. It can be used to view all sources and destinations to the system; make manual routing assignments for the session – for example, to route a mix bus to its output destination; and change IO assignments. Click to assign a different IO Click to change the... - Page 57 7.2.1 PREPARING THE MATRIX The diagram below shows how the matrix sources and destinations are affected by the SESSION SETTINGS and STUDIO SETUP: The available sources are determined by the SOURCES in the SESSION SETTINGS page. The available destinations are determined by both the SESSION SETTINGS page (MIX BUSES and OUTPUTS) and STUDIO SETUP ->...
- Page 58 7.2.3 MATRIX VIEWS The matrix can be displayed in one of three “views” – use the buttons at the top left to change between Full, Chan (channel) and Min (minimized) view. Once the matrix is configured, you can use the Chan and Min views to simply its operation. Full View In Full view, you will see an X/Y crosspoint for every source and destination channel and its assigned input or output.
- Page 59 Channel View In Channel view, the physical I/O assignments are hidden so that you see only the source and destination channels, but not their physical connections. This can be used to simplify the matrix: Minimized View In Minimized view, two things happen: •...
- Page 60 7.2.4 MAKING MULTIPLE CONNECTIONS Click here and drag Release to connect diagonally to make selections (or disconnect) In addition to making connections in the usual manner, you can “drag and drop” to make consecutive channel assignments. This method only works in Full or Channel view and is achieved as follows: ...
- Page 61 7.2.5 DOWNMIXING Downmixing occurs automatically whenever there is a mismatch between a source and a destination – for example, if you assign a surround source to a stereo destination in Min view, and then switch back to Full view, you will see that an automatic routing has been applied.
-
Page 62: Monitoring Mixer
MONITORING MIXER This page controls the summing of the session’s sources onto mix buses. It can be used, for example, to adjust a cue mix. For each mix, you can set the individual summing points and levels, and the overall mix level. You can also choose to monitor a mix on the speakers or headphones using the buttons below each fader: Click to assign a source to the mix... - Page 63 7.3.1 PREPARING THE MIXER The diagram below shows how the available SOURCES and MIXES are determined by the SESSION SETTINGS. Therefore, you will need to configure this page before setting up the mixer. Note that the LEVEL for MIX BUSES in the SESSION SETTINGS is the same as the fader level in the MONITORING MIXER. Note also: •...
-
Page 64: Session Settings
SESSION SETTINGS This page defines parameters which apply to the session. It is divided into four separate areas which can be accessed by scrolling up and down the page: • Sources, Mix Buses & Outputs (shown below) – define the resources available for the session. •... - Page 65 7.4.3 SESSION SETTINGS -> OPTIONS Scroll down the page to access the following options for the speaker and headphone monitoring: • Main source selection mode – sets the default mode used at startup of the monitor source selector: either Toggle or Sum. •...
- Page 66 7.4.5 SESSION SETTINGS -> REMOTE CONTROLLERS Scroll down to the bottom of the page to define the mapping of functions to an Avid EUCON or ICON controller. There are four different sets of mappings which are accessed using the tabs at the top of the area: Speaker sets, Monitor Sources, Cue Sources and Cue Outputs: In each case, click to assign a D-Mon processor resource (e.g.
-
Page 67: Studio Setup
STUDIO SETUP This page defines parameters which apply to the studio. It is divided into six different sets of parameters: • Speaker sets – defines the studio’s speaker sets (optimized and non-optimized). • Inputs & Outputs – defines the talkback and listen-back inputs, plus the AES insert. •... - Page 68 7.5.2 STUDIO SETUP -> SPEAKER SETS This tab defines the name, format and physical connections for each speaker set, plus the bass management options. Once configured, each speaker set appears in the main CONTROLLER page and SESSION ROUTING matrix. Note that speaker sets are divided into two categories, optimized and non-optimized. Optimized speaker sets appear first in the DMCP interface STUDIO SETUP ->...
- Page 69 Stereo In this example, there are still two speaker sets, but this time the Left and Right channels connect to the same physical outputs and, therefore, can share the same Optimizer channels (1 & 2). This time when the user chooses a speaker set from the CONTROLLER page, they are listening either in 5.1 or Stereo but using the same Left and Right loudspeakers.
- Page 70 7.5.2.2 EDITING THE OPTIMIZED SPEAKER SETS ATTENTION! If you make changes to any speaker set (optimized or non-optimized), you will need to re-calibrate the speakers. See 6.4: Configuring the System. Possible Operations Click on the ADD + button to create a new speaker set - the entry is given a default name (e.g. Speaker Set #2) and a generic set of parameters (Format = Stereo, MAIN = on, PATCH = on, Level Trim = 0dB): Click here to ADD a new speaker set...
- Page 71 For speaker sets with surround channels, you can enable or disable the Surround theatrical level alignment option. When enabled, all surround speakers are level aligned to conform to the Dolby standard for cinema listening environments. Re-using some speakers in different speakers sets Is it possible to re-use an optimizer channel in another speaker set by selecting the same physical output for the same channel label (ie.
- Page 72 For speaker sets with a subwoofer (.1) channel, you will also see a number of bass management options, described below. Click on the DELETE symbol (in the right-hand column) to remove a speaker set. ATTENTION! There is no undo for the delete operation, so take care when selecting this symbol! Deleting a speaker set will remove it from the CONTROLLER and SESSION ROUTING pages.
- Page 73 7.5.2.4 WORKING WITH NON-OPTIMIZED SPEAKER SETS Non-optimized speaker sets can be edited identically to optimized speaker sets. However, the number which can be defined is not limited by the D-Mon processor’s Optimizer ® channel resource. In our example below, a stereo non-optimized speaker set (Spk C) has been added to an existing configuration (with two optimized speaker sets: 1 x 5.1 + 1 x stereo): Note that: •...
- Page 74 7.5.3 STUDIO SETUP -> INPUTS & OUTPUTS This tab defines the talkback and listen-back inputs, plus the AES insert. Talkback The system supports two talkback inputs which can be used to talk to the session’s mix buses, see 7.1.8 Talking to an Output. The physical input connectors, level trims and limiter/auto-gain are specified here in the STUDIO SETUP: •...
- Page 75 • Enable Listenback #1 – tick this checkbox to enable the first listen-back input. You can then define its input, level trim and limiter/auto-gain (in the same manner as for the talkback inputs). You can choose any analog or AES in (but please read the note above).
- Page 76 In our example, only Listenback #1 is enabled. Therefore, only LISTEN 1 will appear in the various monitor source selectors (on the CONTROLLER page). AES Insert Scroll down to the bottom of the page to enable (or disable) the AES 1-8 Insert, see 7.1.10: Switching the AES 1-8 Insert. 7.5.4 STUDIO SETUP ->...
- Page 77 7.5.5 STUDIO SETUP -> OPTIONS/LEVELS/POWER-ON STATE This tab sets various options for the speaker listening level: Options • Auto-Dim on Talkback – this option is identical to the one defined under SESSION SETTINGS -> Options. It is repeated here so that it can be saved and loaded by Presets. Levels These options affect how the speaker level (on the CONTROLLER page) is displayed, and the Reference and DIM functions, see 7.1.4: Adjusting the Listening Level (Speaker Volume).
- Page 78 7.5.6 STUDIO SETUP -> REMOTES This tab sets the GPIO mappings for external controllers and the optional USB Volume controller. MPIO General Purpose Inputs & Outputs These fields will map a D-Mon processor function to a General Purpose Input or Output (GPI or GPO). There are two GPIs and one GPO available.
- Page 79 7.5.7 STUDIO SETUP -> UPDATES/ABOUT This tab provides information about the product and its software status: The unit can be updated (via the Trinnov server) once registered. Therefore, for a first-time update, please follow these steps: Step Instructions Comments Connect your unit to the internet and go to register.trinnov.com Follow the on-screen instructions to log in (or create a new user profile), and register your unit.
- Page 80 Click on the Search icon to reveal further information about the device. From here you can load microphone compensation files to the unit, and enable (or disable) software auto-updates: Set the Software Auto-Updates option to Yes to allow updates to be launched directly from the D-Mon Control Panel interface.
- Page 81 The D-Mon processor should now be up and running! You can check the software version from the STUDIO SETUP -> Updates/About tab.
-
Page 82: Configuration Presets
CONFIGURATION PRESETS This icon opens a pop-up menu where you can recall either a snapshot (to reset session parameters) or a preset (to reset the complete unit). The MANAGE button opens a full-size page with further file management options: create, lock, export, delete, etc. 7.6.1 ABOUT SNAPSHOTS AND PRESETS To save and load settings, the system uses two different file types:... - Page 83 7.6.3 USING THE POP-UP MENU When you first select CONFIGURATION PRESETS, a pop-up menu appears over the top of the current page. This allows you to quickly access settings without having to change your view: Possible Operations Use the tabs at the top of the menu to view either SESSION SNAPSHOTS or STUDIO PRESETS. ...
- Page 84 7.6.4 USING THE FULL PAGE VIEW To access other file management options such as Lock, Delete, etc., you will need to open the full page view. Select CONFIGURATION PRESETS followed by the MANAGE button – the pop-up menu is replaced by the full page view: Pop-up Menu Full Page View Possible Operations...
- Page 85 Click on EXPORT ALL (at the bottom of the page) to export all user-defined presets in the list. The presets are packaged together in a single file. This is automatically named and placed in your browser’s “Downloads” folder as before. You can now use the IMPORT function, as described below, to import all presets into the presets list.
- Page 86 7.6.5 SETTING THE DEFAULT PRESET There is one extra field in the Studio Presets tab which defines the DEFAULT preset. This is the preset which is recalled during boot-up, and it should be used to determine how the processor is configured following a reboot or power off/on.
-
Page 87: External Control
EXTERNAL CONTROL This chapter covers the additional steps required to control a D-Mon device using either Avid EUCON or ICON protocols. Please see 3.4.2: External Controllers for an overview of all remote control options. AVID EUCON To use a control surface based on Internet Protocol (IP) and Ethernet, like the Avid S6, then an additional software application is required –... -
Page 88: Avid Icon Series
MIDI standard which is integrated within the D-Mon processor. Trinnov Audio manufactures a specific MPIO breakout cable which can be used for connection to the Avid ICON Series 15-pin cable. As soon as the two are connected, you will have immediate control of the D-Mon processor from the ICON console. - Page 89 The ICON functions not directly supported are marked below with red checkboxes. Most are internal to the ICON and cannot be seen by the D-Mon processor. Some can be achieved indirectly using the DMCP GUI: e.g., Sum from the MONITORING MIXER tab; Set Source using the SESSION ROUTING matrix;...
- Page 90 Icon Control Panel D-Mon Control Panel Comments The Phones output is automatically assigned to the headphones. The Studio LS, Cue 1 and Cue 2 outputs can be assigned from any using SESSION SETTINGS -> Remote Controllers tab. Once an output is selected, level on/off automatically assigned to the Level knob and On...
- Page 91 Icon Control Panel D-Mon Control Panel Comments switch activates Listenback #1. The Internal/External selection for talkback is not supported.
-
Page 92: Appendices
APPENDICES WIRING DIAGRAMS 9.1.1 AUDIO SUBD-25 CONNECTORS SubD-25 audio connectors are compliant with the TASCAM standard: Analog connections AES3 Digital Connections G = Ground; C = Cold (–); H = Hot (+) 9.1.2 MULTI-PURPOSE IN/OUT (MPIO) SUBD-25 CONNECTOR This connector is the same for all D-Mon models. It handles the following signals: 2 x GPI (General Purpose Inputs) Used to trigger events in the D-Mon processor from an external console switch or footswitch. -
Page 93: Midi Implementation
MIDI IMPLEMENTATION Standard MIDI Control The D-Mon processor can be remotely controlled using standard MIDI commands sent to the MIDI input port of the MPIO connector. Simple commands such as volume control changes and note on/off are used. This allows speaker volume, dim and mute;... -
Page 94: Technical Data
TECHNICAL DATA 9.3.1 MECHANICAL • Weight = 13 kg / 28,60 lbs • Height = 87,5 mm / 3,48 inches (compliant with 2U space rack) • Width = 427 mm / 16,81 inches (compliant with 19’’ space rack) • Depth = 410 mm / 16,14 inches (not including any additional connector)
Need help?
Do you have a question about the D-Mon Series and is the answer not in the manual?
Questions and answers