Table of Contents
Advertisement
Quick Links
Advertisement
Table of Contents

Related Manuals for Dyson Pure cool


Summary of Contents for Dyson Pure cool
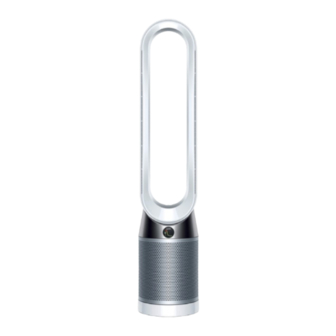
- Page 1 All manuals and user guides at all-guides.com Operating manual TP04...
-
Page 2: Table Of Contents
Getting started Maintenance Registration Changing the glass HEPA filters Important safety instructions Changing the carbon filters Assembly Cleaning Controls Additional functions Connecting to the Dyson Link app Information menu Important information Auto mode Airflow Oscillation Troubleshooting Night mode Additional information... - Page 3 Download the Dyson Link app SA: www.sa.dyson.com/support SA: 90024440000 UAE: www.dyson.ae/support www.sa.dyson.com The Dyson Link app allows you to UAE: 800 Jumbo (58626) control, monitor, customise and get Customer.svc@jumbo.ae automatic setting upgrades for your uae@dyson.com appliance on your mobile device.
-
Page 4: Registration
Note your serial number for future reference. THANK YOU FOR CHOOSING TO BUY A DYSON APPLIANCE After registering your free 2 year guarantee, your Dyson appliance will be covered for parts and labour (excluding filters) for 2 years from the date of purchase, subject to the terms of the guarantee. - Page 5 3 easy ways to register for your 2 year guarantee Register with your smartphone Register online Register by phone Download the Dyson Link app Visit our website to register your full Call our dedicated Helpline. SA: 90024440000 and you will be taken through parts and labour guarantee online.
-
Page 6: Important Safety Instructions
6. Use only as described in this Dyson Operating the appliance. Manual. Do not carry out any maintenance other than that shown in this manual, or advised by the Dyson Customer Care Helpline. - Page 7 If the supply cable is damaged from socket when not in use for extended it must be replaced by Dyson, its service agent periods. To avoid a tripping hazard, safely coil or similarly qualified person in order to avoid the cable.
- Page 8 21. This appliance is only to be used with the power supply unit provided with it. READ AND SAVE THESE INSTRUCTIONS THIS DYSON APPLIANCE IS INTENDED FOR HOUSEHOLD USE ONLY Do not pull on the cable. Do not store near...
-
Page 9: Assembly
All manuals and user guides at all-guides.com Assembly clik clik click Use both hands to lift the Take the carbon filters out Remove the glass HEPA Position the shrouds onto the base filters from their protective appliance out of the box, taking of the box and remove the and push gently until they click packaging and push into the... -
Page 10: Controls
All manuals and user guides at all-guides.com Controls Standby Information ON/OFF menu Auto mode Airflow speed Airflow direction Oscillation Night ON/OFF mode Standby ON/OFF... -
Page 11: Additional Functions
• Collect extensive environmental information (see the "Information menu" section). • Allow historical air quality information to be displayed on the screen and in the Dyson Link app. Continuous monitoring is active at all times unless standby is selected. To stop continuous monitoring, press and hold the Auto mode button for 5 secs. -
Page 12: Connecting To The Dyson Link App
All manuals and user guides at all-guides.com Connecting to the Dyson Link app The Dyson Link app allows you to Plug in your appliance to the mains You will now be able to use the electricity supply and turn on... - Page 13 All manuals and user guides at all-guides.com...
-
Page 14: Information Menu
All manuals and user guides at all-guides.com Information menu Scroll through the options to monitor the performance of your appliance. The menu will also allow you to access information about the pollutants in the air and the temperature and humidity levels. When a particular type of pollutant causes air quality to decrease, the symbol for that pollutant will show in... - Page 15 All manuals and user guides at all-guides.com Indoor air quality - 12 seconds Particulate matter (PM2.5) Nitrogen dioxide and other Particulate matter (PM10) Monitor the current air quality with a oxidising gases Monitors the presence of Monitors the presence of larger graph showing the last 12 seconds microscopic particles up to microscopic particles, up to...
-
Page 16: Auto Mode
The sensors will continue to monitor the air quality, switching the appliance back on when air quality levels have dropped. Customise your Auto mode and air quality settings in the Dyson Link app. -
Page 17: Airflow
All manuals and user guides at all-guides.com Airflow Air will be purified continuously, whether the air is set to flow from the front or the back. For purification and cool airflow, select the airflow direction to 1-10 the front. For purification without cool airflow from the front, select the airflow direction to the back. -
Page 18: Oscillation
Oscillation Press the Oscillation button to scroll through the options from 0° to 350°. Customise your oscillation settings in the Dyson Link app and it will appear as an option as you scroll through. Small details may vary slightly from... -
Page 19: Night Mode
If Auto mode has been set, AUTO mode Night mode will reduce airflow speeds to range from 1-4. 1-10 You can manually change the airflow from 1-10. Manual Customise your Night mode settings in the Dyson Link app. -
Page 20: Changing The Glass Hepa Filters
All manuals and user guides at all-guides.com Changing the glass HEPA filters Important: Always unplug the The shrouds will release Unplug the appliance from Empty the glass HEPA filters appliance before changing filters. the mains electricity supply. with the glass HEPA directly into the bin by pushing The remaining filter life is shown in filters attached. - Page 21 All manuals and user guides at all-guides.com Important clik click Push the new glass HEPA filters Plug the appliance in to the mains Push the shrouds until they click back Press and hold the Night mode into the shrouds until secure. into position in the base.
-
Page 22: Changing The Carbon Filters
All manuals and user guides at all-guides.com Changing the carbon filters The shrouds will release with the Important: Always unplug the To remove the carbon filters: Unplug the appliance from appliance before changing filters. glass HEPA filters attached. pull the tabs on both sides of the mains electricity supply. - Page 23 All manuals and user guides at all-guides.com Important clik clik Plug the appliance in to the mains Push the shrouds until they click Press and hold the Oscillation button Push the new carbon filters onto electricity supply and switch on. on the remote control.
-
Page 24: Cleaning
All manuals and user guides at all-guides.com clik clik clik Cleaning To ensure that your appliance works Dust may accumulate on the surface Look for blockages in the air inlet Do not use detergents or polishes to efficiently, it is important to clean of the machine. -
Page 25: Troubleshooting
Online: have not been changed when Remove the filter shrouds and appliance and plugging it SA: www.sa.dyson.com/support prompted, blockages may occur. look for blockages in the air in again. UAE: www.dyson.ae/support inlet holes under the filters. -
Page 26: Additional Information
• The appliance can connect to either 2.4GHz or 5GHz networks which includes most than normal. modern routers. Check your router documentation for compatibility. • The Dyson Link app requires an iOS device with at least iOS version 10* or an Android DISPOSAL INFORMATION device with at least Android version 5. - Page 27 All manuals and user guides at all-guides.com...
- Page 28 All manuals and user guides at all-guides.com Dyson Customer Care If you have a question about your Dyson appliance, call the Dyson Customer Care Helpline with your serial number and details of where and when you bought the appliance, or contact us via the Dyson website.
Need help?
Do you have a question about the Pure cool and is the answer not in the manual?
Questions and answers