Table of Contents
Advertisement
Quick Links
Operating Instructions
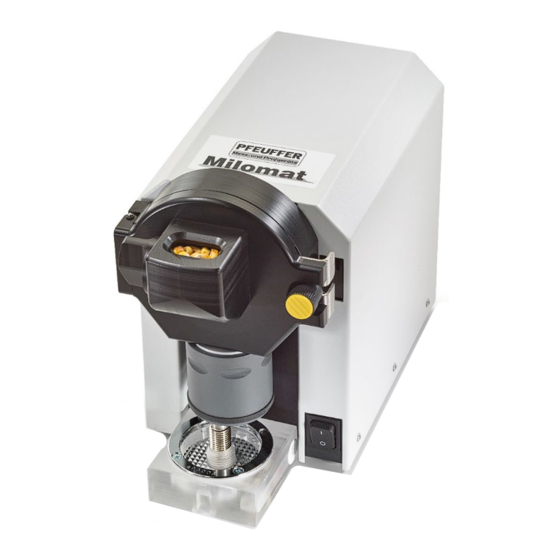
Labormühle
Milomat
PFEUFFER GmbH
Flugplatzstraße 70
Revision 1.2/01.02.2024
97318 Kitzingen
Translation of the original operating instructions
GERMANY
Phone: +49 9321 9369-0
info@pfeuffer.com
Item number operating instructions
www.pfeuffer.com
15209001
Artikelnummer Betriebsanleitung:
Advertisement
Table of Contents

Related Manuals for Pfeuffer Milomat

Summary of Contents for Pfeuffer Milomat
- Page 1 Operating Instructions Labormühle Milomat PFEUFFER GmbH Flugplatzstraße 70 Revision 1.2/01.02.2024 97318 Kitzingen Translation of the original operating instructions GERMANY Phone: +49 9321 9369-0 info@pfeuffer.com Item number operating instructions www.pfeuffer.com 15209001 Artikelnummer Betriebsanleitung:...
- Page 2 These Operating Instructions are a constituent part of the MILOMAT laboratory mill and must be available to all operating personnel at all times. They are intended for the operating company of the system, the operating personnel and the specialists who are responsible for the transport, assembly, installation, operation, maintenance, cleaning, disassembly and disposal.
-
Page 3: Table Of Contents
2.4 Safety measures (to be carried out by the owner) ....................9 2.5 General safety notes ............................10 2.6 Safety tests ................................10 2.7 Residual dangers in connection with the MILOMAT ................... 10 2.8 Switch-off procedure ............................10 Technical data .......................... 11 3.1 Dimensions and weight ............................ -
Page 4: Introduction
The milling material is used for the moisture determination with the Pfeuffer moisture meter HE 60 and HE 90. The outlet nozzle of the MILOMAT is therefore adapted to the measuring cells of these two moisture meters. The MILOMAT should only be operated with a measuring cell under the outlet nozzle. -
Page 5: Pictograms In The Operating Instructions
The identification plate with the type designation is located on the machine housing (rear wall). Correct information of type designation, serial number and year of manufacture is important for all queries. This ensures fast processing. Revision 1.2 | Operating instructions Milomat 5 | 30... -
Page 6: Declaration Of Conformity
DIN EN ISO 12100:2011-03+A1:2013 DIN EN 60204-1:2006 DIN EN 61000-6-2:2019-11 DIN EN 61000-6-3:2011-09+A1: 2012-11 This declaration shall become null and void should any alterations be made to the MILOMAT laboratory mill without our approval. Kitzingen, ________________________ _________________________________________ Lothar Pfeuffer, General Manager 6 | 30 Operating instructions Milomat | Revision 1.2... -
Page 7: Safety
Detachable mains cables must not be replaced by inadequately dimensioned mains cables. Only the specified mains cables may be used! In an emergency, switch off the MILOMAT using the main switch in position 0. Disconnect the mains cable from the power supply or unplug the IEC 60320 C13 connector. -
Page 8: Safety Switch
4. The operator must refrain from any working method that impairs safety on the MILOMAT. 5. The owner must ensure that only authorized people work on the MILOMAT. 6. The owner is obliged to report immediately to the owner any changes that take place on the MILOMAT which impair safety. -
Page 9: Safety Measures (To Be Carried Out By The Owner)
It should be noted that the owner is responsible for the following aspects with regard to the operating and maintenance personnel Providing instruction in the protective devices for the MILOMAT Monitoring compliance with the safety measures. The frequency of the function tests described in chapter 8.38.2 must be complied with. -
Page 10: General Safety Notes
Safety Electrical connections The MILOMAT laboratory mill may only be operated with the specified voltages and may only be connected to a properly earthed socket with a protective earth conductor. General safety notes The safety equipment and safety notes described in these operating instructions must be complied with. -
Page 11: Technical Data
The Delivery, transport and storage chapter is only intended for specialist operators. Scope of delivery The standard scope of delivery to the owner comprises: MILOMAT laboratory mill, Mains cable (IEC 60320 C13 power cable), cleaning brush, Operating Instructions Transport and packaging Systems, machines and devices from Pfeuffer GmbH are carefully tested and packaged prior to dispatch, however it is not possible to exclude the risk of damage during transport. -
Page 12: Intermediate Storage
Make sure that the installation height is ergonomic according to the stature of the operating personnel. Connect the supplied mains cable to the MILOMAT using the connector (IEC 60320 C13 power cable). Make sure that the mains cable never becomes a tripping hazard or that someone can get caught in it or step on it. -
Page 13: Function
Air filter Sequence of functions The laboratory mill MILOMAT is an impact mill for agricultural cereals. Fill a measuring beaker (0.02 l, accessory moisture meter HE 60/90) with the cleaned sample. Place the contents in the filling hopper. The product trickles into the milling chamber by rotating the dosing knob. The product is smashed between a standing and a rotating metal pin collar (impact effect). -
Page 14: Operation
Operation Oper ation The MILOMAT laboratory mill is only allowed to be operated by personnel who have been qualified and trained in its operation. Sample preparation NOTICE Foreign bodies must be removed prior to the milling! Select a representative and cleaned sample for the milling. - Page 15 Slowly turn the dosing knob on the dosing feed backwards until the filling hopper is completely emptied. Let the MILOMAT run until all grains are milled. Switch off the MILOMAT by pressing the main switch, position 0.
- Page 16 The laboratory mill may not be used as a production machine or put into continuous operation! To avoid bending the metal pins in the milling chamber, allow the MILOMAT to cool down sufficiently after each milling. 16 | 30...
-
Page 17: Milling Process Of Inhomogeneous Milling Material With A Sample Dividing Cup (Option)
The second half of the sample remaining behind the separating sheet can then be used for further measurements. Figure 15: Fill in the sample into the bottom part of the measuring cell Revision 1.2 | Operating instructions Milomat 17 | 30... -
Page 18: Maintenance And Cleaning
The Maintenance and cleaning chapter is only intended for specialist operators. NOTICE Opening the housing and inappropriate operation will invalidate the warranty. To ensure trouble-free operation, it is essential for the MILOMAT to be cleaned and maintained at regular intervals. DANGER... -
Page 19: Maintenance
The MILOMAT should therefore be checked for wear and tear at regular intervals. The inspection intervals depend on the frequency of use and the ambient conditions to which the MILOMAT is exposed. Only through regular checks (visual inspection) can damage to the instrument caused during use be detected early and reliably. -
Page 20: Working Inside The Housing
The warranty offered by Pfeuffer GmbH will be invalidated if the housing is opened. Pfeuffer GmbH expressly points out that fitting spare parts and renewing wearing parts are procedures which require a certain level of experience! This work should only be carried out by a specialist if it is not possible to send the MILOMAT to Pfeuffer GmbH customer service. -
Page 21: Opening The Housing
Pull off the turning knob with the spring retainer and the pressure spring from the locking spindle. Figure 18: Loosen the turning knob Figure 19: Push the locking spindle inwards Revision 1.2 | Operating instructions Milomat 21 | 30... - Page 22 Use suitable pliers to pull out both sealing profiles between housing and chassis downwards. Figure 21: Remove sealing profiles Figure 22:Remove housing Replace the MILOMAT and remove the housing. 22 | 30 Operating instructions Milomat | Revision 1.2...
- Page 23 For the further assembly you perform the steps in reverse order. Figure 24: Assembly turning knob to locking spindle Item Designation Yellow cap Counter sunk bolt M2,5x12 mm Spring holder Pressure spring Turning knob Locking spindle Revision 1.2 | Operating instructions Milomat 23 | 30...
-
Page 24: Changing The V-Belt
The impact wheel is impelled by a V-belt transmission. The V-belt only has to be changed when it is obviously torn (no function of the MILOMAT despite the start-up of the motor). Before you start work, pay attention to the instructions in chapter 8.4. - Page 25 Tighten the motor fixing screws properly (hexagon socket screws M5x16 mm, washers and spring washers). Fasten the housing, see chapter 8.5. Figure 30: Tension the V-belt Revision 1.2 | Operating instructions Milomat 25 | 30...
-
Page 26: Changing The Impact Wheel
Figure 31: Dismantle the impact wheel Clean the housing with a brush. Insert the new impact wheel. Fasten it over the four countersunk head screws. Figure 32: Clean the housing 26 | 30 Operating instructions Milomat | Revision 1.2... -
Page 27: Changing The Outlet
If all functions are correct, the machine can be handed over to the owner. NOTICE Following cleaning, maintenance or exchanging wearing parts, check that all safety devices are functioning correctly. Revision 1.2 | Operating instructions Milomat 27 | 30... -
Page 28: Malfunctions - Causes And Rectification
Appropriate tools and test instruments must be provided to these personnel. If the specified measures do not prove successful, contact Pfeuffer GmbH. Correct information of type designation, serial number and year of manufacture is important for all queries. -
Page 29: 10 Spare Parts And Accessories
Installing and/or using such products can thus result in the design properties of the MILOMAT laboratory mill being negatively impaired. Pfeuffer GmbH cannot be held liable for damage attributable to the use of non-genuine parts and non-genuine accessories. -
Page 30: 11 Emergency
Emergency 11 Emergency In an emergency, disconnect the MILOMAT from the electrical power supply. 12 Dismantling and dis posal Dismantling and disposal is only allowed to be carried out by specialist personnel. DANGER Touching live parts can be fatal! It is essential to comply with the switch-off procedure before cleaning, maintenance or repair work! (See chapter 2.8)
Need help?
Do you have a question about the Milomat and is the answer not in the manual?
Questions and answers