
Related Manuals for BKT Elektronik EC335

Summary of Contents for BKT Elektronik EC335
- Page 1 BKT Elektronik - Headquarter Poland, Lochowska 69 Str. 86-005 Biale Blota Phone: +48 52 36 36 750 e-mail: export@bkte.pl User Manual EC335 4DC Environmental Condition Controller Version 2 © 2018 BKT Elektronik www.bkte.pl...
-
Page 2: Table Of Contents
Table of contents DEVICE DESCRIPTION ................................. 4 PACKAGING CONTENTS ............................. 4 TECHNICAL PARAMETERS ............................4 SOCKET VIEW AND DESCRIPTION ..........................5 ADDITIONAL COMPONENTS ............................6 4.1 Analogue sensors ................................... 6 4.2 Digital sensors ..................................7 4.3 Extension modules and accessories ............................7 QUICK START GUIDE .............................. - Page 3 6.15.8 FTP backup settings ..............................24 6.16 System menu (system management) ..........................25 6.16.1 Restoring default settings through a website ......................25 6.16.2 Restarting the device .............................. 25 6.16.3 Firmware update..............................26 6.16.4 Export data to a file ..............................27 6.16.5 Restoring settings from a file ..........................
-
Page 4: Device Description
DEVICE DESCRIPTION The EC335 4DC controller is designed to monitor environmental parameters (temperature, humidity, etc.) in a telecommunications cabinet or small rooms. Its purpose is to warn users about possible emergency situations and report any failures. The following can be connected to the controller: up to 4 analogue sensors, 4 sensors with potential-free contacts and two signalling devices. -
Page 5: Socket View And Description
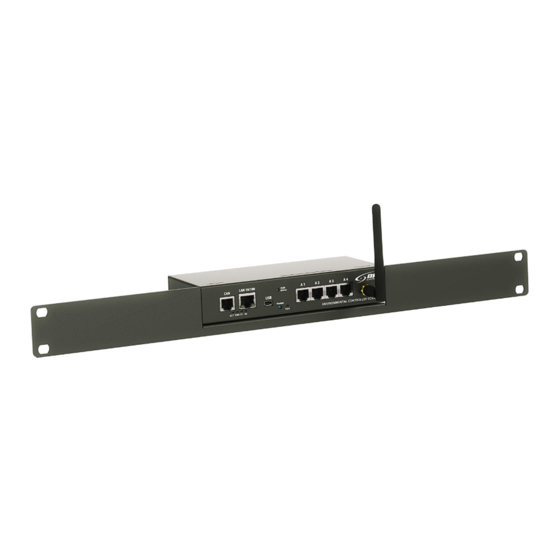
SOCKET VIEW AND DESCRIPTION Fig 1. Front view Fig 2. Rear view... -
Page 6: Additional Components
ADDITIONAL COMPONENTS Analogue sensors Type Description Index ES350 – Temperature sensor 122ES003500 Measurement range: -10°C - +100°C Dimensions: 60x18x18 Maximum length of a connection cable: 100m ES351 – Humidity sensor 122ES003510 Measurement range: 10% - 95% RH Dimensions: 60x18x18 Maximum length of a connection cable: 50m ES352 –... -
Page 7: Digital Sensors
ES362 - 4-20mA sensor 122ES003620 Any sensors with 4-20mA output can be connected to the controller. Galvanic insulation 1kV between the input and the output. Dimensions: 60x18x18 ES363 - 60V DC voltage sensor 122ES003630 Galvanic insulation 1kV between the input and the output. Measurement range: 0VDC - 60VDC Dimensions: 60x18x18 Digital sensors... - Page 8 EA311 - 1U bracket for a 19'' cabinet for EC335 4DC 122EA003110 Dimensions: 482x44x80 EA317 - GSM modem for EC300 4DC 122EA003170 Dimensions: 60x50x15 A modem for SMS communication operating in GSM 850/900/1800/1900 MHz networks.
-
Page 9: Quick Start Guide
QUICK START GUIDE Installation The device can be installed on the wall using provided openings in the housing or mount it to a 19” profile with additional brackets. The 19” bracket symbol is shown in the ‘Accessories’ section. Connection 1. Connect the analogue sensors to any A1-A4 socket. 2. -
Page 10: Initial Configuration
Initial configuration Configure the computer network card for operation in the same network as EC335. For example, you can use settings as shown in the figure. Run the browser and enter http://192.168.0.193 in the address bar. Enter the following in the login window: user: guest, password: guest. -
Page 11: User Logging Out
If necessary, change the network settings. If necessary, change the SNMP protocol communication settings. Create a new user. Click Finish and wait until the configuration is saved. User Logging out You can log out when you click on the Logout button from horizontal menu. -
Page 12: Configuration
CONFIGURATION Horizontal menu Show and hide the vertical menu. Run the initial configuration wizard. Add a new element. This function is available only on certain screens selected from the vertical menu. Refresh the view. Additional settings. This function is availeble only on certain screens selected from the vertical menu. Reset the smoke sensors. -
Page 13: Saving Settings Into Non-Volatile Memory
Saving settings into non-volatile memory All new setting must be saved into FLASH non-volatile memory. Otherwise they will only be valid until the next reboot. General statistics Select Overall Stats from the vertical menu to display basic data on the system status. System tree (system components) Select System tree from the vertical menu to display all system components. -
Page 14: Adding A New Group
7.5.1 Adding a new group By default, there is one group in the system. Additional groups divide the system into parts, which in turn allows the user to assign individual components to proper groups. The user can be granted rights to manage a specific group. -
Page 15: Adding An Sms Notification
7.5.4 Adding an SMS notification If there is an optional GSM modem installed in the controller, it is possible to send SMS (text message) notifications. SMS notifications can also be sent via an SMS Internet gateway. The GSM modem is not required then. 7.5.5 Adding a timer Time conditions can be introduced to the system. -
Page 16: Adding Ping Functions
7.5.7 Adding PING functions The controller can monitor an external device by sending a PING on a regular basis. In logical schemes, it is possible to define, e.g. sending an email alarm when the external device stops to respond to the PING. 7.5.8 Adding an SNMP Get The controller can ask the external device for its parameters using the SNMP v1 and v2. -
Page 17: Dry Contacts (Binary Inputs For Potential-Free Contacts)
Dry contacts (binary inputs for potential-free contacts) Select Dry contacts from the vertical menu to view the state of binary inputs for potential-free contacts. Event log Select Event log from the vertical menu to display logs on all system events. Logical schemes Select Logical schemes from the vertical menu to create relations between the system components (sensors,... -
Page 18: Cameras
Cameras Select Cameras from the vertical menu to view the image captured from installed cameras. Select System tree to configure the cameras. 7.10 Map The system provides a function of displaying the state of sensors against the building layout. Select Map from the vertical menu. -
Page 19: Can Configuration (Extension Module)
1. Connection of sensors to a device extending the number of analogue inputs. 2. Connection of 12VDC/1A power supply. 3. Connection of a CAN bus to the EC335 controller. 4. Stack connection of the CAN bus (from one device to another). - Page 20 Activate the CAN bus. Select Preferences→Network from the vertical menu. Check the Enable CAN box and click Save. Select CAN configuration from the vertical menu, then click the Configure button and wait approx. 2 minutes until the CAN bus is scanned and the device is configured.
-
Page 21: Graphs
The extension modules have two indicator lights to signal the operating status. Error is on, Active flashed – no communication with the controller. Error is on, Active is off – there is communicatio with the controller, but the module is not configured in the controller. -
Page 22: Preferences (System Settings)
7.15 Preferences (system settings) 7.15.1 Web interface settings Select Preferences→Web GUI from the vertical menu. Set the following web interface parameters: language automatic refresh rate temperature unit (Celsius or Fahrenheit degrees) activate an acoustic signal via the website when the alarms are active 7.15.2 Network settings Select Preferences→Network from the vertical menu. -
Page 23: Logging Settings
7.15.4 Logging settings Readings of sensor and system log values can be saved to a file on an USB flash drive, FTP server, Syslog server (system logs only) or periodically sent to mail receipment. Select Preferences→Logging from the vertical menu. 7.15.5 DynDNS settings DynDNS (www.dynDNS.com) -
Page 24: Radius Settings
7.15.7 RADIUS settings The device supports the RADIUS (Remote Authentication Dial-In User Service) protocol. Select Preferences→RADIUS from the vertical menu. 7.15.8 FTP backup settings Device settings can be saved to a file on an FTP server on a regular basis. Select Preferences→FTP Backup from the vertical menu. -
Page 25: System Menu (System Management)
7.16 System menu (system management) 7.16.1 Restoring default settings through a website Select System menu→About from the vertical menu and Confirm to reset default values and wait until the process click OK next to Reset settings to default values. is completed. 7.16.2 Restarting the device Select System menu→About from the vertical menu and Confirm to restart the device and wait until the restarting... -
Page 26: Firmware Update
7.16.3 Firmware update A file with a firmware update is available on http://www.bkte.pl. Note: It may become necessary to reconfigure the device after updating the firmware. It is recommended to reconfigure the device after resetting the default settings. Select System menu→Firmware from the vertical menu, click Browse and choose a firmware update file, e.g. -
Page 27: Export Data To A File
7.16.4 Export data to a file Export sensor data in XML – save the sensor data to an XML file. The file contains max 400 readins from each sensor: 100 readings (every second) from the last 100 seconds 100 readings (every minute) from the last 100 minutes 100 readings (every hours) from the last 100 hours 100 readings (every day) from the last 100 days Export sensor data in CSV –...
Need help?
Do you have a question about the EC335 and is the answer not in the manual?
Questions and answers