
Related Manuals for HYXIPOWER HYX-DMU-W

Summary of Contents for HYXIPOWER HYX-DMU-W
- Page 1 User Manual HYX-DMU-W/4G DATA MANAGEMENT UNIT Carefully read this inverter user instructions before using. Read and save these instructions.
- Page 2 ZHEJIANG HYXI TECHNOLOGY CO., LTD (hereinafter referred to as "HYXIPOWER"). TRADEMARKS and other HYXIPOWER trademarks are the trademarks or registered trademarks of HYXIPOWER All other trademarks mentioned herein are the properties of their respective owners.
-
Page 3: Table Of Contents
HYX-DMU-W/4G User Manual Contents Contents Preface ..................................1 Overview .................................1 Scope of Application ............................1 Safety Instructions ...............................1 1. Product Overview ............................3 1.1 Product introduction ................................3 1.1.1 Microinverter ..................................3 1.1.2 Data management unit ( DMU ) ..........................3 1.2 Product model ..................................3 1.3 Monitoring System ................................4... -
Page 4: Preface
HYX-DMU-W/4G User Manual Preface Preface Overview This manual provides users with the product information of the data management unit (DMU) communication system device. Product information, detailed installation and usage, fault diagnosis and daily maintenance related precautions, does not include all information about the photovoltaic system. - Page 5 HYX-DMU-W/4G User Manual Preface Symbol Description Do not dispose of the inverter as household waste. The symbol indicates DC voltage. Note that only professionals should install or replace the DMU. Do not attempt to repair the DMU without Hyxi’s permission, otherwise it will affect the warranty of the device.
-
Page 6: Product Overview
HYX-DMU-W/4G User Manual 1. Product Overview 1. Product Overview This chapter mainly introduces the DMU appearance, packaging accessories, technical parameters, etc. 1.1 Product introduction PV microinverter system 1.1.1 Microinverter Microinverter (hereinafter referred to as microinverter) converts the DC output of PV panels... -
Page 7: Monitoring System
HYX-DMU-W/4G User Manual 1. Product Overview 1.3 Monitoring System The monitoring system collects the operating data and status of each microinverter in the system through the DMU data management unit, and uses the PC or APP to provide users with module-level monitoring to realize remote operation and maintenance. -
Page 8: Interface Layout
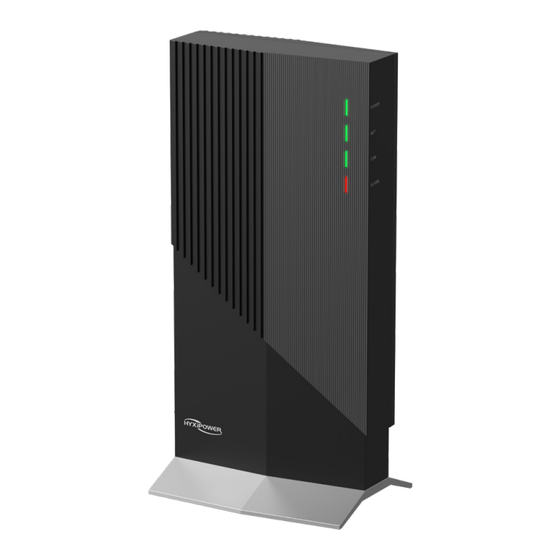
HYX-DMU-W/4G User Manual 1. Product Overview 1.4.2 Interface Layout HYX-DMU-4G (4G Version) Description A Sub-1G antenna interface B SD card slot C USB port (Software upgrades only) D DRM port E Ethernet port F RS485 G Power port H Reset button I... -
Page 9: Anti-Countercurrent Function (Rs485 Port
1.6 Anti-countercurrent Function (RS485 port) 1.6.1 Device list • Microinverter 1-in-1, 2-in-1, 4-in-1 series. • DMU : HYX-DMU-W / HYX-DMU-4G. • Electricity meter: Single phase meter (DDSU666) / Three phase meter (DTSU666). 1.6.2 Controlling type • Type 1: Self-generation and consumption: Limit feed-in power to zero to prevent generated power from being transmitted to the grid. -
Page 10: Installation
HYX-DMU-W/4G User Manual 2. Installation 2. Installation 2.1 Unpack and check The device has been fully tested and strictly inspected before leaving the factory, but damage may still occur during transportation, please conduct a detailed inspection before signing for the product. -
Page 11: Installation Sequence
HYX-DMU-W/4G User Manual 2. Installation DMU installation environment requirements: Keep away from dust, liquid, acid or corrosive gas. • Ambient temperature -20ºC to + 65ºC. • CAUTION • It is forbidden to install it where children can reach it. 2.3 Installation sequence 1、... - Page 12 HYX-DMU-W/4G User Manual 2. Installation NOTICE • One mode selection between Wi-Fi mode and cable mode is enough. HYX-DMU-WIFI(WIFI version ) • Send the wireless network account password to the DMU through the APP, see chapter XX for details • Cable mode: Insert one end of the cable into the Ethernet port of the DMU, and the other end into the broadband router port.
- Page 13 HYX-DMU-W/4G User Manual 2. Installation Step 2: Installation location • Installing on the roof can increase the signal strength. • Installed in the center of the PV array. • Install at least 0.5m from the ground and at least 0.8m from corners.
- Page 14 HYX-DMU-W/4G User Manual 2. Installation Desktop installation Put the DMU on the table • Use special screws to connect the base fixture with the DMU device and place it vertically on the table. • After connecting the power supply and the network, carry out debugging.
-
Page 15: Human-Computer Interaction
Scan the following QR code to download and install the App according to the prompt information: 3.2 APP User manual For more information on using the HYXiPower APP, please refer to the user manual "HYXiPower APP". 3.3 System debugging For system configuration and debugging, please refer to the user manual "HYXipower Local... -
Page 16: Appendix
HYX-DMU-W/4G User Manual 4. Appendix 4. Appendix 4.1 Technical Parameter Product Model HYX-DMU-W HYX-DMU-4G Communication to Microinverter Signal Sub-1G Sub-1G Monitoring data limit from solar panels Communication to Hyxi Cloud Ethernet RJ45×1, 100Mbps RJ45×1, 100Mbps 4G:TDD-LTE, FDD-LTE Wireless WI-FI:802.11b/g/n 3G:SCDMA... -
Page 17: Frequency Range & Transmitted Power
HYX-DMU-W/4G User Manual 4.2 Frequency range & transmitted power Frequency Range Transmitted Power 1920MHz--2170MHz <24dBm 1710MHz--1880MHz <24dBm 2500MHz--2690MHz <24dBm 880MHz--960MHz <24dBm 791MHz--862MHz <24dBm 703MHz--803MHz <24dBm 2570MHz--2620MHz <24dBm 2300MHz--2400MHz <24dBm 1920MHz--2170MHz <24.5dBm WCDMA 880MHz--960MHz <24.5dBm 870MHz--960MHz <33.5dBm 1800 1710MHz--1880MHz <30.5dBm Sub-1G 868MHz--868.58MHz... -
Page 18: Installation Map
HYX-DMU-W/4G User Manual 4. Appendix 4.3 Installation Map 4.4 Contact Information IIf you have any questions about this product, please contact us. In order to provide you with faster and better after-sales service, we need your assistance in providing the following information. - Page 19 Version: v1.0 2023 The manual is subject to change without notice while the product is being improved. Zhejiang Hyxi Technology Co., Ltd. 9-10F, Building 3, Jiuyao Commercial Center, Zhuantang Sub-district, Xihu District, Hangzhou, Zhejiang Province, China, 310008 support@hyxipower.com www.hyxipower.com...
- Page 20 IC Warning This device complies with Industry Canada licence-exempt RSS standard(s). Operation is subject to the following two conditions: (1) This device may not cause interference, and (2) This device must accept any interference, including interference that may cause undesired operation of the device.
- Page 21 -Connect the equipment into an outlet on a circuit different from that to which the receiver is connected. -Consult the dealer or an experienced radio/TV technician for help. This equipment complies with FCC radiation exposure limits set forth for an uncontrolled environment.
Need help?
Do you have a question about the HYX-DMU-W and is the answer not in the manual?
Questions and answers